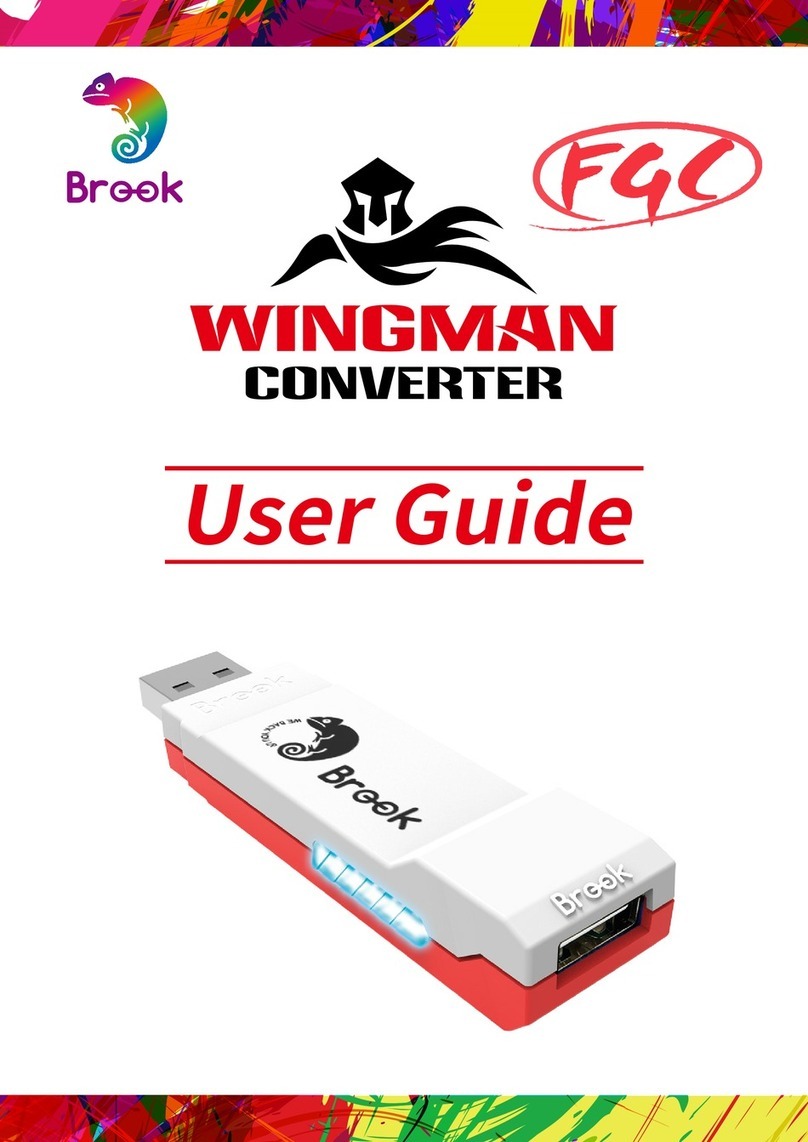
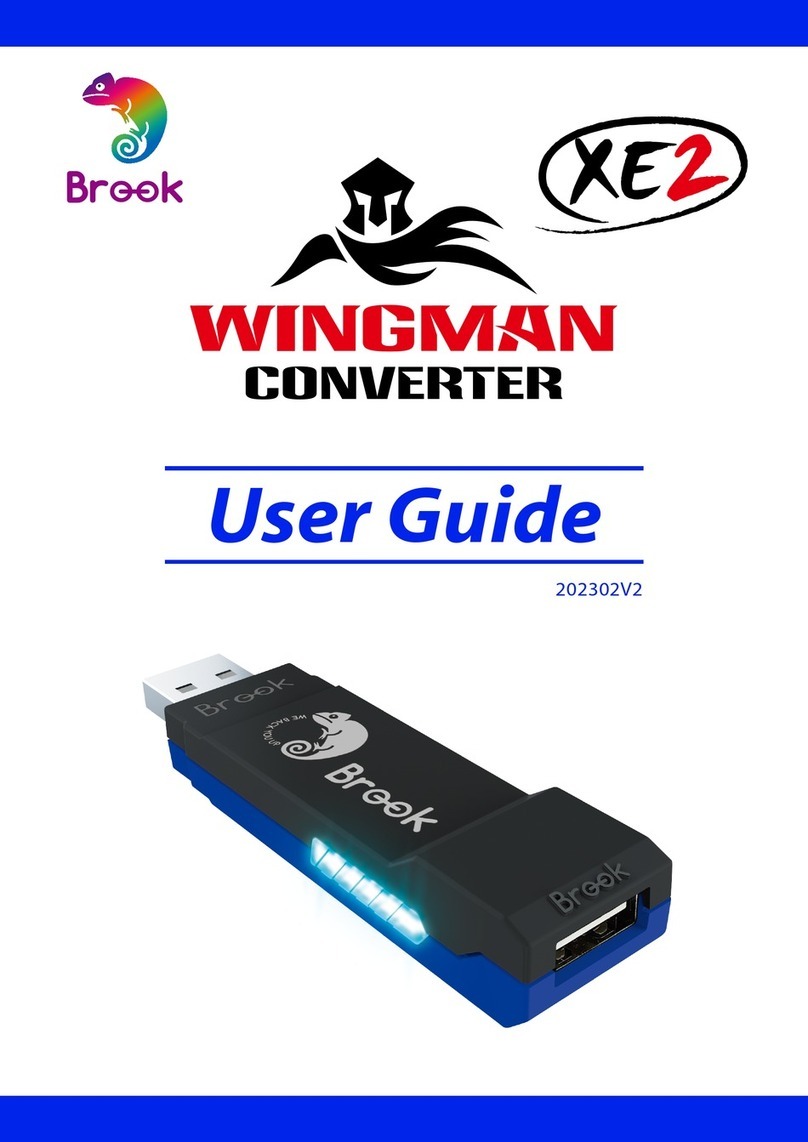
Brook Wingman PS2 User manual

1 2
Connection ……………………………………………….………………………….…..…….…………………
05
Corresponding Buttons List ………………………………………………………..…….………………
07
Turbo Function Settings ……………………………………………….…………....…….………………
09
Remap Settings ……………………………………………….………………………….…….………………
12
Switch the Input mode ……………………………………………….……………..…….………………..
14
連接說明 ……………………………………………….…………………………………….…….………………
19
按鍵配置對應表 ……………………………………………….………………………….…….………………
21
連射功能設定 ……………………...……………………………………….……………..…….……………….
23
自定義按鍵設定 …………………………………….………………………….………...…….……………….
26
切換連接主機 ……………………………………………….…………………………......…….………………
28
接続方法の説明 ..………………………………….……………………………………..…….………………
33
ボタン割り当て対応表 .………………………………….…………………………...…….………………
35
連射(ターボ)機能設定 .……………………………………………….………….…..…….……………..…
37
ボタン割り当て(リマップ)設定..……………………………………….…………..…….……………….
40
ゲーム機の接続切り替え….. …..…………………….………………………….......…….……………….
42
연결 설명 .…………………………………………….………………………………………….……………….
45
버튼 설정표 …………………………………………………….……………………….....…….………………
47
터보기능설정 ……………..……………………………………………….……………..…….………………..
49
버튼 리맵핑 설정 …………………………………………………………….………..…….………………..
52
본체 연결 및전환 ………………...…………………….…………………………......…….………………
54
Video Description
影音版說明
ビデオ説明
동영상 설명
English
繁體中文
日本語
한국어

3 4
Connection:
LED
Frequency
Status
Green
Flashing Slowly
Successfully connected to console
Green
Flashing Fast
Enter Bluetooth pairing mode
Blue
Permanently On
Successfully connected to console and
controller
Digital output (Click the PS button once
for switching to analog signal)
White
Permanently On
Successfully connected to console and
controller
Analog output (Click the PS button once
for switching to digital signal)
White
One Blinking
PS classic turn into X-Input mode
White
Two Blinking
X-Input mode turn into PS classic
Function: Turbo & Remap
LED
Frequency
Status
Yellow
Permanently On
Entering Turbo setting
Purple
Permanently On
Entering Remap setting
LED Display
Connection Diagram and Notice
NOTICE
This converter supports most of brand controllers and fighting boards in
the market.
We are increasing the number of supported accessories, firmware will be
updated irregularly.
Each converter is for one controller at a time.
Turbo and Remap function can only be set in gamepad mode, cannot be
set in fighting board mode.
If the controller does not work due to insufficient power, please connect
the micro USB port to the 5V/1A Charger.

5 6
❶Connects to Console
Connect your Wingman PS2 to the console. You’ll see the green indicator
is turned on. Wingman PS2 and console are connected.
❷Connects to Wired Controller
Insert your wired controller to the USB port. A blue indicator means they
are connected.
❸Connects to Wireless Controller
(1) PS5 / PS4 / PS3 / Switch Pro
Connecting the controller and the Wingman PS2, using a USB cable for
the first time. Remove the USB cable after the blue indicator is on.
(2) Xbox 360
To use the Xbox 360 controller, insert the receiver to the Wingman PS2’s
USB port. The blue indicator means they are connected.
(3) Xbox Elite 2/Xbox One/XSX|S
To use the Xbox Elite2 or the Xbox one controller, press both the Brook
button on Wingman PS2 and the Pair button on the controller, then hold
for 3 seconds to create connection. The blue indicator means they are
connected.
Remember, press the PS or Home button to start
connection.
If the Wingman PS2 indicator is not turned on, it means your
console does not have enough power to drive the Wingman PS2.
Use a power bank to power your Wingman PS2.
Connection
If the Xbox one and Elite2 controller are plugged into the USB
cable, the Bluetooth connection must be re-paired.
If you repeatedly press the Xe key for a short period of time, it
may cause the controller to crash.

7 8
PS5/PS4/PS3/PS Classic Controller
PS/PS2
✕
●
■
▲
L1
R1
L2
R2
L3
R3
START
SELECT
PS Key
PS5
✕
●
■
▲
L1
R1
L2
R2
L3
R3
OPTION
Create
PS Key
PS4
✕
●
■
▲
L1
R1
L2
R2
L3
R3
OPTION
SHARE
PS Key
PS3
✕
●
■
▲
L1
R1
L2
R2
L3
R3
START
SELECT
PS Key
PS Classic
✕
●
■
▲
L1
R1
L2
R2
L3
R3
START
SELECT
-
Xbox 360/Xbox one Controller
PS/PS2
✕
●
■
▲
L1
R1
L2
R2
L3
R3
START
SELECT
PS Key
Xbox One
A
B
X
Y
LB
RB
LT
RT
LSB
RSB
MENU
VIEW
XE key
Xbox 360
A
B
X
Y
LB
RB
LT
RT
LSB
RSB
START
BACK
XE key
PC
A
B
X
Y
LB
RB
LT
RT
LSB
RSB
START
BACK
XE key
Switch Controller
PS/PS2
✕
●
■
▲
L1
R1
L2
R2
L3
R3
START
SELECT
PS Key
Switch
B
A
Y
X
L
R
ZL
ZR
L3
R3
+
-
Home
Corresponding Buttons List

9 10
The following instructions are based on the PS4 controller. For those using
other controller, please refer to the Corresponding Buttons List.
❶Enter the setup mode
Press both SHARE and PS buttons to enter Turbo setup
mode.
The yellow indicator means you enter Turbo setup
mode.
❷Choosing one or more turbo buttons (e.g. ■as turbo
function)
Hold SHARE, then press ■. More than one button can
be chosen.
❸Save
Press OPTION to save your settings.
❹Exit
Press the PS button to leave Turbo setup mode. The
Yellow indicator will then turned off.
The following instructions are based on the PS4 controller. For those using
other controller, please refer to the Corresponding Buttons List.
❶Enter the setup mode
Press both SHARE and PS buttons to enter Turbo setup
mode.
The yellow indicator means Turbo setup mode is on.
❷Turbo Frequency Setting
The Up button increases frequency while the Down
button decreases it.
To increase frequency: press both SHARE and the Up
buttons, and the indicator will flash faster.
To decrease frequency: press both SHARE and Down
buttons, then the indicator will flash slower.
❸Save
Press OPTION to save your settings.
❹Exit
Press the PS button to leave Turbo setup mode. The
Yellow indicator will then turned off.
Turbo Frequency Setting
Buttons that can be set as Turbo include: ✕/●/■/▲/L1
/R1/L2/R2/L3/R3
Turbo Function Settings

11 12
The following instructions are based on the PS4 controller. For those using
other controller, please refer to the Corresponding Buttons List.
❶Enter the setting mode
Press both SHARE and PS buttons to enter Turbo setup
mode.
The yellow indicator means you enter Turbo setup
mode.
❷Erasing all Turbo function buttons
Press both SHARE and OPTION buttons to cancel all
Turbo mode settings.
❸Exit
Press the PS button to leave Turbo setup mode. The
yellow indicator will then turned off.
The following instructions are based on the PS4 controller. For those using
other controller, please refer to the Corresponding Buttons List.
❶Enter the setting mode
Press both OPTION and PS buttons to enter Remap setup
mode.
The purple indicator means you enter Remap setup mode.
❷Transfer a function from one button to another. (e.g., Setting ■as ●)
Select a button you want to remap.
For example, to have the button
act as , press once, then press
both SHARE and .
❸Transfer a function from one button to multiple buttons. (e.g., Setting ✕
as ■+●)
To have act as “+ ”, press
once, then press SHARE, , and .
❹Save
Press OPTION to save your settings.
❺Exit
Press the PS button to leave Remap setup mode. The purple indicator will
then turned off.
Remap Settings
Clearing Turbo Function

13 14
The following instructions are based on the PS4 controller. For those using
other controller, please refer to the Corresponding Buttons List.
❶Enter the setting mode
Press both OPTION and PS buttons to enter Remap
setup mode.
The purple indicator means you enter Remap setup
mode.
❷Erasing all Remap function buttons
Press both SHARE and OPTION buttons to cancel all
Remap mode settings.
❸Exit
Press the PS button to leave Remap setup mode. The purple indicator will
then turned off.
The following instructions are based on the PS4 controller. For those using
other controller, please refer to the Corresponding Buttons List.
PS classic switch to PC mode (X-Input )
If you are a PC gamer, press and hold OPTION + D pad-Down button for 2
seconds after inserting your Wingman PS2 to the PC USB port. The white
signal flashes once and it enters PC mode (X-input).
X-Input switch to PS classic mode
For switching to console mode, press and hold your OPTIONS + D pad-Up for 2
seconds. The white flashes twice and then you enter default PS Classic mode.
Switch the Input mode
Clearing Remap Function

15 16
FCC Statement:
This device complies with part 15 of the FCC Rules. Operation is subject to the
following two conditions:
(1) This device may not cause harmful interference.
(2) This device must accept any interference received, including interference that
may cause undesired operation.
NOTE
This equipment has been tested and found to comply with the limits for a Class B
digital device, pursuant to part 15 of the FCC Rules. These limits are designed to
provide reasonable protection against harmful interference in a residential
installation.
This equipment generates, uses and radiates radiofrequency energy, and if not
installed and used in accordance with the instructions, may cause harmful
interference to radio communications. However, there is no guarantee that
interference will not occur in a particular installation.
If this equipment does cause harmful interference to radio or television reception,
which can be determined by turning the equipment off and on, the user is
encouraged to try to correct the interference by one or more of the following
measures:
Reorient or relocate the receiving antenna.
Increase the separation between the equipment and receiver.
Connect the equipment into an outlet on a circuit different from that to which
the receiver is connected.
Consult the dealer or an experienced radio/TV technician for help.
Changes or modifications not expressly approved by the party responsible for
compliance could void the user’s authority to operate the equipment.
We are increasing the number of supported
accessories, firmware will be updated irregularly.
P/N: Wingman PS2
M/N: ZPP0062
FCC ID: 2ADKM0062
Other

17 18
連接:
燈號
頻率
狀態
綠色
慢閃
成功連接到遊戲主機
綠色
快閃
進入藍芽無線配對模式
藍色
恆亮
成功連接到遊戲主機及控制器
數位輸出狀態 (按一次 PS 鍵會切回類比狀態)
白色
恆亮
成功連接到遊戲主機及控制器
類比輸出狀態 (按一次 PS 鍵會切回數位狀態)
白色
一次閃爍
PS classic 模式轉為 X-Input 模式
白色
兩次閃爍
X-Input 模式轉為 PS classic 模式
功能設定: Turbo & Remap
LED
頻率
狀態
黃色
恆亮
進入 Turbo 功能設定模式
紫色
恆亮
進入 Remap 功能設定模式
LED 顯示
注意事項
Wingman PS2 支援市場上大部分的原廠控制器,其韌體仍不定期更
新,相關的韌體更新資訊會在 Brook 官網及社群進行發佈。
每支轉接器只能連接一個控制器。
Turbo 和Remap 只能在手把模式下進行設定,無法使用在格鬥台。
若有線控制器無供正常使用時,有可能是因為老舊主機無法足夠供電給
轉接器,可額外插上行動電源供電給轉接器。
連接圖及注意事項

19 20
❶連接到遊戲主機
將轉接器連接到 PS 或PS2 主機, 或利用 USB 將轉接器連接到 PS Classic,
綠色慢閃表示與主機連線成功。
❷連接到有線控制器
將有線控制器的 USB 接上轉接器,藍色恆亮表示與手把連線成功。
❸連接到無線控制器
(1) PS5 / PS4 / PS3 / Switch Pro
第一次使用時請先用 USB 連接手把及轉接器進行註冊,顯示藍色燈號後再移
除USB,藍色恆亮表示與手把連線成功。
(2) Xbox 360
直接將 Xbox 360 的接收器連接到轉接器,燈號顯示為藍色,表示已連線成
功。
(3) Xbox One/Xbox Elite 2/XSX|S
按壓轉接器上的 Brook 鍵約 1秒進入無線配對狀態,綠色快速閃爍表示
進入藍芽配對模式,同時按下無線控制器上的 Pair button 進行配對,藍
色恆亮表示與手把連線成功。
請記得,之後每次連接時,都要按下 PS 鍵或 Home 鍵才能完成連線
有些控制器的耗電量較高,例如 PS5 或Switch Pro 手把,需額外外
接電源才能正常使用。
連接說明
若Xbox One 無線控制器(藍芽規格)或 Xbox One 菁英手把二
代進行無線配對後再改為有線連接時,將導致原本的無線配對紀錄
被清除,此時則需重新無線配對。
如果短時間內重複按壓 Xe 鍵多次,則可能會使手把發生當機

21 22
PS5/PS4/PS3/PS Classic 手把
PS/PS2
✕
●
■
▲
L1
R1
L2
R2
L3
R3
START
Select
PS Key
PS5
✕
●
■
▲
L1
R1
L2
R2
L3
R3
OPTION
Create
PS Key
PS4
✕
●
■
▲
L1
R1
L2
R2
L3
R3
OPTION
SHARE
PS Key
PS3
✕
●
■
▲
L1
R1
L2
R2
L3
R3
START
SELECT
PS Key
PS Classic
✕
●
■
▲
L1
R1
L2
R2
L3
R3
START
SELECT
-
Xbox 360/Xbox one 手把
PS/PS2
✕
●
■
▲
L1
R1
L2
R2
L3
R3
START
Select
PS Key
Xbox One
A
B
X
Y
LB
RB
LT
RT
LSB
RSB
MENU
VIEW
XE key
Xbox 360
A
B
X
Y
LB
RB
LT
RT
LSB
RSB
START
BACK
Xe key
PC
A
B
X
Y
LB
RB
LT
RT
LSB
RSB
START
BACK
Xe key
Switch 手把
PS/PS2
✕
●
■
▲
L1
R1
L2
R2
L3
R3
START
Select
PS Key
Switch
B
A
Y
X
L
R
ZL
ZR
L3
R3
+
-
Home
按鍵配置對應表

23 24
以下說明使用 PS4手把為範例,使用其他控制器請參照按鍵配置對應表
❶進入設定模式
請同時按下 SHARE 和PS 鍵,進入到 Turbo 設定模式,
燈號顯示為黃色,表示已進入到 Turbo 設定模式。
❷選擇一個或一個以上 Turbo 鍵(例如將 ■設置為 Turbo 鍵)
選擇一個或多個想要設定為 Turbo 的按鍵,同時按住
SHARE 再按 ■。
❸儲存設定
按下 OPTIONS 儲存設定
❹退出設定
按下 PS 鍵離開 Turbo 設定模式,黃色燈號將會熄滅。
以下說明使用 PS4 手把為範例,使用其他控制器請參照按鍵配置對應表
❶進入設定模式
時按下 SHARE 和PS 鍵,進入到 Turbo 設定模式,燈號顯
示為黃色,表示已進入到 Turbo 設定模式。
❷連射頻率設定
左邊的方向鍵上代表將 Turbo 的頻率調高、方向鍵下則代表將 Turbo 的頻率調
低。
如果要調高,則同時按下 SHARE 和方向鍵上,此時的燈號
的閃爍頻率會跟著加快;
如果要調低,則同時按下 SHARE 和方向鍵下,此時的燈號
頻率會跟著降低。
❸儲存設定
按下 OPTIONS 儲存設定
❹退出設定
按下 PS 鍵離開 Turbo 設定模式,黃色燈號將會熄滅。
連射頻率設定
可設置 Turbo 的按鍵包含:✕/●/■/▲/L1/R1/L2/R2/L3/R3
連射功能設定

25 26
以下說明使用 PS4手把為範例,使用其他控制器請參照按鍵配置對應表
❶進入設定模式
同時按下 SHARE 和PS 鍵,進入到 Turbo 設定模式,
燈號顯示為黃色,表示已進入到 Turbo 設定模式。
❷清除所有 Turbo 功能
同時按下 SHARE 和OPTION 鍵,此時所設定的 Turbo
將全部取消。
❸退出設定
按下 PS 鍵離開 Turbo 設定模式,黃色燈號將會熄滅。
以下說明使用 PS4手把為範例,使用其他控制器請參照按鍵配置對應表
❶進入設定模式
同時按下 OPTION 和PS 鍵,進入到 Remap 設定模式,
燈號顯示為紫色,表示已進入到 Remap 設定模式。
❷將某個按鍵轉至另一個按鍵。(例如:■作為 ●的功能 )
按下 ■然後放開,按住 SHARE 再按下 ●
❸將某個按鍵轉至多個按鍵。(例如:✕作為 ■+● 的功能)
按下 ✕然後放開,按住 SHARE 再按下 ■+●.
❹儲存設定
按下 OPTIONS 儲存設定。
❺退出設定
按下 PS 鍵離開 Remap 設定模式,紫色燈號將會熄滅。
自定義按鍵設定
清除連射功能設定

27 28
以下說明使用 PS4手把為範例,使用其他控制器請參照按鍵配置對應表
❶進入設定模式
同時按住 OPTION + PS 鍵,紫色將會恆亮
❷清除所有自定義的功能
按住 SHARE+ OPTIONS
❸退出設定
按下 PS 鍵,紫色燈號將會熄滅。
以下說明使用 PS4 手把為範例,使用其他控制器請參照按鍵配置對應表
PS classic 切換至 PC 模式 (X-Input )
如果你是PC 的玩家,請將轉接器插上 PC 後,按下手把上的 select + D
pad-Down 大約兩秒鐘,此時會閃爍一次白光,表示成功切換到 PC 模式
(X-Input)
X-Input 切換至 PS classic 模式
若要回到 PS Classic 玩遊戲的話,要再把模式切換回來。請按下 select + D
pad-up 大約兩秒鐘,此時會閃爍兩次白光,表示已經切回原來的出廠預設值
PS Classic 模式
切換連接主機
清除自定義按鍵設定

29 30
取得審驗證明之低功率射頻器材,非經核准,公司、商號或使用者均不得擅自變更頻率、
加大功率或變更原設計之特性及功能。低功率射頻器材之使用不得影響飛航安全及干擾
合法通信;經發現有干擾現象時,應立即停用,並改善至無干擾時方得繼續使用。前述
合法通信,指依電信管理法規定作業之無線電通信。
低功率射頻器材須忍受合法通信或工業、科學及醫療用電波輻射性電機設備之干擾。
Wingman PS2 支援市場上大部分的原廠控制器,其韌
體仍不定期更新,相關的韌體更新資訊會在 Brook 官網
及社群進行發佈。
P/N: Wingman PS2
M/N: ZPP0062
其他

31 32
接続:
ランプ
頻度
状態
緑色
ゆっくり点滅
ゲーム機への接続に成功
緑色
すばやく点滅
Bluetooth ワイヤレスペアリングモードに入る
青色
常時点灯
ゲーム機とコントローラーの接続に成功
デジタル出力状態 (PS ボタンを 1回押して、アナ
ログモードに戻ります)
白色
常時点灯
ゲーム機とコントローラーの接続に成功
アナログ出力状態 (PS ボタンを 1回押して、デジ
タルモードに戻ります)
白色
1回点滅
PS classic モードから X-Input モードに切り替え
白色
2回点滅
X-Input モードから PS classic モードに切り替え
機能設定: 連射(ターボ) & ボタン割り当て(リマップ)
LED
頻率
狀態
黄色
常時点灯
連射(ターボ)機能設定モードに入る
紫色
常時点灯
ボタン割り当て(リマップ)設定モードに入る
インジケーターランプ表示
注意事項
Wingman PS2 は市販されているコントローラーのほぼすべてをサポートし
ており、ファームウェアを不定期で更新しています。関連情報は、Brook 公
式ウェブサイトやコミュニティでお知らせします。
各コンバーターは、一度に 1台のコントローラーのみ接続できます。
連射(ターボ)とボタン割り当て(リマップ)はコントローラーモードのみ設定
が可能で、アーケードコントローラーには非対応です。
有線コントローラーが正常に作動しない場合、古いゲーム機のためコンバー
ターに供給される電力の不足が考えられます。別途モバイルバッテリーを接
続してください。
接続図と注意事項

33 34
❶ゲーム機に接続する
まず Wingman PS2 をゲーム機に接続します,製品のランプが緑色に点灯
して、Wingman PS2 とゲーム機が正常に接続されたことをお知らせします。
❷有線コントローラーに接続する
有線コントローラーの場合、Wingman PS2 のUSB ポートに直接差し込み
ます。製品のランプが青色に点灯して、正常に接続されたことをお知らせ
します。
❸ワイヤレスコントローラーに接続する
(1) PS5 / PS4 / PS3 / Switch Pro
PS5、PS4、PS3、Switch のワイヤレスコントローラーを初めて使用する
際、まずコントローラーと Wingman PS2 を有線で接続して登録します。
青色のランプが点灯したら、USB ケーブルを取り外してください。
(2) Xbox 360
Xbox 360 コントローラーの場合、レシーバーを直接 Wingman PS2 のUSB
ポートに差し込みます。ランプが青色に点灯して、正常に接続されたこと
をお知らせします。
(3) Xbox One/Xbox Elite 2/XSX|S
Wingman PS2 のBrook ボタンと、コントローラーのペアリングボタンを
同時に約 3秒間長押しします。ランプが青色に点灯して、正常に接続され
たことをお知らせします。
今後使用するときは、毎回 PS ボタンまたは Home ボタンを押して接続します。
もし Wingman PS2 のランプが点灯しないときは、古いゲーム機に接続して
いて、Wingman PS2 へのパワーが不足していることを意味します。モバイ
ルバッテリーを追加接続してください。
接続方法の説明
Xbox One ワイヤレスコントローラー(Bluetooth 仕様)、または Xbox Elite
ワイヤレスコントローラーシリーズ 2のワイヤレスペアリング後、有線接続
に切り替えた場合、ワイヤレスペアリングの記録は消去されます。再度、ワ
イヤレスペアリング設定を行ってください。
短時間に Xe ボタンを何度も繰り返し押すと、コントローラーが動かなくな
る場合がありますのでご注意ください。

35 36
PS5/PS4/PS3/PS Classic コントローラー
PS/PS2
✕
●
■
▲
L1
R1
L2
R2
L3
R3
START
Select
PS Key
PS5
✕
●
■
▲
L1
R1
L2
R2
L3
R3
OPTION
Create
PS Key
PS4
✕
●
■
▲
L1
R1
L2
R2
L3
R3
OPTION
SHARE
PS Key
PS3
✕
●
■
▲
L1
R1
L2
R2
L3
R3
START
SELECT
PS Key
PS Classic
✕
●
■
▲
L1
R1
L2
R2
L3
R3
START
SELECT
-
Xbox 360/Xbox one コントローラー
PS/PS2
✕
●
■
▲
L1
R1
L2
R2
L3
R3
START
Select
PS Key
Xbox One
A
B
X
Y
LB
RB
LT
RT
LSB
RSB
MENU
VIEW
XE key
Xbox 360
A
B
X
Y
LB
RB
LT
RT
LSB
RSB
START
BACK
Xe key
PC
A
B
X
Y
LB
RB
LT
RT
LSB
RSB
START
BACK
Xe key
Switch コントローラー
PS/PS2
✕
●
■
▲
L1
R1
L2
R2
L3
R3
START
Select
PS Key
Switch
B
A
Y
X
L
R
ZL
ZR
L3
R3
+
-
Home
ボタン割り当て対応表

37 38
以下の説明では、PS4 コントローラーを例にしています。その他のコントロー
ラーは、ボタン割り当て対応表をご覧ください。
❶設定モードに入る
SHARE ボタンと PS ボタンを同時に押して、ターボ設定
モードに入ります。ランプが黄色に点灯して、ターボ設
定モードをお知らせします。
❷連射機能を設定したい 1つまたは複数のボタンを選ぶ(例:■ボタンを連射
ボタンに設定する)
連射機能を設定したい 1つまたは複数のボタンを選び、
SHARE ボタンを押しながら■ボタンを押します。
❸設定の保存
OPTION ボタンを押して、設定を保存します。
❹設定モードを出る
PS ボタンを押して、ターボ設定モードを終了します。
このとき、黄色のランプは消灯します。
以下說明使用 PS4 手把為範例,使用其他控制器請參照按鍵配置對應表
❶設定モードに入る
同じように SHARE ボタンと PS ボタンを同時に押して、
ターボ設定モードに入ります。ランプが黄色に点灯して、
ターボ設定モードをお知らせします。
❷連射速度設定
十字ボタンの上方向で連射速度を上げ、下方向で連射速
度を下げます。
連射速度を上げる場合、SHARE ボタンと十字ボタンの上
方向を同時に押します。速度に応じて、ランプの点滅が
速くなります。
連射速度を下げる場合、SHARE ボタンと十字ボタンの下
方向を同時に押します。速度に応じて、ランプの点滅が
遅くなります。
❸設定の保存
OPTION ボタンを押して、設定を保存します。
❹設定モードを出る
PS ボタンを押して、ターボ設定モードを終了します。こ
のとき、黄色のランプは消灯します。
連射速度設定
可設置 Turbo 的按鍵包含:✕/●/■/▲/L1/R1/L2/R2/L3/R3
連射(ターボ)機能設定

39 40
以下の説明では、PS4 コントローラーを例にしています。その他のコントロー
ラーは、ボタン割り当て対応表をご覧ください。
❶設定モードに入る
さっきと同じように、SHARE ボタンと PS ボタンを同時
に押して、ターボ設定モードに入ります。ランプが黄色
に点灯して、ターボ設定モードをお知らせします。
❷連射(ターボ)機能設定の解除
SHARE ボタンと OPTION ボタンを同時に押すと、設定
したすべてのターボ設定が解除されます。
❸設定モードを出る
PS ボタンを押して、ターボ設定モードを終了します。こ
のとき、黄色のランプは消灯します。
以下の説明では、PS4 コントローラーを例にしています。その他のコントロー
ラーは、ボタン割り当て対応表をご覧ください。
❶設定モードに入る
OPTION ボタンと PS ボタンを同時に押して、リマップ
設定モードに入ります。ランプが紫色に点灯して、リマ
ップ設定モードをお知らせします。
❷1つのボタン割り当て(例:■ボタンに●ボタンを割り当てる )
まず■ボタンを押してから放し、次に SHARE ボタンと●ボタンを同時に押
します。
❸複数のボタン割り当て(例:✕ボタンに■+●を割り当てる)
ボタンを組み合わせて設定することもできます。同様にまず✕ボタンを押
してから放し、次に SHARE ボタ
ンと■+●ボタンを同時に押し
ます。
❹設定の保存
OPTION ボタンを押して、設定を保存します。
❺設定モードを出る
PS ボタンを押して、リマップ設定モードを終了します。
このとき、紫色のランプは消灯します。
ボタン割り当て(リマップ)設定
連射(ターボ)機能設定の解除
Table of contents
Languages:
Other Brook Media Converter manuals