manuals.online logo
Brands
  1. Home
  2. •
  3. Brands
  4. •
  5. Brother
  6. •
  7. Printer
  8. •
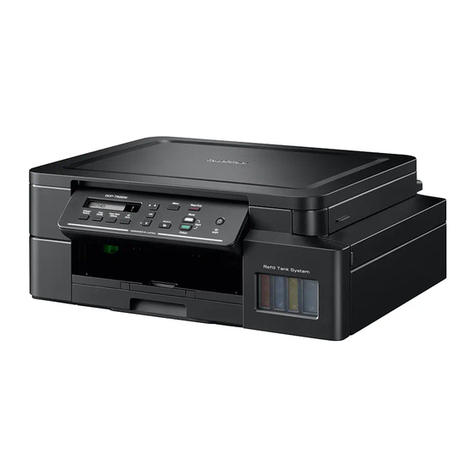
  9. Brother MFC-J5340DW User manual

Brother MFC-J5340DW User manual

Quick Setup Guide
Read the Product Safety Guide first, then read this Quick Setup Guide for the correct installation procedure.
D01Y3M001-00
USA/CAN
Version 0
EN FR
1Unpack the machine and check the components
Remove the protective tape or film covering the machine and the supplies. The components included in the box may differ depending on your country.
MFC-J5340DW / MFC-J5855DW / MFC-J5955DW
NOTE
• Save all packing materials and the box in case you must ship your machine.
• You must purchase the correct interface cable for the interface you want to use.
USB cable
Use a USB 2.0 cable (Type A/B) that is no more than 16 feet (5 meters) long.
Ethernet (Network) cable
Use a straight-through Category 5 (or greater) twisted-pair cable for 10BASE-T or 100BASE-TX
Fast Ethernet Network.
NOTE
You can adjust the control
panel angle to read the LCD
more easily.
NOTE
The first time you install the
ink cartridges, the machine
will use extra ink to fill the
ink delivery tubes. This is a
one-time process that enables
high-quality printing.
Open the ink cartridge cover.
For MFC-J5340DW only:
Remove the orange protective part
from the machine. Follow the
LCD instructions to store the orange
protective part inside the machine.
If you must transport the machine,
remove the ink cartridges and
replace this part.
The latest manuals are available at the Brother support website:
support.brother.com/manuals
Video setup instructions:
support.brother.com/videos
Manuals in Spanish for this model are available at support.brother.com.
Manuales en Español para este modelo están disponibles en support.brother.com.
Pull the paper tray completely
out of the machine as shown
by the arrow. Remove the tray
top cover.
Fan the paper well. Load the paper in the tray
and adjust the paper guides.
Put on the tray top cover,
and then slowly push the
paper tray completely into
the machine.
Pull out the paper support until
it locks into place.
Quickly shake just the
black ink cartridge
horizontally 15 times as
shown, before inserting
it into the machine.
Follow the LCD instructions
to install the ink cartridges.
Close the ink cartridge
cover. The machine will
prepare the ink tube
system for printing.
Follow the LCD instructions to
set the date and time.
After setting the date and time,
you can set the Brother LCD
Message defaults.
Follow the LCD instructions,
and then press [S t a r t].
The machine prints the Print
Quality Check Sheet.
Follow the LCD instructions and
check the quality of the four color
blocks on the sheet, and then
start the cleaning procedure if
required.
Follow the LCD instructions
to print the Adjustment
Sheet. The black circle mark
is located in the upper right
corner of the sheet.
Place the Adjustment Sheet
face down on the scanner
glass. Make sure the black
circle is in the upper left corner
of the scanner glass.
Follow the LCD instructions
and complete adjusting the
alignment.
When finished, remove the
Adjustment Sheet from the
scanner glass.
After finishing the machine setup, you can change the paper type or size. For more information
about paper handling, see the Online User’s Guide at support.brother.com/manuals.
2Load plain Letter/A4 paper
4Install the starter ink cartridges
3Connect the
power cord
6Check the print quality 7Adjust the print alignment (recommended)
To adjust the print alignment before using your machine, press [S t a r t].
5Set the date
and time
• Most of the machine illustrations in this Quick Setup Guide show the MFC-J5955DW.
• The images in this guide are for illustration purposes only and may differ from the
actual products.
Do not exceed
this mark (bbb).
OK Poor
Can’t Connect? Check the following:
Wireless network
Wired network
USB connection
Restart your wireless access point/
router (if possible). If still not successful, go to 14 .
Disconnect the cable. If still not successful, visit support.brother.com
for FAQs and Troubleshooting.
Restart your machine and
computer, and then go to 13 .
Follow the LCD instructions to configure
the machine settings.
• Configure the tray settings and check
the paper orientation information (not
available on all models).
• Check the software installation
information.
1. Press [Settings] > [All
Settings] > [Initial Setup] >
[Local Language].
2. Press your language.
3. Press .
1. Press [Settings] > [All Settings]
> [Fax] > [Setup Receive] > [Receive
Mode].
2. Press your preferred Receive Mode.
3. Press .
1. Press [Settings] > [All Settings] > [Initial
Setup] > [Station ID] > [Fax].
2. Enter your fax number (up to 20 digits) on the touchscreen
and then press [OK].
3. Press [Name].
4. Enter your name (up to 20 characters) using the
touchscreen, and then press [OK].
5. Press .
Visit setup.brother.com to download and install
Brother software.
Follow the on-screen instructions and prompts.
NOTE
For Wired Network Connection and USB Connection,
locate the correct port (based on the cable you are using)
inside the machine as shown.
Setup Finished
You can now print and scan using your machine.
To check for the latest firmware, visit
support.brother.com/up7.
Find your SSID (Network Name) and Network Key
(Password) on your wireless access point/router
and write them in the table provided below.
SSID (Network Name)
Network Key (Password)
Go to your machine,
and press
>
[Find Wi-Fi Network] >
[Yes].
Go to 13 to install software.
SSID: XXXXXXX
Network Key: XXXX
If you cannot find this information, ask your network
administrator or wireless access point/router
manufacturer.
If setup is not successful, restart
your Brother machine and your
wireless access point/router, and
repeat 14 .
Important Notice for Network Security:
The default password to manage this machine’s
settings is located on the back of the machine
and marked “Pwd”. We recommend immediately
changing the default password to protect your
machine from unauthorized access.
For detailed machine information and product specifications, see the Online User's Guide at support.brother.com/manuals.
© 2021 Brother Industries, Ltd. All rights reserved.
Store your name and fax number so the machine prints it on
all outgoing fax pages.
14 Manual wireless setup
If the wireless setup is not successful, try to set up the connection manually.
13 Connect your computer or mobile device to your machine
Follow these steps to complete the setup using one of the connection types available on your machine.
11 Select the correct
Receive Mode
If you are not using your machine as a
fax, go to 13 .
12 Set your Station ID
If you are not using your machine as a fax, go to 13 .
9Connect the telephone line cord
If you are not using your machine as a fax, go to 10 . For more information on using the fax feature, see the
Online User’s Guide.
10 Select your language
(if needed)
8Machine settings
setup.brother.com
Select the SSID (Network
Name) for your access point/
router and enter the Network Key
(Password).
When the wireless setup is
successful, the LCD displays
[Connected].
Lift the scanner cover. Close the scanner cover.
Connect the telephone
line cord. Use the jack
marked LINE and guide
the cord out the back of
the machine.
NOTE
For Windows only, CD installation is also available (for
some countries).

Other manuals for MFC-J5340DW

1

This manual suits for next models

2

Other Brother Printer manuals

Brother RJ-3150 User manual

Brother

Brother RJ-3150 User manual

Brother HL-2400C Series User manual

Brother

Brother HL-2400C Series User manual

Brother HL-5440D User manual

Brother

Brother HL-5440D User manual

Brother HL-5040 User manual

Brother

Brother HL-5040 User manual

Brother HL-L6300DW User manual

Brother

Brother HL-L6300DW User manual

Brother HL 5030 - B/W Laser Printer User manual

Brother

Brother HL 5030 - B/W Laser Printer User manual

Brother MFC-T920DW User manual

Brother

Brother MFC-T920DW User manual

Brother HL-5350DN User manual

Brother

Brother HL-5350DN User manual

Brother RJ-4250WB User manual

Brother

Brother RJ-4250WB User manual

Brother HL-1440 User manual

Brother

Brother HL-1440 User manual

Brother HL-2290 User manual

Brother

Brother HL-2290 User manual

Brother DCP-1610WE User manual

Brother

Brother DCP-1610WE User manual

Brother DCP 330C - Color Inkjet - All-in-One User manual

Brother

Brother DCP 330C - Color Inkjet - All-in-One User manual

Brother HL-3260N User manual

Brother

Brother HL-3260N User manual

Brother HL-5240L User manual

Brother

Brother HL-5240L User manual

Brother MFC-1810 User manual

Brother

Brother MFC-1810 User manual

Brother HL-2220 User manual

Brother

Brother HL-2220 User manual

Brother HL-J6000DW User manual

Brother

Brother HL-J6000DW User manual

Brother P-Touch QL-500 User manual

Brother

Brother P-Touch QL-500 User manual

Brother HL 760 - B/W Laser Printer User manual

Brother

Brother HL 760 - B/W Laser Printer User manual

Brother GTX User manual

Brother

Brother GTX User manual

Brother RuggedJet RJ-4030 User manual

Brother

Brother RuggedJet RJ-4030 User manual

Brother m-PRINT MW-100 Quick start guide

Brother

Brother m-PRINT MW-100 Quick start guide

Brother HL-5030 User manual

Brother

Brother HL-5030 User manual

Popular Printer manuals by other brands

Epson XP-6100 user guide

Epson

Epson XP-6100 user guide

Olivetti PG L2140 Operation guide

Olivetti

Olivetti PG L2140 Operation guide

Canon PIXMA PRO-1 Series Getting started

Canon

Canon PIXMA PRO-1 Series Getting started

Oki C610dn Handy reference

Oki

Oki C610dn Handy reference

Canon iP6700D - PIXMA Color Inkjet Printer Specifications

Canon

Canon iP6700D - PIXMA Color Inkjet Printer Specifications

Roland SOLJET Pro III XC-540 Service notes

Roland

Roland SOLJET Pro III XC-540 Service notes

Epson ET-4810 Series Start here

Epson

Epson ET-4810 Series Start here

Konica Minolta Magicolor 7440 installation guide

Konica Minolta

Konica Minolta Magicolor 7440 installation guide

Canon Q30-3201-US1 user guide

Canon

Canon Q30-3201-US1 user guide

IBM Infoprint Color 8 user guide

IBM

IBM Infoprint Color 8 user guide

Canon PIXMA MX432 Setting up

Canon

Canon PIXMA MX432 Setting up

Ricoh SP204SF user guide

Ricoh

Ricoh SP204SF user guide

Epson B-510DN - Business Color Ink Jet Printer Specifications

Epson

Epson B-510DN - Business Color Ink Jet Printer Specifications

Fuji Xerox DocuCentre-IV C3373 Quick reference guide

Fuji Xerox

Fuji Xerox DocuCentre-IV C3373 Quick reference guide

Xerox Phaser 6200N specification

Xerox

Xerox Phaser 6200N specification

Ricoh SG 7100DN installation guide

Ricoh

Ricoh SG 7100DN installation guide

Reiner jetStamp 1025 operating manual

Reiner

Reiner jetStamp 1025 operating manual

MUTOH ValueJet VJ-1624 installation manual

MUTOH

MUTOH ValueJet VJ-1624 installation manual

manuals.online logo
manuals.online logoBrands
  • About & Mission
  • Contact us
  • Privacy Policy
  • Terms and Conditions

Copyright 2025 Manuals.Online. All Rights Reserved.