manuals.online logo
Brands
  1. Home
  2. •
  3. Brands
  4. •
  5. Brother
  6. •
  7. Printer
  8. •
  9. Brother PT-E500 User manual

Brother PT-E500 User manual

LABEL CARTRIDGES FOR THE PT-E500 AND PT-E550W
The following cartridges are available from EzProducts:
part number description _ price $US
LC5-C12- K-PT 12MM (½”) Clothing Labels, white / black ribbon, 32’ $ 29.00
LC5-C18- K-PT 18MM (
3
/
4
”) Clothing Labels, white / black ribbon, 32’ $ 31.00
LC5-C24- K-PT 24MM (1”) Clothing Labels, white / black ribbon, 32” $ 33.00
TZe231 ½” Laminated Self-stick white with black ribbon, 26’ $ 19.00
TZe241
3
/
4
” Laminated Self-stick white with black ribbon, 26’ $ 22.00
TZe251 1” Laminated Self-stick white with black ribbon, 26’ $ 25.00
HSe221 Medium Eyeglass Label Cartridge, 4.9’ $ 56.00
HSe231 Large Eyeglass Label Cartridge, 4.9’ $ 60.00
IF YOU HAVE PROBLEMS
If you have problems, please call EzProducts TOLL FREE at
877.906.1818 international 863.767.0155 8:30am to 5:00pm EST.
WARRANTY REPAIR
This Brother PT500 printer is warranted for one year from the date of
purchase. A copy of your invoice may be required when requesting
warranty repair. Always call EzProducts at 877.906.1818 or
international call 863.767.0155 to obtain a Return Machine
Authorization Number (RMA) prior to returning a PT500 for repair.
Page - 10
Operator’s Manual
for the
Brother PT-E500 printer
and
Brother PT-E550 printer
Start Printing & Applying Labels Quickly
Revised 11/06/2015
© copyright 2015
EzPi
EzProducts International Inc
612 North Florida Ave, auchula FL 33873 USA ● 863.767.0155 ● www.ezpi. s
LABEL PRINTING - Printing a Single Label
1. Press the Print key.
2. Press OK or Enter key to select C t/Pa se
LABEL PRINTING – Printing Several Identical Labels
1. Hold down the Shift key and press the Print/ key.
2. Using the ˄ ˅ key scroll to the quantity of labels you wish to print and press
Ok or Enter key.
LABEL PRINTING – A tomatic Print & C t M ltiple Labels
1. Press the Men key, select Advanced using the ˄ ˅ keys, then press OK
or Enter key.
2. Press OK or Enter key to select C t/Pa se.
3. Scroll to ON or OFF and press OK or Enter.
4. Press Shift and Print and scroll to number of copies, then press Print.
LABEL PRINTING - Editing a Label
Use the left/right arrow keys to underscore the character you want to
change. Tap the BS key to delete those characters one at a time.
LABEL PRINTING - Erasing a Label
Press the BS key to delete all characters or press the Clear button.
LABEL PRINTING - Saving a Label in a File
Type your label and click File. Arrow down to select Save, then click the
Enter key. Type the name for the file and click Enter.
LABEL PRINTING - Retrieving a Label from a File
Click File and arrow down to open or arrow up to the File Name. The
Name and Number of the file will display.
Page 9
CREATING A LABEL
The P-touch printer can print six different label types:
General, Faceplate, Cable rap, Cable Flag, Punch Panel, and
Punch Block.
To label Clothing, Eyeglasses, or any other smooth s rface, Always
Select General, the defa lt val e.
CREATING A LABEL - One Line Label
1. At the [] Prompt, type one line of data.
2. Press the Print Key.
CREATING A LABEL - Two Line Label
1. At the [] Prompt, type one line of data and press Enter.
2. Type your second line of data.
3. Press the Print Key.
CREATING A LABEL – Fixed Length Label
1. Press the General key twice to display Label length.
2. Press < key to decrease the label length or press > to increase the
label length.
3. Press the Enter or OK key.
CREATING A LABEL – Variable Length Label
1. Press the General key twice to display Label length.
2. Press > key until AUTO appears in the display
3. Press the Enter or OK key.
Page - 8
Contents
GETTING STARTED page
Key names & functions
●●●●●●●●●●●●●●●●●●●●●●●●●●●●●●●●●●●●
2
AC Power Adapter
●●●●●●●●●●●●●●●●●●●●●●●●●●●●●●●●●●●●●●●●
4
Installing the Rechargeable Li-ion Battery
●●●●●●●●●●●●●●●●●●●●●●
4
Alkaline Ni-MH Battery
●●●●●●●●●●●●●●●●●●●●●●●●●●●●●●●●●●●●
5
Turning Power On/Off
●●●●●●●●●●●●●●●●●●●●●●●●●●●●●●●●●●●●
6
Installing a Label Cartridge
●●●●●●●●●●●●●●●●●●●●●●●●●●●●●●●●
6
Feeding Tape
●●●●●●●●●●●●●●●●●●●●●●●●●●●●●●●●●●●●●●●●●●
7
LCD Display
●●●●●●●●●●●●●●●●●●●●●●●●●●●●●●●●●●●●●●●●●●●
7
CREATING A LABEL
TrackIt™ Clothing Labels
●●●●●●●●●●●●●●●●●●●●●●●●●●●●●●●●●●●●
8
Selecting Eyeglass Labels
●●●●●●●●●●●●●●●●●●●●●●●●●●●●●●●●●
8
Selecting P-touch Laminated Self-stick Labels
●●●●●●●●●●●●●●●●●●●
8
Creating a Fixed Length Label
●●●●●●●●●●●●●●●●●●●●●●●●●●●●●●●
8
Creating a Variable Length Label
●●●●●●●●●●●●●●●●●●●●●●●●●●●●●
8
Creating a One Line Label
●●●●●●●●●●●●●●●●●●●●●●●●●●●●●●●●●
8
Creating a Two Line Label
●●●●●●●●●●●●●●●●●●●●●●●●●●●●●●●●●
8
LABEL PRINTING
Printing a Single Label
●●●●●●●●●●●●●●●●●●●●●●●●●●●●●●●●●●●
9
Printing Several Identical Labels
●●●●●●●●●●●●●●●●●●●●●●●●●●●●
9
Editing a Label
●●●●●●●●●●●●●●●●●●●●●●●●●●●●●●●●●●●●●●●●●●
9
Automatic Print & Cut Multiple Labels
●●●●●●●●●●●●●●●●●●●●●●●●●●
9
Erasing a Label
●●●●●●●●●●●●●●●●●●●●●●●●●●●●●●●●●●●●●●●●●●
9
Saving a Label in a File
●●●●●●●●●●●●●●●●●●●●●●●●●●●●●●●●●●●●
9
Retrieving a Label That as Saved in a File
●●●●●●●●●●●●●●●●●●●●●
9
Feeding & Cutting Labels
●●●●●●●●●●●●●●●●●●●●●●●●●●●●●●●●●●
7
LABEL CARTRIDGES FROM EZPRODUCTS
Clothing Labels – 12mm, 18mm, 24mm
●●●●●●●●●●●●●●●●●●●●●●●
10
Eyeglass Labels – Medium, Large
●●●●●●●●●●●●●●●●●●●●●●●●●●●.
10
Laminated Self Stick Labels – 12mm, 18mm & 24mm
●●●●●●●●●●●●●●
10
IF YOU HAVE PROBLEMS
●●●●●●●●●●●●●●●●●●●●●●●●●●●●●●
10
WARRANTY REPAIR
●●●●●●●●●●●●●●●●●●●●●●●●●●●●●●●●●●●●
10
WIRELESS & USB CABLE ATTACHMENT TO A PC OR TABLET
The PT500 can be attached to a PC via a mini USB Cable. See PT500 Software
Users Guide for details. The PT550 can be attached to a PC via a mini USB Cable
or via the wireless bluetooth interface. See PT550 Software Users Guide for details.
Page - 1
GETTING STARTED – Key Names & F nctions
1. Power - Turns the P-touch label printer on and off.
2. Style - Sets character and label attributes.
3. Preview - Displays a preview of the label.
4. Feed & C t - Feeds 1” of blank label media then cuts it.
5. Print - Prints 1 copy of the current label.
Shift Print - Prints multiple copies of the same label.
6. General - Creates general purpose labels.
7. Faceplate - Creates labels for faceplates, nameplates and single port
applications.
8. Cable Wrap - Creates labels that wrap around a cable or wire.
9. Cable Flag - Creates cable flag labels.
10. Patch Panel - Creates single and multiple line labels for ports on a patch
panel.
11. P nch Block - Creates labels up to 3 lines for punch-down blocks.
12. Men - Sets the printer operating preferences (Language, Adjustment, etc.)
13. Esc (Escape) - Cancels the current command and returns the display to
the data entry screen or the previous step.
14. Clear - Clears all text entered or all text and current label settings.
15. OK - Selects the displayed option.
16. C rsor (˄ ˅ ˂ ˃) - Moves the cursor in the direction of the arrow.
17. Letter - Use these keys to type letters or numbers. Use Caps or Shift key
to type uppercase letters and symbols.
Page – 2
GETTING STARTED - Feeding Tape
Feed & C t
This function will feed approximately 1” of tape and cut it.
1. Press the Feed & Cut Key. “Feed & Cut?” will appear on the LCD display.
2. Use the ˄ ˅ key to select the “Feed & Cut” and then press either OK or
Enter. The message “Feeding Tape….Please ait” appears while the tape
is fed and then cut.
3. To exit or cancel this function, press Esc.
Feed Only
This function will feed approximately 1” of tape resulting in a blank label
sticking out of the label cartridge. This should always be done prior to
removing a label cartridge.
1. Press the Feed & C t Key. “Feed & C t?” will appear on the LCD display.
2. Use the ˄ ˅ key to select the “Feed Only” and then press either the OK or
Enter key. The message “Feeding Tape….Please ait” appears while the
tape is fed.
GETTING STARTED - LCD Display
LCD Contrast
You can change the LC display to one of five levels (+2, +1, 0, 1, 2)
To make the screen easier to read. The default setting is “0”.
1. Press the Men key, select “Adjustment” using the ˄ ˅ keys, then press
OK or Enter key.
2. Pressing the Space key sets the contrast setting to 0, the default value.
Backlight
You can change the backlight setting to on or off. The display is easier
to see with the backlight on. The default is on.
1. Press the Men key, select “Advanced” using the ˄ ˅ keys, then press OK
or Enter key.
2. Select “On” or “Off” using the ˄ ˅ and then press Ok or Enter.
3. Power can be saved when the backlight is turned off. The backlight will
automatically turn off after 10 seconds of inactivity, press any key to re-
enable it.
Page - 7
GETTING STARTED - T rning Power On/Off
1. Press the ɸ (Power) to turn the P-touch printer on/off
GETTING STARTED – Installing a Label Cartridge
1. If the new label cartridge has a
cardboard stopper, be sure to remove
the stopper before inserting the
cassette.
2. Check that the end of the tape is not
bent and it passes through the tape
guide at least ½ inch, also make sure
that the ink ribbon is wound tight.
(see photo).
3. After making sure that the power is off,
place the P-touch printer on a flat surface and open the rear cover. If there is
already a tape cassette in the P-touch, remove it by pulling it straight up.
4. Insert the label cartridge into the compartment with the end of the tape
protruding out of the P-touch printer tape
exit slot and press firmly until you hear it
click.
When inserting the label cartridge, make
s re that the tape and ribbon do not
catch on the print head. If there is slack in the tape, p ll the tape
thro gh the tape g ide.
5. Close the rear cover.
6. DO NOT PULL THE LABEL WHILE IT IS COMING OUT OF THE
PRINTER. DOING SO WILL CAUSE THE INK RIBBON TO PULL OUT OF
THE EXIT SLOT AND TO BE CUT WHEN THE LABEL IS CUT. THIS
WILL CAUSE THE LABEL CARTRIDGE TO NO LONGER FUNCTION.
Page - 6
GETTING STARTED – Key Names & F nctions
(continued)
18. BS (backspace) - Deletes the character to the left of the cursor.
19. Shift - Use this key in combination with letter and number keys to type
uppercase letters or the symbols indicated on the number keys.
20. Caps - Turns Caps mode on and off.
21. Enter - Enters a new line when entering text.
Shift Enter - For only the “general” label application type, enters a new
block.
22. Accent - Use this key to select and enter an accented character.
23. Space - Enters a space or returns a setting to the default value.
24. File - Enables frequently used labels in the file memory to be printed,
opened, saved or deleted.
25. Symbol - Use this key to select and enter a symbol from a list of available
symbols.
26. Bar Code - Opens the Bar Code Setup Screen.
27. Serialize - Prints serialized labels.
28. Adv. Serialize - Serializes and prints any 2 numbers on a label
simultaneously.
29. Database - Use the selected range of records in the downloaded database
to create labels.
Page - 3
GETTING STARTED - AC Power Adapter
1. Connect AC Adapter
Plug the AC Adapter AD-E001 as shown above.
DO NOT USE ad-18 or AD24ES AC Adapters!
Plug the AC Adapter into a standard electrical outlet.
Installing the echargeable Li-ion Battery
1. Open the rear cover by pressing the cover latch.
1. Rear Cover
2. Cover latch
2. Insert the rechargeable
Li-ion battery
3. Confirm that the hooks on the edge
of the rear cover are inserted
correctly and then reattach the
cover.
Page – 4
GETTING STARTED - Alkaline Ni-MH Battery
1. Make s re the POWER IS OFF! Always replace all six batteries at the
same time sing six brand new
f lly charged batteries.
2. Remove the rear cover.
3. If the batteries are already in the P-
touch label printer, remove them.
4. Insert six new AA-size alkaline
batteries (LR6), or fully charged Ni-MH
rechargeable batteries (HR6), making
sure that the positive (+) and negative
(-) ends of the batteries match the
positive (+) and negative (-) marks
inside the battery compartment.
5. Visit http//solutions.brother.com/ for the
latest information about recommended
batteries.
6. Attach the rear cover by inserting
the three hooks at the bottom into
the slots on the P-touch label
printer, then pushing down firmly
until it snaps into place.
7. REMOVE THE BATTERIES IF YOU DO NOT INTEND TO USE THE
P-TOUCH FOR AN EXTENDED PERIOD OF TIME.
Page - 5

Other manuals for PT-E500

2

Other Brother Printer manuals

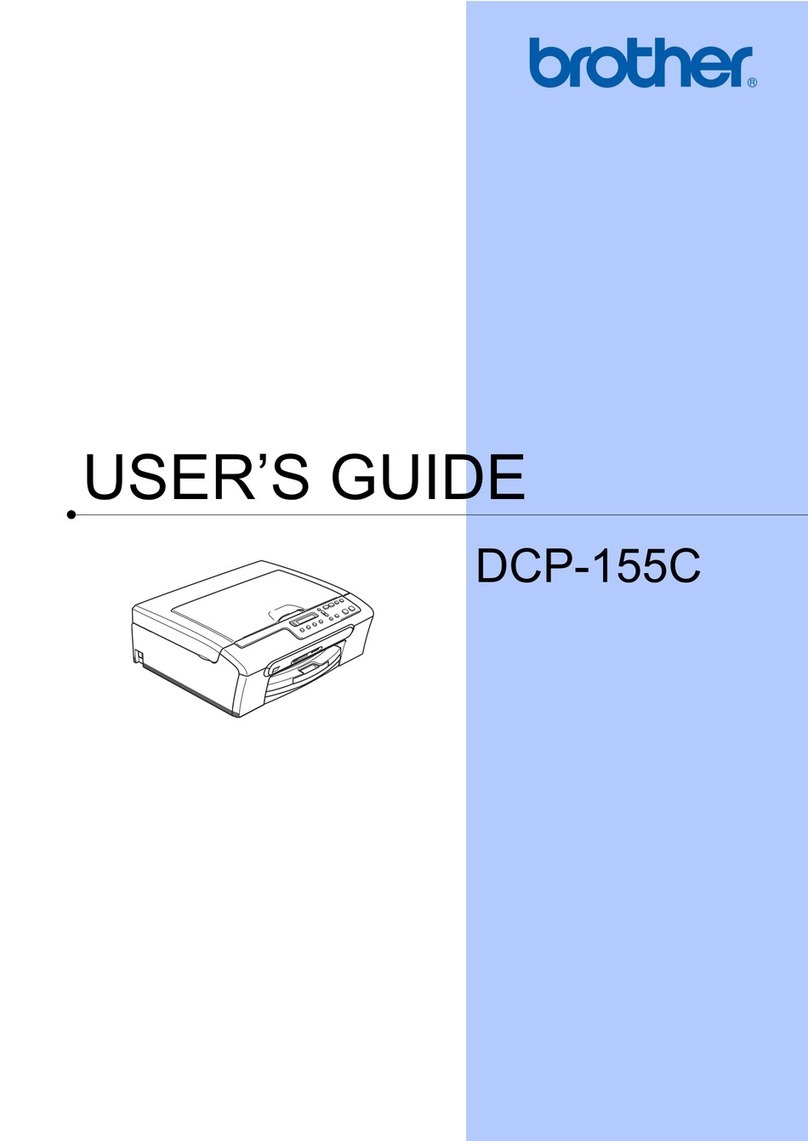
Brother DCP-L3520CDW User manual

Brother

Brother DCP-L3520CDW User manual

Brother 1440 - HL B/W Laser Printer Installation instructions

Brother

Brother 1440 - HL B/W Laser Printer Installation instructions

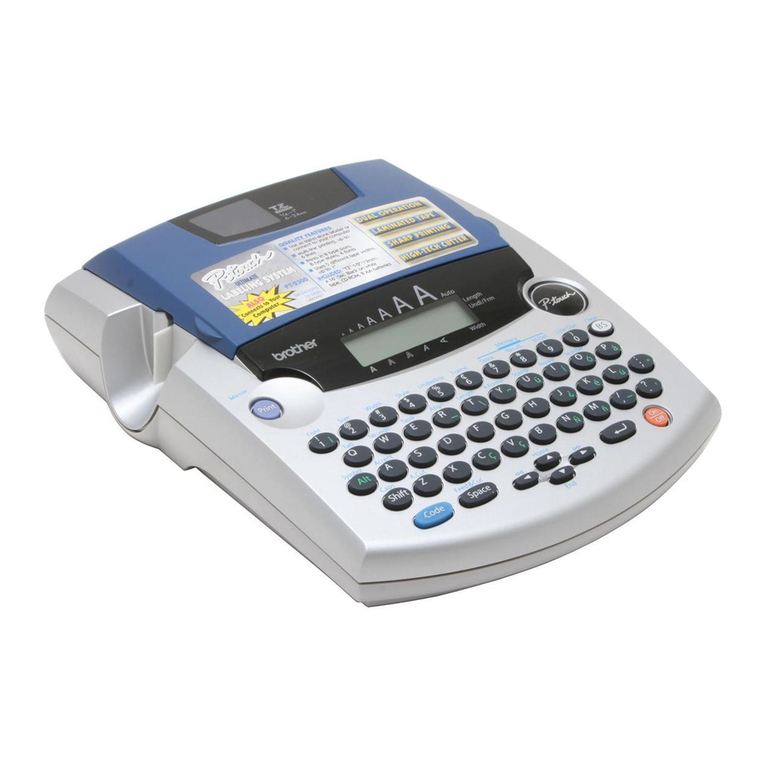
Brother P-Touch 2300 User manual

Brother

Brother P-Touch 2300 User manual

Brother DCP-J132W User manual

Brother

Brother DCP-J132W User manual

Brother DCP-L3528CDW User manual

Brother

Brother DCP-L3528CDW User manual

Brother HL-L3215CW User manual

Brother

Brother HL-L3215CW User manual

Brother MPrint MW-140BT User manual

Brother

Brother MPrint MW-140BT User manual

Brother DCP-T520W User manual

Brother

Brother DCP-T520W User manual

Brother MFC-J5945DW User manual

Brother

Brother MFC-J5945DW User manual

Brother GT-541 Installation guide

Brother

Brother GT-541 Installation guide

Brother HL-L2350DW Operating manual

Brother

Brother HL-L2350DW Operating manual

Brother HL-3140CW User manual

Brother

Brother HL-3140CW User manual

Brother DCP-L2508DW User manual

Brother

Brother DCP-L2508DW User manual

Brother DCP-J100 User manual

Brother

Brother DCP-J100 User manual

Brother MFC-9320CW Instruction Manual

Brother

Brother MFC-9320CW Instruction Manual

Brother m-PRINT MW-100 User manual

Brother

Brother m-PRINT MW-100 User manual

Brother LASER PRINTER HL-2140 User manual

Brother

Brother LASER PRINTER HL-2140 User manual

Brother Airprint MFC-J460DW Technical manual

Brother

Brother Airprint MFC-J460DW Technical manual

Brother MFC-J2340DW User manual

Brother

Brother MFC-J2340DW User manual

Brother HL-1070 User manual

Brother

Brother HL-1070 User manual

Brother DCP-J572DW Technical manual

Brother

Brother DCP-J572DW Technical manual

Brother PocketJet 6 User manual

Brother

Brother PocketJet 6 User manual

Brother DCP-T226 Technical manual

Brother

Brother DCP-T226 Technical manual

Brother MFC-J5340DW User manual

Brother

Brother MFC-J5340DW User manual

Popular Printer manuals by other brands

Oki B 6100 user guide

Oki

Oki B 6100 user guide

Canon LBP-810 user guide

Canon

Canon LBP-810 user guide

Olivetti PG L2140 Operation guide

Olivetti

Olivetti PG L2140 Operation guide

Eltron P210 Guide manual

Eltron

Eltron P210 Guide manual

Xerox DocuPrint 96 Installation planning guide

Xerox

Xerox DocuPrint 96 Installation planning guide

Ricoh MD-P1 Service manual

Ricoh

Ricoh MD-P1 Service manual

Lexmark E360 Brochure & specs

Lexmark

Lexmark E360 Brochure & specs

Citizen CBM-262 Type II Command reference guide

Citizen

Citizen CBM-262 Type II Command reference guide

Xerox DocuPrint C621 user guide

Xerox

Xerox DocuPrint C621 user guide

SNBC BTP-M280 user manual

SNBC

SNBC BTP-M280 user manual

Polaroid MD100I user guide

Polaroid

Polaroid MD100I user guide

DNP DS40 Repacking guide

DNP

DNP DS40 Repacking guide

Ricoh SP C250DN operating instructions

Ricoh

Ricoh SP C250DN operating instructions

Epson DFX-5000+ Product support bulletin

Epson

Epson DFX-5000+ Product support bulletin

Samsung CLP-36x Series user guide

Samsung

Samsung CLP-36x Series user guide

Intermec EasyCoder PC41 user guide

Intermec

Intermec EasyCoder PC41 user guide

Armasight APOLLO Quick reference guide

Armasight

Armasight APOLLO Quick reference guide

Samsung ML-4500/XAA Service manual

Samsung

Samsung ML-4500/XAA Service manual

manuals.online logo
manuals.online logoBrands
  • About & Mission
  • Contact us
  • Privacy Policy
  • Terms and Conditions

Copyright 2025 Manuals.Online. All Rights Reserved.