Broyhill SC-K-454PGS2 User manual

1
ASSEMBLY INSTRUCTION
ITEM#: SC-K-454PGS2
SKU# 810547502
Need help? We are here for you!
Please contact 1-800-457-4652 or contact us at
www.numarkcustomerservice.com for assistance
Broyhill, LLC P.O. Box 236; Summit Station, OH 43073 / Made In China
Pergola Daybed Swing
SANDPOINTE COLLECTION

2
KEEP ALL FLAME AND HEAT SOURCES AWAY FROM CANOPY FABRIC
The canopy is made with flame-resistant fabric which meets CPAI-84 specifications. It is not
fireproof. The canopy fabric will burn if left in continuous contact with flame source. The application
of any foreign substance to the canopy fabric may render the flame-resistant properties ineffective.
* Determine you have adequate space for assembly (1.83m or 6ft.) from any obstruction, including
buildings, tree limbs, and electrical wires.
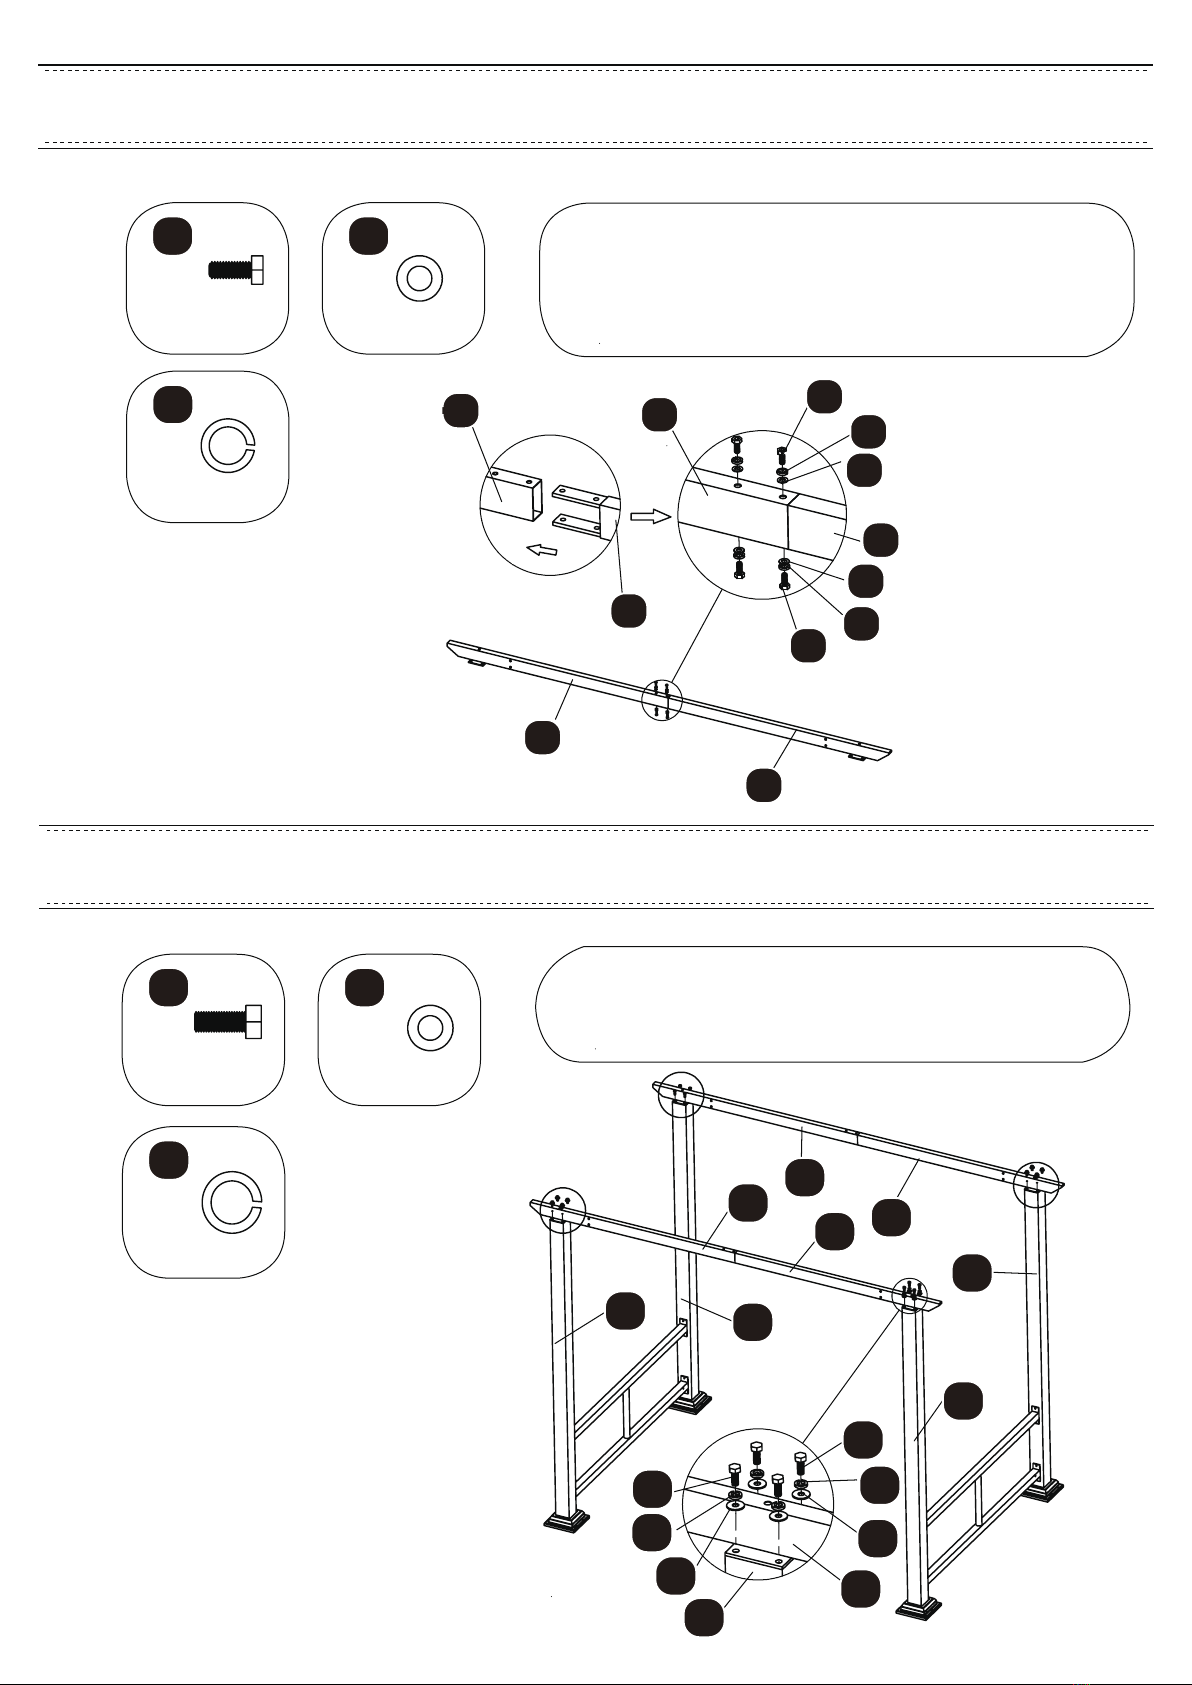
* Assembly by four adults is recommended
* Keep children away during assembly. This item contains small parts which can be swallowed by
children. Children should always be under adult supervision while using this product.
* Always inspect the swing during each use for any obstructions.
* Remove the canopy in heavy wind conditions to avoid tipping over and damage to the swing.
* Do not discard any of the packaging until you have checked that you have all the parts and fittings.
* Retain the assembly instructions for future reference.
* The manufacturer will not accept responsibility for unauthorized repairs or modifications to
this product.
* Annually:
* Check all nuts and bolts for tightness each season and more often if used frequently.
* Oil all metal moving parts with a general purpose lubricating oil to ensure proper performance
and safety.
* To clean, wash frame and fabric with mild soap and water; rinse thoroughly. Dry frame completely
and allow the fabric to drip dry away from direct sunlight.
* Do not use bleach, acid, or other solvents on the fabric or frame parts.
* To prolong the life of your swing we recommend storage in a dry area when not in use or during
austere weather conditions.
MAINTENANCE:
GENERAL BEST PRACTICES FOR ASSEMBLY:
Weight limit is 750lbs.
This product is for residential use only, not for commercial use.
Do not stand on product or use as a step ladder.
Do not pull or hang on the spreading rod/bar.
For optimum safety, use on even surface only!
Improper use of this product or failure to use as directed may result in injury.
GENERAL BEST PRACTICES FOR ASSEMBLY:
WARNINGS:
MAINTENANCE:

3
x 4
Leg Post
x 2
Side Panel
x 2
Top Crossbar
x 2
Top Crossbar
x 3
Inside Canopy Crossbar
x 1
Leg Support Bar
x 1
Left Arm
x 1
Right
Arm
x 2
Rear and Front Connector Bar
x 4
Long Hanging Bar
x 2
Short Hanging Bar
x 2
Canopy Side Bar
x 1
Cushion
Left Right
x 2
Outside Canopy Crossbar
Short
Long
ABC D
EF1 F2 G
HIJK
L M NO
P
x 2
Top Crossbar
x 1
Seat and Back
x 1
Canopy
x 4
Post Base
QR
x 4
Base Plate
PARTS LIST

x 12 + 1 spare
M6 x 18L Bolt
x 2
Hook
x 2
Plastic Washer
x 2
M6 x 55L Bolt
x 16 + 1 spare
M8 x 15L Bolt
x 16 + 1 spare
M8 x 20L Bolt
x 2
Nut
x 42
Large Metal Washer
x 8 + 1 spare
M8 x 45L Bolt
x 14
x 1
Hex Wrench
x 1
Open Hex Wrench
x 1
Allen Wrench
Small Metal Washer
x 2
M8 x 77L Bolt
x 16
Lawn Stake
x 14
Small Locker Washer
x 40
Large Locker Washer
4
x 8 +1 spare
M6 x 12L Bolt
Sa Sb Sc Sd
Se Sf Sg Sh
Si Sj Sk Sl
Sm So Sp Sq
Sr Ss
HARDWARE LIST

5
x 8
Sa
AA
A
Q
R
Sa
Sa
Attach 1 leg post (A) to the post base (Q) and base plate (R)
with 2 bolts (Sa). Note: The side with sunk hole on the base
plate should be towards outside and keep the base plate
and bolts level. Securely tighten all bolts.
Repeat procedure for the other remaining three leg posts.
x 16
Se Attach 1 side panel (B) to the leg posts (A) with 8 bolts (Se),
8 large locker washers (Ss) and 8 large metal washers (Si) .
A
A
B
Se
Ss
Si B
x 16
Si
x 16
Ss
Do not tighten completely.
Repeat procedure for the other pair of leg posts.
Note: The Broyhill Logo located on one of the
leg post should be positioned on the front
left post as you face the swing.
STEP 1
STEP 2

6
x 8
Sb Assemble 1 top crossbar (C) and 1 top crossbar (D) with 4
bolts (Sb), 4 small locker washers (Sr) and 4 small metal
washers (Sh). Do not tighten completely.
Repeat procedure for the other pair of top crossbars.
x 8
Sh
x 8
Sr
CC
C
D
D
D
Sb
Sb
Sr
Sr
Sh
Sh
x 16
Sd Attach 2 pairs of assembled top crossbars (C & D) to leg
posts (A) with 16 bolts (Sd), 16 large locker washers (Ss)
and 16 large metal washers (Si).
Do not tighten completely.
x 16
Si
x 16
Ss
C
C
CD
D
D
A
A
A
A
A
Sd
Sd
Ss
Ss
Si
Si
STEP 3
STEP 4

7
Attach 2 top crossbars (E) to top crossbars (C & D) with 8
bolts (Sf), 8 large locker washers (Ss) and 8 large metal
washers (Si). Do not tighten completely.
C
CD
D
E
E
Si
Ss
Sf
x 8
Sf
x 8
Si
x 8
Ss
C
C
C
C
D
D
F1 F1
F1
F1
F1
Insert 3 inside canopy crossbars (F1) into top crossbars (C & D).
Insert both ends of the inside canopy crossbar into top
crossbar at the same time.
STEP 5
STEP 6

8
Insert 2 outside canopy crossbars (F2) into top crossbars (C & D)
with 4 bolts (Sb), 4 small locker washers (Sr) and 4 small metal
washers (Sh). Do not tighten completely.
C
C
C
C
D
D
F2
F2
Sb
Sr
Sh
x 4
Sb
x 4
Sh
x 4
Sr
F2
F2
x 2
Sc
x 2
Sh
x 2
Sr
inside
Sh Sr
Sc
GB
B
B
Attach 1 leg support bar (G) to side panels (B) with 2 bolts (Sc),
2 small locker washers (Sr) and 2 small metal washers (Sh).
Note: The side with “ inside ” label and “U ” shaped bracket
should be towards inside.
The distance between two assembled side panel with leg posts
can be adjusted when assemble the leg support bar (G).
The side with the connected bracket out should be facing upwards.
TIGHTEN ALL BOLTS FOR STEPS 2, 3, 4, 5, 7,8.
STEP 7
STEP 8

H
J
J
J
J
I
I
Connect 2 rear and front connector bars (J) to left and
right arms (I & H). Attach the seat support bars to the
arms by pressing the tabs on the ends of the seat support
bars down into the brackets on the arms.
Make sure they are securely seated.
FRONT
x 2
Sg Sk
x 2
Si
FRONT
I
K
H
H
K
Sj
Si
Sk
Sg
x 2
Sj
x 2
Attach 1 seat and back (K) to left and right arms (H & I) with 2
bolts (Sg), 2 plastic washers (Sk), 2 large metal washers (Si) and
2 nuts (Sj). Note: the side of the seat with “front” label should be
in accordance with the side with label of the arm.
Securely tighten all bolts for this step.
9
STEP 9
STEP 10

x 2
TOP
TOP
TOP
Sl
M
M
M
M
K
L
L
L
L
H
Attach 4 hanging bars (L) and 2 hanging bars (M) to the
arms (I & H) and top crossbars (E) with hooks (Sl).
Note: Hanging bars with top sticker should be on top.
E
Sl
Sl
K
K
H
I
Sm
A
Q
R
x 16
Sm
Attach 16 lawn stakes (Sm) to base plate (R).
10
M
STEP 11
STEP 12

N
N
N
P
F2
F2
Attach 1 canopy (N) to canopy cross bars.
Note: the canopy should be placed under the brackets.
O
O
N
N
Insert 2 canopy side bars (O) into canopy (N) and
attach cushion (Swing is ready for use).
11
Note: The Broyhill Logo located on one of the
leg post should be positioned on the front
left post as you face the swing.
STEP 13
STEP 14

M
K
Convert swing to canopy Bed. Remove the cushions.
Remove 2 hanging bars (M) from the pin bolt on the seat back (K).
M
K
K
G
G
L
K
K
G
G
The support bar on the back of seat and back (K) should be
inserted into the U-shaped brackets at the same time by 2
people and firmly pressed into place keeping the bed steady.
Replace cushions.
Lock canopy bed in place.
12
STEP 15
STEP 16
This manual suits for next models
1
Table of contents