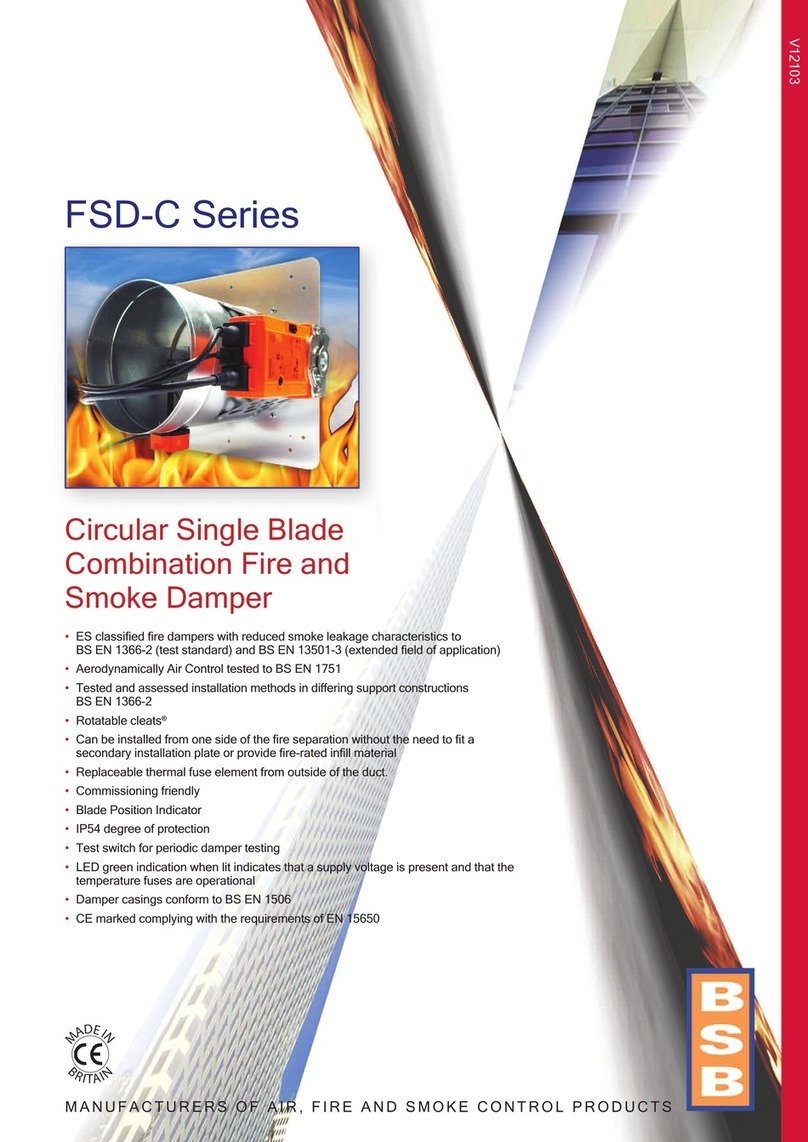
BSB FSD-C Assembly instructions

FSD-C Damper Installation, Operating &
Maintenance Instructions
1
Health and Safety
1.1
Only competent personnel may carry out the work outlined in this document.
1.2
Wear appropriate Personal Protective Equipment as required for safe working
conditions and as site rules dictate.
1.3
Do not introduce fingers across the open blade.
1.4
Where dampers are only accessible with the need for additional elevation, any
equipment used should be done so with due consideration to the Work at
Height regulations 2005 and current site rules.
2
Important
2.1
These instructions should be read in its entirety before commencing work. The
installer must be Competent with the manufacturer’s separating element
construction.
2.2
PML Actuators are IP54 rated – Check actuator connection box is suitably
located.
2.3
Do not cut/shorten the Thermal Fuse lead (-TF Actuators). This will render the
unit inoperable and invalidate the warranty.
2.4
Refer to actuator label for wiring of actuator.
2.5
Refer to section 10 for testing.
2.6
For existing dry walls – When cutting the opening for damper, and (partial)
removal of stud is unavoidable, ensure the structure is sufficiently supported
to conform to design specification
2.7
Dry wall openings must be lined.
2.8
Ensure that appropriate ‘fire-rated’ plasterboard is used throughout the
construction of drywall partitions that need to act as fire-barriers.
2.9
Ductwork to be fitted and connected in accordance with DW 144/145.
Aluminum rivets should be used (to act as breakaway joint).
2.10
All installations are subject to local Building Control Approval (BCA). Tested
Installations are detailed herein. If the proposed installation has minor
variations to that shown, acceptance from BCA should be sought before
proceeding. Manufacturers are not able to ‘approve’ specific installation
methods.
3
Equipment required
3.1
Equipment and tools will vary dependent upon the fire barrier construction that
the damper is being installed within. Standard equipment that are normally
used for the building of the particular barrier should suffice. Access-equipment
as necessary.
3.2
8mm, 10mm for motor fixing and 12mm AF spanners to change blade position
via drive shaft. Phillips №2 screwdriver for setting of OPEN position if required.
3.3
Cordless drill
3.4
Screwdriver to suit junction box terminals.
4
Preparation for Installation
4.1
Before installation, the damper should be inspected to ensure that it has not been
damaged and is in good condition following transportation/on site storage.
4.2
Check damper reference and size to site specification.
4.3
Install damper to site specification details and building codes of practice. (Refer
to Tested Installation Methods). Non-tested installations may be rejected by
building control.
4.4
Ensure that the ductwork is independently and adequately supported.
4.5
Connecting ductwork should be connected with breakaway fixings such as
aluminium rivets in accordance with DW144 and 145.
4.6
Note: All Fire / Smoke Damper installations must be carried out to the satisfaction
of the appropriate Building Control officer and/or specifying authority. Where
more than one duct penetrates a wall or floor, adjacent fire damper assemblies
should be separated by a structural element with a minimum width of 200mm
(to comply with BS EN1366-2 13.6).
4.7
Test damper (Refer to section 10)
Tested Installation Methods
5
Preparation
5.1
The installation method contained herein assumes the wall has been built prior
to the damper opening preparation.
5.2
Determine required position of damper. Check sufficient space exists to fit the
product. Ensure any services (e.g. electrical/plumbing) within the structure or
running close to the structure will not be affected. If existing stud/track is
avoidable, ensure the structure is sufficiently supported to conform to design
specification and that the opening is lined.
5.3
When the structure is deeper than the casing length it may be necessary to
connect ducting to the non-access side of the damper through the opening,
before final fitting the damper. Once this is done slide the damper and
ductwork assembly back through the opening until the Installation Plate butts
up to the structural surface ready to be fixed.
6
Procedure
Dry wall Installation
6.1
Preferably, prepare opening whilst building wall, or cut opening if wall already
exists.

6.2
The aperture must be ‘lined out’.
6.3
Cut size = damper size + (2 x nominal gap size) + (2 x wall board thickness).
E.g. for 150mm dia. damper, and 12.5mm wall board, cut aperture should be
195mm (150+(2x10)+(2x12.5))
6.4
Mark out position and size of required cut size on the wall.
6.5
Using appropriate means (e.g. jig saw), cut the aperture in the wall, removing
each layer and any infill that is present
6.6
Cut 2 pieces of steel track 50mm+ longer than opening size.
6.7
Fit track to top and bottom of opening, screwing in position from both sides
of wall at each end of track with drywall screws and at maximum 300mm
centers.
6.8
Cut 2 more pieces of track, this time, equal opening size.
6.9
Fit track to sides of opening, screwing in position in a similar fashion as
above.
6.10
Cut 4 pieces of board width to line the opening to the full width of the wall.
Screw each baton with 2 screws to the track that is lining the opening.
Ensure the access side baton is flush with the surface of the wall.
6.11
Position the damper centrally in wall opening (width/height), with blade axle
running horizontally. Using drywall screws, fix Installation Plate to wall using
drywall screws. Important: Ensure the screws ‘pick up’ the track lining the
aperture so that the proper fire integrity of the installation will not be
compromised. Use either one of the two appropriate Ø5mm corner fixing
holes and all Ø5mm mid-span fixing holes. Note for damper sizes of 100mm
– 200mm dia, the mid span fixing behind the fitted actuator, can be omitted.
Block wall and Floor Installation
6.12
Preferably, prepare opening whilst building wall, or cut opening if wall
already exists.
6.13
Cut size = finished size
6.14
E.g. for 250 dia. damper, cut aperture should be 270mm square (250+20)
6.15
Mark out the position and size of opening on the wall.
6.16
Using appropriate means, cut the aperture in the wall.
6.17
Position damper centrally in wall opening with blade axle running
horizontally. Fix Installation Plate to wall. (See section 3)
6.18
There are a variety of proprietary fixings available. Fixings must be fire rated
(steel, NOT aluminum or plastic). Check minimum dimension specification
between fixing and edge of opening. BSB recommend steel anchor type
bolts Ø5mm minimum).
6.19
Position the damper centrally in wall opening (width/height), with blade axle
running horizontally. Using steel screws, fix Installation Plate to wall
Important: Use either one of the two appropriate Ø5mm corner fixing holes
and all Ø5mm mid-span fixing holes. Note for damper sizes of 100mm –
200mm dia, the mid span fixing behind the fitted actuator, can be omitted.
Obscured fixing hole behind
actuator (see 6.11)
38mm long drywall screws to affix
installation
plate to metal frame within drywall (see 6.11)
No infill required in the void
behind Installation Plate
Steel fixings
–
refer to 6.19

7
Actuator Orientation Change / Replacement
7.1
If required, the orientation may be changed to +90° or -90° from default ‘in-
line-with-duct’.
7.2
Ensure power to actuator is removed and allow actuator to travel to end
position.
7.3
Unscrew the 8mm AF head screw (central motor retaining screw) and
remove the set-point assembly
7.4
Remove the 10mm AF head screws (motor body retaining bolts). (It may be
necessary to partially wind the actuator a few degrees with the aid of the
manual reset key to release residual torque).
7.5
Remove the actuator and refit in new position without changing the blade’s
position.
7.6
Secure with the 10mm AF head screws (5Nm), followed by the ’snail stop
assembly’ and 8mm AF head screw (3Nm).
7.7
Test (refer to section 10).
8
Setting of Damper mid set-point Position (optional)
8.1
Dampers are supplied with actuators set to travel to ‘fully open’ position by
default.
8.2
Optionally, dampers can be set so that the ‘open position’ is restricted to
between 30° to 90° (60° range). This is for system air balancing purposes,
should it be required.
8.3
To utilise set-point positioning, temporarily release actuator, unscrew and
reposition the positional limiter engaging into the 2mm dia holes (as below).
8.4
Retighten the retaining screw to approx. 3Nm.
8.5
Reapply power and check correct open position is attained.
9
Wiring
9.1
Refer to electrical specification on back page of this document
9.2
Dampers are supplied with actuators factory fitted and tested.
9.3
Connect wires in accordance with the wiring details below.
9.4
Test (Refer to section 10.2)

10
Commissioning, Maintenance and Test
10.1
In accordance with BS9999 Annex W.1, inspections should be undertaken
at least annually, or more frequently where corrosive or dirty conditions
prevail. The maintenance log should be reviewed at each inspection and
the frequency adjusted as required dependent upon findings. (BSB also
recommend a maximum of 1 year between inspections which should start
more frequently initially and reduce frequencies only if conditions are
proven to allow).
10.2
Check damper is in its ‘normal state’.
10.3
If damper is not in its ‘normal state’, refer to fault finding chart otherwise
continue.
10.4
As a pre-check BEFORE power is established – When the actuator
orientation has been changed or the actuator has been replaced, it should
be wound manually using the manual reset. If resistance is encountered –
over- winding can result in permanent damage to the damper which may
invalidate the warranty).
10.5
The actuator can be ‘locked’ open by winding manually with key provided,
then locked and also released by rotating the black lever (next to the
padlock symbol) on face of actuator.
10.6
Switch on power to actuator. LED on TF will illuminate, and actuator will
start to travel to the DRIVE-END position. After 60 seconds, visually check
that damper blade position and signaling corresponds.
10.7
IMPORTANT: Press and hold test switch button on the TF to allow damper
to travel to its closed position. Visually check that the damper blade position
and signal corresponds. (This is to ensure that the actuator functions
electrically and overrides the manual reset facility, should it have been
used, as it is feasible to leave the damper inadvertently reset without the
TF being functional if this test is not carried out!)
10.8
Release TF button to allow damper to drive to normal position.
10.9
If damper has seized: -
10.5.2
Open the damper (even partially if possible). Clean the inside
of the damper case where the blade seals make contact. Use
a soft cloth with a light application of light lubricant. (Connect
Duck Oil recommended).
10.5.3
From the outside of the case, lightly apply a light lubricant
into blade axle bearings
10.5.4
Remove excess lubricant.
10.5.5
It is important to log, and review maintenance frequency
based on inspections and test history.
10.6 Use of heavy oils is not permitted, as this can lead to a build-up of dust/dirt
on damper surfaces.
10.7 The PML actuator is maintenance-free.
11
Fault Finding
Symptom Fault Corrective Action
Damper not in its
‘normal’ state or
Green LED on the
Thermal Fuse
(TF) is not
illuminated
No power / incorrect
supply
Check supply/terminations Check signal
connections
TF tripped. Remove
TF from duct,
separate two halves,
continuity check the
two contacts within
the probe section (or
test with new probe)
If open circuit, replace probe
Actuator faulty Replace
Damper does not
travel fully open /
closed
Damper seized Clean and lubricate. (Refer to section
10.9)
Casing
dented/damaged or
not round
Minor damage may be corrected carefully
with a mallet. (BSB always recommend
replacement of damaged dampers)
Foreign body
interfering with blade
sweep (commonly
rivet or screw)
Inspect inside of damper case. Remove
any offending item
Damper blade and/or
actuator does not
move open
Damper internals have
been exposed to
excessive moisture
Check via access panel for any water
marks. Remove actuator and check
operation whilst disconnected. Where
actuator operates, isolate and check the
blade. Gentle apply pressure to blade by
hand to move open. Use Scotch Bright pad
RED 07447 grade, wet and clean the
damper internally at the point where the
blade sweeps on the damper surface. Wipe
dry and leave clean. Massage duck oil into
the exposed peripheral blade seal until
pliable. Remove all residue.
Report and log any damage found with actions to be taken.

Electrical details
24V
230V
Installation Check List
DAMPER REFERENCE NO.: DAMPER LOCATION:
DAMPER SIZE: Dia (mm)
WALL/FLOOR APERTURE SIZE (‘OPENING SIZE’)
WIDTH HEIGHT
DAMPER INSTALLED BY: ..........................................................
(Print name)
Signature: Company: Date:
ACTUATOR ELECTRICALLY CONNECTED BY: .......................................................
(Print name)
Signature: Company: Date:
Actuator mid-point setting (circle)
30° 35° 40° 45° 50° 55° 60° 65° 70° 75° 80° 85° 90°
THERMAL FUSE FITTED BY: ..........................................................
(Print name)
Signature: Company: Date:
FAIL
-
SAFE POSITION (POWER OFF position)
–
Tick appropriate
box CLOSED (default) OPEN (non
-
std)
FINAL INSPECTION BY: ..........................................................
(Print name)
Signature: Company: Date:
Rev 2 May 2020 BSB Engineering Services Ltd
Tel +44 (0)1795 422609
Email: [email protected]k website: www.bsb-dampers.co.uk
Other BSB Fire And Smoke Damper manuals
Popular Fire And Smoke Damper manuals by other brands

Greenheck
Greenheck GFSD Series Installation, operation and maintenance manual

KNF
KNF FPD 06 Operating and installation instructions

JRClancy
JRClancy 016-410L installation instructions

Swegon
Swegon SAFEGARDSYSTEMS FD 25 product manual

Advanced Air
Advanced Air 2530 CE Series manual

LUCOMA
LUCOMA WSG-H3 Installation, operation and maintenance instructions

Mandik
Mandik MSD Technical documentation

Broan
Broan FRESH IN FIN-6MD installation instructions

Trox Technik
Trox Technik EK-EU Installation and operating manual

Mandik
Mandik FDMB manual

Komfovent
Komfovent UVS 120H installation manual

Val-Matic
Val-Matic FrostSafe Two-Way Damper Operation, maintenance and installation manual