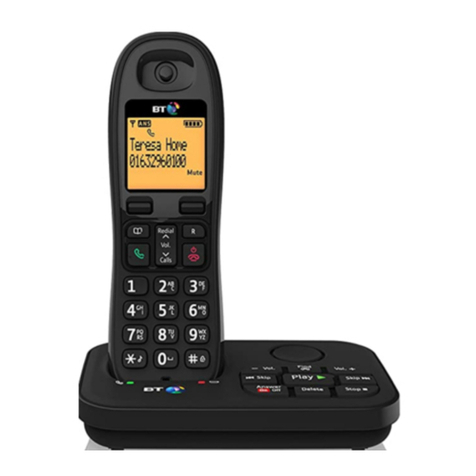
BT FREELANCE XC 1500 User manual

BT Freelance XC1500
User Guide

•Up to 12 minutes digital recording time.
•Access your messages remotely from any other
Touchtone™ phone.
•Caller Display shows you who’s calling before you answer
the phone1and stores a list of your last 40 callers. You can
also dial numbers direct from the Calls list.
•Handsfree lets you make and receive calls using the built-in
handset loudspeaker so your hands are free for other tasks
during a call.
•50 Name and number phonebook for storing your most
frequently used numbers.
•10 last number redial.
•Use up to 5 handsets with one base and one phone line.
•Make internal calls and transfer external calls between handsets.
Please note: This equipment is not designed for making
emergency telephone calls when the power fails. Alternative
arrangements should be made for access to emergency services.
1 Requires subscription toyour network’sCaller Display service.
Aquarterly fee may be payable.
Welcome…
to your BT Freelance XC1500 Digital
Cordless Telephone Answering Machine

Section
This User Guide provides you with all the
information you need to get the most from
your phone. Before you make your first
call you will need toset up your phone.
Follow the simple instructions in ‘Getting
Started’, over the next few pages.
Need help?
If you have any problems setting up or using your BT Freelance
XC1500 please contact the Helpline on 0808 100 6556*.
Alternatively, you may find the answer in ‘Help’ at the back of
this guide.
IMPORTANT
Only use the telephone line cord supplied.
Got everything?
• BT Freelance XC1500 handset
• BT Freelance XC1500 base
•Battery compartment cover
•2xAAA NiMH
rechargeable batteries
•Mains power adaptor
(Item code: 041293)
• Telephone line cord
If you have purchased a BT
Freelance XC1500 multiple pack
you will also have the following
for each handset:
•BT Freelance XC1500 handset
• BT Freelance XC1500 charger
Battery compartment cover
•2xAAA NiMH
rechargeable batteries
•Mains power adaptor
(Item code: 041294)
*Calls made from within the UK mainland network are free.
Mobile and international call costs may vary.

In this guide
4
Getting started
Location . . . . . . . . . . . . . . . . . . . . . . . . . . . . . 6
Connect the base to mains power. . . . . . . . . 6
Preparing your handset . . . . . . . . . . . . . . . . . 7
BT Freelance XC1500 multipack users only . 7
Connect to the telephone line . . . . . . . . . . . 8
Set the answering machine day and time . . 9
Getting to know your phone
Handset buttons.......................10
Standby screen. . . . . . . . . . . . . . . . . . . . . . . . 11
Handset display icons . . . . . . . . . . . . . . . . . . 11
Using the menu . . . . . . . . . . . . . . . . . . . . . . . 12
Menu map ...........................12
Base ................................13
Using your phone
Switch the handset on/off. . . . . . . . . . . . . . . 14
Make a call . . . . . . . . . . . . . . . . . . . . . . . . . . . 14
Preparatory dialling . . . . . . . . . . . . . . . . . . . . 14
End a call . . . . . . . . . . . . . . . . . . . . . . . . . . . . 14
Receiving calls . . . . . . . . . . . . . . . . . . . . . . . . 15
Chain dialling .........................15
Secrecy / Mute . . . . . . . . . . . . . . . . . . . . . . . . 16
Adjusting the earpiece/handsfree volume . . 16
Make a handsfree call . . . . . . . . . . . . . . . . . . 16
Answer a call handsfree. . . . . . . . . . . . . . . . . 17
Switch tohandsfree during a call . . . . . . . . . 17
Redial a number .......................17
Copy a redial number to the phonebook . . . 18
Delete a number from the redial list . . . . . . . 18
Delete the entire redial list . . . . . . . . . . . . . . 18
Keypad lock . . . . . . . . . . . . . . . . . . . . . . . . . . 19
Paging. . . . . . . . . . . . . . . . . . . . . . . . . . . . . . . 19
Using the phonebook . . . . . . . . . . . . . . . . . . 20
Add an entry. . . . . . . . . . . . . . . . . . . . . . . . . . 20
View and dial entries . . . . . . . . . . . . . . . . . . . 21
Edit an entry. . . . . . . . . . . . . . . . . . . . . . . . . . 21
Delete an entry. . . . . . . . . . . . . . . . . . . . . . . . 22
Deleteentirephonebook. . . . . . . . . . . . . . . . 22
Internal calls . . . . . . . . . . . . . . . . . . . . . . . . . . 22
Make an internal call . . . . . . . . . . . . . . . . . . . 23
Transfer an external call . . . . . . . . . . . . . . . . . 23
3 Way call ............................24
Caller Display and the calls list
Caller Display . . . . . . . . . . . . . . . . . . . . . . . . . 25
Calls list . . . . . . . . . . . . . . . . . . . . . . . . . . . . . . 25
View the Calls list . . . . . . . . . . . . . . . . . . . . . . 26
Dial a number in the Calls list . . . . . . . . . . . . 26
Copy a number to the phonebook . . . . . . . . 26
Delete an entry. . . . . . . . . . . . . . . . . . . . . . . . 27
Deletethe entireCalls list . . . . . . . . . . . . . . . 27
Call Waiting...........................28
To use Call Waiting . . . . . . . . . . . . . . . . . . . . . 28
If you experience any problems, please call the Helpline on 0808 100 6556*

Using the answering machine
Switching the answering machine on/off. . . 29
Listening to your messages . . . . . . . . . . . . . . 29
Play messages . . . . . . . . . . . . . . . . . . . . . . . . 29
Delete all old messages . . . . . . . . . . . . . . . . . 30
Record a memo . . . . . . . . . . . . . . . . . . . . . . . 30
Base loudspeaker volume . . . . . . . . . . . . . . . 31
Outgoing messages . . . . . . . . . . . . . . . . . . . . 31
Select outgoing message. . . . . . . . . . . . . . . . 32
Recordyour own outgoing message(s) . . . . 32
Play your outgoing message . . . . . . . . . . . . . 33
Re-instate the pre-recorded
outgoing message . . . . . . . . . . . . . . . . . . . . . 33
Memoryfull indicator ..................33
Ring delay and Security PIN .............34
Set ring delay and security PIN . . . . . . . . . . . 34
Call screening . . . . . . . . . . . . . . . . . . . . . . . . . 35
Remote access . . . . . . . . . . . . . . . . . . . . . . . . 36
Switch on your answering machine
from another phone. . . . . . . . . . . . . . . . . . . . 36
Operating your answering machine
from another phone. . . . . . . . . . . . . . . . . . . . 36
Settings
Handset and base ringer volume . . . . . . . . . 38
Handset and base ringer melody . . . . . . . . . 38
Keypad beep on / off. . . . . . . . . . . . . . . . . . . 39
Handset name ........................39
Autoanswer ..........................40
Date and time. . . . . . . . . . . . . . . . . . . . . . . . . 40
Set the date and time . . . . . . . . . . . . . . . . . . 40
Set the alarm . . . . . . . . . . . . . . . . . . . . . . . . . 41
Change alarm time. . . . . . . . . . . . . . . . . . . . . 41
Select alarm clock melody . . . . . . . . . . . . . . . 42
Additional handsets
Register a new BT Freelance XC1500 handset
to your BT Freelance XC1500 base . . . . . . . . 43
Register a different manufacturer’s handset
toyour BTFreelance XC1500 base. . . . . . . . 44
De-register a handset . . . . . . . . . . . . . . . . . . 44
Change master PIN . . . . . . . . . . . . . . . . . . . . 45
Reset to default . . . . . . . . . . . . . . . . . . . . . . . 45
Help ................................46
General information
Safety . . . . . . . . . . . . . . . . . . . . . . . . . . . . . . . 49
Cleaning . . . . . . . . . . . . . . . . . . . . . . . . . . . . . 50
Environmental . . . . . . . . . . . . . . . . . . . . . . . . 50
Product disposal instructions . . . . . . . . . . . . 50
Guarantee . . . . . . . . . . . . . . . . . . . . . . . . . . . . 51
Technical information...................52
R&TTE ...............................52
Declaration of Conformance . . . . . . . . . . . . . 52
Connecting to a switchboard. . . . . . . . . . . . . 53
Inserting a pause . . . . . . . . . . . . . . . . . . . . . . 53
Recall (R).............................53
5In this guide
If you experience any problems, please call the Helpline on 0808 100 6556*
Getting started
6
WARNING
Do not place your BT Freelance
XC1500 in the bathroom or other
humid areas.
Handset range
Your BT Freelance XC1500 has a range
of up to 300m outdoors when there is
aclear line of sight between the base
and the handset. When there is no
clear line of sight between the handset
and the base, e.g. the base is indoors
and the handset is either indoorsor
outdoors, the range could be reduced
to50m. Thick stone walls will severely
affect the range.
Signal strength
The icon on your handset display
indicates when you are in range of
the base. When it flashes and you
hear a warning beep, you are out of
range and will need to move closer
to the base.
IMPORTANT
Do not connect the telephone line to
the telephone line wall socket until the
handset is fully charged. The base
station should be plugged into the
mains power socket at all times.
Location
You need to place your BT Freelance XC1500 base within 3
metres of a mains power socket and 2 metres of the telephone
wall socket so that the cables will reach.
Make sure it is at least 1 metre away from other electrical
appliances to avoid interference.
Your BT Freelance XC1500 works by sending radio signals
between the handset and base. The strength of the signal
depends on where you position the base. Putting it as high as
possible can help to provide the best signal.
Connect the base to the mains power
1. Plug the mains power adaptor with the black connector (item
code 041293) into the power socket on the back of the base
and plug the other end into the mains power wall socket. The
base will come on and beep and display
00
.It will default to
Answer and record mode.
If you experience any problems, please call the Helpline on 0808 100 6556*
Preparing your handset
2. Insert the 2 x AAA rechargeable batteries supplied, taking
note of the polarity markings inside the battery compartment,
then slide the battery compartment shut.
3. Place the handset on the base to charge. It will beep when
placed in and the battery icon on the handset will flash to
indicatecharging. You should let the batteries charge
continuously for at least24 hours. The batteries and case may
become warm during charging, this is normal.
BTFreelance XC1500 multipack users only:
If you have purchased a BT Freelance XC1500 multiple pack,
you will need to prepare any additional handsets and charger
for use.
Place each BT Freelance XC1500 charger within reach of a
mains power wall socket.
For each additional handset and charger:
i. Plug the mains power adaptor with the white connector
(item code 041294) into the power socket on the underside
of the charger and plug the other end into the mains power
wall socket.
7Getting started
WARNING
Never use non-rechargeable batteries.
Only use the approved batteries. Using
unapproved batteries will invalidate
your guarantee and may damage the
telephone.
Talk/Standby time
Under ideal conditions, the handset
batteries should give up to 10 hours
talk time or 100 hours standby on a
single charge.
(This does not mean you can unplug
the base or leave the handset for this
length of time without charge).
Please notethat new NiMH
rechargeable batteries do not reach
full capacity until they have been in
normal use for several days.
See ‘Battery performance’ on the
following page.
Battery low warning
If the icon is flashing in the display
and you hear a warning beep every
minute during a call, you will need to
recharge your handset before you can
use it.
If you experience any problems, please call the Helpline on 0808 100 6556*
Battery performance
To keep the batteries in the best
condition, leave the handset off the
base for a few hours at a time.
Running the batteries right down at
least once a week will help them last as
long as possible.
After charging your handset for the
first time, subsequent charging time
for the batteries is approximately
6–8 hours.
The charge capacity of rechargeable
batteries will reduce with time as they
wear out, thus reducing the
talk/standby time. Eventually they will
need replacing. New batteries are
available from the BT Freelance
XC1500 Helpline on 0808 100 6556*.
ii. Insert the 2 x AAA rechargeable batteries supplied, taking
note of the polarity markings inside the battery compartment,
then slide the battery compartment shut.
The display will show the handset number,
2
,to show it is
registered to the base.
iii. Place the handset on the charger. It will beep when placed in
and the batteryicon on the handset will flash to indicate
charging. You should let the batteries charge continuously for
at least 24 hours.
Any additional handsets supplied as part of a multipack are
pre-registered to the base. So, once charged, are ready for use.
Connect to the telephone line
4. Plug the telephone line cord into the socket marked on the
back of the base and plug the other end into the telephone
wall socket.
8 Getting started
If you experience any problems, please call the Helpline on 0808 100 6556*
IMPORTANT
Only use the telephone line cord
supplied with the phone.

Set the answering machine day and time
Once the answering machine day and time has been set,
the day and time will be announced when a message is
played back.
1. At the answering machine base, press and hold .
The current hour setting is announced and displayed.
Press or to set the hour. Press to confirm.
2. The minutes setting will be announced and displayed.
Press or to set the minute. Press to confirm.
3. The current setting for PM/AM will be displayed and
announced. Press or to select A for am or P for pm.
Press to confirm.
4. The current day setting is announced. Press or to
set the day which is announced. Press to confirm.
The full time and day will be announced.
Your BT Freelance XC1500 is now
ready for use.
9Getting started
Press to cancel and return to
standby.
Handset date and time
Providing you have subscribed to your
network’s Caller ID service, the date
and time on the handset will be set
automatically when you receive your
first call.
To set the handset date and time
manually, see Date and Time, page 40.
The handset date and time needs to
be set separately tothe answering
machine day and time.
If you experience any problems, please call the Helpline on 0808 100 6556*

Getting to know your phone
10
Handset buttons
Phonebook
Press to open the phonebook, page 20.
Redial / Volume +
Press to open the redial list and scroll back
through redial numbers, page 17.
Press to raise the volume during a call,
page 16.
Menu / OK
Press to open the menu, page 12.
Press to select menu options.
Talk
Press to make and receive calls, page 14-15.
During a call, press to switch handsfree
loudspeaker on and off.
Calls list / Vol -
Press toopen and scroll forward
through the Calls list, page 25.
Press to lower the volume during a call,
page 16.
*/Keypad lock
Press and hold tolock/unlock the keypad to
prevent accidental dialling, page 19.
R
Recall – used with
switchboard services and
certain BT Calling Features.
If you experience any problems, please call the Helpline on 0808 100 6556*
Secrecy / Clear/ Back
During a call, mutes your voice so your
caller cannot hear you, page 16.
Press to return to the previous menu.
Use to delete characters in the
phonebook and calls lists.
End Call
Press to end a call.
Press and hold to switch the handset
off and on, page 14.
#/P
Press and hold to insert a Pause,
page 53.
Selects name/number or time/date
display in the Calls list.
Int
Use to make internal calls and transfer
calls to other handsets registered to
the base, pages 22-23.

11Getting to know your phone
If you experience any problems, please call the Helpline on 0808 100 6556*
Standby screen
Handset display icons
Phone off-hook.
Indicates signal strength.
Flashes when handset is not
registered to the base.
Phonebook open.
Handsfree speaker in use.
New number(s) in Call list*.
Alarm has been set.
Handset ringer volume set to off.
More options available,
scroll up or down.
Battery30 – 100% charged.
Battery 10 – 30% charged.
Batteryunder 10% charged.
Icon will flash.
Battery level
Handset number
Range indicator
Handset name
*This features requires subscription toyour network provider’s Caller Display service. A quarterly fee may be payable.

Using the menu
All your phone’s functions and settings can be accessed through the main menu.
The menu map below shows all the menu options you can choose from.
Press to enter the menu.
Press or to scroll through the menu options.
When you reach the end of the list, the first option is displayed again.
To select an option, press .
To return to the previous menu display, press .
Menu map
12 Getting to know your phone
If you experience any problems, please call the Helpline on 0808 100 6556*
PHONEBOOK
(Menu only appears
when phonebook is
empty. When entries
stored, press again
to enter the menu).
ADD ENTRY
MODIFY ENTRY
DELETE ENTRY
DELETE ALL
CLOCK /ALARM
DATE / TIME
ALARM
ALARM TONE
SETTINGS
HANDSET TONE
HANDSET NAME
AUTO ANSWER
BASE TONES
ADVANCED SET
REGISTRATION
DE-REGISTER
PIN CODE
PHONE RESET

Answering machine base
13Getting to know your phone
If you experience any problems, please call the Helpline on 0808 100 6556*

Find / Page
Press to ring handsets
registered to the base,
page 19.
Used to register new
handsets tothe base,
page 43.
Volume Down
Lower base
loudspeaker volume,
page 31.
In standby,press and
hold to set the time
and weekday for the
answering machine.
Message indicator
Shows the number
of messages.
If new messages have
been received, the
number of new
messages will be
displayed flashing.
If there are no new
messages, the counter
will display the total
number of old
messages stored.
Two dots areactivated
next to the counter
digits toindicatewhen
the line is in use.
Skip back/
Set message alert
During playback, press
once to skip back to
the beginning of
the message, page 30.
In standby, press to
play the current OGM,
page 33.
Press and hold to
recordanew OGM,
page 32.
Play/Stop
Press to play messages
and stop playback,
page 29.
Volume Up
Raise base
loudspeaker volume, page 31.
In standby, press and hold to
set the Ring delay, page 34.
Ans/On/Off
Switches answering machine
on/off, page 29.
Delete
During playback, deletes the
current message.
Press and hold to delete
all messages, page 30.
Skip forward
During playback,
press to play the
nextmessage, page 30.
Press and hold to record
amemo, page 30.
In standby, press to set call
screening on or off,page 35.

Using your phone
14
Out of range warning
During a call, if you start to move the
handset out of range of the base, the
flashes and you hear a beep in the
earpiece every 3 seconds. Move closer
to the base or you will lose the call.
Call timer
After the first 20 seconds of your call,
the call timer is displayed.
Switch the handset on/off
1. To switch off, press and hold until the display goes off.
2. To switch the handset on, press and hold .
Make a call
1. Press . When you hear the dial tone, enter the phone
number using the keypad.
Preparatory dialling
1. Enter the phone number first. The number is shown in
the display.
2. Press to dial the number.
If you make a mistake as you enter the number, press to
deleteadigit.
End a call
1. Press or replace the handset on the base.
If you experience any problems, please call the Helpline on 0808 100 6556*
Receiving calls
1. When the phone rings, the display flashes
CALL
and
the icon. Press to answer the call.
Or, you can answer the call by picking the handset up from the
base or charger without having to press . This is called Auto
answer, see page 40.
2. Press to hang up.
Chain dialling
Chain dialling is a convenient way of entering long sequences
of numbers during a telephone call. This can be when trying
todial a phone number greater than 24 digits (the largest
number that can be stored in a single phonebook entry)
or when using automated telephone services,
e.g. telephone banking.
Dial a chain number
1. Enter the first part of the number as usual using the keypad or
from the phonebook. Press .
2. Either enter the additional part of the number using the
keypad or press , scroll to the phonebook entry
containing the nextnumber sequence and press to dial
the number.
15Using your phone
Caller Display
If you have subscribed to your
network’s Caller Display service, the
caller’s number (or name, if an exact
number match is found in the
phonebook) will also be displayed.
Important
Storing security code information in
the phonebook may allow other
people access to your personal details.
If you experience any problems, please call the Helpline on 0808 100 6556*

Secrecy / Mute
You can stop your caller from hearing you while you talk to
someone else close by.
1. During a call, press . The handset microphone is muted
and the display shows
MUTE
.
2. Press again to resume your call.
Adjusting the earpiece/handsfree volume
You can adjust the earpiece or loudspeaker volume, 1-5.
1. During a call, press to increase or to decrease
the volume.
Makeahandsfree call
1. Dial the number then press .
2. Press again. The icon is displayed and you hear your call
over the handset loudspeaker.
Press to switch the call between the earpiece and the
loudspeaker.
3. Press to end the call.
16 Using your phone
If you experience any problems, please call the Helpline on 0808 100 6556*
Handsfree
Handsfree lets you talk toyour caller
without holding the handset. It also
enables other people in the room to
listen to your conversation over the
loudspeaker.
During a handsfree call, press or
to change the volume.

If the redial number is longer than 12
digits, you can scroll along the number
by pressing the button.
Answer a call handsfree
When the phone rings:
1. Press to answer the call then press again.
The call is transferred to the loudspeaker.
Switch to handsfree during a call
1. During a call: press toput the call on the loudspeaker.
To switch handsfree off and return the call to the earpiece,
press again.
Redial
Redial a number
The last 10 numbersdialled are stored in the redial list. Each
entry can be up to 24 digits long.
1. Press to open the redial list. The most recently dialled
number is displayed. If the number matches an entry stored in
the handset phonebook, the name is displayed.
2. Scroll or to the number or name you want.
3. Press to redial the entry displayed.
17Using your phone
If you experience any problems, please call the Helpline on 0808 100 6556*

Copy a redial number to the phonebook
1. Press then scroll or through the list to the
entry you want.
2. Press . The displays shows
ADD ENTRY
.
3. Press . Use the keypad to enter the name, then press .
4. Display shows the number from the redial list. You can edit the
number using todeletecharacters if required. Press
to save.
5. Press to return to the standby screen.
Delete a number from the redial list
1. Press then scroll or to the entry you want.
2. Press and scroll to
DELETE ENTRY
.
3. Press to confirm or to cancel.
Delete the entire redial list
1. Press toopen the redial list.
2. Press and scroll to
DELETE ALL
.
3. Press . Display shows
CONFIRM?
.
4. Press toconfirm or tocancel.
18 Using your phone
If you experience any problems, please call the Helpline on 0808 100 6556*
If you enter a name that already exists
in the phonebook the display shows
DOUBLE NAME for 2 seconds before
returning to the name screen.

IMPORTANT
You cannot call emergency numbers
(999 / 112) when the keypad
is locked.
Keypad lock
You can lock the handset keypad to prevent accidental dialling
while carrying it around.
You do not need to unlock the keypad to answer a call, just
press .
1. To lock the keypad press and hold until the display shows
KEYS LOCKED
.
2. To unlock the keypad press and hold again or replace
the handset in the base.
Paging
You can alert handset users that they arewanted or locate a
missing handset. Paging calls cannot be answered by a handset.
1. Press on the base. All handsets registered to the base will
ring with the Paging ringtone for 30 seconds. To stop the
ringing, press any button on a handset or press again
on the base.
19Using your phone
If you experience any problems, please call the Helpline on 0808 100 6556*
Memory full
When the phonebook memory is full
the display shows MEMORY FULL when
you try to add a new entry.
Entering names
Use the keypad to enter the letters
shown on each button.
For example to store TOM:
Press once to enter T.
Press three times toenter O.
Press once to enter M.
If the next letter you want to enter is
on the same button, wait a moment
then press the button.
Press to delete an incorrect
character or digit.
To enter a space press .
To enter a dash, press twice.
Toenter 1, press twice.
Using the phonebook
You can store up to 50 name and number entries on each BT
Freelance XC1500 handset registered to your base.
You open the phonebook with the button.
Add an entry
1. From the standby screen, press .
PHONEBOOK
is displayed,
press .
2. If there are already entries stored in the phonebook the first
entry will be displayed and you will need to press again.
The displays shows
ADD ENTRY
.Press .
3. The displays shows
ADD NAME
Use the keypad toenter the name
and press .
4. The displays shows
ADD NUMBER
.Use the keypad to enter the
phone number.
5. Press to confirm.
20 Using your phone
If you experience any problems, please call the Helpline on 0808 100 6556*
If you enter a name that already
exists the display shows DOUBLE NAME
for 2 seconds.
Each name can be up to 12
characters long and each number up
to 24 digits long.
Other manuals for FREELANCE XC 1500
1
Table of contents
Other BT Cordless Telephone manuals

BT
BT ON-AIR 1300 EXECUTIVE User manual

BT
BT BT4500 Specification sheet

BT
BT BT Diverse 5450 User manual

BT
BT DIVERSE 1010 User manual

BT
BT QUARTET 3100 User manual

BT
BT FREELANCE XA 2000 User manual

BT
BT Freestyle 130 User manual

BT
BT 3010 Executive User manual

BT
BT ON-AIR 1100 EXECUTIVE User manual

BT
BT 2100 Classic User manual

BT
BT DIVERSE 4016 User manual

BT
BT GLIDE User manual

BT
BT VERVE 3010 EXECUTIVE User manual

BT
BT FREESTYLE 7310 User manual

BT
BT Diverse 3000 Executive User manual

BT
BT Diverse 6110 User manual

BT
BT BT2600 Specification sheet

BT
BT BT8500 Specification sheet

BT
BT PARAGON 500 User manual

BT
BT Cordless Headset H55 Specification sheet