BT PARAGON 500 User manual

BT Studio 500/Studio 500 Twin – 3rd Edition – 14th August ’03 – 5464
User Guide
BT STUDI 500
BT STUDI 500 TWIN
5464 BT Studio 500/Twin UG [3] 14/8/03 4:05 PM Page 1

BT Studio 500/Studio 500 Twin – 3rd Edition – 14th August ’03 – 5464
Section
12 minutes digital recording time with a capacity for up
to 59 messages.
Access your messages from any other modern telephone.
Use Caller Display and the calls list to see who is
calling before you pick up the phone and keep track
of incoming calls.
Use the Quickdial directory to store and dial up to 10 of
most frequently used phone numbers.
As a Digitally Enhanced Cordless Telecommunications
(DECT) product, BT Studio 500 provides digital quality
call clarity.
Welcome…
to your BT Studio 500
Digital Cordless Telephone
Answering Machine
5464 BT Studio 500/Twin UG [2] 14/8/03 3:32 PM Page 2

BT Studio 500/Studio 500 Twin – 3rd Edition – 14th August ’03 – 5464
Section
This User Guide provides you with all
the information you need to get the
most from your phone.
Additional instructions are included
for the BT Studio 500 Twin.
Before you make your first call you will
need to set up your phone. Follow the
simple instructions in ‘Getting Started’,
on the next few pages.
Need help?
If you have any problems setting up or using your
BT Studio 500 please contact the Helpline on
0870 605 8047.
Alternatively, you may find the answer in ‘Help’
at the back of this guide.
Got everything?
BT Studio 500 handset
BT Studio 500 base
2 x AAA NiMH
rechargeable batteries
Mains power adaptor
Telephone line cord
If you have purchased
the BT Studio 500
Twin you will also
have:
BT Studio 500
additional handset
BT Studio 500 charger
2 x AAA NiMH
rechargeable batteries
Mains power adaptor
5464 BT Studio 500/Twin UG [2] 14/8/03 3:32 PM Page 3

BT Studio 500/Studio 500 Twin – 3rd Edition – 14th August ’03 – 5464
Getting started
Location . . . . . . . . . . . . . . . . . . . . . .6
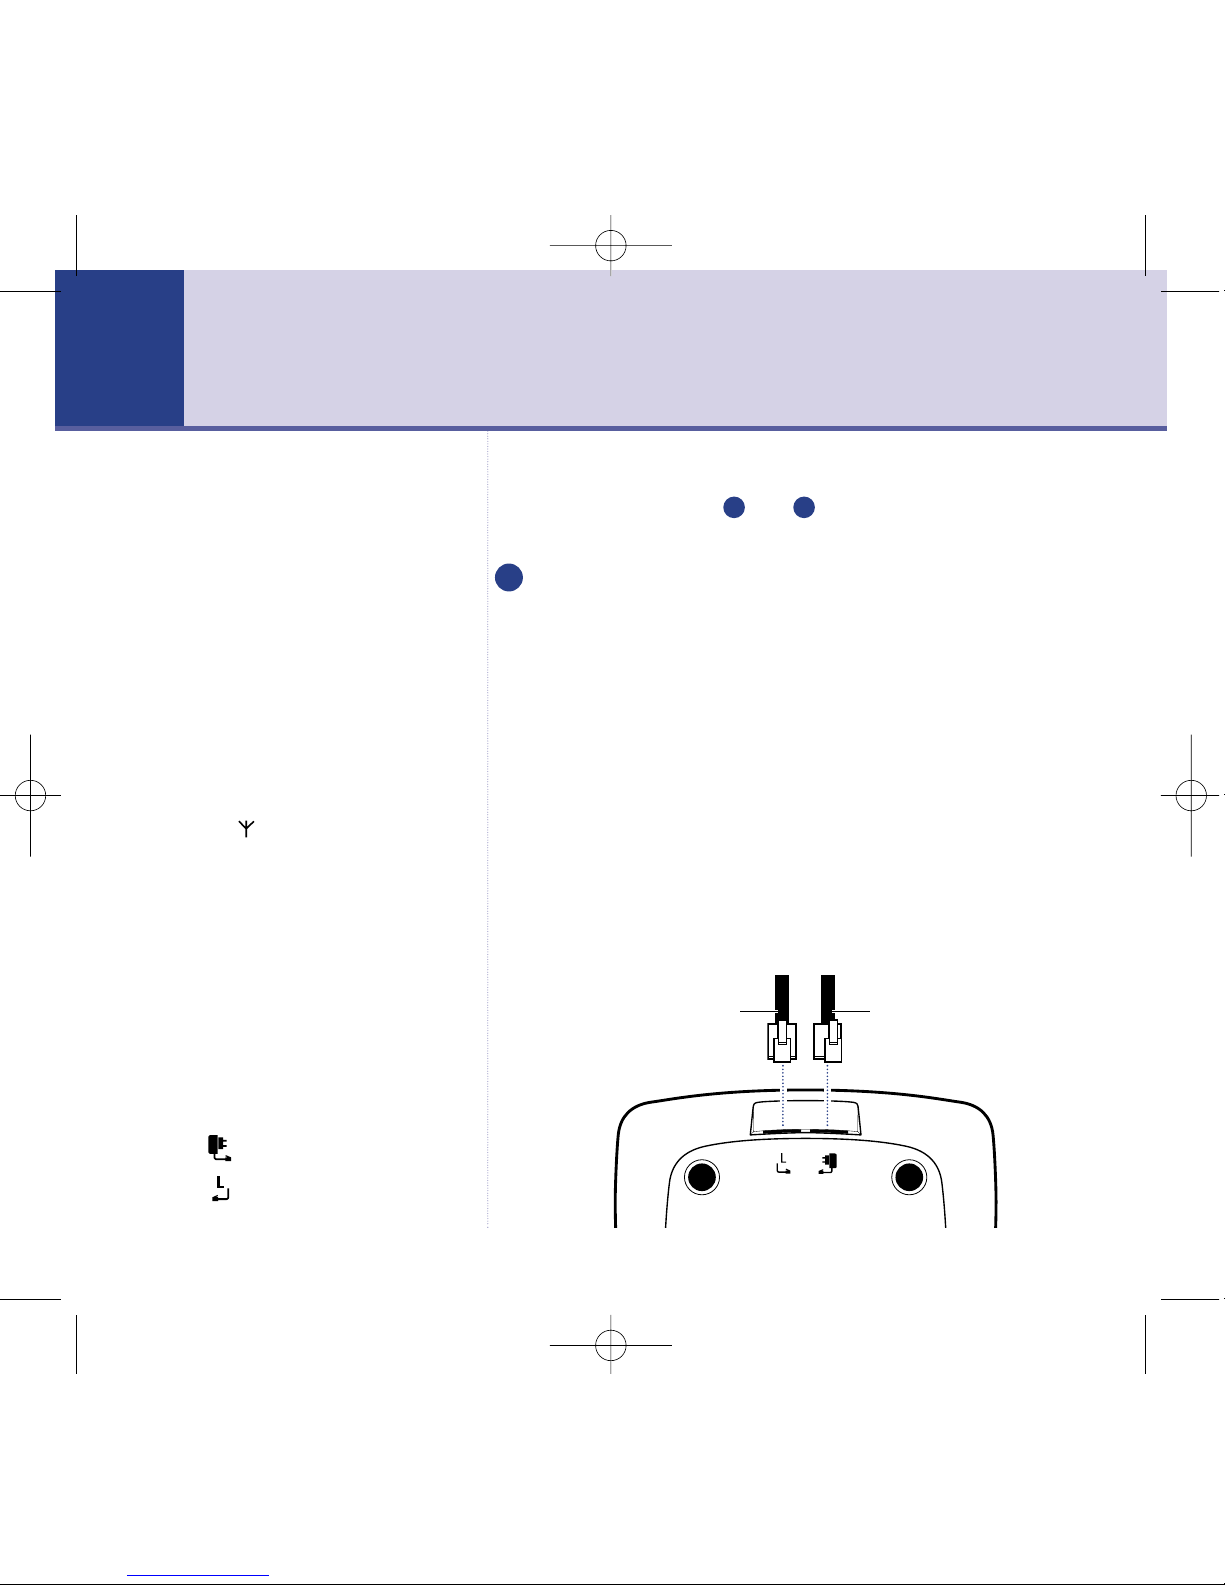
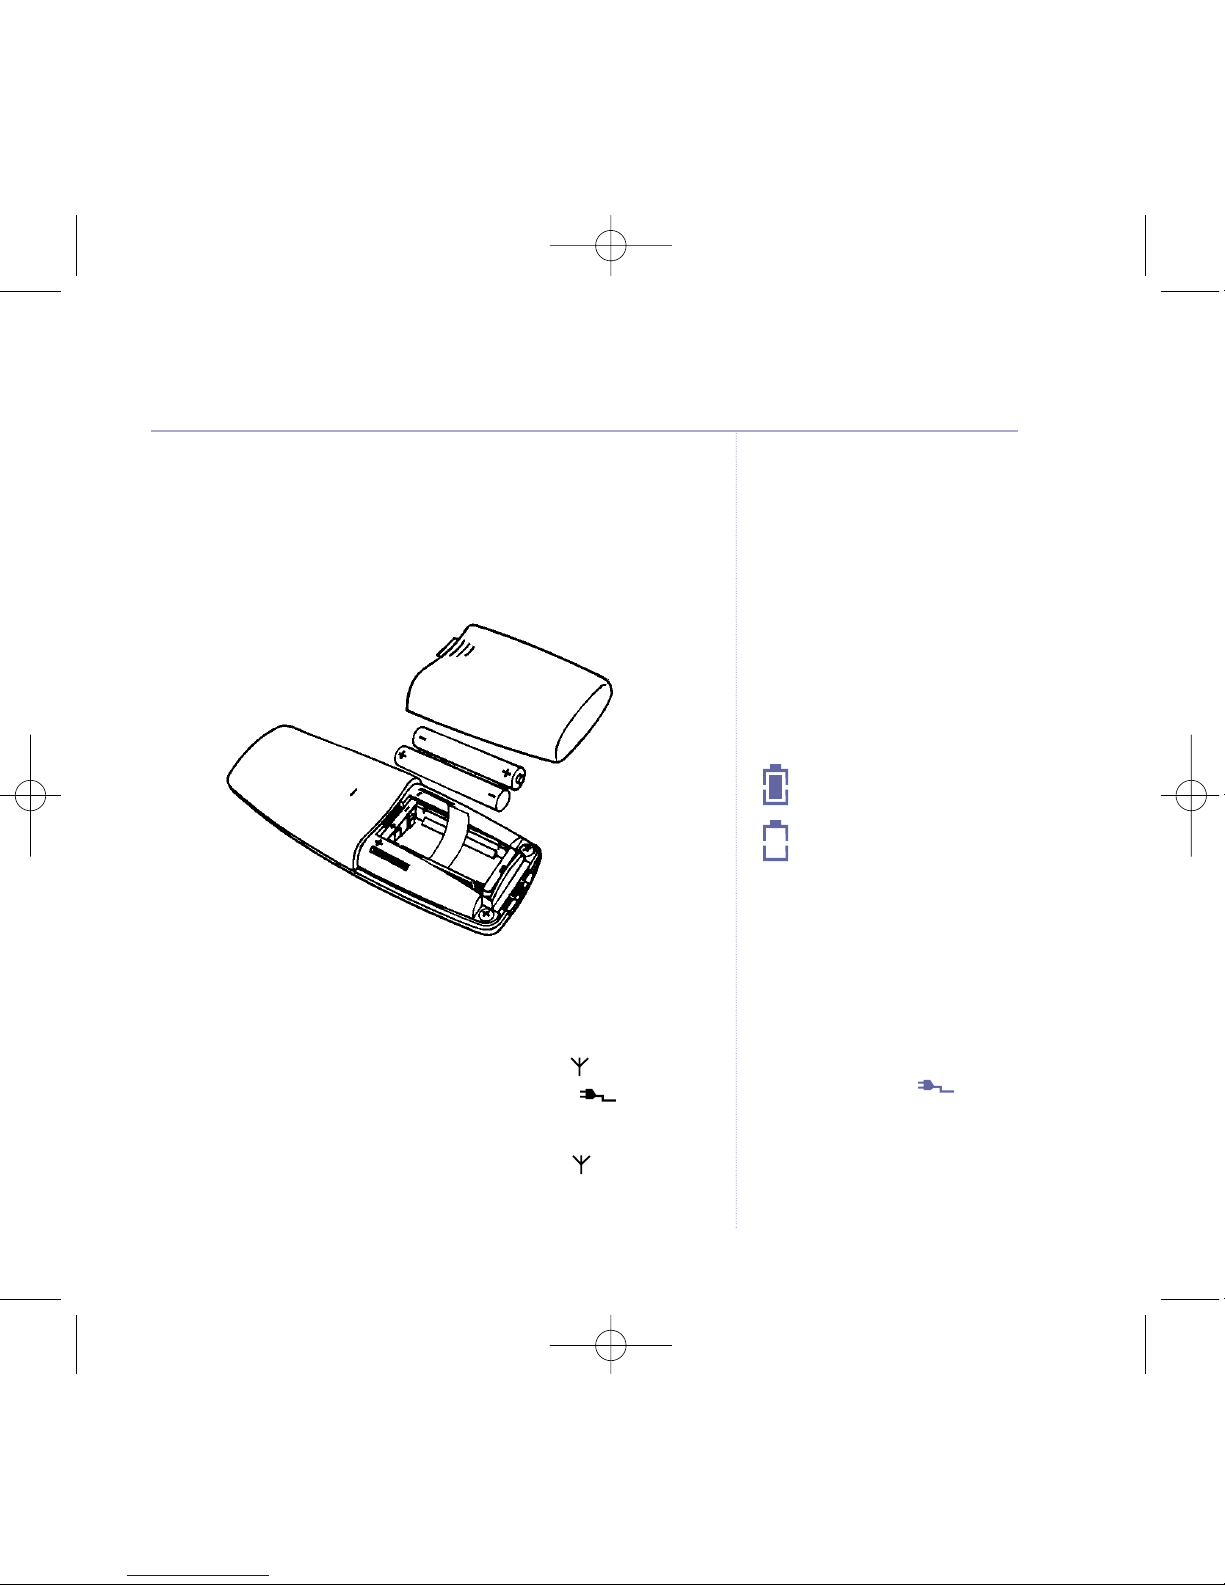
Setting up the base . . . . . . . . . . . . . .6
Setting up the charger . . . . . . . . . . . .8
Getting to know your phone
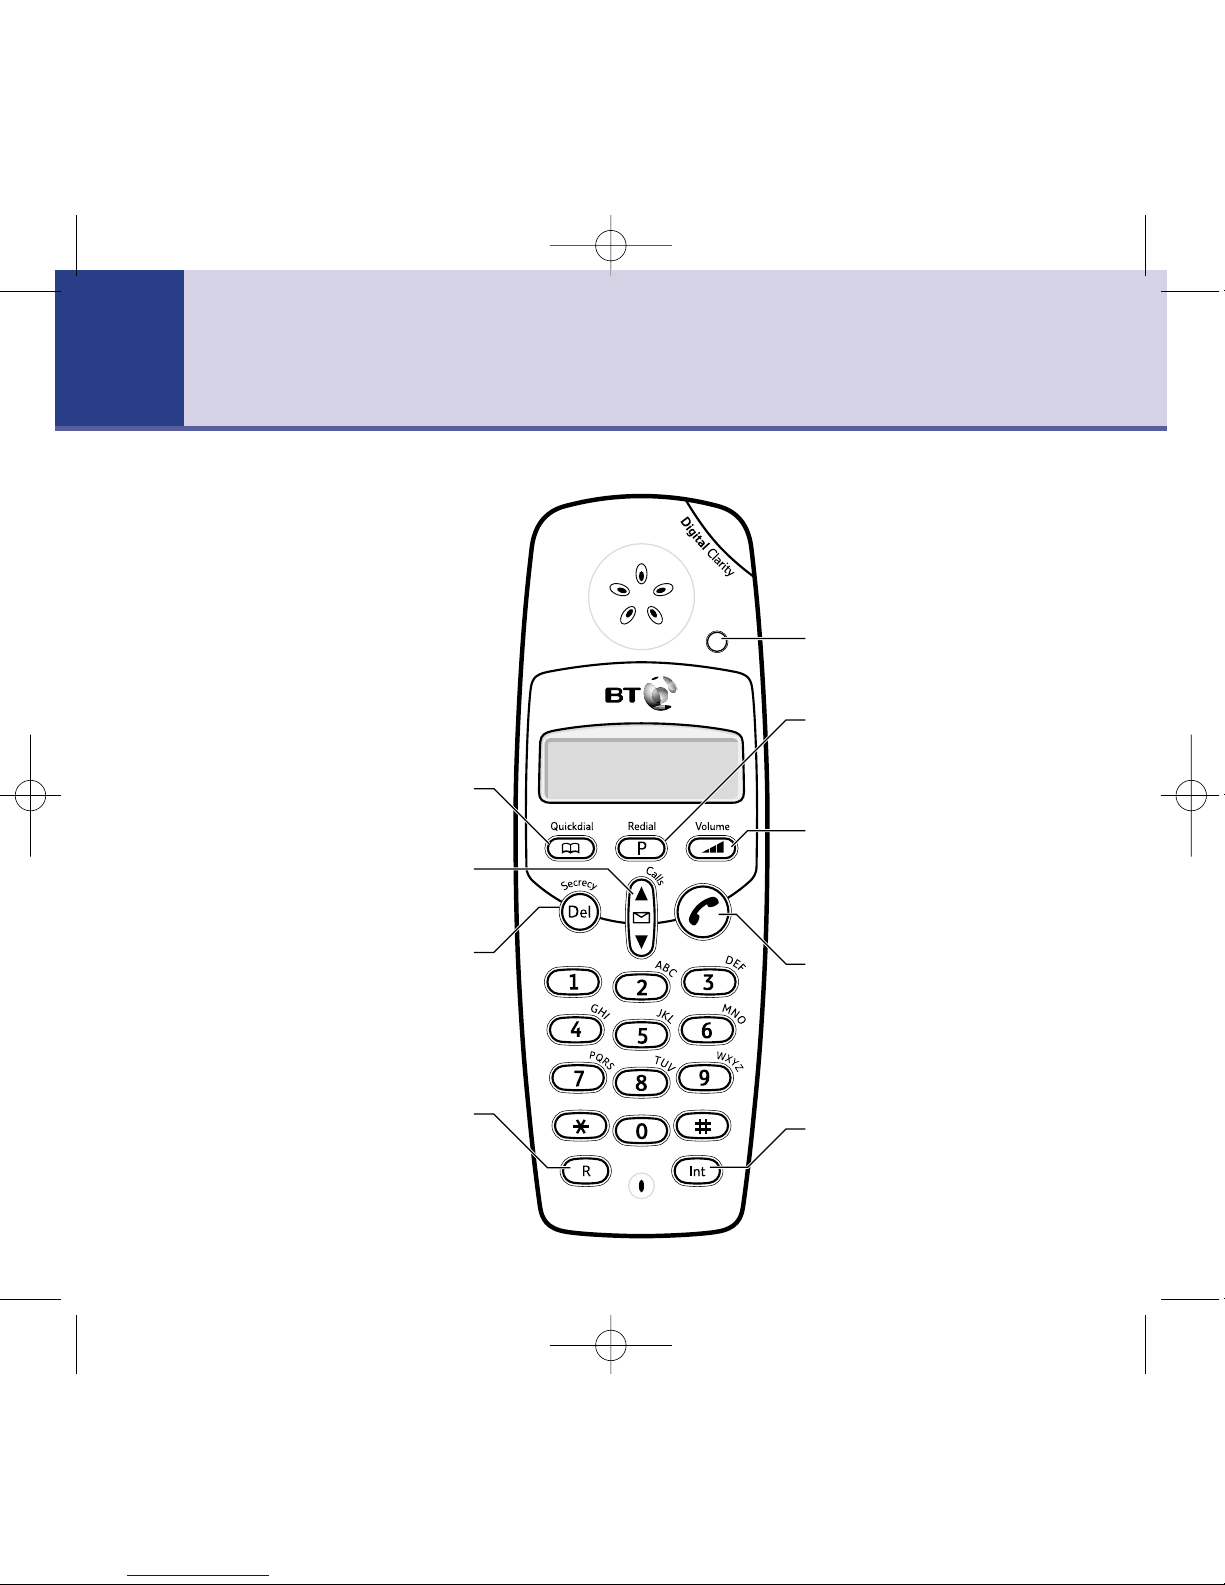
Handset buttons . . . . . . . . . . . . . . . .10
Handset display icons . . . . . . . . . . . . .11
Base buttons . . . . . . . . . . . . . . . . . . .12
Base LEDs . . . . . . . . . . . . . . . . . . . . .13
Using the phone
Make an external call . . . . . . . . . . . . .14
Preparatory dialling . . . . . . . . . . . . . .14
End a call . . . . . . . . . . . . . . . . . . . . . .14
Receiving calls . . . . . . . . . . . . . . . . . .14
Earpiece volume . . . . . . . . . . . . . . . .15
Handset ringer volume . . . . . . . . . . . .15
Secrecy . . . . . . . . . . . . . . . . . . . . . . .15
Last number redial . . . . . . . . . . . . . . .16
Paging . . . . . . . . . . . . . . . . . . . . . . .16
Quickdial
Store a number in the Quickdial
memory . . . . . . . . . . . . . . . . . . . . . .17
Dial a Quickdial number . . . . . . . . . . .17
Delete a Quickdial number . . . . . . . . .17
Caller Display and the calls list
View, dial and delete entries in
the calls list . . . . . . . . . . . . . . . . . . . .18
Exit the calls list . . . . . . . . . . . . . . . . .18
B Studio 500 win additional handset
Making internal calls . . . . . . . . . . . . . .19
Receiving internal calls . . . . . . . . . . . .19
Transferring calls . . . . . . . . . . . . . . . .20
Using the answering machine
Switching the answering machine
on/off . . . . . . . . . . . . . . . . . . . . . . . .21
Set date and time . . . . . . . . . . . . . . .21
Play all messages . . . . . . . . . . . . . . . .22
Play new messages only . . . . . . . . . . .22
Select and play outgoing message . . .24
Record your own outgoing message(s) 25
Delete your outgoing message(s) . . . .25
Adjust answer delay . . . . . . . . . . . . . .26
Record a memo . . . . . . . . . . . . . . . . .26
Memory full during a call . . . . . . . . . .27
Call screening . . . . . . . . . . . . . . . . . .28
Remote access
Switch on your answering machine from
another phone . . . . . . . . . . . . . . . . . .29
4In this guide
5464 BT Studio 500/Twin UG [2] 14/8/03 3:32 PM Page 4

BT Studio 500/Studio 500 Twin – 3rd Edition – 14th August ’03 – 5464
5In this guide
Change the securit PIN . . . . . . . . . . .29
Operating our answering machine
from another phone . . . . . . . . . . . . . .30
Outgoing message menu . . . . . . . . . .32
Switchboard use
Switchboard compatibilit . . . . . . . . . .33
Switchboard external line access code . .33
Recall . . . . . . . . . . . . . . . . . . . . . . . .34
Help . . . . . . . . . . . . . . . . . . . . . . . . .35
General information
Safet . . . . . . . . . . . . . . . . . . . . . . . .38
Cleaning . . . . . . . . . . . . . . . . . . . . . .39
How man telephones can ou have? . .40
Guarantee . . . . . . . . . . . . . . . . . . . . .41
Returning our phone . . . . . . . . . . . . .42
R&TTE . . . . . . . . . . . . . . . . . . . . . . .43
Declaration of Conformance . . . . . . . .43
5464 BT Studio 500/Twin UG [3] 15/8/03 9:48 AM Page 5

BT Studio 500/Studio 500 Twin – 3rd Edition – 14th August ’03 – 5464
Getting started6
WARNING
Do not place your BT Studio 500 in
the bathroom or other humid areas.
Handset range
The handset reception range from
the base is up to 300m outdoors
and up to 50m indoors, in ideal
conditions.
Signal strength
The icon on your handset
indicates when you are in range.
When it flashes, you are out of
range.
IMPOR AN
The base station must be plugged
into the mains power socket at all
times.
Do not connect the telephone line
until the handset is fully charged.
Which socket?
Power socket
Telephone line socket
A
If you have purchased the B Studio 500 win please
follow instructions Aand B.
Location
You need to place your BT Studio 500 close enough to
a mains power and telephone socket so that the cables
will reach.
The strength of the handset signal depends on where you
site the base. Putting it as high as possible can help to
provide the best signal. Make sure it is at least 1 metre
away from other electrical appliances to avoid interference.
Setting up the ase
1. Plug the power adaptor and telephone cables into the
back of the base.
Power adaptor cableelephone line cable
5464 BT Studio 500/Twin UG [2] 14/8/03 3:32 PM Page 6

BT Studio 500/Studio 500 Twin – 3rd Edition – 14th August ’03 – 5464
2. Plug the power adaptor into the mains wall socket and
switch the power on. The green Power light on the base
comes on.
3. Install the 2 x AAA rechargeable batteries supplied.
Then slide the battery compartment cover into place.
4. Charge the handset for at least 16 hours by placing the
handset on the base. The red Charging light at the base
comes on.
nce the batteries are partly charged the icon will
flash briefly in the handset display and the icon will
appear.
nce the handset links with the base, the icon stops
flashing.
7Getting started
alk/Standby time
Under ideal conditions, the
handset batteries should give
about 14 hours talk time or 350
hours standby on a single charge.
(The base must still remain
plugged in to the mains and
switched on at all times.)
Note that new batteries do not
reach full capacity until they have
been in normal use for several days.
Battery symbols
– Battery charged
– Battery low
Battery low warning
If the battery charge becomes low
during a call you will hear a
warning beep once every minute.
If the battery runs out you will be
cut off.
You will need to recharge the
handset before using it.
During charging, the icon
will be displayed.
See ‘Battery performance’ on the
following page.
5464 BT Studio 500/Twin UG [2] 14/8/03 3:32 PM Page 7

BT Studio 500/Studio 500 Twin – 3rd Edition – 14th August ’03 – 5464
5. After the handset is fully charged, the icon will
disappear from the display.
You can now plug the telephone line cord into the
telephone wall socket.
Your BT Studio 500 is ready for use.
B Studio 500 win owners only
Location
You need to place your BT Studio 500 charger close
enough to a mains power socket so that the cable will
reach.
Setting up the charger
1. Plug the power adaptor cable into the underside of
the charger.
2. Plug the power adaptor into the mains wall socket and
switch the power on.
3. Install the 2 x AAA rechargeable batteries supplied into
the second handset.
8 Getting started
Battery performance
To keep your batteries in the best
condition, leave the handset off
the base for a few hours at a time
Running the batteries right down
at least once a week will help them
last as long as possible.
The charge capacity of
rechargeable batteries will reduce
with time as they wear out, giving
the handset less talk/standby time.
Eventually they will need to be
replaced. New batteries are
available from the BT Studio 500
Helpline on 0870 605 8047.
After charging your handset for the
first time, subsequent charging time
is about 6–8 hours a day. Batteries
and handset may become warm
during charging.This is normal.
B
5464 BT Studio 500/Twin UG [2] 14/8/03 3:32 PM Page 8

4. Place the handset in the charger and charge the handset
for at least 16 hours. The red Charging light on the
charger comes on.
nce the batteries are partly charged, the icon will
flash in the handset display and the icon will appear.
nce the handset registers with the base, the icon
stops flashing.
Your BT Studio 500 Twin is ready for use.
9Getting started
B Studio 500 additional handset
Your BT Studio 500 handsets
are the same, so instructions
throughout this guide apply
to both.
Handset numbers
nce registered with the base,
each handset will display its
handset number, and
respectively.
BT Studio 500/Studio 500 Twin – 3rd Edition – 14th August ’03 – 5464
5464 BT Studio 500/Twin UG [2] 14/8/03 3:32 PM Page 9

BT Studio 500/Studio 500 Twin – 3rd Edition – 14th August ’03 – 5464
10 Getting to know your phone
Quickdial
Use to store and dial up to 10 phone
numbers, page 17.
Calls list/Scroll
pens the Calls list and lets you scroll
through the entries, page 18.
Del/Secrecy
Delete characters, page 17.
Delete entries in the calls list, page 18.
During a call, press to stop your
caller hearing you, page 15.
R (Recall)/Calls list exit
Exits the Calls list, page 18.
Used when connected to a
switchboard/PBX and some
BT Calling Features, page 34.
Handset uttons
In-use light
Comes on when you make/receive
a call.
Redial/P
Redials the last number, page 16.
Enters a Pause when storing numbers,
page 17.
Vol
Adjusts the earpiece volume during
a call, page 15.
Adjusts the handset ringer volume,
page 15.
alk
Press to make, receive and end calls,
page 14.
Int
Use to make an internal call, page 19.
r to transfer a call to an additional
BT Studio 500 handset, page 20.
5464 BT Studio 500/Twin UG [2] 14/8/03 3:32 PM Page 10

BT Studio 500/Studio 500 Twin – 3rd Edition – 14th August ’03 – 5464
11Getting to know your phone
Battery charged
Battery low
Indicates when the battery is low.
Handset charging, page 7.
alk
Indicates a call is in progress, page 14.
External call
Flashes when you receive an external call.
Stays on during the conversation, page 14.
Internal call
Flashes when you have a call from
another BT Studio 500 handset, page 19.
Quickdial
Displayed when you are dialling or storing
numbers in the Quickdial directory, page 17.
Secrecy on, page 15.
New calls*
Flashes when you have new calls in the Calls list.
n when viewing the Calls list, page 18
Signal strength
In range. Flashes when the handset is out of
range of the base.
Sample stand y screen – These are where the handset icons will appear.
Handset display icons – These are the symbols you will see on your handset’s screen.
* For these features to work you must subscribe to your Network Provider’s Caller Display service.
Handset number
Battery status
Handset
charging
New calls indicator
Signal strength
Secrecy
alk
Internal
call
Quickdial
External
call
5464 BT Studio 500/Twin UG [2] 14/8/03 3:32 PM Page 11

BT Studio 500/Studio 500 Twin – 3rd Edition – 14th August ’03 – 5464
12 Getting to know your phone
Base uttons
Ans On/Off
Switches the
answering machine
on/off, page 21.
Vol +–
Adjusts the
loudspeaker volume,
page 23.
Page
Press to page the
handset(s), page 16.
Skip
Plays next message,
page 23.
Stop
Stops playback and
recording, page 23.
Skip
Replays current
message and skips
back to previous
messages, page 22.
Play
Press to play back messages,
page 22.
Del
Deletes messages,
page 23.
5464 BT Studio 500/Twin UG [2] 14/8/03 3:32 PM Page 12

BT Studio 500/Studio 500 Twin – 3rd Edition – 14th August ’03 – 5464
13Getting to know your phone
Base LEDs
Charging light (on base
and charger)
n = Handset charging
Messages light
n = Answering machine is switched on/
Playback in progress
ff = Answering machine is off
Short flashes
then a break = No. of messages
Medium flashes
every half a second = Memory full
Long flashes
every second = Recording
Power/In use
n = Power connected
n standby
Flashes = During a call
Flashes = When the phone
rings
5464 BT Studio 500/Twin UG [2] 14/8/03 3:32 PM Page 13

BT Studio 500/Studio 500 Twin – 3rd Edition – 14th August ’03 – 5464
Using the phone
Dialling numbers quickly
Numbers can also be dialled using
the Quickdial directory (page 17),
and from the calls list (page 18).
Please note
The first digit of a telephone
number you enter or receive via
Caller Display, will not be shown
on the screen. For example, the
first 0 or 020 8123 4567 will not
be displayed.
Make an external call
1. Press , listen for the dial tone then dial the number.
The display shows the icon.
Preparatory dialling
1. Enter the number first. If you make a mistake, press
to delete. Press to dial.
End a call
1. Press or place the handset back on the base.
Receiving calls
The base and handset will ring, the icon flashes on
the display.
1. Press to answer the call or, if the handset is on the
base, simply lift it and speak.
If you have subscribed to your network’s Caller Display
service, the caller’s number will also be displayed.
See page 18 for more information.
14
5464 BT Studio 500/Twin UG [2] 14/8/03 3:32 PM Page 14

BT Studio 500/Studio 500 Twin – 3rd Edition – 14th August ’03 – 5464
15Using the phone
Earpiece volume
1. During a call, press button to scroll through the
settings – Low, Medium, High – until you reach the
volume level you prefer.
You can only adjust the earpiece volume during a call.
Handset ringer volume
1. Press button to scroll through the settings – Low,
Medium, High – until you reach the volume level you
prefer. This level is set until you adjust it again.
Secrecy
During a call, you can talk to someone nearby without
your caller hearing you.
1. During your call, press . Display shows the
icon. Your caller cannot hear you.
2. Press again to resume your call.
5464 BT Studio 500/Twin UG [2] 14/8/03 3:32 PM Page 15

Last num er redial
Your handset automatically saves the last number you
dialled, up to a maximum of 25 digits.
1. Press then . The last number is displayed and
dialled. You can add further digits if required.
Paging
You can alert handset users that they are wanted or
locate a missing handset. Paging calls cannot be
answered by a handset.
1. Press on the base. The handset(s) will ring for
30 seconds.
2. Press any button on the handset to stop it ringing.
16 Using the phone
BT Studio 500/Studio 500 Twin – 3rd Edition – 14th August ’03 – 5464
5464 BT Studio 500/Twin UG [2] 14/8/03 3:32 PM Page 16

BT Studio 500/Studio 500 Twin – 3rd Edition – 14th August ’03 – 5464
17
Store a num er in the Quickdial memory
You can store up to 10 numbers for easy dialling.
Each number can be up to 20 digits long.
1. Press . Display shows the icon.
2. Select the location number (0–9) under which you want
to store the number.
3. Enter the telephone number then press . You hear a
confirmation beep.
Dial a Quickdial num er
1. Press then .
2. Press the location number (0–9) under which the entry
is stored. The number is displayed and dialled.
Delete a Quickdial num er
1. Press then the location number (0–9) under which
the phone number you want is stored.
2. Press to delete.
Quickdial
You hear a warning beep if you try
to enter more than 20 digits.
Deleting the last digit
If you make a mistake, press .
Cancel storing a number
Press at any time.
Inserting a Pause
When storing a Quickdial number
you can insert a Pause in the
dialling sequence. This can be
useful if your phone is connected
to an internal switchboard. See
page 33 for more information.
If you hear a beep when trying to
dial a Quickdial number, it means
no number has been stored.
Alternatively, you can overwrite a
number by storing a new one in
its place.
5464 BT Studio 500/Twin UG [2] 14/8/03 3:32 PM Page 17

BT Studio 500/Studio 500 Twin – 3rd Edition – 14th August ’03 – 5464
IMPOR AN
To use Caller Display you must first
subscribe to the service from your
network provider. A quarterly fee
is payable.
For more information on BT’s
Calling Features, call BT on
Freefone 0800 800 150.
Caller information not available
ccasionally the telephone number
of the caller is not available and
cannot therefore be displayed.
In this case, your BT Studio 500 will
show CALL instead of the caller’s
telephone number. The word CALL
will not be stored in the calls list.
If the telephone number is longer
than 10 digits, then the last 10
digits will be displayed.
18
If you subscribe to a Caller Display service you can see
your caller’s number on your handset’s display (unless it
has been withheld) before you answer the call.
Whether you answer a call or not, the caller’s phone
number is stored in the calls list.
New entries in the calls list are indicated by the icon.
When all the entries in the calls list have been viewed,
the icon will disappear.
Up to 10 phone numbers can be stored in the calls list.
When the calls list is full, a new call replaces the oldest.
View, dial and delete entries in the calls list
1. Press to open the calls list. The most recent caller’s
number is displayed.
2. Press and to scroll through the list.
Press to dial the number displayed.
Press to delete the number displayed.
Exit the calls list
1. Press to exit the list.
Caller Display and the calls list
5464 BT Studio 500/Twin UG [2] 14/8/03 3:32 PM Page 18

BT Studio 500/Studio 500 Twin – 3rd Edition – 14th August ’03 – 5464
19
COMPA IBILI Y
The BT Studio 500 additional
handset is the only handset that
can be used with your BT Studio
500 base.
BT Studio 500 phones are not
GAP compatible. This means they
cannot be registered to other
DECT telephones.
The BT Studio 500 additional handset (available as part
of the BT Studio 500 Twin package) is designed to
provide an additional handset for your BT Studio 500.
With the BT Studio 500 Twin, you can make internal calls
and transfer external calls between the two BT Studio 500
handsets.
The additional handset is pre-registered to your BT Studio
500 base. It is supplied with its own charger and must be
charged for 16 hours before you can use it, see ‘Getting
Started’ page 6 if you have not already done this.
Making internal calls
You can make internal calls between two BT Studio 500
handsets.
1. Press . The other handset will ring.
Receiving internal calls
1. When the handset rings, the display shows the icon.
Press to answer.
2. Press again to end the call.
BT Studio 500 Twin additional handset
5464 BT Studio 500/Twin UG [2] 14/8/03 3:32 PM Page 19

Please note
If, after 30 seconds, the other
handset has not answered, you are
automatically re-connected to your
caller.
Transferring calls
You can transfer an external call to the other BT Studio
500 handset.
During an e ternal call:
1. Press . Your caller is put on hold and the other
handset will ring.
2. When the handset answers, press . You can now tell
the other user you are transferring the call.
3. Press again to transfer the call.
If the other handset does not answer, press to talk
to your caller again.
20 BT Studio 500 Twin additional handset
BT Studio 500/Studio 500 Twin – 3rd Edition – 14th August ’03 – 5464
5464 BT Studio 500/Twin UG [2] 14/8/03 3:32 PM Page 20
Other manuals for PARAGON 500
4
This manual suits for next models
1
Table of contents
Other BT Cordless Telephone manuals