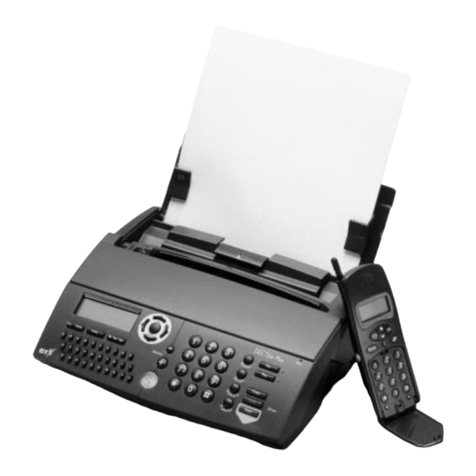
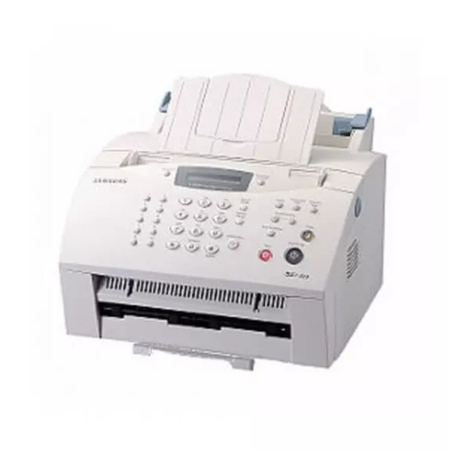
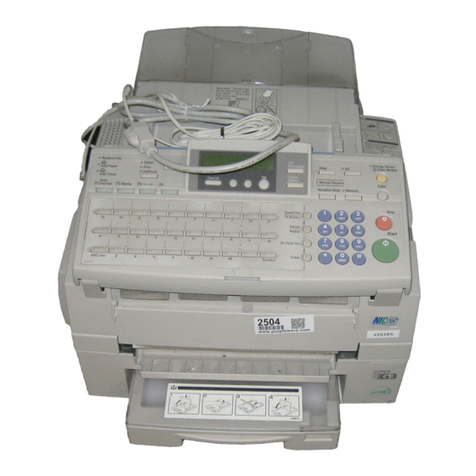
BT Multifax 2020 User manual

Multifax 2020 ~ 1st Edition ~ 20th November ’01 ~ 4207
This product is intended for connection to analo ue public switched telephone networks and private
switchboards in the United Kin dom.
This equipment complies with the essential requirements of the Radio Equipment and Telecommunications
Terminal Equipment Directive, 1999/5/EC.
BT Multifax 2020
Multifunctional, plain paper fax machine
User
Guide
All manuals and user guides at all-guides.com
all-guides.com

Multifax 2020 ~ 1st Edition ~ 20th November ’01 ~ 4207
Please open this page for an ‘at a glance’
guide to your BT Multifax 2020.
All manuals and user guides at all-guides.com

Multifax 2020 ~ 1st Edition ~ 20th November ’01 ~ 4207
Please open this page for a further ‘at a glance’
guide to your BT Multifax 2020.
All manuals and user guides at all-guides.com

Multifax 2020 ~ 1st Edition ~ 20th November ’01 ~ 4207
At a glance
1. Delayed TX
Lets you send a fax at a pre-set time, p37.
2. Print operation
Used to print faxes received into the memory, p25.
3. Conf. TX
Lets you send a confidential fax to a personal mailbox, p41.
4. Relay Init. TX
Lets you initiate a relay fax when communicating with compatible
machines, p44.
5. Polling
Used for polling faxes, p45.
6. Report print
Print a report, p48.
7. Counter display
Displays the number of pages printed and scanned, p28.
. Location Prog
Used when storing entries in the one touch and auto dial directo-
ries.
9. User Prog
Used to change settings on your machine.
10. Printer Cleaning
Cleans excess toner from the image drum.
1 2 3 4 5
DELAYED PRINT CONF. TX RELAY POLLING
TX OPERATION INIT.-TX
6 7 8/+ 9/SPACE 10/PAUSE
REPORT COUNTER LOCATION USER PRINTER
PRINT DISPLAY PROG. PROG. CLEANING
21 3 4 5
6
7 8 9
10
Note
These one touch dialling buttons are used for storing
names and numbers. When used in conjunction with
the Select Function button, they perform additional
functions.
1
All manuals and user guides at all-guides.com

Multifax 2020 ~ 1st Edition ~ 20th November ’01 ~ 4207
1 2 3 4 5
DELAYED PRINT CONF. TX RELAY POLLING
TX OPERATION INIT.-TX
6 7 8/+ 9/SPACE 10/PAUSE
REPORT COUNTER LOCATION USER PRINTER
PRINT DISPLAY PROG. PROG. CLEANING
STOP START
1 2 3
4 5 6
7 8 9
*0#
WXYZTUVPQRS
MNOJKL
DEFABC
GHI
8.5" A4 B5 A5
PHOTO EX FINE FINE STD LIGHT NORMAL DARK
OPER/UNIQUE ALARM
HOOK SELECT
YES NO AUTO REC HYPHEN SEARCH V.REQUEST REDIAL AUTO DIAL FUNCTION COPY
1. LCD display
2. Resolution/Yes
Selects option from the menu. Also lets you set the resolution, p21.
3. Contrast/No.
Displays option from the menu. Also lets you set the contrast, p21.
4. Auto Rec
Sets the reception mode.
5. Hyphen
Inserts a ‘wait for dial tone’ pause when storing numbers.
Also inserts a ‘+’ in TSI/CSI and call back numbers.
. Search
Lets you find numbers stored in the directory and one-touch buttons.
7. Hook/Voice. Request
Press to hear dialling tone. During a fax call, press to let the person
at the other machine know that you want to talk (both faxes must
have telephone attached), p28.
8. Redial
Press to redial the last number called.
9. Auto Dial
Used to dial and search numbers stored in the directory, p31.
Also used when sending group faxes.
10. Select Function
Lets you select options from the one-touch menu buttons.
11. Copy
Lets you copy a document, p27.
12. Stop
Press to stop the current action.
13. Start
Press to dial a number or send a fax. Also used to accept some
entries when programming.
14. Alarm light
Comes on to indicate a problem.
15. 8/+
Lets you add phone numbers longer than 32 digits into the
memory, p31.
1 . Pause
Lets you enter a Pause when storing a number, p31.
17. Space
Lets you enter a space when entering a number. Also used deletes
previously stored information.
18. One touch keypad
Lets you dial numbers with one touch. Also lets you access functions
and change settings.
19. Directory label
Lift off plastic cover to write details of one-touch numbers.
20. Group/
#
Lets you send a fax to a group of numbers stored in the
directories, p32.
21. 0/Oper/Unique
When storing information, lets you enter a range of different
characters.
22. ✱
Lets you switch from pulse to tone dialling.
14
15
16
17
18192021
1
2 3 4 5 6 7 8 9 10 11 12 13
22
2
All manuals and user guides at all-guides.com

3
Multifax 2020 ~ 1st Edition ~ 20th November ’01 ~ 4207
Paper tray
Holds up to 100 sheets of A4 paper.
Received document tray
Holds up to 30 pages of
received faxes or copied
documents.
Document feeder tray
Holds original documents
to be faxed or copied.
Document guides
Adjust to the width of the
document to keep pages
straight.
One touch buttons
For dialling numbers.
Manual paper feeder
Lets you load a different type of
paper than that in the paper tray.
Sent document tray
Holds original documents that
have been faxed or copied.
Control panel
LCD display
eypad
All manuals and user guides at all-guides.com
all-guides.com

4
Multifax 2020 ~ 1st Edition ~ 20th November ’01 ~ 4207
Print Head
Image Drum Unit
Toner Cartridge
PC connection socket
Telephone line socket
Phone sockets
Lets you connect a
telephone, or answering
machine.
Power on/off
Mains power socket
All manuals and user guides at all-guides.com

5
Multifax 2020 ~ 1st Edition ~ 20th November ’01 ~ 4207
Key features
Multifunctional fax machine
When connected to a computer, you can use your
Multifax 2020 to:
• Print documents
• Send faxes directly from your PC
• Receive and store fax messages directly into
your PC
• Scan pages into your PC
• Carry out Optical Character Recognition (OCR)
on received faxes or scanned pages.
You can also add entries into the directories from
your PC.
One touch and auto dial directories
10 one-touch buttons let you display names and phone
numbers at a single press.
The auto dial directory stores up to 70 numbers and
lets you display them by pressing just three buttons.
Directory search
Search facility lets you search for stored entries
by name.
Memory reception
You can receive faxes into memory for printing later.
You can also keep faxes confidential by protecting
the memory with a 4-digit password.
Advanced features
Your Multifax 2020 has a range of special fax features
including:
• Group sending - send a fax to up to 5 different
groups of numbers in a single operation.
• Polling – lets you store a fax in the memory for
other machines to dial in and pick up.
• Delayed faxing – lets you store a fax in the memory
for sending at a pre-set time.
• Password protection – enables you to keep faxes
confidential.
All manuals and user guides at all-guides.com

6
Multifax 2020 ~ 1st Edition ~ 20th November ’01 ~ 4207
In this guide
At a glance 1
Introduction 7
Safety information 8
Setting up 10
Connecting to a C 17
Installing the JetSuite Pro software 17
Registering your software 18
Printing the user guides 19
Using Online Help 0
Using your Multifax 2020 21
Loading documents 1
Setting the answering mode
Sending faxes 3
Redialling 4
Receiving faxes 5
Dual access 6
Using the copier 7
Voice request 8
Using the directories 9
One touch buttons 9
Auto Dial directory 31
Additional features 32
Group dialling 3
Delayed faxing 37
Confidential faxes and mailboxes 41
Relaying faxes 44
Polling 45
Confidential polling 46
Print outs and reports 48
Optional settings 52
Memory password 56
Restricted access 57
Dial settings 59
One touch dialling settings 61
Language 61
General information 62
Guarantee and customer helpline 6
Technical specification 63
Help 64
Clearing jams 65
Replacing toner 66
Replacing drum 68
Problem checklist 70
Index 73
All manuals and user guides at all-guides.com

7
Multifax 2020 ~ 1st Edition ~ 20th November ’01 ~ 4207
For your records
For guarantee purposes, proof of purchase is required,
so please keep your receipt.
Introduction
Unpacking
When you unpack your Multifax 2020 you should have:
Fax
Paper Tray/Received Document Tray
Document Tray
Document Stacker
Toner Cartridge
Mains power cable with
3-pin plug fitted with 5A fuse
Printer cable
Date of purchase:
Place of purchase:
Serial number (on base of unit):
Purchase price:
Telephone line cord
CD containing PC software
and manuals
TAD adaptor lead
All manuals and user guides at all-guides.com

8
Multifax 2020 ~ 1st Edition ~ 20th November ’01 ~ 4207
Safety information
General
Your Multifax 2020 has been designed to give you
years of safe, reliable performance.
Never put foreign bodies into the fax machine. Their
accidental contact with powered parts may cause a
fire or electric shocks.
Disconnect the machine before you clean it. Do not
use liquid or aerosol cleaners to clean the machine.
Do not attempt to service the machine or lubricate
moving parts yourself.
Cleaning
Always use a dry cloth to clean the control panel and
the main body of the machine.
Environmental
Do not expose to direct sunlight.
Do not stand your fax machine on carpets or other
surfaces which generate fibres, or place it in
locations preventing free flow of air over its surfaces.
Do not use your machine near water or spill liquid of
any kind into it. Do not use it in damp or humid
conditions such as bathrooms.
Do not expose your fax machine to fire, explosive or
other hazardous conditions.
There is a slight chance that your fax machine could
be damaged by an electrical storm. We recommend
that you unplug the power and telephone line cord
for the duration of the storm.
CAUT ON
Always leave unused toner cartridges and image
drum units in their packages until needed.
Reuse the packaging to dispose of the old toner and
drum.
Do not expose the toner cartridge and image drum
units to light for more than 5 minutes. Never expose
the green drum (inside the image drum unit) to
direct sunlight.
Small amounts of tone spilled on the skin or clothing
can be removed with soap and cold water. Using hot
water makes the stain much more difficult to remove.
All manuals and user guides at all-guides.com
all-guides.com

9
Multifax 2020 ~ 1st Edition ~ 20th November ’01 ~ 4207
WARN NG
If you open the top cover, you will see a label that
reads CAUTION – HOT. This area is extremely hot
and must not be touched.
EMERGENCY F RST A D
IF TONER IS SWALLOWED – induce vomiting and
seek medical attention. If the person is unconscious,
never attempt to induce vomiting or give anything by
mouth.
IF TONER IS INHALED – take the person into the
open for fresh air. Seek medical attention.
IF TONER GETS IN THE EYES – flush eyes with
large quantities of cool, not cold, water for a
minimum of 15 minutes keeping eyelids open with
fingers. Seek medical attention.
All manuals and user guides at all-guides.com

10
Multifax 2020 ~ 1st Edition ~ 20th November ’01 ~ 4207
Insert the tabs of the Received Document Tray into
the slots at the front of the machine until they click
into place.
Setting up
1Plan the location of your Multifax 2020
Situate your machine close enough to both
telephone and mains power sockets so that the
cables will reach.
Make sure the surface is stable and flat.
2Install the paper trays
Insert the tabs of the Paper Tray into the slots at the
rear of the machine.
Insert the Document Tray into the long slot on top
of the machine until it clicks into place.
3Install the Toner Cartridge
Remove the protective sheet from the document
feeder.
Open the top cover.
All manuals and user guides at all-guides.com

11
Multifax 2020 ~ 1st Edition ~ 20th November ’01 ~ 4207
Now press down firmly on both ends of the drum
until it snaps into place.
To remove the orange plastic cover from the toner
well which is located in the image drum unit. First
remove the tape, then press in the left hand tab and
lift out the cover. You can discard the plastic cover.
Remove the protective film from the image drum unit.
Place the image drum unit back into your machine
Make sure the tabs on both sides of the drum slot
into place as shown.
Pull the control panel up and forward.
First making a note of its installed position, lift the
image drum unit out. Do not touch the green
surface of the drum.
CAUT ON
Do not expose the toner cartridge and image drum
units to light for more than 5 minutes. Never expose
the green drum (inside the image drum unit) to
direct sunlight.
Always hold the image drum unit by the ends. Never
touch the surface of the green drum inside the image
drum unit.
All manuals and user guides at all-guides.com

Remove toner cartridge from packaging and gently
shake it from side to side in order to distribute the
toner evenly.
Now carefully peel the white plastic tape from the
bottom of the cartridge.
With the smooth, black surface uppermost
(marked L and R) and the grey lever on the right,
insert the toner cartridge into the image drum unit.
Slide in the left end of the cartridge first, then lower
the right end into place.
12
Multifax 2020 ~ 1st Edition ~ 20th November ’01 ~ 4207
Close the top cover until is snaps into place.
Close the control panel by pressing down until it
clicks into place.
Caution
Be sure to insert the toner cartridge into the drum
the right way around.
Once in place, push the grey lever on the toner
cartridge towards the back of the machine to secure it.
WARN NG
Handle toner cartridge carefully. Avoid spilling toner
onto your clothing or other materials. See ‘Safety
Information’ on page 8)
All manuals and user guides at all-guides.com

13
Multifax 2020 ~ 1st Edition ~ 20th November ’01 ~ 4207
Note
To connect both an answering machine and a
telephone, first connect your answering machine to the
Multifax 2020 and then insert the telephone cable
into the telephone socket on the answering machine.
5Connect a telephone or answering
machine
If you want to connect an answering machine you
must set the reception mode of your Multifax 2020
to TAD/FAX AUTO SW MODE in order for the
answering machine to work. See page 22.
• Plug the TAD adaptor lead into the TEL 1 socket
at the back of the machine.
• Plug the answering machine (or telephone) line
cord into the TAD adaptor socket.
4Connect the power and telephone line
Plug one end of the telephone line cord into the
LINE socket at the back of the machine.
Plug the other end into the telephone wall socket.
Plug the mains power cable into the socket on the
back of the machine and the other end into a mains
power socket.
Switch your Multifax 2020 on using the On/Off
switch. Display shows the time and reception mode.
Your machine is now in standby, ready to send
and receive faxes.
Caution
Before connecting power, ensure that the power switch
is OFF (The side nearest 0 is down).
All manuals and user guides at all-guides.com
all-guides.com

Multifax 2020 ~ 1st Edition ~ 20th November ’01 ~ 4207
7Set the time and day
The current date and time will be printed
on every fax page you send.
Press SELECT FUNCTION.
Press USER PROG.
Press 3.
Display shows
3: CLOCK ADJUSTMENT
Press YES. Display shows the default date
and time.
Use the keypad to enter the correct date and
time using the format
DD/MM/YYYY HH:MM
Press to confirm.
Press SELECT FUNCTION to return to
standby.
SELECT
FUNCTION
SELECT
FUNCTION
USER
PROG.
3
DEF
YES
YES
8Enter your name and fax number
Your name and number will be added to
every fax page you send. You can enter a
maximum of 20 digits and 23 characters.
You can also enter a Call Back number.
This is a phone number that the person you
are faxing can use to call you. See ‘Voice
Request’, page 28.
Press SELECT FUNCTION.
Press USER PROG.
Press 4.
Display shows
4: SYSTEM DATA PRG
.
Press YES. Display shows
NO = <TSI/CSI>
I D = <SENDER ID>
and changes to
NO =
ID =
SELECT
FUNCTION
USER
PROG.
4
GHI
YES
6Loading paper
The Paper Tray can hold up to 100 sheets of
standard weight (80gsm) paper. Your Multifax 2020
automatically reduces the size of incoming documents
so that they can fit onto A4 paper.
1Fan the paper to separate the sheets.
2Insert the paper into the Paper Tray.
3Adjust the paper guides to the width of the paper.
You can set your machine to take different paper
sizes, see page 53.
14
All manuals and user guides at all-guides.com

15
Multifax 2020 ~ 1st Edition ~ 20th November ’01 ~ 4207
Connecting to a switchboard
When connecting to a switchboard you normally
have to dial a prefix (e.g. 9) to get an outside line.
When storing numbers in memory you will need to
enter the prefix before each external number. Please
note that if your switchboard requires a pause after
the prefix, before the rest of the number is dialled,
you will also need to set PBX LINE to ON and enter
a DIAL PREFIX. This is shown below.
If, when dialling outside numbers, you find that your
Multifax 2020 dials the prefix but not the rest of the
number, you should switch off Dial Tone Detection. To
do this, please contact the Helpline on 0870 241 3929.
Enter your fax machine’s number.
Press START to save the entry.
Enter your name or Sender ID.
START
Please note
Press the HYPHEN button to enter a +before
a number.
Press the 9/SPACE button to enter a space.
0
Press START to save the entry. Display shows
NO = <CALL BACK NO >
and then clears.
If required enter a telephone number that
can be used to contact you.
Press Start to confirm.
Press SELECT FUNCTION to return to
standby.
START
OPER/UNIQUE
HYPHEN
9/SPACE
5
JKL
6
MNO
6
MNO
4
GHI
YES
NO
HYPHEN
9/SPACE
For example to enter the name JOHN:
Press the 5button until the display shows
J
Press the 6button until the display shows
O
Press the 4button until the display shows
H
Press the 6button until the display shows
N
Press 9/SPACE = space.
Press HYPHEN = -
Press 0 OPER/UNIQUE repeatedly until the
character you want is displayed. These
include:
Ø./! &’()*+,-:;=?
Press the NO button to move the cursor
forward.
Press the YES button to move the cursor
back.
If you make a mistake when entering a
name or number, move the cursor back to
the error and either overwrite it by entering
the correct number or press the 9/SPACE
button to delete it.
SELECT
FUNCTION
START
To set your Multifax 2020 to switchboard
mode
Press SELECT FUNCTION.
Press USER PROG.
Display shows
1: FUNC.PROGRAMMING
Press 2. Display shows
2:DIAL PARAMETER
Press YES until the display shows
PBX LINE [OFF]
Press NO until the display shows
PBX LINE [ON]
Press SELECT FUNCTION to return to
standby.
SELECT
FUNCTION
SELECT
FUNCTION
USER
PROG.
2
ABC
YES
NO
All manuals and user guides at all-guides.com

16
Multifax 2020 ~ 1st Edition ~ 20th November ’01 ~ 4207
To enter the dial prefix
If you enter the dial prefix then Multifax 2020
will always insert a pause after any number
starting with this prefix.
Press SELECT FUNCTION.
Press USER PROG. Display shows
1:FUNC.PROGRAMMING
Press 2. Display shows
2:DIAL PARAMETER
Press YES until the display shows
DIAL
PREFIX [OFF]
Press NO until the display shows
DIAL
PREFIX [ ] ENTER 4 DIGITS
Enter the number you dial to get an outside
line
Press 9/SPACE until the display changes.
Press YES .
Press SELECT FUNCTION to return to
standby.
To delete the dial prefix
Press SELECT FUNCTION.
Press USER PROG. Display shows
1:FUNC.PROGRAMMING
Press 2. Display shows
2:DIAL PARAMETER
Press YES until the display shows
DIAL PREFIX [OFF]
Press NO until the display shows
DIAL PREFIX [ ] ENTER 4 DIGITS
Press NO to delete the existing prefix.
Press 9/SPACE four times to display
OFF
Press YES .
Press SELECT FUNCTION to return to
standby.
USER
PROG.
2
ABC
YES
YES
NO
9/SPACE
SELECT
FUNCTION
SELECT
FUNCTION
SELECT
FUNCTION
USER
PROG.
2
ABC
YES
NO
NO
YES
9/SPACE
SELECT
FUNCTION
Note
PBX settings:
You should switch PBX mode on ONLY if your PBX
(switchboard) requires a pause, between the Access
code (prefix) and the number to be dialled.
If you are unsure whether a “pause” is required,
contact your switchboard administrator.
In case of difficulties – contact the BT Helpline on
0870 241 3929.
All manuals and user guides at all-guides.com

17
Multifax 2020 ~ 1st Edition ~ 20th November ’01 ~ 4207
Connecting to a C
nstalling the JetSuite Pro software
Please note
The JetSuite Pro software manual is contained on the
CD ROM and can be printed once the software has
been installed. On screen help is also available.
If you have a previous version of JetSuite or a JetSuite
driver installed on your PC, you must uninstall it first
using the JetSuite Uninstall program.
When connected to a PC you can:
• Use your Multifax 2020 as a printer.
• Send fax messages directly from your PC.
• Receive and store fax messages directly onto
your PC.
• Scan pages from your Multifax 2020 into your PC.
• Carry out Optical Character Recognition (OCR)
on documents. This allows you to convert scanned
pages (or faxes received to your PC) into ‘text’
documents which can then be read and edited by
your word processing program.
• Easily store numbers in the directories.
When connected to a PC you can use your Multifax
2020 as a printer, fax and scanner.
To connect to a PC
Plug one end of the printer connection
cable into your Multifax 2020 and the other
end into the printer socket of your PC.
To install the software
Install the JetSuite Pro software by following
the steps for the version of Microsoft
Windows you are using. The software is
provided on a CD-ROM.
Make sure that no other programmes
are running.
Insert the PC Software CD in your CD
drive.
Autorun should locate and begin installing
your Multifax 2020 software automatically.
1
2
3
All manuals and user guides at all-guides.com
Other manuals for Multifax 2020
1
Table of contents
Other BT Fax Machine manuals

BT
BT PAPERJET 150 User manual

BT
BT PAPERJET 60 User manual

BT
BT PaperJet 60E User manual

BT
BT PAPERJET 30 User manual

BT
BT Copier User manual

BT
BT IMAGE 370 User manual

BT
BT On-Air DECTf@x Plus F@x machine and digital telephone... User manual

BT
BT FREESTYLE 65 User manual

BT
BT BT PaperJet 35 User manual

BT
BT PAPERJET 55 Configuration guide

BT
BT paperjet 50 User manual

BT
BT PAPERJET 45 User manual

BT
BT PaperJet 100 User manual

BT
BT PaperJet 65E Configuration guide

BT
BT IMAGE 2001 User manual

BT
BT PaperJet 55E Configuration guide

BT
BT DF60 User manual

BT
BT DECTfax Fax machine and digital telephone... User manual

BT
BT PAPERJET 55 User manual

BT
BT Multifax 2020 User manual