07
EN
DISPOSAL CONSIDERATIONS
If there is a legal regulation for the disposal of electrical
and electronic devices in your country, this symbol on the
product or on the packaging indicates that this product
must not be disposed of with household waste. Instead,
it must be taken to a collection point for the recycling of
electrical and electronic equipment. By disposing of it in
accordance with the rules, you are protecting the
environment and the health of your fellow human
beings from negative consequences. For information
about the recycling and disposal of this product, please
contact your local authority or your household waste
disposal service.
This product contains batteries. If there is a legal
regulation for the disposal of batteries in your country,
the batteries must not be disposed of with household
waste. Find out about local regulations for disposing of
batteries. By disposing of them in accordance with the
rules, you are protecting the environment and the health
of your fellow human beings from negative consequences.
This device complies with Part 15 of FCC Rules
operation is subject to the following two conditions
(1) This device must not cause armful interference,and
(2)This device must accept any interference received,
including interference that may cause undesired
operation
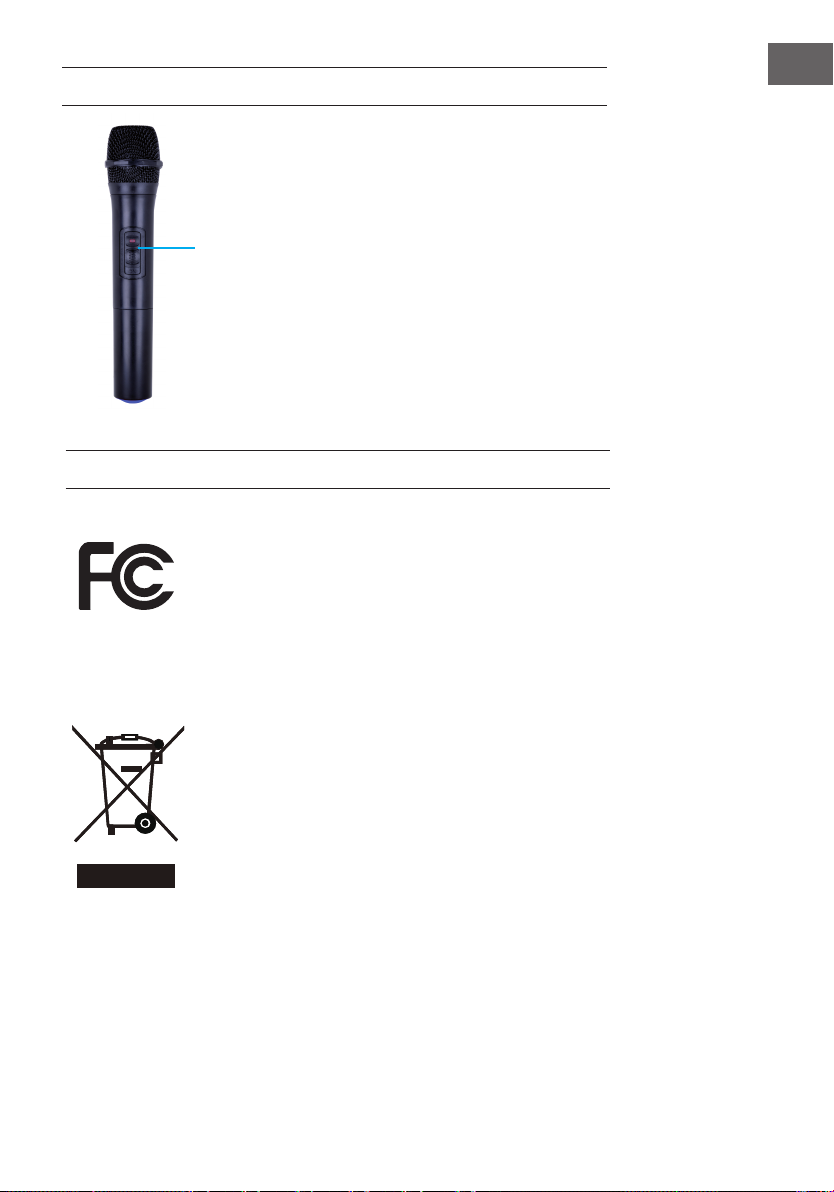
MICROPHONE
On/Off
Mute
1. Before powering on the microphone, be
sure to set the Microphone Volume Knob to
zero.Once the microphone is powered on,
slowly increase the microphone volume.
2.If you notice static or distortion in the
microphone, check if XLR is fixed to the body
properly of echo volume is too high.
3.When not in use, turn off the power of the
microphone.