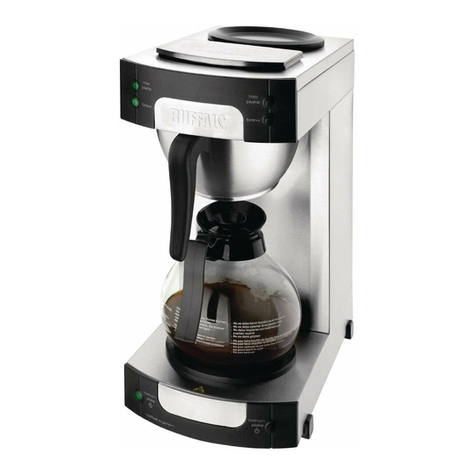
Buffalo DN487 User manual

Koffiezetapparaat
Handleiding
Machine à café
Mode d'emploi
Kaffeemaschine
Bedienungsanleitung
Macchina da caffè
Manuale di istruzioni
Cafetera
Manual de instrucciones
Máquina de café filtro
Manual de instruções
NL
FR
DE
IT
ES
PT
Coffee Machine
Instruction manual
Model •Modèle •Modell •Modello •Modelo •Malli:
DN487

Table of Contents
Safety Tips . . . . . . . . . . . . . . . . . . . . . . . . . . . . . . . . . . . . . . . . . . . . . . . . . . . .1
Introduction . . . . . . . . . . . . . . . . . . . . . . . . . . . . . . . . . . . . . . . . . . . . . . . . . . .1
Pack Contents . . . . . . . . . . . . . . . . . . . . . . . . . . . . . . . . . . . . . . . . . . . . . . . . .1
Operation . . . . . . . . . . . . . . . . . . . . . . . . . . . . . . . . . . . . . . . . . . . . . . . . . . . .2
Location of Controls . . . . . . . . . . . . . . . . . . . . . . . . . . . . . . . . . . . . . .2
Before Using for the First Time . . . . . . . . . . . . . . . . . . . . . . . . . . . . . .2
Making Coffee . . . . . . . . . . . . . . . . . . . . . . . . . . . . . . . . . . . . . . . . . . . .3
Cleaning, Care & Maintenance . . . . . . . . . . . . . . . . . . . . . . . . . . . . . . . . . . . .3
Descaling . . . . . . . . . . . . . . . . . . . . . . . . . . . . . . . . . . . . . . . . . . . . . . . .3
Troubleshooting . . . . . . . . . . . . . . . . . . . . . . . . . . . . . . . . . . . . . . . . . . . . . . .4
Technical Specifications . . . . . . . . . . . . . . . . . . . . . . . . . . . . . . . . . . . . . . . . . .4
Electrical Wiring . . . . . . . . . . . . . . . . . . . . . . . . . . . . . . . . . . . . . . . . . . . . . . .4
Compliance . . . . . . . . . . . . . . . . . . . . . . . . . . . . . . . . . . . . . . . . . . . . . . . . . . .5
Inhoudsopgave
Veiligheidstips . . . . . . . . . . . . . . . . . . . . . . . . . . . . . . . . . . . . . . . . . . . . . . . . .6
Inleiding . . . . . . . . . . . . . . . . . . . . . . . . . . . . . . . . . . . . . . . . . . . . . . . . . . . . . .6
Verpakkingsinhoud . . . . . . . . . . . . . . . . . . . . . . . . . . . . . . . . . . . . . . . . . . . . .6
Bediening . . . . . . . . . . . . . . . . . . . . . . . . . . . . . . . . . . . . . . . . . . . . . . . . . . . . .7
Locatie van alle onderdelen . . . . . . . . . . . . . . . . . . . . . . . . . . . . . . . . .7
Voor het eerste gebruik . . . . . . . . . . . . . . . . . . . . . . . . . . . . . . . . . . . .7
Koffie zetten . . . . . . . . . . . . . . . . . . . . . . . . . . . . . . . . . . . . . . . . . . . . .8
Reiniging, zorg & onderhoud . . . . . . . . . . . . . . . . . . . . . . . . . . . . . . . . . . . . . .8
Ontkalken . . . . . . . . . . . . . . . . . . . . . . . . . . . . . . . . . . . . . . . . . . . . . . .9
Oplossen van problemen . . . . . . . . . . . . . . . . . . . . . . . . . . . . . . . . . . . . . . . .9
Technische specificaties . . . . . . . . . . . . . . . . . . . . . . . . . . . . . . . . . . . . . . . . .10
Elektrische bedrading . . . . . . . . . . . . . . . . . . . . . . . . . . . . . . . . . . . . . . . . . . .10
Productconformiteit . . . . . . . . . . . . . . . . . . . . . . . . . . . . . . . . . . . . . . . . . . . .10
Sommaire
Conseils de sécurité . . . . . . . . . . . . . . . . . . . . . . . . . . . . . . . . . . . . . . . . . . . .11
UK
NL
FR

Introduction . . . . . . . . . . . . . . . . . . . . . . . . . . . . . . . . . . . . . . . . . . . . . . . . . . .11
Contenu de l'emballage . . . . . . . . . . . . . . . . . . . . . . . . . . . . . . . . . . . . . . . . . .11
Utilisation . . . . . . . . . . . . . . . . . . . . . . . . . . . . . . . . . . . . . . . . . . . . . . . . . . . . .12
Emplacement des commandes . . . . . . . . . . . . . . . . . . . . . . . . . . . . . . .12
Avant la première mise en service . . . . . . . . . . . . . . . . . . . . . . . . . . . .12
Pour faire le café . . . . . . . . . . . . . . . . . . . . . . . . . . . . . . . . . . . . . . . . . .13
Nettoyage, entretien et maintenance . . . . . . . . . . . . . . . . . . . . . . . . . . . . . . .13
Détartrage . . . . . . . . . . . . . . . . . . . . . . . . . . . . . . . . . . . . . . . . . . . . . . .14
Dépannage . . . . . . . . . . . . . . . . . . . . . . . . . . . . . . . . . . . . . . . . . . . . . . . . . . . .14
Spécifications techniques . . . . . . . . . . . . . . . . . . . . . . . . . . . . . . . . . . . . . . . . .15
Raccordement électrique . . . . . . . . . . . . . . . . . . . . . . . . . . . . . . . . . . . . . . . .15
Conformité . . . . . . . . . . . . . . . . . . . . . . . . . . . . . . . . . . . . . . . . . . . . . . . . . . .15
Inhalt
Sicherheitshinweise . . . . . . . . . . . . . . . . . . . . . . . . . . . . . . . . . . . . . . . . . . . . .16
Einführung . . . . . . . . . . . . . . . . . . . . . . . . . . . . . . . . . . . . . . . . . . . . . . . . . . . .16
Packungsinhalt . . . . . . . . . . . . . . . . . . . . . . . . . . . . . . . . . . . . . . . . . . . . . . . . .16
Betrieb . . . . . . . . . . . . . . . . . . . . . . . . . . . . . . . . . . . . . . . . . . . . . . . . . . . . . . .17
Teile und Bedienelemente . . . . . . . . . . . . . . . . . . . . . . . . . . . . . . . . . .17
Vor dem ersten Gebrauch . . . . . . . . . . . . . . . . . . . . . . . . . . . . . . . . . .17
Kaffeezubereitung . . . . . . . . . . . . . . . . . . . . . . . . . . . . . . . . . . . . . . . . .18
Reinigung, Pflege und Wartung . . . . . . . . . . . . . . . . . . . . . . . . . . . . . . . . . . . .18
Entkalken . . . . . . . . . . . . . . . . . . . . . . . . . . . . . . . . . . . . . . . . . . . . . . . .19
Fehlersuche . . . . . . . . . . . . . . . . . . . . . . . . . . . . . . . . . . . . . . . . . . . . . . . . . . .19
Technische Spezifikationen . . . . . . . . . . . . . . . . . . . . . . . . . . . . . . . . . . . . . . .20
Elektroanschlüsse . . . . . . . . . . . . . . . . . . . . . . . . . . . . . . . . . . . . . . . . . . . . . .20
Konformität . . . . . . . . . . . . . . . . . . . . . . . . . . . . . . . . . . . . . . . . . . . . . . . . . . .20
Indice
Suggerimenti per la sicurezza . . . . . . . . . . . . . . . . . . . . . . . . . . . . . . . . . . . . .21
Introduzione . . . . . . . . . . . . . . . . . . . . . . . . . . . . . . . . . . . . . . . . . . . . . . . . . .21
Contenuto della confezione . . . . . . . . . . . . . . . . . . . . . . . . . . . . . . . . . . . . . .21
Funzionamento . . . . . . . . . . . . . . . . . . . . . . . . . . . . . . . . . . . . . . . . . . . . . . . .22
DE
IT
Posizione dei comandi . . . . . . . . . . . . . . . . . . . . . . . . . . . . . . . . . . . . .22
Primo utilizzo della macchina da caffè . . . . . . . . . . . . . . . . . . . . . . . . .22
Preparazione del caffè . . . . . . . . . . . . . . . . . . . . . . . . . . . . . . . . . . . . . .23
Pulizia e manutenzione . . . . . . . . . . . . . . . . . . . . . . . . . . . . . . . . . . . . . . . . . .23
Rimozione del calcare . . . . . . . . . . . . . . . . . . . . . . . . . . . . . . . . . . . . . .24
Risoluzione dei problemi . . . . . . . . . . . . . . . . . . . . . . . . . . . . . . . . . . . . . . . . .24
Specifiche tecniche . . . . . . . . . . . . . . . . . . . . . . . . . . . . . . . . . . . . . . . . . . . . .25
Cablaggi elettrici . . . . . . . . . . . . . . . . . . . . . . . . . . . . . . . . . . . . . . . . . . . . . . .25
Conformità . . . . . . . . . . . . . . . . . . . . . . . . . . . . . . . . . . . . . . . . . . . . . . . . . . .25
Índice
Consejos de Seguridad . . . . . . . . . . . . . . . . . . . . . . . . . . . . . . . . . . . . . . . . . .26
Introducción . . . . . . . . . . . . . . . . . . . . . . . . . . . . . . . . . . . . . . . . . . . . . . . . . .26
Contenido del Conjunto . . . . . . . . . . . . . . . . . . . . . . . . . . . . . . . . . . . . . . . . .26
Funcionamiento . . . . . . . . . . . . . . . . . . . . . . . . . . . . . . . . . . . . . . . . . . . . . . . .27
Ubicación de los controles . . . . . . . . . . . . . . . . . . . . . . . . . . . . . . . . . .27
Antes de utilizar el aparato por primera vez . . . . . . . . . . . . . . . . . . . .27
Preparación de café . . . . . . . . . . . . . . . . . . . . . . . . . . . . . . . . . . . . . . . .28
Limpieza, Cuidado y Mantenimiento . . . . . . . . . . . . . . . . . . . . . . . . . . . . . . . .28
Eliminación de la cal . . . . . . . . . . . . . . . . . . . . . . . . . . . . . . . . . . . . . . .29
Resolución de problemas . . . . . . . . . . . . . . . . . . . . . . . . . . . . . . . . . . . . . . . .29
Especificaciones Técnicas . . . . . . . . . . . . . . . . . . . . . . . . . . . . . . . . . . . . . . . .30
Cableado Eléctrico . . . . . . . . . . . . . . . . . . . . . . . . . . . . . . . . . . . . . . . . . . . . .30
Cumplimiento . . . . . . . . . . . . . . . . . . . . . . . . . . . . . . . . . . . . . . . . . . . . . . . . .30
Índice
Conselhos de segurança . . . . . . . . . . . . . . . . . . . . . . . . . . . . . . . . . . . . . . . . .31
Introdução . . . . . . . . . . . . . . . . . . . . . . . . . . . . . . . . . . . . . . . . . . . . . . . . . . . .31
Conteúdo da embalagem . . . . . . . . . . . . . . . . . . . . . . . . . . . . . . . . . . . . . . . .31
Funcionamento . . . . . . . . . . . . . . . . . . . . . . . . . . . . . . . . . . . . . . . . . . . . . . . .32
O lugar dos comandos . . . . . . . . . . . . . . . . . . . . . . . . . . . . . . . . . . . . .32
Antes de utilizar o produto pela primeira vez . . . . . . . . . . . . . . . . . . .32
Fazer café . . . . . . . . . . . . . . . . . . . . . . . . . . . . . . . . . . . . . . . . . . . . . . .33
ES
PT

Limpeza, cuidados & manutenção . . . . . . . . . . . . . . . . . . . . . . . . . . . . . . . . . .33
Descalcificar . . . . . . . . . . . . . . . . . . . . . . . . . . . . . . . . . . . . . . . . . . . . .33
Resolução de problemas . . . . . . . . . . . . . . . . . . . . . . . . . . . . . . . . . . . . . . . . .34
Especificações técnicas . . . . . . . . . . . . . . . . . . . . . . . . . . . . . . . . . . . . . . . . . .34
Cablagem eléctrica . . . . . . . . . . . . . . . . . . . . . . . . . . . . . . . . . . . . . . . . . . . . .34
Conformidade . . . . . . . . . . . . . . . . . . . . . . . . . . . . . . . . . . . . . . . . . . . . . . . . .35

1
UK
Safety Tips
• Position on a flat, stable surface.
• A service agent/qualified technician should carry out installation and any repairs if required. Do not
remove any components on this product.
• Consult Local and National Standards to comply with the following:
• Health and Safety at Work Legislation
• BS EN Codes of Practice
• Fire Precautions
• IEE Wiring Regulations
• Building Regulations
• DO NOT immerse the appliance in water.
• DO NOT touch hot surfaces.
• DO NOT leave the appliance unattended during operation.
• DO NOT remove the filter basket during the filtration process.
• Suitable for indoor use only.
• Always switch off and disconnect the power supply to the appliance when not in use.
• This appliance must only be used in accordance with these instructions and by persons competent to
do so.
• This appliance is not intended for use by persons (including children) with reduced physical, sensory
or mental capabilities, or lack of experience and knowledge, unless they have been given supervision
or instruction concerning use of the apliance by a person reponsible for their safety.
• Keep all packaging away from children. Dispose of the packaging in accordance to the regulations of
local authorities.
• If the power cord is damaged, it must be replaced by an BUFFALO agent or a recommended qualified
technician in order to avoid a hazard.
Introduction
Please take a few moments to carefully read through this manual. Correct maintenance and operation of
this machine will provide the best possible performance from your BUFFALO product.
Pack Contents
The following is included:
• BUFFALO Coffee Machine
• Filter basket
•VacuumJug
• Instruction manual
BUFFALO prides itself on quality and service, ensuring that at the time of packaging the contents are
supplied fully functional and free of damage.
Should you find any damage as a result of transit, please contact your BUFFALO dealer immediately.

2
UK
Operation
Location of Controls
Before Using for the First Time
BUFFALO recommend that the appliance is cleaned out before using for the first time, or if the appliance
has been sat unused for an extended period of time.
1. Fill the water reservoir with cold water.
2. Slide the empty filter basket into position between the two basket tabs.
3. Place the jug on the base beneath the basket.
4. Turn the power switch On . The Brewing Indicator lights up and hot water will begin to fill the jug.
5. Once finished the Brewing Indicator light will switch off. Discard the hot water in the jug.
6. Repeat steps 1-5. The appliance is now clean.
Note: Use the jug to fill the reservoir to ensure the maximum capacity of the jug is not
exceeded. The maximum amount of water the reservoir can contain is 2.2 litres.
Note: During operation, steam may rise from the appliance and loud bubbling noises
may be heard. This is perfectly normal.
WARNING: The jug becomes hot during operation. Always pick up the jug by the handle
to avoid injury.
Warning indicator
(red light)
Brewing Indicator
(green light)
Stainless Steel Jug
Water reservoir
inlet
On / Off Switch
with indicator
Filter basket
Jug Lid

3
UK
Telephone Helpline: 0845 146 2887 (United Kingdom)
Making Coffee
1. Fill the water reservoir with cold water.
2. Place a filter paper inside the filter basket.
3. Measure the required amount of coffee into the filter paper and slide the filter basket into position.
4. Place the jug on the base beneath the filter basket.
5. Turn the power switch On . The Brewing Indicator lights up and hot water will begin to fill the jug.
6. Once finished the Brewing indicator will switch off.
Cleaning, Care & Maintenance
• Always turn off and disconnect the appliance from the power supply before cleaning.
• Use soapy water and a damp cloth to clean the exterior of the appliance.
•Drythoroughlyafter cleaning.
Descaling
In hard water areas limescale can build up within the appliance after prolonged use. To descale the
appliance:
1. Pour a solution of descaler and water into the reservoir.
2. Turn thepower switch On.
3. After approximately 4 minutes turn the appliance Off to allow the descaling solution to work through
the system.
4. After approximately 10 minutes turn the Brewing power switch back On . Allow the reservoir to empty.
5. Discard the solution collected in the jug.
6. Fill the reservoir with clean water and turn the appliance back On to flush out the system and remove
any descaler residue. Discard the collected water and rinse the jug.
7. The appliance is now ready for use.
Note: Use the Jug to fill the reservoir to ensure it’s maximum capacity is not exceeded.
The maximum amount of water the reservoir can contain is 2.2 litres.
Note: During operation, steam may rise from the appliance and loud bubbling noises
may be heard. This is perfectly normal.
WARNING: The jug becomes hot during operation. Always pick up the jug by the handle
to avoid injury.
Note: Use a suitable descaler and follow the instructions on the container.
Note: BUFFALO recommend that this appliance is descaled every 3 months or more
frequently in hard water areas.

4
UK
Troubleshooting
Technical Specifications
Electrical Wiring
This appliance is supplied with a 3 pin, moulded, BS1363 plug and lead, with a 13 amp fuse as standard.
The plug is to be connected to a suitable mains socket.
This appliance is wired as follows:
• Live wire (coloured brown) to terminal marked L
• Neutral wire (coloured blue) to terminal marked N
• Earth wire (coloured green/yellow) to terminal marked E
This appliance must be earthed, using a dedicated earthing circuit.
If in doubt consult a qualified electrician.
Electrical isolation points must be kept clear of any obstructions. In the event of any emergency
disconnection being required they must be readily accessible.
Fault Probable Cause Action
The unit is not
working
The unit is not switched on Check the unit is plugged in correctly and
switched on
Plug and lead are damaged Call BUFFALO agent or qualified technician
Fuse in the plug has blown Replace the plug fuse
Power supply Check power supply
Internal wiring fault Call BUFFALO agent or qualified technician
Coffee is not
coming from the
filter basket
No water in reservoir Turn Off and fill reservoir
Coffee is too compact within the
filter
Turn off, loosen coffee within the filter and
resume
Loud noise coming
from appliance
No water in reservoir Turn Off and fill reservoir
Model Voltage Power Current Reservoir
Capacity Weight Dimensions
h x w x d mm
DN487 230V 50Hz 2.2Kw 9.1A 2.2 litres 5.8kg 455 x 205 x 405

5
UK
Telephone Helpline: 0845 146 2887 (United Kingdom)
Compliance
The WEEE logo on this product or its documentation indicates that the product must
not be disposed of as household waste. To help prevent possible harm to human
health and/or the environment, the product must be disposed of in an approved and
environmentally safe recycling process. For further information on how to dispose of
this product correctly, contact the product supplier, or the local authority responsible
for waste disposal in your area.
BUFFALO parts have undergone strict product testing in order to comply with
regulatory standards and specifications set by international, independent, and federal
authorities.
BUFFALO products have been approved to carry the following symbol:
All rights reserved. No part of these instructions may be produced or transmitted in any form or by any means,
electronic, mechanical, photocopying, recording or otherwise, without the prior written permission of BUFFALO.
Every effort is made to ensure all details are correct at the time of going to press, however, BUFFALO reserve the
right to change specifications without notice.

6
NL
Klantenondersteuning: 040 – 2628080 (Nederland)
Veiligheidstips
• Plaatsen op een vlakke en stabiele ondergrond.
• De installatie en eventuele reparaties zijn door een servicetechnicus/vaktechnicus uit te voeren.
Verwijder geen componenten of servicepanelen van dit product.
• Raadpleeg en volg de plaatselijke en nationale regelgeving op m.b.t. tot het volgende:
• Wetgeving van gezondheid en veiligheid op de werkplaats
• Werkregels
• Brandpreventie
• IEE bekabelingsnormen
• Bouwverordeningen
• Dit apparaat NIET in water dompelen.
• Hete oppervlakken NIET aanraken.
• Laat het apparaat tijdens werking NIET zonder toezicht.
• Filterhouder tijdens het filterproces NIET verwijderen.
• Uitsluitend geschikt voor gebruik binnenshuis.
• Schakel het apparaat altijd uit en haal de steker uit het stopcontact wanneer u het apparaat niet
gebruikt.
• Dit apparaat mag uitsluitend in overeenstemming met deze instructies en door hiervoor opgeleide
personen worden gebruikt.
• Dit apparaat is niet geschikt voor kinderen.
• Laat verpakkingsmateriaal niet binnen handbereik van kinderen. Verpakkingsmateriaal in
overeenstemming met de regelgeving van de plaatselijke overheden als afval laten verwerken.
• Indien de stroomkabel beschadigd raakt, dient men deze door een BUFFALO technicus of aanbevolen
vaktechnicus te laten vervangen om gevaarlijke situaties te verhinderen.
Inleiding
Neem de tijd en lees deze handleiding aandachtig door. Een correct gebruik en onderhoud van deze
machine waarborgt de beste prestatie van uw BUFFALO product.
Verpakkingsinhoud
De verpakking bevat het volgende:
• BUFFALO Koffiezetapparaat
• Filterhouder
•Koffiekan
• Handleiding
BUFFALO is trots op de haar productkwaliteit en dienstverlening en controleer de inhoud van de
verpakkingen, tijdens de verpakkingsfase, op functionaliteit en schade.
Mocht u product door transport zijn beschadigd, neem dan onmiddellijk contact op met uw BUFFALO dealer.

7
NL Klantenondersteuning: 050 – 609999 (België)
Bediening
Locatie van alle onderdelen
Voor het eerste gebruik
BUFFALO raadt u aan om het apparaat te reinigen alvorens het eerste gebruik of wanneer het apparaat
gedurende een langere periode niet is gebruikt.
1. Vul het waterreservoir met koud water.
2. Schuif de lege filterhouder in de positie tussen de twee houdermarkeringen.
3. Plaats de koffiekan op het warmhoudplaatje onder de filterhouder.
4. Zet de koffieschakelaar op On. koffielampje licht op en kan vult zich met heet water.
5. Zit al het hete water in de koffiekan dan gaat het koffielampje uit. Schenk het hete water uit de
koffiekan.
6. Herhaal de stappen 1-5. Het apparaat is nu schoon.
Opmerking: Gebruik de koffiekan voor het vullen van het reservoir zodat de maximale
inhoud van de koffiekan niet wordt overschreden. Het water reservoir heeft een
maximale inhoud van 2,2 liter.
Opmerking: tijdens het zetten van koffie kan stoom opstijgen en kunnen bubbelende
geluiden hoorbaar zijn. Dit is normaal.
WAARSCHUWING: tijdens werking kan koffiekan heet worden. Grijp de koffiekan altijd
bij het handvat om eventueel letsel te voorkomen.
De indicator van de
waarschuwing
(Rood licht)
Brouwende indicator
(Groen licht)
De kruik van het
roestvrij staal
Waterreservoir
Op/van schakelaar
met indictor
Filterhouder
Het deksel van de
kruik

8
NL
Klantenondersteuning: 040 – 2628080 (Nederland)
Koffie zetten
1. Vul het waterreservoir met koud water.
2. Plaats een koffiefilter in de filterhouder.
3. Plaats de vereiste hoeveelheid koffie in de koffiefilter en schuif de filter in de filterhouder.
4. Plaats de koffiekan op het warmhoudplaatje onder de filterhouder.
5. Zet de koffieschakelaar op On. koffielampje licht op en kan vult zich met heet water.
6. Is de koffie klaar dan gaat het koffielampje uit..
Reiniging, zorg & onderhoud
• Alvorens het apparaat te reinigen dient men altijd de stroomvoorziening uit te schakelen.
• Gebruik zeepwater en een vochtige doek om de buitenkant van het apparaat te reinigen.
• Na reiniging goed drogen.
Opmerking: Gebruik de koffiekan voor het vullen van het reservoir zodat de maximale
inhoud van de koffiekan niet wordt overschreden. Het water reservoir heeft een
maximale inhoud van 2,2 liter.
Opmerking: tijdens het zetten van koffie kan stoom opstijgen en kunnen bubbelende
geluiden hoorbaar zijn. Dit is normaal.
WAARSCHUWING: tijdens werking kan de koffiekan heet worden. Grijp de koffiekan
altijd bij het handvat om eventueel letsel te voorkomen.

9
NL Klantenondersteuning: 050 – 609999 (België)
Ontkalken
Daar waar sprake is van hard water kan er na langdurig gebruik kalkafzetting in het apparaat voorkomen.
Het apparaat ontkalken:
1. Schenk een oplossing van ontkalkingsmiddel en water in het reservoir.
2. Zet de koffieschakelaar op On (Aan).
3. Schakel het apparaat na circa 4 minuten uit (Off) zodat het ontkalkingsmiddel de tijd krijgt om op de
kalkafzetting in te werken.
4. Zet de koffieschakelaar na circa 10 minuten opnieuw op On. Wacht tot het reservoir leeg is.
5. Schenk de verzamelde oplossing uit de koffiekan.
6. Vul het waterreservoir met schoon water en zet het apparaat opnieuw aan om het systeem te spoelen
en eventuele resten ontkalkingsmiddel te verwijderen. Schenk het verzamelde water uit de koffiekan
en maak de koffiekan schoon.
7. Het apparaat is nu gebruiksklaar.
Oplossen van problemen
Indien er een storing van uw BUFFALO product optreedt, dient u de onderstaande tabel te raadplegen
alvorens contact op te nemen met uw BUFFALO dealer of de Hulplijn te bellen.
Opmerking: gebruik een geschikt ontkalkingsmiddel en volg de gebruiksaanwijzingen
op de verpakking.
Opmerking: BUFFALO raadt u aan om dit apparaat om de 3 maanden te ontkalken en
met kortere intervallen wanneer er sprake is van hard water.
Probleem Mogelijke oorzaak Handeling
Het apparaat werkt
niet
Het apparaat staat uit Controleer of de stroomkabel van het apparaat is
aangesloten en of het apparaat is ingeschakeld
Steker en kabel zijn
beschadigd
Laat een BUFFALO technicus of een vaktechnicus
komen
De zekering in de steker is
gesprongen
Vervang de zekering in de steker
Stroomvoorziening Controleer de stroomvoorziening
Storing interne bedrading Laat een BUFFALO technicus of een vaktechnicus
komen
Er komt géén koffie uit
de filterhouder
Er is géén water in het
reservoir
Zet het apparaat uit en vul het reservoir
Koffie in de filter te
compact.
Zet het apparaat uit, maak de koffie in de filter
los en ga verder.
Het apparaat maakt
harde geluiden
Er is géén water in het
reservoir
Zet het apparaat uit en vul het reservoir

10
NL
Klantenondersteuning: 040 – 2628080 (Nederland)
Technische specificaties
Elektrische bedrading
Men dient de steker op een geschikt stopcontact aan te sluiten.
De bedrading van dit apparaat is als volgt:
• Stroomkabel (bruin) naar de aansluitklem gemarkeerd met L
• Neutraalkabel (blauw) naar de aansluitklem gemarkeerd met N
• Aardekabel (groen/geel) naar de aansluitklem gemarkeerd met E
Dit apparaat moet worden geaard met behulp van een adequaat aardingscircuit.
Bij twijfels raadpleeg een vakkundige elektricien.
De elektrische isolatiepunten mogen niet worden geblokkeerd. In geval van een nooduitschakeling moeten
de isolatiepunten direct toegankelijk zijn.
Productconformiteit
Het WEEE-logo op dit product of bijbehorende documentatie geeft aan dat het product
niet onder huisvuil valt en als zodanig ook niet mag worden verwerkt. Ter preventie
van mogelijke gevaren voor de gezondheid van personen en/of voor het milieu, dient
men dit product in overeenstemming met het voorgeschreven en milieuveilige
recyclingproces als afval te verwerken. Raadpleeg uw productleverancier of uw
plaatselijk afvalverwerkingsbedrijf voor meer informatie over de juiste
afvalverwerking van dit product.
De onderdelen van BUFFALO producten hebben strenge producttesten ondergaan om
te voldoen aan wettelijke regels en specificaties die door internationale,
onafhankelijke en landelijke overheden worden voorgeschreven.
BUFFALO producten zijn goedgekeurd en voorzien van het volgende symbool:
Alle rechten voorbehouden. Het is verboden om deze handleiding, hetzij volledig of gedeeltelijk, elektronisch of
mechanisch te reproduceren, kopiëren, op opslagmedia op te slaan of op enigerlei wijze over te dragen, zonder
voorafgaande goedkeuring van BUFFALO.
Wij hebben er alles aan gedaan om er zeker van te zijn dat op publicatiedatum van de handleiding alle details correct
zijn, desondanks, behoudt BUFFALO het recht voor om specificaties zonder aankondiging te wijzigen.
Model Voltage Vermogen Stroom Reservoirinhoud Gewicht Afmetingen
h x b x d mm
DN487 230V 50Hz 2.2Kw 9.1A 2.2 litres 5.8kg 455 x 205 x 405

11
FR
Conseils de sécurité
• Placez l'appareil sur une surface plane, stable.
• L'installation et les éventuelles réparations doivent être confiées à un dépanneur / technicien qualifié.
Ne retirez aucun composant ou cache de ce produit.
• Consultez les normes locales et nationales pour vous conformer aux :
• lois sur l'hygiène et la sécurité au travail ;
• codes de bonnes pratiques BS EN ;
• précautions contre le risque d'incendie ;
• réglementations sur les branchements électriques IEE ;
• règlements sur la construction.
• NE PAS immerger l'appareil.
• NE PAS toucher ses surfaces chaudes.
• NE PAS laisser l'appareil en service sans surveillance.
• NE PAS retirer le porte-filtre pendant le processus de filtration.
• Cet appareil est réservé exclusivement à une utilisation à l'intérieur.
• N'oubliez jamais d'éteindre et de débrancher l'appareil hors utilisation.
• L'utilisation de cet appareil est exclusivement réservée aux personnes formées en la matière et doit se
conformer à ces instructions.
• Cet appareil n'a pas été conçu pour être utilisé par un enfant.
• Gardez les emballages hors de portée des enfants. Débarrassez-vous des emballages conformément
aux règlements des autorités locales.
• Un cordon d'alimentation endommagé doit être remplacé par un agent BUFFALO ou un technicien
qualifié recommandé, pour éviter tout danger.
Introduction
Nous vous invitons à consacrer quelques instants à la lecture attentive de ce manuel. L'entretien et
l'utilisation appropriés de cet appareil vous permettront de tirer le meilleur de votre produit BUFFALO.
Contenu de l'emballage
Eléments fournis de série :
• Machine à café BUFFALO
•Porte-filtre
•Verseuse
• Mode d'emploi
BUFFALO attache une grande importance à la qualité et au service et veille à fournir des produits en parfait
état opérationnel, parfaitement intacts au moment de l'emballage.
Nous vous prions de contacter votre revendeur BUFFALO immédiatement si vous constatez un dommage
quelconque survenu pendant le transport du produit.

12
FR
Standard d'assistance téléphonique: 08 20 30 01 16 (Français)
Utilisation
Emplacement des commandes
Avant la première mise en service
BUFFALO vous recommande de nettoyer la machine avant de la mettre en service pour la première fois ou
après une période d'inutilisation prolongée.
1. Remplissez le réservoir d'eau froide.
2. Faites coulissez le porte-filtre vide à sa place, entre les deux languettes du porte-filtre.
3. Placez la verseuse sur la plaque chauffante inférieure, sous le porte-filtre.
4. Mettez l'interrupteur marche/arrêt de filtration sur marche (ON) . TLe témoin de filtration s'allume et la
verseuse se remplit progressivement d'eau chaude.
5. À la fin du cycle, le témoin de filtration s'éteint. Jetez l'eau chaude contenue dans la verseuse.
6. Répétez les étapes 1 à 5. La machine est propre.
Remarque : Servez-vous de la verseuse pour remplir le réservoir, pour éviter de
dépasser sa capacité maximum. Le réservoir peut contenir jusqu'à 2,2 litres d'eau
(contenance maximum).
Remarque : En service, il est possible que de la vapeur monte de la machine et qu'un
bouillonnement bruyant se produise. Ces phénomènes sont tout à fait normaux.
AVERTISSEMENT : La verseuse chauffe en service. Veillez à toujours prendre la verseuse
par l'anse, pour éviter tout risque de blessure.
Indicateur
d’avertissement
(lumiere rouge)
Indicateur de
brassage (feu vert)
Cruche d’cier
inoxydable
Reservoir d’eau
Commutateur
‘MArche/Arret’
avec l’indicateurr
Porte-filtre
Couvercle de
cruche

13
FR
Pour faire le café
1. Remplissez le réservoir d'eau froide.
2. Placez un filtre papier dans le porte-filtre.
3. Mesurez la quantité voulue de café dans le filtre papier et positionnez le porte-filtre.
4. Placez la verseuse sur la plaque chauffante inférieure, sous le porte-filtre.
5. Mettez l'interrupteur marche/arrêt de filtration sur marche (ON) . TLe témoin de filtration s'allume et la
verseuse se remplit progressivement d'eau chaude.
6. À la fin du cycle, le témoin de filtration s'éteint.
Nettoyage, entretien et maintenance
• Veillez à toujours éteindre et débrancher l'appareil de la prise secteur avant de le nettoyer.
• Nettoyez l'extérieur de l'appareil à l'aide d'un chiffon humide imbibé d'eau savonneuse.
• Veillez à bien l'essuyer après nettoyage.
Remarque : Servez-vous de la verseuse pour remplir le réservoir, pour éviter de
dépasser sa capacité maximum. Le réservoir peut contenir jusqu'à 2,2 litres d'eau
(contenance maximum).
Remarque : En service, il est possible que de la vapeur monte de la machine et qu'un
bouillonnement bruyant se produise. Ces phénomènes sont tout à fait normaux.
AVERTISSEMENT : La verseuse chauffe en service. Veillez à toujours prendre la verseuse
par l'anse, pour éviter tout risque de blessure.

14
FR
Standard d'assistance téléphonique: 08 20 30 01 16 (Français)
Détartrage
Dans les zones où l'eau est très calcaire, le calcaire peut s'accumuler sur les parois de la machine à café au
bout d'un certain temps d'utilisation prolongée. Pour détartrer l'appareil :
1. Versez la solution de détartrage et l'eau dans le réservoir.
2. Mettez l'interrupteur marche/arrêt de filtration sur marche (ON) .
3. Au bout d'environ quatre minutes, éteignez la machine à café pour donner le temps à la solution de
détartrage de faire effet.
4. Attendez environ 10 minutes, puis mettez l'interrupteur marche/arrêt de filtration sur marche (ON) .
Attendez que le réservoir se vide.
5. Jetez la solution recueillie dans la verseuse.
6. Remplissez le réservoir d'eau propre et rallumez la machine pour rincer le système et le débarrasser
d'éventuels résidus de produit de détartrage. Jetez l'eau recueillie et rincez la verseuse.
7. La machine à café est prête à l'emploi.
Dépannage
Remarque : Utilisez le produit de détartrage qui convient et suivez les consignes de
l'emballage.
Remarque : BUFFALO vous recommande de procéder au détartrage de cette machine à
café tous les trois mois ou plus fréquemment dans les zones où l'eau est très calcaire.
Dysfonctionnement Cause probable Intervention
L'appareil ne
fonctionne pas
L'appareil n'est pas allumé Vérifier que l'appareil est bien branché et
allumé
La prise et le cordon sont
endommagés
Appeler un agent BUFFALO ou un
technicien qualifié
Alimentation Vérifier l'alimentation
Problème de branchement interne Appeler un agent BUFFALO ou un
technicien qualifié
Le café ne sort pas du
porte-filtre
Le réservoir est vide Eteindre la machine et remplir le
réservoir
Le café est trop tassé dans le filtre Eteindre la machine, aérer le café dans le
filtre et remettre la machine en marche
La machine émet un
bruit sourd
Le réservoir est vide Eteindre la machine et remplir le
réservoir

15
FR Standard d'assistance téléphonique: 050 – 600006 (Belgique)
Spécifications techniques
Raccordement électrique
La prise doit être reliée à la prise secteur qui convient.
Cet appareil est câblé comme suit :
• Fil conducteur (brun) à la borne marquée L
• Fil neutre (bleu) à la borne marquée N
• Fil de terre (vert / jaune) à la borne marquée E
Cet appareil doit être raccordé à la terre, par le biais d'un circuit de mise à la terre dédié.
En cas de doute, consultez un électricien qualifié.
Les points d'isolation électrique doivent être libres de toute obstruction. En cas de débranchement requis
en urgence, ils doivent être facilement accessibles.
Conformité
Le logo WEEE qui figure sur ce produit ou sa documentation indique qu'il ne doit pas
être mis au rebut avec les ordures ménagères. Pour éviter qu'il ne présente un risque
pour la santé humaine et / ou écologique, confiez la mise au rebut de ce produit à un
site de recyclage agréé respectueux de l'environnement. Pour de plus amples détails
sur la mise au rebut appropriée de ce produit, contactez le fournisseur du produit ou
l'autorité responsable de l'enlèvement des ordures dans votre région.
Les pièces BUFFALO ont été soumises à des tests rigoureux pour pouvoir être
déclarées conformes aux normes et spécifications réglementaires définies par les
autorités internationales, indépendantes et fédérales.
Les produits BUFFALO ont été déclarés aptes à porter le symbole suivant :
Tous droits réservés. La production ou transmission, partielles ou intégrales, sous quelque forme que ce soit ou par
n'importe quel moyen, tant électronique que mécanique, sous forme de photocopie, d'enregistrement ou autre de
ce mode d'emploi sont interdites sans l'autorisation préalablement accordée par BUFFALO.
Nous nous efforçons, par tous les moyens dont nous disposons, de faire en sorte que les détails contenus dans le
présent mode d'emploi soient corrects en date d'impression. Toutefois, BUFFALO se réserve le droit de changer les
spécifications de ses produits sans préavis.
Modèle Tension Puissance Courant Capacité du
réservoir Poids Dimensions
h x l x p mm
DN487 230V 50Hz 2.2Kw 9.1A 2.2 litres 5.8kg 455 x 205 x 405
Table of contents
Languages:
Other Buffalo Coffee Maker manuals

Buffalo
Buffalo F249 User manual

Buffalo
Buffalo CW306 User manual

Buffalo
Buffalo CW306 User manual

Buffalo
Buffalo CW305 User manual

Buffalo
Buffalo CT815 User manual

Buffalo
Buffalo G108 User manual

Buffalo
Buffalo F131 User manual

Buffalo
Buffalo CT815 User manual

Buffalo
Buffalo CW306 User manual

Buffalo
Buffalo APBG108 User manual