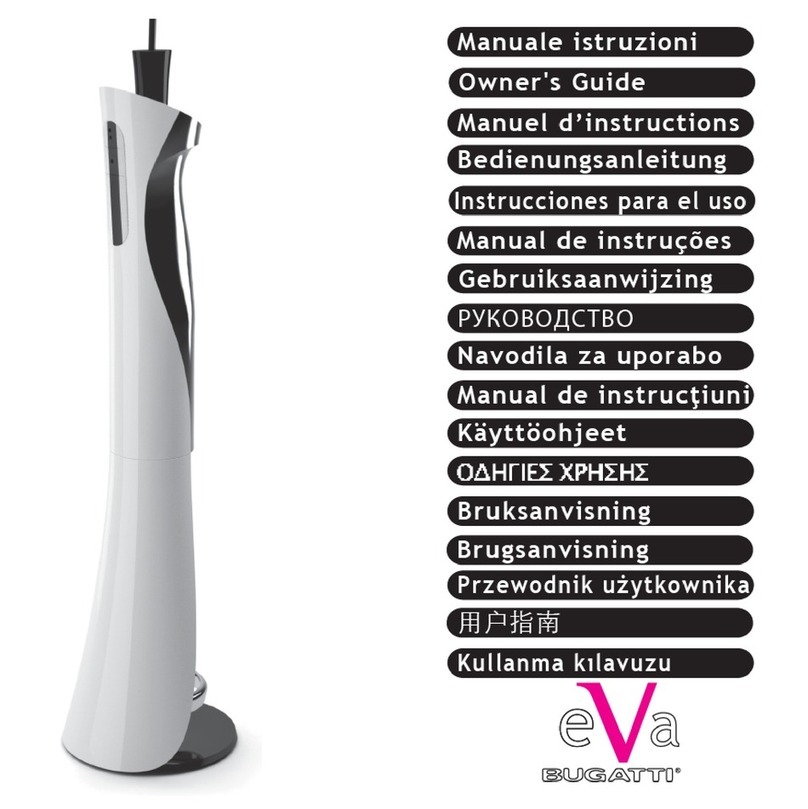
Bugatti Noun User manual


Pag. 1 italiano
Pag. 21 english
Pag. 41 français
Pag. 61 deutsch
Pag. 81 español
Pag. 101 nederlands
Pag. 121 русский
Pag. 141 polski
Pag. 161 ةيبرعلا
Pag. 181 中文
Pag. 201 תירבע
Visita il sito Bugatti per
CENTRI ASSISTENZA - MANUALI D’USO - REGISTRARE LA GARANZIA - VIDEO
Visit Bugatti website to find
SERVICE CENTRES - OWNERS’S GUIDES - WARRANTY REGISTRATION - VIDEO
www.casabugatti.it

21
IMPORTANT NOTICES
Dear Customer, thank you for choosing Noun, the smart cooking appliance from Casa Bugatti. Like
any domestic appliance, this smart cooking appliance must be used with care and attention to
prevent people getting burnt and the smart cooking appliance getting damaged.
BEFORE USING THE SMART COOKING APPLIANCE FOR THE FIRST TIME, READ
ALL THE INSTRUCTIONS ON INSTALLATION, USE AND MAINTENANCE AND
THE SAFETY INSTRUCTIONS CAREFULLY. DO NOT USE THE SMART COOKING
APPLIANCE UNLESS YOU ARE THOROUGHLY FAMILIAR WITH THE INSTRUCTIONS.
WARNING
NO LIABILITY IS ACCEPTED FOR DAMAGE DUE TO:
- INCORRECT USE OR USE OTHER THAN FOR ITS INTENDED PURPOSE
- CONTINUOUS USE OF THE SMART COOKING APPLIANCE WITHOUT ANY
BREAD/FOOD
- REPAIRS CARRIED OUT BY UNAUTHORIZED PEOPLE
- USE OF NON-ORIGINAL SPARE PARTS OR ACCESSORIES
Instructions for use
For further information, or in the event of problems that have not been suciently addressed in these
instructions, contact Customer Care at BUGATTI.
SAVE THESE INSTRUCTIONS CAREFULLY AND REMEMBER TO PASS
THEM ON TO THOSE WHO WILL USE THE SMART COOKING APPLIANCE AFTER YOU.
If the instructions are lost before you use the smart cooking appliance, request the instruction booklet from
casabugatti.com.
On the rst page of the cover you will nd the illustrations related to the text. Keep the rst page open
as you read the instructions on use.


22
Index
Pag. 23 TECHNICAL FEATURES
Pag. 23 DESCRIPTION OF SMART COOKING APPLIANCE PARTS
Pag. 23 SMART COOKING APPLIANCE CONTROLS
Pag. 24 SETTING CONTROLS
Pag. 24 WARNING
Pag. 25-28 IMPORTANT SAFEGUARDS
Pag. 29 Installation and starting up
Pag. 30-34 Advice and recommendation on use
Pag. 31 Toast function
Pag. 31 Defrost function
Pag. 32 Bagel function
Pag. 33 Cooking function
Pag. 33 Preset cooking programs
Pag. 33 Manual cooking
Pag. 34 Cooking with B-Chef
Pag. 35 Cleaning and maintenance
Pag. 36-37 Troubleshooting
Pag. 37-39 WARRANTY

23
TECHNICAL FEATURES
Power supply See rating plate underneath machine
Power rating See rating plate underneath machine
Dimensions 535 x 225 x h 226 mm approximately
Body Stainless steel; Ceramic glassr
Weight 2,5 Kg approximately
Length of power supply cable 1,0 meters approximately
Incorporated thermal overload protection Built in
Crumb tray Included
Certications See rating plate underneath machine
DESCRIPTION OF SMART COOKING APPLIANCE PARTS
SMART COOKING APPLIANCE CONTROLS
Fixed front glass heating element
Moving back glass heating element
Slot
Base
Crumb tray
Cable with plug
Pulling lever
Protection glass ( on both heating elements 1 and 2 )
Lift
1
2
3
4
5
6
7
8
9
Proximity Touch Screen Display
On/o button
B-Chef button
Close button
Open button
Stop button
Start button
Bagel button
Defrost button
Toast button
Cooking button
10
11
12
14
15
16
18
19
20
21
22

24
SETTING CONTROLS
Timer button
Temperature button
Browning button
Preset button
“-” Decreasing (Time / Temperature / Browning level / Cooking preset)
“+” Increasing (Time / Temperature / Browning level / Cooking preset)
Bluetooth icon
23
24
25
26
27
28
29
WARNING
Attention Hot Surfaces icon 30

25
IMPORTANT SAFEGUARDS
READ ALL INSTRUCTIONS CAREFULLY. THE SMART COOKING APPLIANCE
MUST BE USED ONLY BY ADULTS WHO HAVE BEEN TRAINED IN ITS USE.
KEEP THESE INSTRUCTIONS CAREFULLY.
1.TO PREVENT SERIOUS INJURIES, ELECTRIC SHOCKS AND FIRE TO PEO-
PLE, DO NOT IMMERSE CABLE (6), PLUGS, BASE (4) AND BOTH HEATING
ELEMENTS (1 and 2), OR THE SMART COOKING APPLIANCE ITSELF IN
WATER OR OTHER LIQUIDS, EITHER PARTIALLY OR TOTALLY. WARNING:
DANGER OF BURNS! PAY ATTENTION TO HOT SURFACES!
DO NOT TOUCH HOT SURFACES. USE HANDLES OR KNOBS. USE AN OVEN GLOVE WHEN
TOUCHING VERY HOT PARTS AND ALL SURFACES OF THE SMART COOKING APPLIANCE:
DANGER OF BURNS!
2. THIS APPLIANCE IS INTENDED TO BE USED IN HOUSEHOLD AND SIMILAR APPLICATIONS
SUCH AS:
- STAFF KITCHEN AREAS IN SHOPS, OFFICES AND OTHERS WORKING ENVIRONMENTS;
- FARM HOUSES;
- BY CLIENTS IN HOTELS, MOTELS AND OTHER RESIDENTIAL TYPE ENVIRONMENTS;
- BED AND BREAKFAST TYPE ENVIRONMENTS
USE THE SMART COOKING APPLIANCE ONLY FOR ITS INTENDED USE. Do not make any tech-
nical modications that might cause risks.
3. THIS APPLIANCE CAN BE USED BY CHILDREN AGED FROM 8 YEARS AND
ABOVE AND PERSONS WITH REDUCED PHYSICAL, SENSORY OR MENTAL CA-
PABILITIES OR LACK OF EXPERIENCE AND KNOWLEDGE ONLY IF THEY HAVE
BEEN GIVEN SUPERVISION OR INSTRUCTION CONCERNING THE USE OF
THE APPLIANCE IN A SAFE WAY AND DEMONSTRATE TO UNDERSTAND THE
HAZARDS INVOLVED. CHILDREN SHALL NOT PLAY WITH THE APPLIANCE.

26
CLEANING AND USER MAINTENANCE SHALL NOT BE MADE BY CHILDREN
UNLESS THEY ARE OLDER THAN 8 AND SUPERVISED. KEEP THE APPLIAN-
CE AND ITS CORD OUT OF REACH OF CHILDREN LESS THAN 8 YEARS OLD.
4. NEVER TOUCH LIVE ELECTRICAL PARTS. They may cause electric shocks and serious perso-
nal injury. Connect the appliance to a wall socket having the appropriate voltage. The voltage must corre-
spond to the voltage indicated on the rating plate underneath the smart cooking appliance. Make sure that
the socket that you are using is earthed .
DO NOT USE THE SMART COOKING APPLIANCE WITH BARE OR WET FEET.
5. A SHORT POWER CABLE WITH PLUG IS SUPPLIED TO REDUCE THE RISK THAT IT COULD
BECOME ENTANGLED IN OBJECTS, PEOPLE COULD TRIP OVER IT AND THAT IT COULD
WRAP ITSELF AROUND A LONGER CABLE. LONG DETACHABLE POWER CABLES OR EXTEN-
SION CABLES ARE AVAILABLE BUT THEY MAY BE USED ONLY IF A QUALIFIED ELECTRICIAN
CAN CONFIRM THAT THEY COMPLY WITH WIRING REGULATIONS. DO NOT USE PLUG/
SOCKET ADAPTERS. IF A LONG DETACHABLE POWER CABLE OR EXTENSION CABLE IS USED:
a)THE ELECTRICAL RATING OF THE DETACHABLE POWER CABLE OR EXTENSION CABLE
SHOULD BE AT LEAST AS GREAT AS THE ELECTRICAL RATING OF THE SMART COOKING
APPLIANCE INDICATED UNDERNEATH THE SMART COOKING APPLIANCE ITSELF.
b)THE EXTENSION CABLE MUST BE OF THE 3-WIRE/POLE TYPE AND MUST BE EARTHED.
c) A LONG CABLE OR EXTENSION CABLE MUST NEVER PROTRUDE FROM FURNITURE OR
OVER COUNTER TOPS OR TABLE TOPS WHERE IT MAY BE PULLED ON BY CHILDREN OR
TRIPPED OVER.
d) DO NOT PLACE SMART COOKING APPLIANCE OR CABLES ON OR NEAR A HOT GAS RING
OR ELECTRIC HOTPLATE, OR IN OR NEAR THE OVEN.
e) DO NOT USE OUTDOORS.
f) DO NOT LET THE CABLES HANG OVER THE EDGE OF THE TABLE OR COUNTER, OR TOU-
CH HOT SURFACES.
g) DO NOT OPERATE THE SMART COOKING APPLIANCE WITH A DAMAGED CORD OR PLUG
OR AFTER THE APPLIANCE DEVELOPS FAULTS, OR HAS BEEN DAMAGED IN ANY MANNER.
Return appliance to the nearest authorized service facility for examination, repair or adjustment.
h) IF THE SUPPLY CORD IS DAMAGED, IT MUST BE REPLACED BY THE MANUFACTURER,

27
IMPORTANT SAFEGUARDS
ITS AUTHORIZED SERVICE CENTRE OR SIMILARLY QUALIFIED PERSONS IN ORDER TO
AVOID A HAZARD. The use of accessory attachments not recommended by the appliances manufacturer may
result in re, electric shock or serious injuries to persons.
6. MAKE SURE THAT CHILDREN CANNOT PLAY WITH THE SMART COOKING
APPLIANCE. CHILDREN ARE NOT AWARE OF THE DANGERS OF ELECTRICAL
APPLIANCES.
7.Place the smart cooking appliance on a at surface, making sure that the feet adhere rmly to the support sur-
face so that the appliance cannot be overturned.
DO NOT PLACE THE SMART COOKING APPLIANCE ON OR NEAR HOT SURFACES OR
NEAR NAKED FLAMES.
8. The temperature of accessible surface may be high when the appliance is operating. Pay attention
to hot surfaces. Use handles or knobs or wear oven gloves. Be very careful when touching
very hot parts and all surfaces of the smart cooking appliance. Absolutely never put your
ngers between the two glass heating elements (1 and 2). WARNING! DANGER OF
BURNS! THE AREAS SURROUNDING THE TWO GLASS HEATING ELE-
MENTS (1AND 2) BECOME VERY HOT DURING USE.
9. To ensure that the smart cooking appliance works correctly, place it on a at surface in an adequately lighted
and hygienic environment with an easily accessible electrical socket. Keep the smart cooking appliance at least
10 cm away from the walls.
10. NEVER TOUCH THE APPLIANCE WITH WET OR DAMP CLOTHS/HANDS. Always unplug the
smart cooking appliance when it is not in use and before cleaning. DO NOT UNPLUG THE APPLIANCE BY
PULLING ON THE CABLE. Allow the smart cooking appliance to cool before tting or removing parts, and before
cleaning. The smart cooking appliance must be cleaned with a dry or slightly dampened non-abrasive cloth soaked with
a few drops of neutral non-corrosive detergent (never use solvents).
11. BREAD SLICES THAT ARE LARGER THAN THE SLOTS (3) AS WELL AS ALUMI-
NIUM FOIL MUST NOT BE INSERTED IN THE SLOTS (3) AS THEY CAUSE A FIRE,
ELECTRIC SHOCK OR SERIOUS INJURY TO PERSONS.
12. Bread is a foodstu which may catch re. DANGER OF FIRE: a re may occur if the smart cooking appliance
is covered or when in operation. Do not use the smart cooking appliance under or near ammable material such
as curtains, wallpapers, walls and the like.

28
DURING USE, THE APPLIANCE MUST BE LOOKED AFTER.
In case of re, use carbon-dioxide (CO2) extinguishers.
DO NOT USE WATER OR POWDER EXTINGUISHERS.
13. THE APPLIANCES ARE NOT INTENDED TO BE OPERATED BY MEANS OF AN
EXTERNAL TIMER OR SEPARATE REMOTE CONTROL SYSTEM.
14. In the event of faults, defects or suspected faults after a fall, unplug the smart cooking appliance im-
mediately. Never start up a faulty appliance. The repairs must be carried out by the BUGATTI Service Centre.
Contact your dealer and/or contact Customer Care at BUGATTI or send an e-mail to [email protected].

29
Installation and starting up
The original packaging has been designed for dispatch by post. Keep it in case you need to return the smart cooking
appliance to the supplier. Before installing the smart cooking appliance, comply with all the points of the safety
instructions on the previous pages. After removing the smart cooking appliance from its packaging, make sure that
it is in perfect condition and make sure that no kind of matter, packaging material, warranty sheets or similars have
accidentally fallen inside the slots (3) during transport or when opening the packaging. THE PLASTIC BAG
IN WHICH THE SMART COOKING APPLIANCE IS PACKAGED SHOULD BE KEPT OUT
OF REACH OF CHILDREN AS IT POSES A SUFFOCATION HAZARD. In order to remove dust
that may have accumulated on the smart cooking appliance, simply dust it o with a dry soft cloth.
ATTENTION:
A: Both glass heating elements (1 and 2) are exactly the same. During
installation, be careful to correctly plug in both internal sockets that
connect the smart cooking appliance base (4) with each glass heating
element (1 and 2). Firmly hold the glass heating element by the pulling
levers (7). Insert it into the slot correctly. When it is in the slot, push
down the pulling levers (7) in their place and push the glass heating
element downwards.
Repeat the same steps with the other heating element wall glass. After
you have carried out the above steps and have strictly followed the
safety standards, proceed to connect to the power supply.
CONNECTING TO POWER SUPPLY: ELECTRIC
CURRENT CAN KILL! FOLLOW SAFETY INSTRUCTIONS
STRICTLY. Plug the power cable (6) of the Noun into its base (4) and insert the other side of the cable (6) into
a power socket, the voltage of which corresponds to the voltage indicated on the rating plate underneath the
smart cooking appliance. To disconnect, make sure that the smart cooking appliance is not running or press the on/
o button (11) and wait for the smart cooking appliance to stop and the lift (3) to reach the bottom. Remove the
plug from the wall socket. DO NOT UNPLUG THE SMART COOKING APPLIANCE FROM THE
POWER POINT BY PULLING ON THE CABLE.
Make sure that the electric socket that you are using is suitably earthed .Never use faulty or damaged power
cables. Use an extension cable only after making sure that it is in perfect condition (adhere strictly to the safety
instructions specied in point 6 of IMPORTANT SAFEGUARDS). NEVER ALLOW PARTS
CARRYING LIVE VOLTAGE TO COME INTO CONTACT WITH WATER: YOU MAY CAUSE A
SHORT CIRCUIT! (adhere strictly to all points of the safety instructions specied before).
The smart cooking appliance may emit a pungent odour or light smoke the rst time you use it. This is a normal
result of the manufacturing process. Odour or smoke are harmless and will quickly disperse.
CONTINUOUS USE OF THE SMART COOKING APPLIANCE WITHOUT ANY BREAD/FOOD
MAY DAMAGE IT IRREPARABLY AND THUS AUTOMATICALLY VOID THE WARRANTY.
Advice and recommendations on use

30
Advice and recommendations on use
1) ADHERE STRICTLY TO ALL SAFETY, INSTALLATION AND COMMISSIONING
INSTRUCTIONS SPECIFIED BEFORE.
2) When the plug (6) is inserted into the socket the display (10) lights up, the lift (3) automatically goes up and Noun
emits a “beep”. This is a very important feature which indicates that the smart cooking appliance is connected to
the power supply .
3) If no buttons are pressed for 3 minutes, the smart cooking appliance goes into “sleep” mode, the lift (3) goes
down and the white light on the On/O button (11) blinks slowly to warn that the smart cooking appliance is plugged
into the electric power supply. To resume operations, press the On/O button (11).
4) It is also extremely important to remove all crumbs and drops from the crumb tray before using the smart cooking
appliance.
5) Bread slices or food width must be between 8 and 35 mm and no longer than 290 mm.
6) DO NOT USE THE SMART COOKING APPLIANCE UNLESS THE CRUMB TRAY (5) IS
CORRECTLY INSERTED INTO THE SMART COOKING APPLIANCE BASE (4). After using the
smart cooking appliance, always unplug it and empty the crumb tray (5) in accordance with the CLEANING and
MAINTENANCE instructions.
7)The smart cooking appliance is not equipped with bun warmer. If you want you can heat/reheat bread or food
placing it on the top of the glass heating elements (1 and 2) and using the Toast function (see Toast function below).
ATTENTION: thanks to the heating elements features that heat by far infrared rays and thanks to the fact that
this system cooks the food by contact, Noun allows to cook at the perfect cooking temperature any kind of dierent
food; not only bread, but also slices of vegetables, meat, sh only by using the high temperature cooking bags (up
to 250°c).
Advice and recommendations on use

31
Advice and recommendations on use
A) TOAST FUNCTION
If the display is switched o, the lift (3) is down. Press on the On/O button (11), the appliance emits a
“beep”, the display (10) switches on and the lift (3) comes up. When the lift (3) reaches the top, Noun emits
another “beep”; it means that the appliance is ready to work.
1) Put the bread slices on the tray lift (3) of the smart cooking appliance. To avoid drops of dierent food, we
suggest to use high temperature cooking bags to toast sandwiches (e.g. ham and cheese ones).
2) Select the Toast function (21) on the display (10) and both Toast button (21) and Start button (18) start to
blink.
3) It is automatically proposed the browning level 3.However Noun gives the possibility to choose among 6
dierent grades of browning, from 1 to 6. To set a dierent browning level, touch the browning button (25)
and it starts to blink (it blinks for 5 seconds and then it stops. If this happens, please re-touch the browning
button 25). Then, touching the buttons 27 and 28 you can change the browning level: the higher the number,
the higher the browning level. Automatically every setting is conrmed after 5 seconds, and it is shown by
the icon that stops to blink.
4) To start the toasting function press the Start button (18). The lift (3) goes down and when it reaches the
bottom of the base (4) the buzzer starts to beep and the close button (14) starts to blink: it informs that to
start the toasting function the glass heating elements must be closed by touching on the Close button (14).
To close them easily, keep on touching the close button (14) until the moving glass heating element (2)
gently touches the food on the lift (3) between the two glass heating elements (1 and 2).
5) On the display (10) the timer/time button (23) starts to count down showing the remaining toasting time.
When the toasting cycle is nished, the appliance emits 5 “beep”, the glass heating element (2) opens and
the lift (3) goes up automatically. When the lift (3) reaches the top, Noun emits another “beep”; it means
that the appliance has completed the opening and it is possible to take out the food from the smart cooking
appliance. If during the process you want to stop the toasting function, simply touch the Stop button (16).
B) DEFROST FUNCTION
If the display is switched o, the lift (3) is down. Press on the On/O button (11), the appliance emits a
“beep”, the display (10) switches on and the lift (3) comes up. When the lift (3) reaches the top, Noun emits
another “beep”; it means that the appliance is ready to work.
1) Put the slices of frozen bread on the tray lift (3) of the smart cooking appliance. To avoid drops of dierent
food, we suggest to use high temperature cooking bags to defrost sandwiches (e.g. ham and cheese ones).
2) Select the Defrost function (20) on the display (10) and both Defrost button (20) and Start button (18) start
to blink.
3) It is automatically proposed the browning level 3.However Noun gives the possibility to choose among 6
dierent grades of browning, from 1 to 6. To set a dierent browning level, touch the browning button (25)
and it starts to blink (it blinks for 5 seconds and then it stops. If this happens, please re-touch the browning
button 25). Then, touching the buttons 27 and 28 you can change the browning level: the higher the number,
the higher the browning level. Automatically every setting is conrmed after 5 seconds, and it is shown by

32
the icon that stops to blink.
4) To start the Defrost function press the Start button (18). The lift (3) goes down and when it reaches the
bottom of the base (4) the buzzer starts to beep and the close button (14) starts to blink: it informs that to
start the defrost function the glass heating elements must be closed by touching on the Close button (14). To
close them easily, keep on touching the close button (14) until the glass heating element (2) gently touches
the food on the lift (3) between the two glass heating elements (1 and 2).
5) On the display (10) the timer/time button (23) starts to count down showing the remaining defrosting time.
When the defrosting cycle is nished, the appliance emits 5 “beep”, the glass heating element (2) opens and
the lift (3) goes up automatically. When the lift (3) reaches the top, Noun emits another “beep”; it means
that the appliance has completed the opening and it is possible to take out the food from the smart cooking
appliance.
If during the process you want to stop the defrosting function, simply touch the Stop button (16).
C) BAGEL FUNCTION to toast only one external surface, the one in touch with glass heating element 1, of
the bread/bun. If the display is switched o, the lift (3) is down. Press on the On/O button (11), the
appliance emits a “beep”, the display (10) switches on and the lift (3) comes up. When the lift (3) reaches
the top, Noun emits another “beep”; it means that the appliance is ready to work.
1) The Bagel function is for bagels and other kinds of buns. This function enables to toast only one of the two
surfaces of the bun or bread slice. In this way you have a toasted and crunchy side whilst the other side
remains soft.
2) Put the bread slices on the tray lift (3) of the smart cooking appliance. To avoid drops of dierent food, we
suggest to use high temperature cooking bags to toast sandwiches (e.g. ham and cheese ones).
3) Select the Bagel function (19) on the display (10) and both Bagel button (19) and Start button (18) start to
blink.
4) It is automatically proposed the browning level 3.However Noun gives the possibility to choose among 6
dierent grades of browning, from 1 to 6. To set a dierent browning level, touch the browning button (25)
and it starts to blink (it blinks for 5 seconds and then it stops. If this happens, please re-touch the browning
button 25). Then, touching the buttons 27 and 28 you can change the browning level: the higher the number,
the higher the browning level. Automatically every setting is conrmed after 5 seconds, and it is shown by
the icon that stops to blink.
5) To start the bagel function press the Start button (18). The lift (3) goes down and when it reaches the
bottom of the base (4) the buzzer starts to beep and the close button (14) starts to blink: it informs that to
start the bagel function the glass heating elements must be closed by touching on the Close button (14). To
close them easily, keep on touching the close button (14) until the glass heating element (2) gently touches
the food on the lift (3) between the two glass heating elements (1 and 2).
6) On the display (10) the timer/time button (23) starts to count down showing the remaining toasting time.
When the toasting cycle is nished, the appliance emits 5 “beep”, the glass heating element (2) opens and
the lift (3) goes up automatically. When the lift (3) reaches the top, Noun emits another “beep”; it means
that the appliance has completed the opening and it is possible to take out the food from the smart cooking
appliance. If during the process you want to stop the bagel function, simply touch the Stop button (16).

33
D) COOKING FUNCTION
Thanks to the heating elements features that heat by far infrared rays and thanks to the fact that this system
cooks the food by contact, Noun allows to cook at the perfect cooking temperature any kind of dierent food:
slices of vegetables, meat, sh.
a)PRESET COOKING PROGRAMS
The function contains 5 preset cooking programs at 5 dierent temperatures:
1) Insert the food in high temperature cooking bags to have a more natural
cooking thanks to the food water and juice. This will keep all nutritive
features of every kind of food during the cooking. Put the food on the tray
lift (3) of the smart cooking appliance.
2) Select the Cooking function (22) on the display (10) and both Cooking
button (22) and Start button (18) start to blink.
3) It is automatically proposed the preset program 3 (200°C/392°F). To
select a dierent preset program
touch the preset button (26) and the preset number starts to blink (it blinks
for 5 seconds and then it stops. If this happens, please re-touch the preset
button 26). Then, touching the buttons 27 and 28 you can change the preset
cooking program from 1 to 5 (see the table above). Automatically every
setting is conrmed after 5 seconds, and it is shown by the icon that stops
to blink.
4) To start the cooking function press the Start button (18). The lift (3) goes down and when it reaches the
bottom of the base (4) the buzzer starts to beep and the close button (14) starts to blink: it informs that to
start the cooking function the glass heating elements must be closed by touching on the Close button (14).
To close them easily, keep on touching the close button (14) until the glass heating element (2) gently
touches the food on the lift (3) between the two glass heating elements (1 and 2).
5) On the display (10) the timer/time button (23) starts to count down showing the remaining cooking time.
When the cooking cycle is nished, the appliance emits 5 “beep”, the glass heating element (2) opens and
the lift (3) goes up automatically. When the lift (3) reaches the top, Noun emits another “beep”; it means
that the appliance has completed the opening and it is possible to take out the food from the smart cooking
appliance. If during the process you want to stop the toasting function, simply touch the Stop button (16).
b) MANUAL COOKING
The cooking function allows to set manually the time and the temperature, that goes from 50°C up to
300°C(see the below table):If the display is switched o, the lift (3) is down. Press on the On/O button
(11), the appliance emits a “beep”, the display (10) switches on and the lift (3) comes up. When the lift (3)
reaches the top, Noun emits another “beep”; it means that the appliance is ready to work. start to blink.
1) Insert the food in high temperature cooking bags to have a more natural cooking thanks to the food water
and juices, that will keep all nutritive features of every kind of food during the cooking. Put the food on the
tray lift (3) of the smart cooking appliance.
Programme Preset temperature
150 / 122°F
260 / 140°F
370 / 158°F
480 / 176°F
590 / 194°F
6100°C / 212°F
7150°C / 302°F
8200°C / 392°F
9250°C / 482°F
10 300°C / 572°F
Table of contents
Other Bugatti Kitchen Appliance manuals
Popular Kitchen Appliance manuals by other brands

TriStar
TriStar YB-2612 manual

Goldmedal
Goldmedal Top Half Antique Unifloss 3119 Series instruction manual

Silvercrest
Silvercrest SMA 550 A1 operating instructions

Crock-Pot
Crock-Pot Express CSC051X instruction manual

MAXSTAR
MAXSTAR TURBO MIX user manual

Silvercrest
Silvercrest SEAD 1800 A1 operating instructions

Goldmedal
Goldmedal Pop-A-Lot Series instruction manual

Goldmedal
Goldmedal Deluxe 60 Special 2660 instruction manual

Silvercrest
Silvercrest SCM 1500 B1 operating instructions

Greenlife
Greenlife NOW SHOWING Instruction booklet

Masterpro
Masterpro BGMP-9002 instruction manual

Goldmedal
Goldmedal G-Whiz 5908 instruction manual