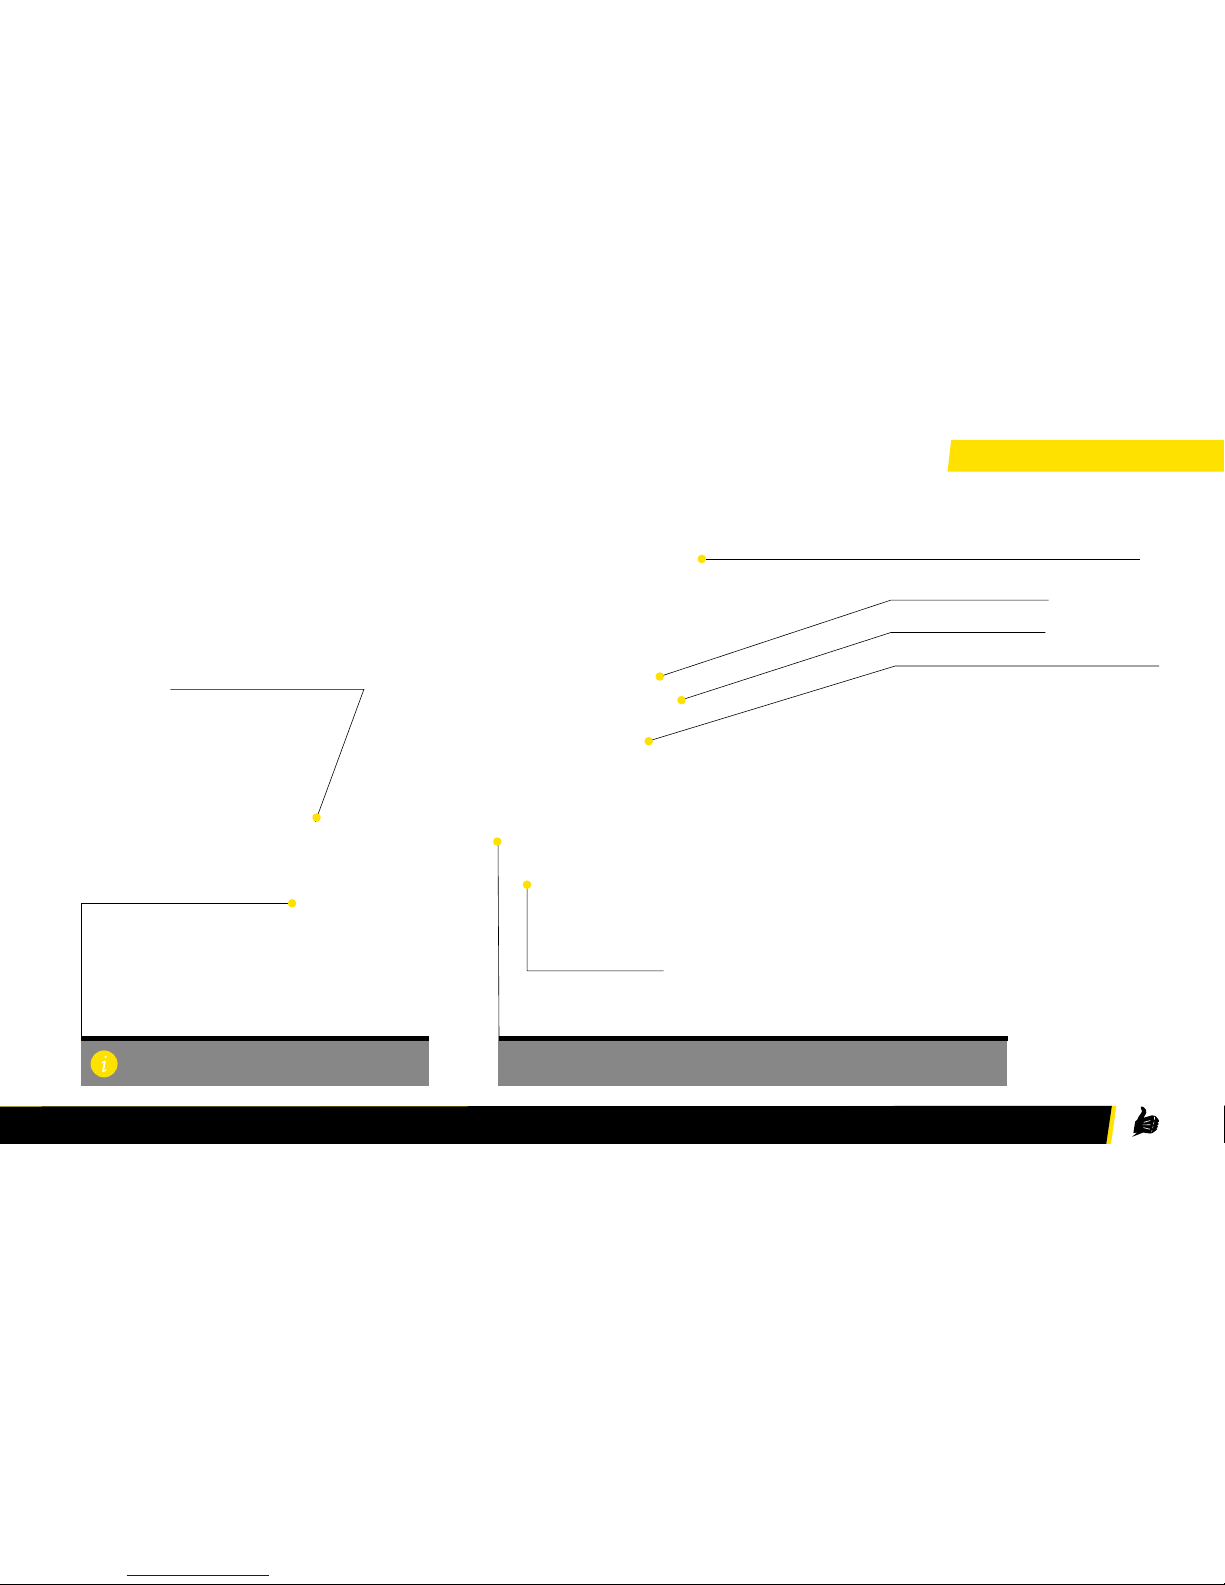
manuals.online logo
Brands
  1. Home
  2. •
  3. Brands
  4. •
  5. Bultaco
  6. •
  7. Bicycle
  8. •
  9. Bultaco BRINCO R User manual

Bultaco BRINCO R User manual

Popular Bicycle manuals by other brands

Grace ONE manual

Grace

Grace ONE manual

Woosh Gran Camino manual

Woosh

Woosh Gran Camino manual

Razor FLASHRIDER 360 user manual

Razor

Razor FLASHRIDER 360 user manual

TAUBIK SOHO 2.0 user manual

TAUBIK

TAUBIK SOHO 2.0 user manual

Oxybul FREEbul 331067 manual

Oxybul

Oxybul FREEbul 331067 manual

Cycle Force Group BICYCLE BABY TRAILER & JOGGER Assembly instructions

Cycle Force Group

Cycle Force Group BICYCLE BABY TRAILER & JOGGER Assembly instructions

Giant TWIST FREEDOM DX datasheet

Giant

Giant TWIST FREEDOM DX datasheet

RAMBO R1000X2M-FF-BFD manual

RAMBO

RAMBO R1000X2M-FF-BFD manual

Vermeiren SAFARI Maintenance manual

Vermeiren

Vermeiren SAFARI Maintenance manual

Velec A2/36V owner's manual

Velec

Velec A2/36V owner's manual

Cervélo S3 2019 Assembly manual

Cervélo

Cervélo S3 2019 Assembly manual

Festo EGSC-BS-KF Instructions & Operating

Festo

Festo EGSC-BS-KF Instructions & Operating

Gio Electric H1 Volt owner's manual

Gio Electric

Gio Electric H1 Volt owner's manual

Huka orthros manual

Huka

Huka orthros manual

DAHON CIAO - 2009 manual

DAHON

DAHON CIAO - 2009 manual

Aprimatic ONDA 500 Installation, use and maintenance instructions

Aprimatic

Aprimatic ONDA 500 Installation, use and maintenance instructions

Greyp G6 Series user manual

Greyp

Greyp G6 Series user manual

Babboe Carve-E user manual

Babboe

Babboe Carve-E user manual

manuals.online logo
manuals.online logoBrands
  • About & Mission
  • Contact us
  • Privacy Policy
  • Terms and Conditions

Copyright 2025 Manuals.Online. All Rights Reserved.

QUICK GUIDE
BULTACO BRINCO R
Index
1. Welcome kit
2. Know your Brinco
3. Get your Brinco ready
4. Drive and enjoy
Welcome
bultaquista
First of all thanks for buying a Bultaco. We are proud of having your confidence.
The new Brinco is a new and groundbreaking concept, the Moto- Bike, that
you will enjoy as never before dreamed.
For Bultaco, innovation is not only to reach new technological goals, but also to oer
new experiences. And Brinco is something completely new, ground-breaking, it is
the result of the will to transfer the Bultaco spirit to a new era, with a new language,
but always true to the classic brand values: passion, innovation, competition.
With Brinco, Bultaco proposes a whole new way to understand and live
the two wheels. A combination striking between the worlds of motorcycle and
bicycle: electric propulsion and physical experience of pedaling, independently, or
combining the two systems. You decide at every moment how to maximize the
perfect symbiosis between grip and pedal.
The following information contains the main highlights on how to enjoy your Brinco.
We also recomend to carefully read the User’s Manual which you can easily find at
www.bultacobrinco.com
Bultaco Team
The Welcome Kit of your new Brinco contains the items
listed below:
Bultaco Battery Charger
2 Key Cards
- Security Master
(marked with a yellow sticker)
- “Slave” Copy for daily use
Brinco Wristband Key
Bultaco Tools kit
(includes keys to disassemble
battery and rear wheel)
WELCOME KIT
Rear shifter
Front suspension adjustment
Battery safety lock
Battery connector
Power Cell Li-Ion Matrix Battery
Three phase permanent
magnet motor
Overdrive
DC/AC Three
phase controller
Implement Overdrive - Low Range Gearbox by pressing the button located
at the base of the crank, push the right hand side for higher speed use.
To prevent the derailleur from coming loose,
always lean it on its left side.
KNOW YOUR BRINCO / OVERVIEW
Rear brake
handle
Shifter
Stop button
Power Control
Button
Throttle
control
Front brake
lever
Dashboard
Allows you to select
and keep the same
power during your ride.
Activates/deactivates the
throttle control.
Pressed = OFF
Unpressed = ON
WARNING
IDENTIFY CORRECTLY BRAKES
POSITIONING. The front brake lever
is on the right. The rear brake lever
is on the left handlebar grip.
Always make sure, before
switching ON your Brinco, that the
accelerator returns correctly to its
position when you release it after
accelerating.
While using the POWER
CONTROL button please increase
caution.
ALWAYS check that the vehicle
is turned o after every use. Stop
button in OFF position.
KNOW YOUR BRINCO / HANDLEBAR CONTROLS
Battery level Driving mode
Speedometer
NFC Antenna to lock/unlock
your Brinco
Activation Indicator
Warning
Indicator MODE
Function
3 driving modes:
Sport / Tour / Eco
Sets to 0 the
odometer.
SET
Function
Low battery
Indicator Odometer/ Trip
WARNING
WARNING INDICATOR.
Flashing light: keep driving and enjoying your
Brinco. The self-protection system will regulate the
power delivery to decrease your Brinco’s level of
demand.
Steady light: vehicle will stop. Check the user’s
Manual for the full list of warning signs.
To improve battery life as much as possible and
optimize its performance, recharge it after every use.
At the Driving Mode’s right side you will find the
instant power value in W.
Whenever the dashboard is illuminated your Brinco
will be on, but it only will be in running condition
when stop button is ON.
KNOW YOUR BRINCO / DASHBOARD
1. Seat: adjust the height to your size
2. Handlbar: adjust the height to your size
3. Mechanical Components: make sure that all items are correctly set.
4. Brakes: adjust the position of the handles, check its operation and
familiarise with the brake levers.
5. Suspension: set both front and rear as you prefer.
6. Tires: check condition and pressure. [Recommended pressure: 1.8-2.2 BAR]
7. Throttle lever: handle it carefully and release to check that it correctly
returns to its initial position (make sure to do it with the stop button in OFF
position).
8. Battery: charge it for maximum performance. Do not forget that when the
battery indicator on the dashboard displays only two lines, you can use only
the ride map eco and tour.
Before riding your Brinco,
ensure everything works properly
GET YOUR BRINCO READY
WARNING
Enter the key provided by Bultaco to
unlock the battery safety lock.
Remove the battery retaining
screw.
Unplug the power cord from
the battery by hand turning the
connector housing a quarter turn
counterclockwise and pulling it
4.
3.
2.
1.
Hold the battery firmly, rotate it
slightly on its base to release the
anchoring with the chassis.
Once the battery is disconnected
from the lower support, raise the
battery to fully remove it. You can now
connect it to the charger.
Battery: Removal, charging and reassembling
To reassemble your battery, follow the steps described in
reverse order.
If you want to charge your battery without removing
it you must follow only step 1 and directly connect it to the
charger turning it counterclockwise.
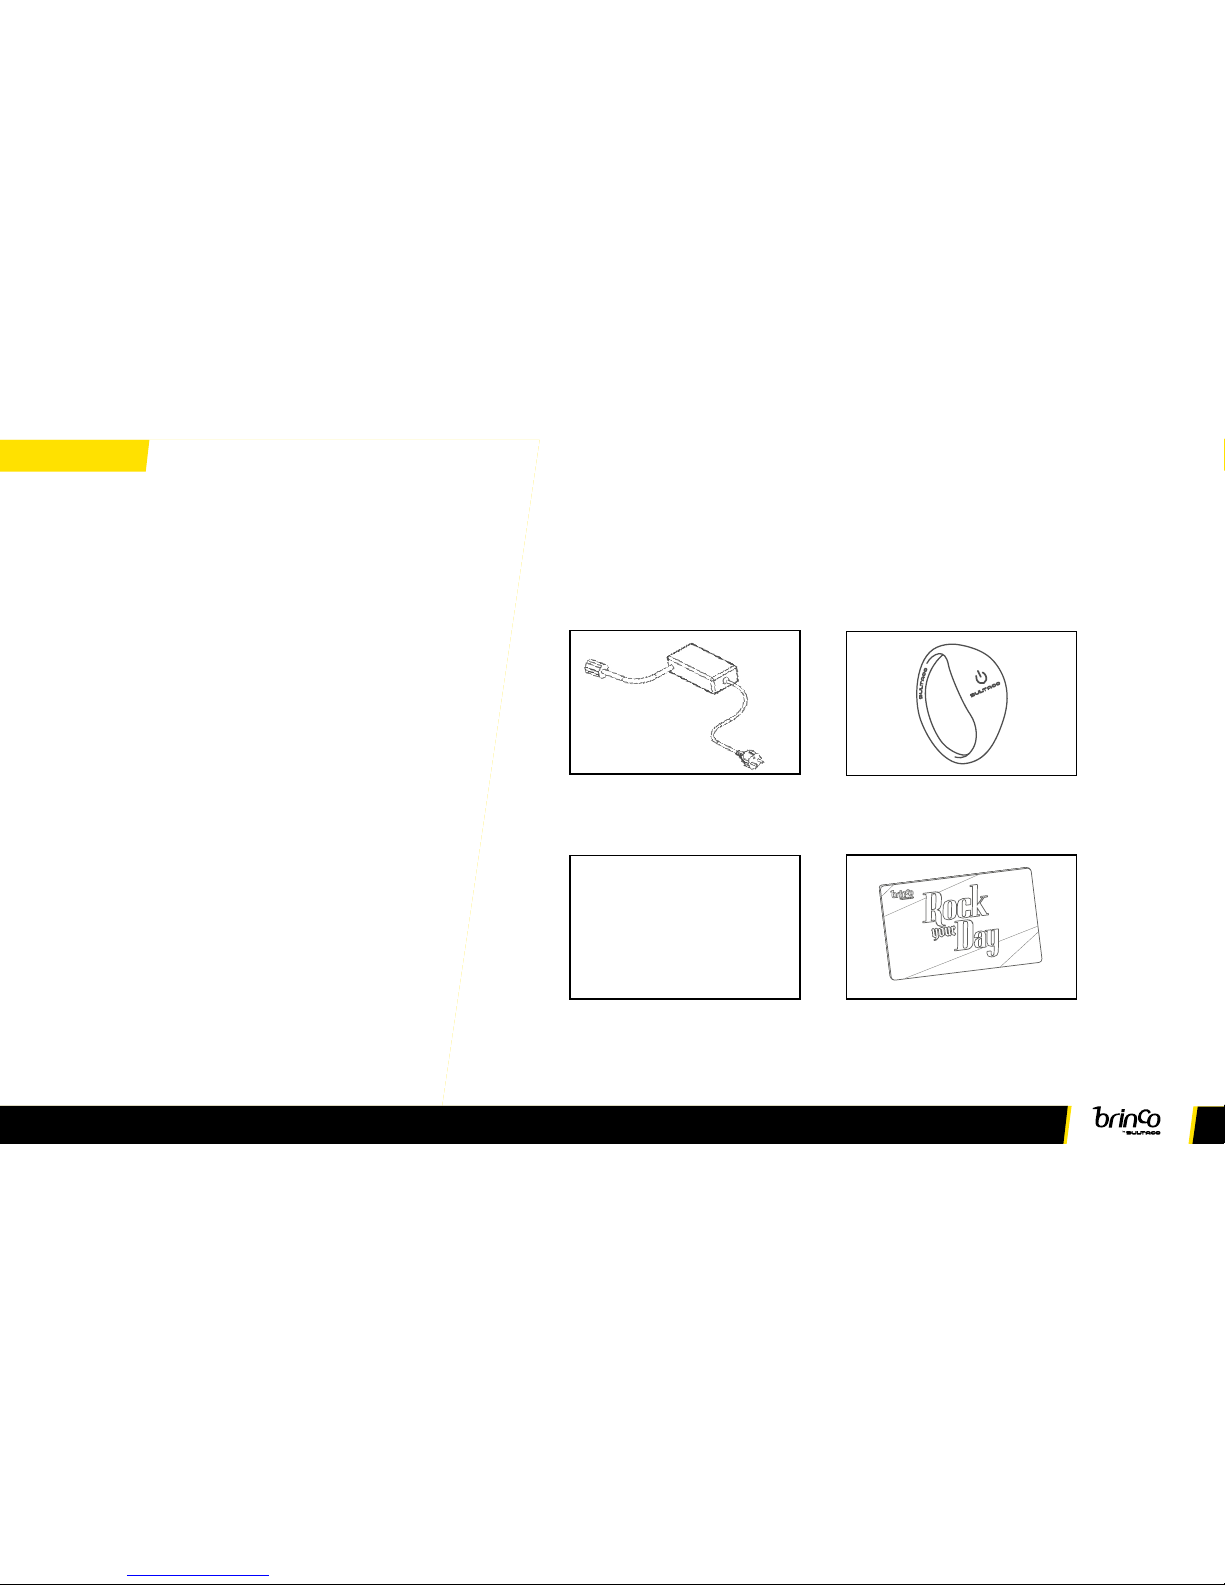
The following charger indicators will inform you about
battery charge state:
Before removing the battery make sure your Brinco is
always disconnected. The battery may be damaged if
fully discharged.
While charging, place the battery horizontally in a safe
position and close to the socket.
When you plug the male connector to the battery, either the
moto-bike’s or the charger’s, be careful not to damage it.
The battery is
charging.
The battery is
fully charged.
Failure during
charging. Check
charger indications.
GET YOUR BRINCO READY
First of all make sure that the stop button
is in OFF position (pressed).
1. Put your key card on the rear side of
the dashboard (warning light will be
activated).
2. Pull one of the two brake levers.
3. Select your riding map (ECO / TOUR
/ SPORT). To change it, make a short
press on “MODE” button.
4. Position the stop button in ON (button
not pressed).
5. Throttle and Rock Your Brinco!
Start riding your Moto- Bike
in 5 simple steps
Always ride responsibly.
Always wear a helmet, gloves and
use proper equipment for your ride.
Never carry passengers.
Do not use the Moto-Bike to tow or to
transport luggage. Maintain properly
the Moto-Bike to avoid damage and
any technical failure.
The Moto-Bike is for o road use and
not suitable for use on the public
road.
WARNING
DRIVE AND ENJOY