Bundutec BunduTop User manual

BUNDUTOP
MANUAL
TM

The BunduTop standard size is
2100 x 1350 x 300 mm when closed,
and 2100 x 1350 x 1000 mm when open.
PLEASE NOTE you can order a custom sized
BunduTop up to 1.6m wide and 3m long.
The tent weighs about 80 kgs.
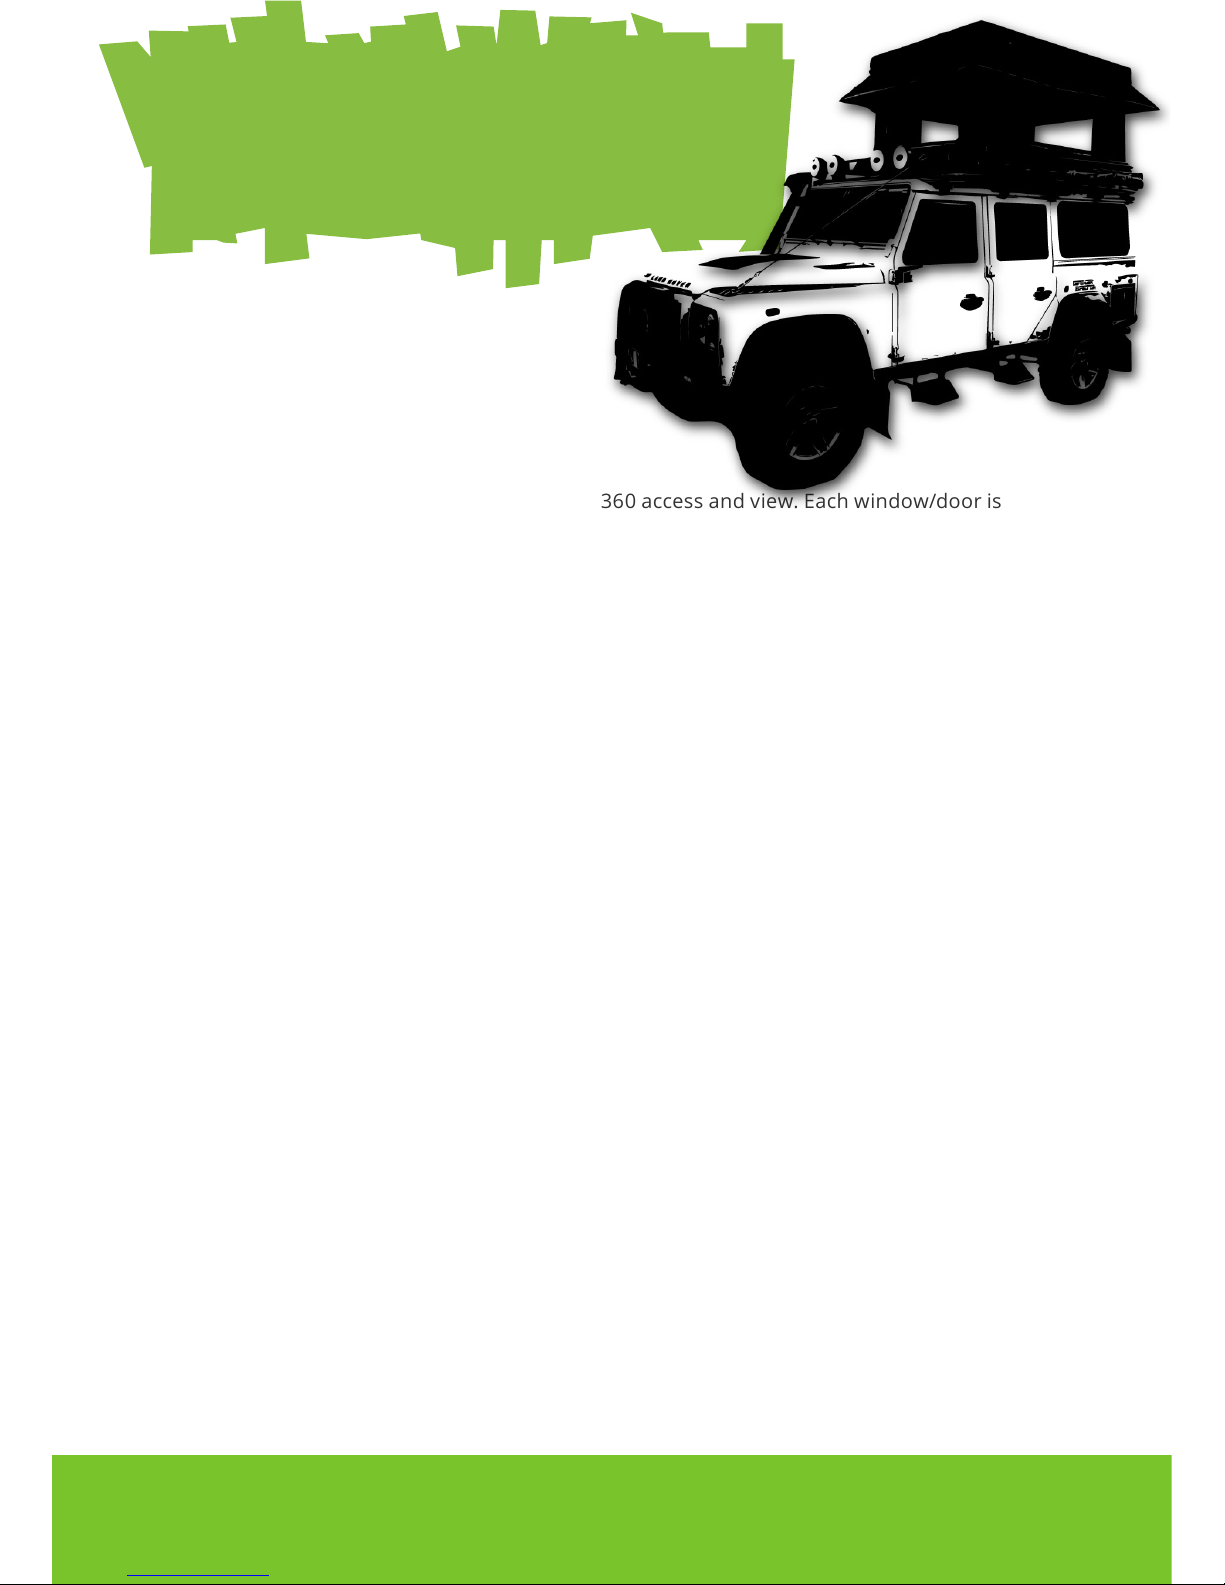
The tent boasts entry from any side, giving you 360 access and view. Each window/door is
manufactured with the canvas on the outside and the mesh on the inside. This allows you to
leave the windows open for ventilation, even in poor weather conditions
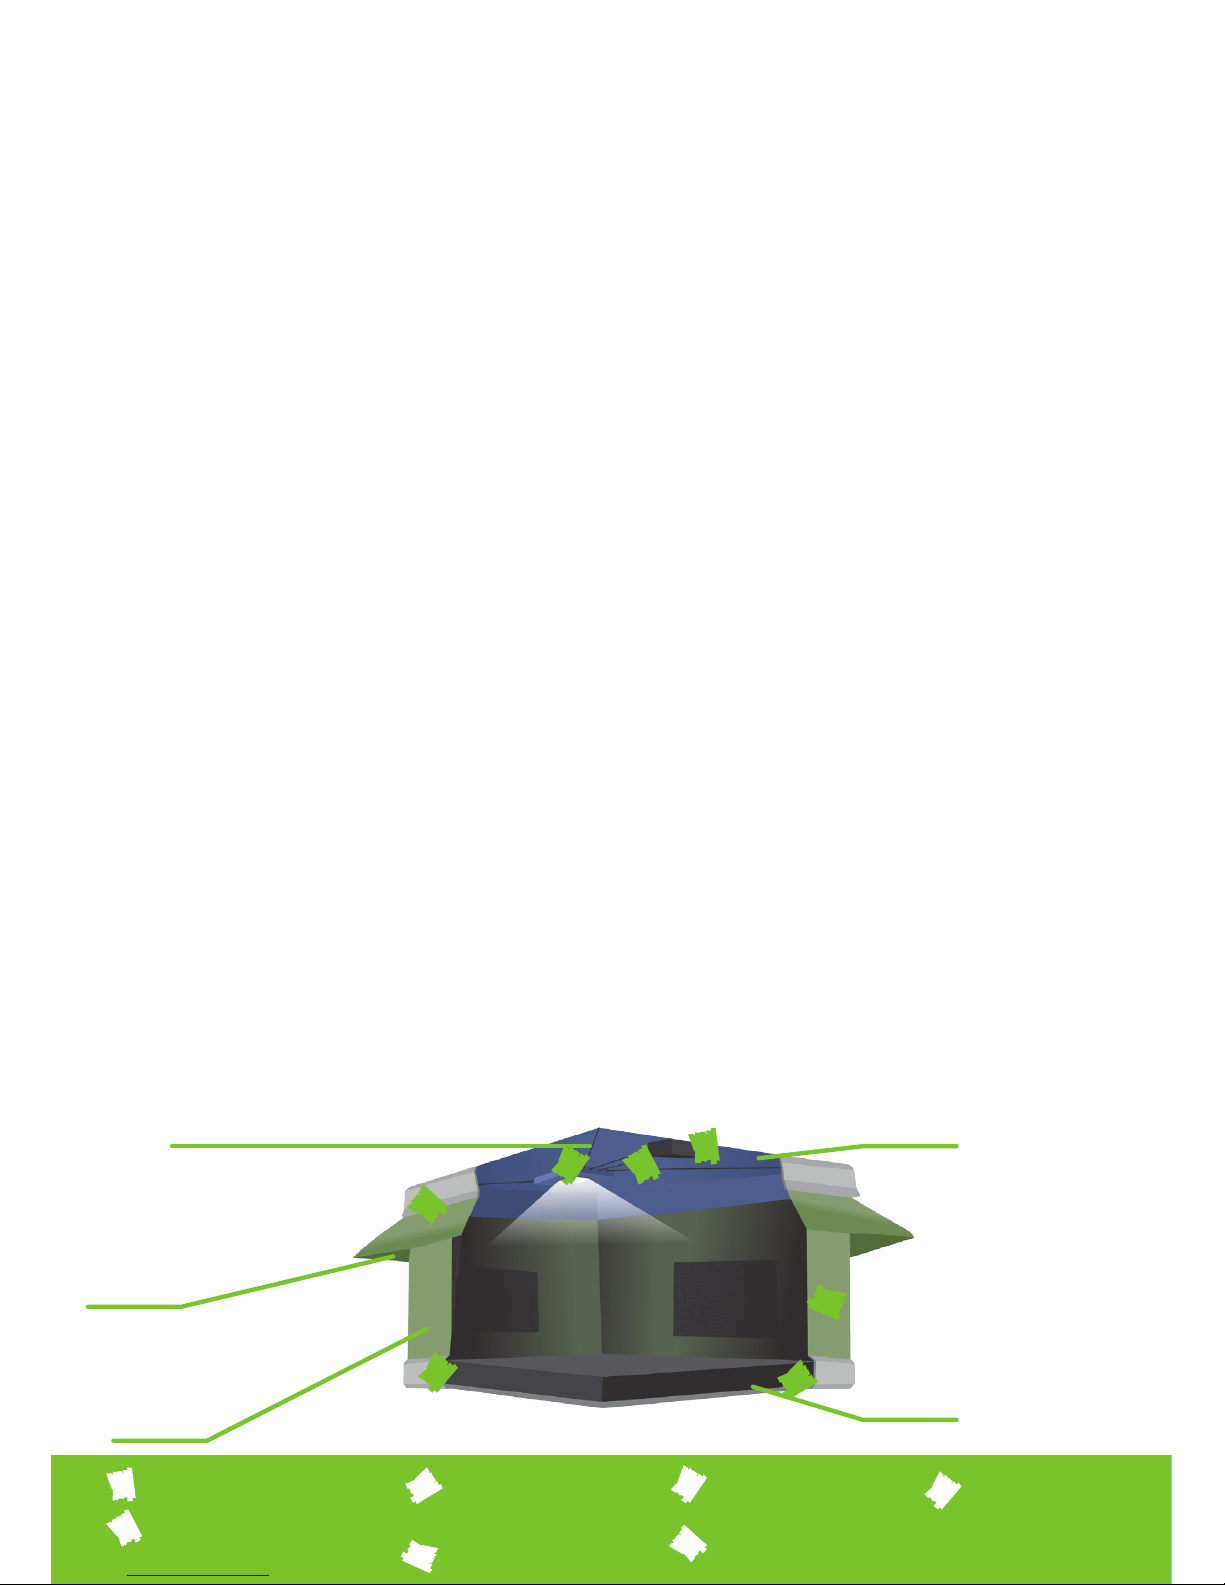
The BunduTop comes standard with an aluminium sliding ladder and 2 pockets inside to put
keys, cellphones etc. and has a cigarette lighter plug and an LED light inside.
The roof of the BunduTop is a raw aluminium sheet to ensure maximum heat reection and is
the main reason you can sleep comfortably cool inside, even in direct sunlight.
The roof weighs 20 kgs and can carry additional weight of 25 kgs, if evenly spread.
You are welcome to install a solar panel on top. We now include solar wiring and it simplies the
installation of a solar panel by allowing the wiring to go unseen through the tent.
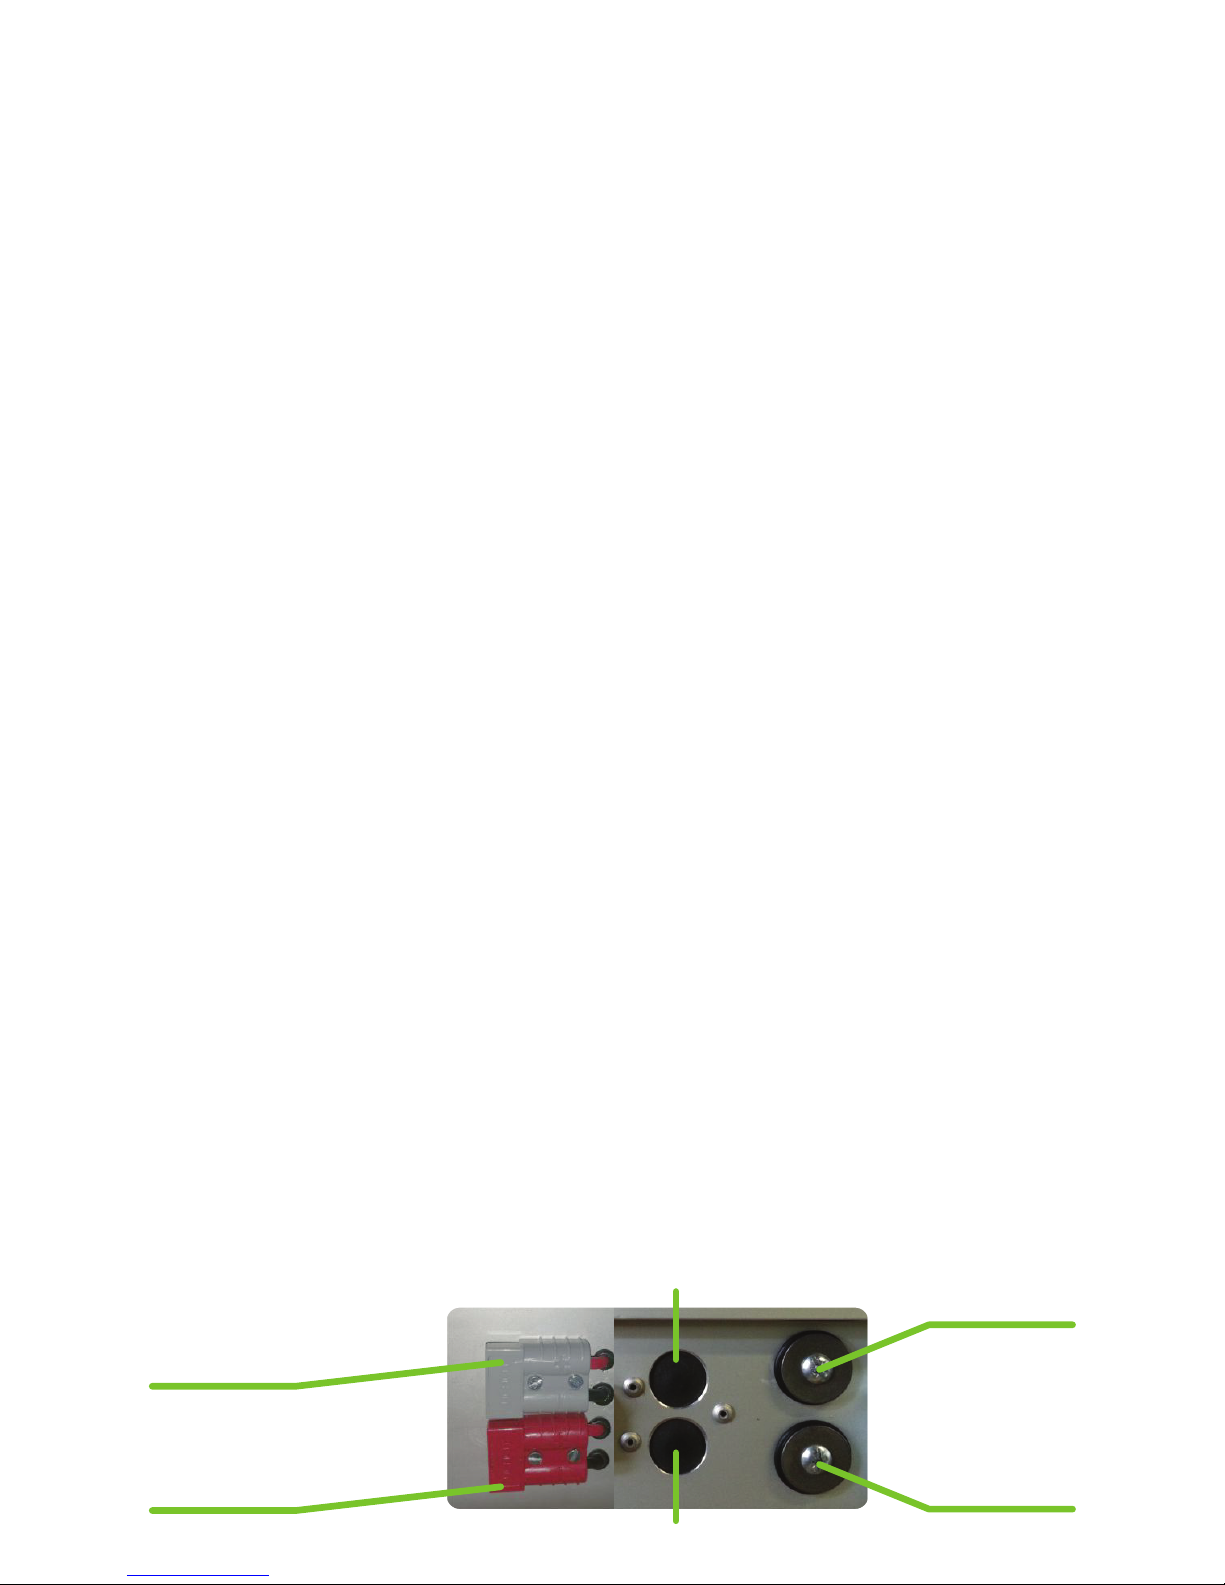
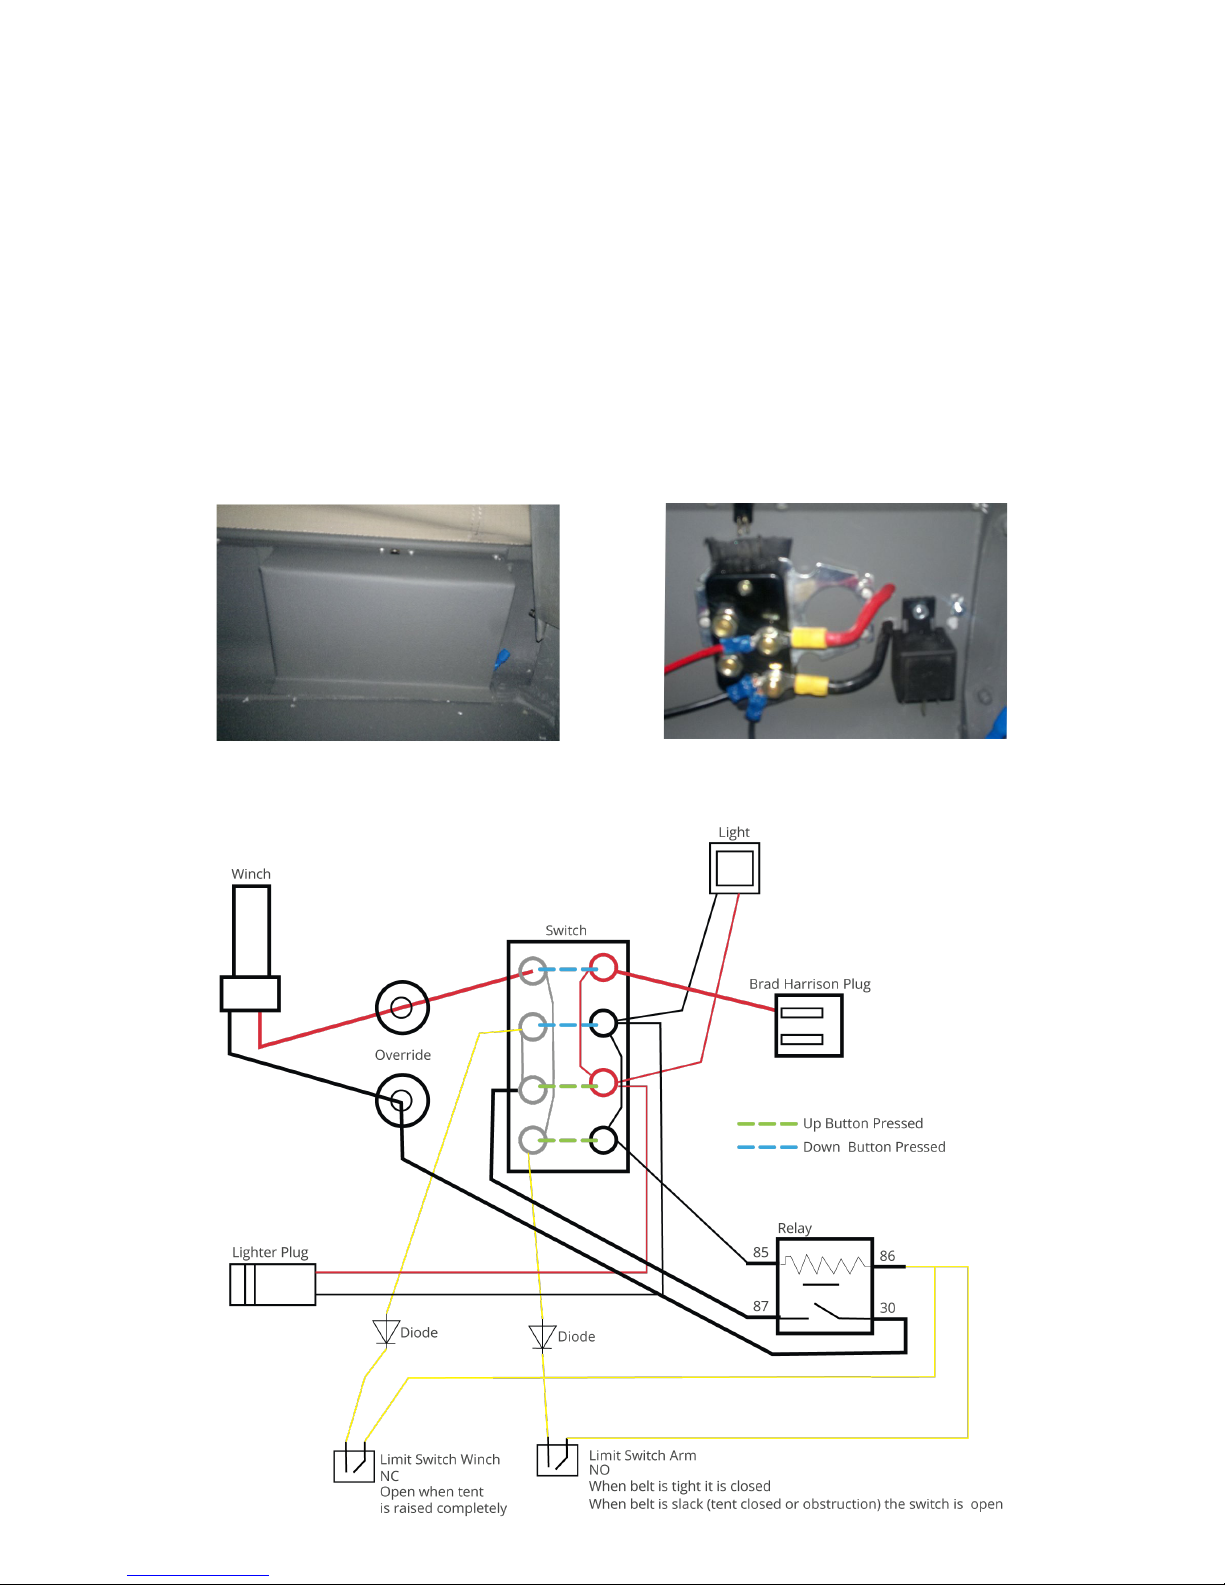
The 2000lbs winch motor lifts and lowers the tent with the use of 3mm Dyneema rope on a
pulley system.
The foam backed roof-lining absorbs moisture and condensation, but if you are going to
extremely cold areas we do recommend putting a carpet under the mattress as insulation, as
very cold temperatures creates additional condensation.
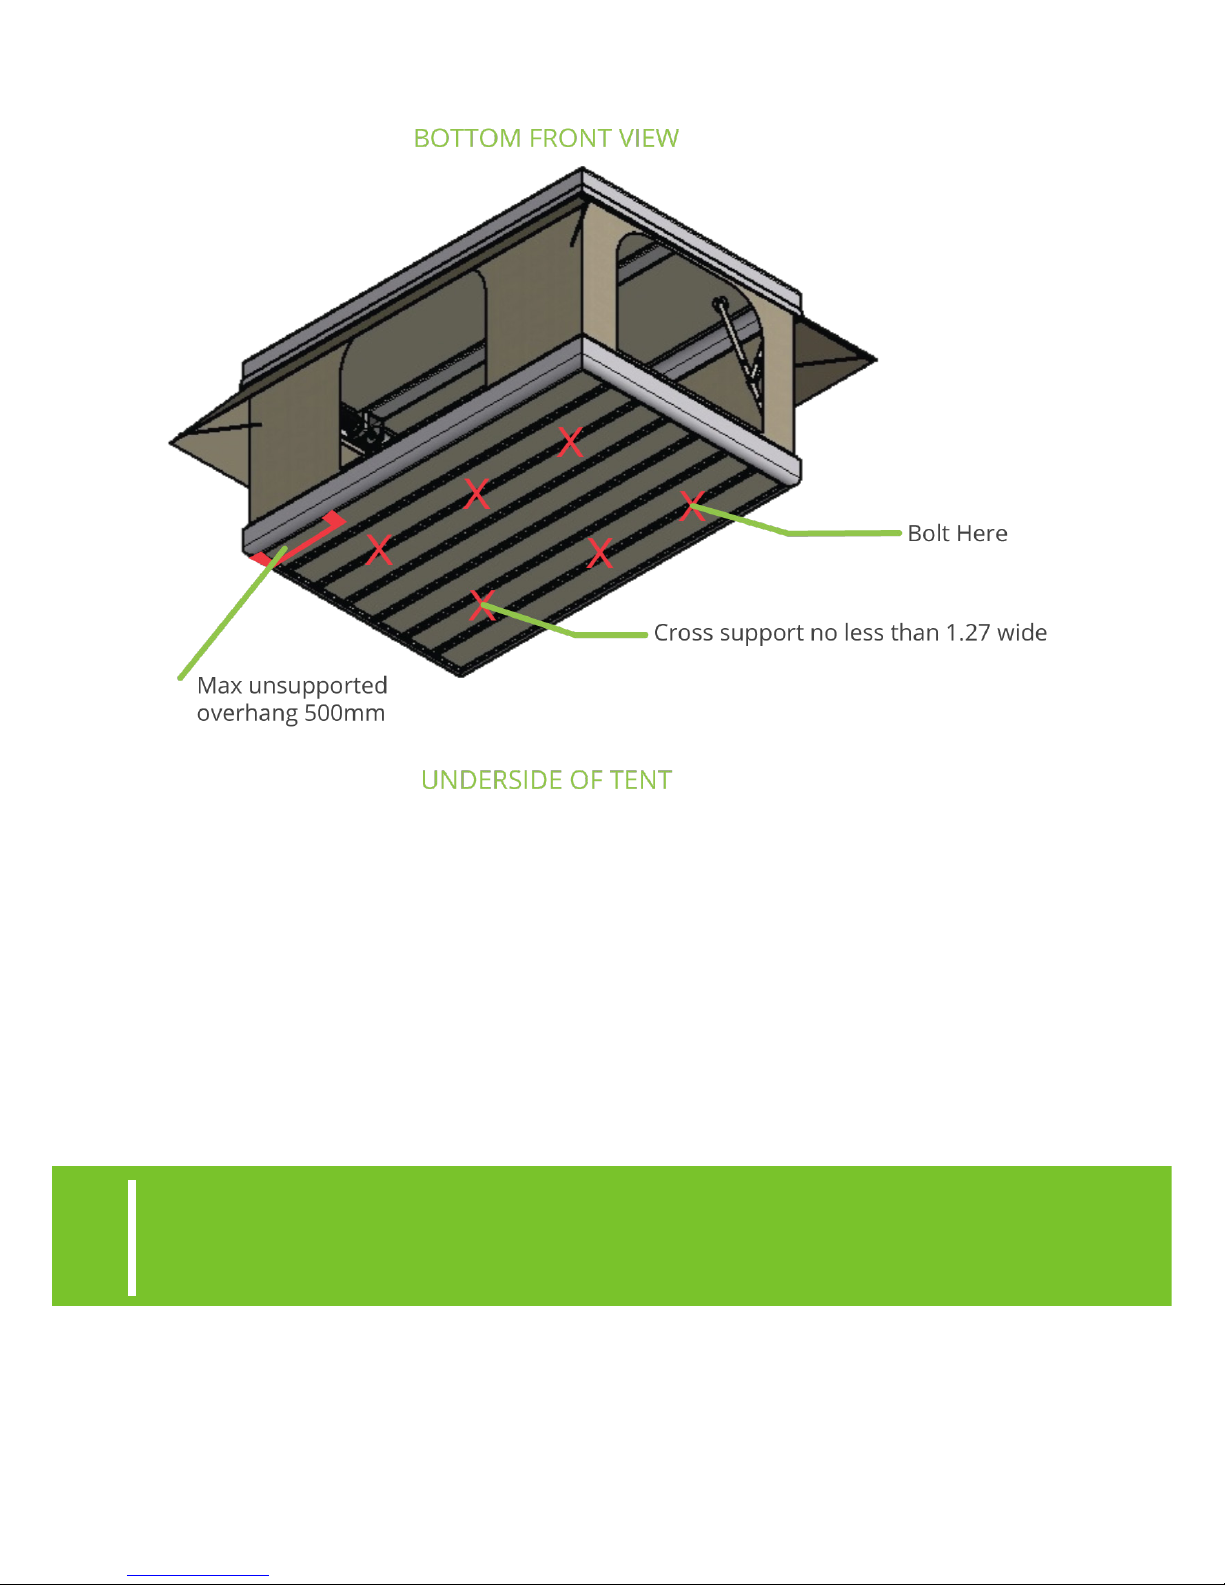
The frame built into the bottom of the tent provides additional strength and makes it versatile to
mount. It can be bolted directly to your load bars or roof rack.
The mattress inside is 2000 x 1250 x 100 mm and is made from a high density foam. A double
bed tted sheet ts it just ne. This leaves enough space inside the tent so that you can leave
your bedding inside.
Kindly arrange your bedding so that it can’t hook into the rope system inside; attened bedding
won’t interfere.
Please ensure you leave some windows open or close only the mosquito net so that trapped air
can escape. Trapped air will push out the canvas sides and cause it to not fold in properly when
lowering the tent.
When entering or exiting the tent, ensure that the zips are completely zipped down as the zips/
mosquito net isn’t designed to carry weight.
The tent has been tested extensively in various locations and weather types. In the USA it has
proven to withstand 50 mph winds and has also performed well in snow.
TheBunduTop
DO NOT OPEN THE TENT WHILE THE LATCHES ARE
STILL CLOSED AS THIS WILL DAMAGE THE TENT.

In locations with extreme humidity and heat, the combination can cause extreme condensa-
tion inside the tent. This will be UNDERNEATH the mattress. If you are experiencing similar
conditions, try to ventilate the tent to prevent the condensation.
PLEASE NOTE that when using it for the rst time please note that the canvas can be sti.
It gets coated with various resins to ensure its longevity and UV qualities, so when rst operating
the canvas has no “memory” of how to fold.
After a couple of uses the canvas will evolve a “memory” of how to fold and the folding will be-
come neater and easier as time passes.
The initial folding process will seem sti but with time it will ease into its shape and fold neatly.
INCLUDES
It boasts:
• Full electric operation
• Shade awning around all four sides of the tent
• Tent fully erect, with awnings, in 30 seconds at the press of a button.
• Tent fully closed, all sides & awnings folded away in 30 seconds at the press of a button
• 2100 x 1350 x 300 mm closed & 2100 x 1350 x 1030 opened
• Window covers zip open/closed from the inside
• Insulated roof inside
• All aluminium construction
• Stainless steel supports:
àThe tent has an existing aluminium frame built into the bottom.
àIf replaced with stainless steel the frame can accommodate an overhang of up to
500mm.
Includes:
• 100mm high density foam mattress
• 12V outlet inside
• LED light inside
• All aluminium construction ladder
Solar Wiring:
• Since 2017 we incorporated solar wiring as a xture with every BunduTop.
• The wiring for the solar wiring runs underneath the roof-lining.
• There will be a red Brad Harrison plug on the roof of the tent for easy connection to your solar
panel.
• There will be a red Brad Harrison plug on the bottom of the tent for easy access to your
vehicle’s wiring.
• Please remember when mounting a solar panel that the max weight is 25 kgs and the weight
needs to be evenly spread – make sure the supports run the entire length of the roof.
3mm Dyneema Rope to
lift/lower the tent
Awn at a 45° angle so that you
don’t have to close the
windows entirely
in rain
Our Mesh is coated in a
rubber compound
making it extremely
flexible and
durable
We use a 300gsm
UV treated Riptech canvas
Frame built into the bottom of the tent so it
can be bolted directly to your Load Bars or Roof Rack
Raw Aluminium Sheet roof to reflect
heat away even in direct sunlight Foam backed Roof Lining to absorb
moisture and avoid condensation
100mm High Density Foam
mattress inside
2000lbs Winch Motor (or 907kgs)
1Electronics Box
Cigarette lighter plug inside
(You can also add a USB port)
212V LED light in the roof
(You can also add 12V Fans)
3Red Brad Anderson
Grey Brad Anderson
Manual Override
4
Limit Switch near winch5
Limit Switch on arm
6Red Brad Anderson
7
1
2
3
4
5
6
7

Extras
• Added room
• USB port
àIf you prefer we can add a USB port to your rooftop tent.
àIt will be accessible from inside.
• 12V fan
àAs an additional extra you can add 12V fans.
àThey can be switched on and o with their own individual switches from inside the
tent. The wiring for the fans also run underneath the roof-lining.
Pros & Cons
Pros:
• Lifts or lowers at the touch of a button
• Leave bedding inside
• Rigged for solar panels
• Has an LED light and cigarette lighter plug inside
• Comes with our all new double sided ladder – you can specify round or square
• Weighs approx. 80 kgs
Cons:
• Takes up a lot of roofrack space
How does it work?
The tent has a winch inside that lifts and lowers it. It is connected to ropes that run on bearings to
eectively pull in the awnings and sides. The rope system inside is essentially dyneema plasma rope
snaked through various pulleys and arms, as well as the mechanisms for the awning to pull in the
sides and awnings when the tent is shut.
The arms and their unique design again assist with the lifting of the tent and ensures that it is rigid
when open, essentially strengthening the construction.
Unclip ALL FOUR latches and ensure that they are open before pressing the button to lift the tent.
There is a safety feature (limit switch) that assists with telling the motor when to STOP while lifting/
lowering the tent. YOU, however, are responsible for telling the tent when to START, so kindly en-
sure all the latches have been opened.
Should you forget to unclip one of the latches the arm inside will bend. It is also the only way to
damage the tent from the inside. It is easy enough to x but best avoided.
We will also be able to tell whether this was the cause, so better to be honest when taking it in for
repairs!
OUR TENTS HAVE A ONE YEAR MECHANICAL WARRANTY.
Operating the Tent
12v Power
Connects to
vehicle’s dual
battery system.
Solar Wiring Connects to
vehicle’s regulator.
Down Button
Override
Connection
Override
Connection
Up Button

the Electronics
All the electronics used in the BunduTop can be found inside the Electronics Box which houses:
• The Switch
• The Manual Override
• 2 x Diodes
• 1 x Relay
• 1 x Lighter Socket
Should you experience any diculties with your tent’s wiring, this is where everything is located.
Electrical Override:
Up – Open Down – Close
Positive top Negative top
Negative bottom Positive bottom
COVERED: Location of electronics cover
inside tent
UNCOVERED-Location of relay
5
Other manuals for BunduTop
1
Table of contents
Other Bundutec Automobile Accessories manuals
Popular Automobile Accessories manuals by other brands

ULTIMATE SPEED
ULTIMATE SPEED 279746 Assembly and Safety Advice

SSV Works
SSV Works DF-F65 manual

ULTIMATE SPEED
ULTIMATE SPEED CARBON Assembly and Safety Advice

Witter
Witter F174 Fitting instructions

WeatherTech
WeatherTech No-Drill installation instructions

TAUBENREUTHER
TAUBENREUTHER 1-336050 Installation instruction