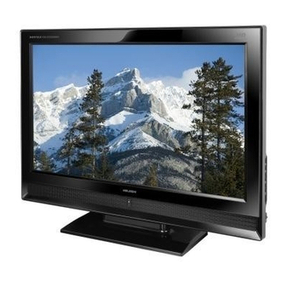
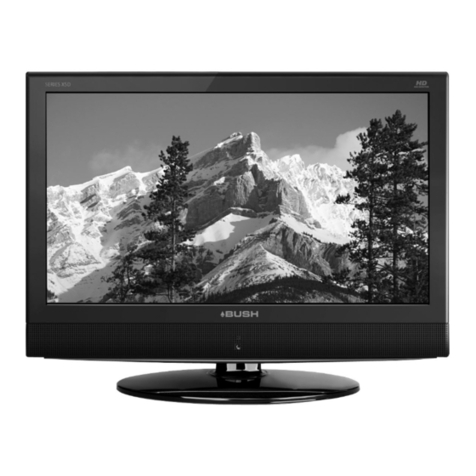
Bush S642F1 User manual

26 /32 /42 Digital LCD Television
INSTRUCTION MANUAL
Customer helpline:0845 604 0105


Contents
P.25
P. 3 8
P.
4
0
P. 4 4
P. 4 5
P.02
P.03
P.04
P.05
P.06
01 Safety Warnings
02 About your LCD TV
03 Getting Started
04 Using the features
05 Reference Sections
P.08
P.09
P.11
P.12
P.13
P.18
P.16
P.19
P.20
P.21
P.23
P.27
P.29
Welcome
Important information
Safety notice
Electrical connections
Get to know your TV
Get to know your remote control
Connecting your TV
Preparation of your remote control
Setting up
Tuning your TV
Common interface
Using your TV
Adjusting picture settings
Adjusting sound settings
Function settings
Time settings
Lock menu settings
Shortcut menu display
Teletext function
USB mode
Using External USB Disk For Recording
Using your DVD player(certain models only)
Troubleshooting
Specification
P.31
06 Product Guarantee
P.46
Product guarantee
BUSH | HD Ready LCD TV | User Manual | Helpline: 0845 604 0105

WELCOME
01 Safety Warnings
Thanks for buyingthis 26"/32"/42" HDReady Digital LCDTV.
This guide willhelp you setup and beginusing your TV.
First, check the contents of your box with the parts checklist below:
26"/32"/42"HD Ready DigitalLCD TV
Remote control
AAAbattery x2
Instruction Manual
Quick Start Guide
Now you can get started!
BUSH | HD Ready LCD TV | User Manual | Helpline: 0845 604 0105

CAUTION
TO REDUCE THE RISK OF ELECTRIC SHOCKAND FIRE,DO NOT
PUT THE TV SET NEAR SOURCES OF HUMIDITY.
DO NOT USE ANYABRASIVE CLEANERS WHICH MAY SCRATCH
OR DAMAGE THE LCD SCREEN. AVOID CONTACT WITH OBJECTS
THAT MAY SCRATCH THE LCD SCREEN.
NOTE: SERVICING THE UNIT YOURSELF IS UNAUTHORISED AND
COULD LEAD TO INJURY OR PRODUCT DAMAGE. REFER ALL
SERVICING TOTHE CUSTOMER HELPLINE.
IMPORTANT INFORMATION
READ ALLINSTRUCTIONS BEFORE USEAND KEEPFOR FUTURE REFERENCE.
CAUTION
TO REDUCE THE RISK OF ELECTRIC SHOCK,DO NOT
REMOVE COVER (ORBACK).NO USER SERVICEABLE
PARTS INSIDE. FORANY PROBLEMS, REFER SERVICING
TO THE CUSTOMER HELP LINE. THERE IS ALIGHTNING
ARROW SYMBOL IN THE TRIANGLE:THIS SYMBOL
INDICATES HIGH VOLTAGE IS PRESENT INSIDE. IT IS
DANGEROUS TO MAKE ANYKIND OF CONTACT WITH ANY
INSIDE PART OF THIS PRODUCT.
THERE ISA EXCLAMATION MARK IN THE TRIANGLE:
THIS SYMBOL ALERTS YOU THAT IMPORTANT LITERATURE
CONCERNING OPERATION ANDMAINTENANCE HAS
BEEN INCLUDED WITHTHIS PRODUCT.
BUSH | HD Ready LCD TV | User Manual | Helpline: 0845 604 0105

For your protection please read these instruction completely and keep this manual
for future reference
Please ensure thatthe set has adequate ventilation.
Do not placethe set near a heat source or in directsunlight.
Do not putthe unit near water or oil as it maycause a fire.
During thunderstorms, unplugboth the antenna and power plug to prevent damage.
Do not usea damaged power plug or put the power supplynear a heat source as it may
cause electric shockor fire.
Toprevent potential fire, do not overload an electrical outletwith too many plugs.
Place the seton a level surface to prevent it from tippingand potential damage.
Do not removethe cover of the set or try to serviceyour TV. This may result in electrical
shock or fire.All service work must be completed by anauthorised technician.
If there areany abnormal sounds or smells from the unit, unplugit immediately and
contact an authorisedservice provider.
Toprevent fire, do not use or store any flammablematerials near the unit.
Toprevent fire, do not place the unit near adamp wall.
Toprevent electric shock, ensure that any external antenna connectedto the set is clear
of contact withany power lines.
Do not plug/unplugthe unit while your hands are wet. This may cause an electric shock.
Please ensure asolid connection with the AC wall socket inorder to avoid shock and
potential fire.
Toprevent electric shock or fire, please prevent rain fromentering the set along the wire
connected to theoutside antenna.
When cleaning, pleaseunplug the unit. Use a soft cotton cloth. Donot use any abrasive
cleansers, and preventwater from entering the set.
If any plugsor input wires are dirty, unplug the set and cleanthem. This will prevent the
risk of electricshock or fire.
If the setis not going to be used for an extendedperiod, unplug the unit from the main
power.
Moderate climates usedonly.
Replace the batteryby the equivalent or same type. In case ofexplosion don't throw
battery to fire.Dispose the battery according to local regulation.
A warningthat excessive sound pressure from earphones can cause hearing-loss.
The apparatus shouldnot be exposed to dripping or splashing and noobjects filled with
liquids, such asvases should be placed on the apparatus.
The mains plugis used for disconnecting the device, make it easilyaccessible.
Do not useany accessories that are not recommended by the manufacture.
SAFETY NOTICE
BUSH | HD Ready LCD TV | User Manual | Helpline: 0845 604 0105
BLUE OR BLACK
NEUTRAL (N)
BROWN OR RED
LIVE (L)
ELECTRICAL CONNECTIONS
The colours ofthe wires in the mains lead of this apparatus may not correspondwith the
coloured markings identifyingthe terminals in your plug, proceed as follows:
WASTE ELECTRICALPRODUCTS SHOULD NOTBE
DISPOSED OF WITHHOUSEHOLD WASTE. PLEASE
RECYCLE WHERE FACILITIES EXIST. CHECK WITH
YOUR LOCALAUTHORITY FORRECYCLING ADVICE.
Before connecting, checkthat voltage indicatedon the appliance (button of the appliance)
corresponds with themain voltage in your home. If this is not the case, consultyour dealer
and do notuse.
This appliance maybe fitted witha non-rewirable plug.If you need to change the fuse in
a non-rewirable plug,the fuse is lost or damaged, the plug must be used untila
replacement is obtained(available from the appliance manufacturer).
If the plughas to be changed because it is not suitable for your socket,or becomes
damaged, it shouldbe cut offand appropriate plugfitted following the wiring instructions.
The plug removedmust be disposedof safety asinsertion into a mains socket is likely to
cause an electricalhazard.
This equipment mustbe disconnected fromthe mains whennot in use. Do not allow
this unit tobe exposed to rain or moisture.
For your ownsafety read the following instructions carefully before attempting
to connect thisunit to the mains.
You should only plug the appliance intoa 150V-240V AC,50/60HZ supply, Connecting it
to other powersources may damagethe appliance.
The wires inthis mains lead are coloured in
accordance with thefollowing code:
Blue=Neutral
Brown=Live
IMPORTANT
Caution
Toprevent electric shock disconnect from the mains before
removing the cover
The blue wiremust be connectedto the terminalmarked with the letter N or coloured black.
The brown wiremust be connectedto the terminalmarked with the letter L or coloured red.
If a 13Amp (BS 1363) fused plug is used it must be fitted a 3Afuse conforming to BS 1362
and beASTA apporved. If in doubt contact aqualified electrician.
BUSH | HD Ready LCD TV | User Manual | Helpline: 0845 604 0105
About your LCD TV
GET TO KNOW YOUR TV
USB
2
1REC
17.OPTICAL
Front control panel
Source button
Menu button
Volume up/downbutton
Program up/down button
Power button
1. YPbPr input
2. YPbPr AUDIO input
3. DVI AUDIO input
4. ANTENNA input
5. HDMI3 input
6. S-VIDEO input
7. EARPHONE output
8. HDMI1 input
9. HDMI2 input
10. AV-VIDEO input
11. Common Interface
12. SCART1 input
13. VGA AUDIO input
14. SCART2 input
15. VGA input
16. USB
COMPONENT IN
HDMI3
VGA IN
ANT IN
BUSH | HD Ready LCD TV | User Manual | Helpline: 0845 604 0105
GET TO KNOW YOUR TV WITH DVD
17.OPTICAL
Front control panel
1. YPbPr input
2. YPbPr AUDIO input
3. DVI AUDIO input
4. ANTENNA input
5. HDMI3 input
6. S-VIDEO input
7. EARPHONE output
8. HDMI1 input
9. HDMI2 input
10.AV-VIDEO input
11. Common Interface
12.SCART1 input
13.VGA AUDIO input
14.SCART2 input
15.VGA input
16.USB
Source button
Menu button
Volume up/down
button
Program up/down
button
Power button
USB
2
1REC
COMPONENT IN
HDMI3
VGA IN
ANT IN
BUSH | HD Ready LCD TV | User Manual | Helpline: 0845 604 0105
When using theremote control, aim it
towards the remotesensor on the TV Stand By
DVD Menu / REC
DVD open / close
Picture Mode
Sound Mode
Call Screen Display
Sleep button
DTV Audio / NICAM / DVD Audio
Aspect Ratio Control button
Channel list button
Subtitle button
Program Number Channel selection
Source Exchange
Q.VIEW / Swap Channel
V+/V- : Volume selection
P+/P-: Channel selection
Mute
Menu button
GUIDE button (only for DTV)
Favourite list button
OK button
Cursor Mover button
Back button (only for USB)
Exit Screen Display
REPEAT (only for DVD , USB , REC & Timeshift) /
CANCEL button
Zoom (only for DVD &USB)/Teletext index(only for
TV) / REC index
Play / Pause button (only for DVD &USB) / Timeshift
Stop (only for DVD, USB, REC & Timeshift)
Fast Reverse (only for DVD, USB, REC & Timeshift)
Fast Forward (only for DVD, USB, REC & Timeshift)
Previous (only for DVD, USB, REC & Timeshift)
Next (only for DVD, USB, REC & Timeshift)
DVD Set up / Text
DVD Title / Teletext Mix
DVD Search / Teletext Subcode
DVD 10+ / Teletext Hold
DVD Program / Teletext Reveal
DVD A-B Repeat / Teletext Size
DVD Call / Teletext Mode
DVD Angle /Teletext Time
NOTE:RED button ,GREENbutton
BLUE button andYELLOW button arefast
text button inanalog signal .Function
button in DVBT(just reference theOSD)
SCREEN
SCREEN
STOP
.
GET TO KNOW YOUR REMOTE CONTROL
BUSH | HD Ready LCD TV | User Manual | Helpline: 0845 604 0105
LR YPbPr
DVD
CONNECTING YOUR TV
ANTENNA CONNECTION
Connect your aerialto the side of the TV into the ANTENNA IN socket.
IMPROVE YOUR SIGNAL
Toimprove picture quality in a poor signal area, use a signal amplifier
(not supplied).
CONNECT YOUR PC TO THE TV
You can use yourTV as a monitor foryour personal computerby connecting it
with a VGAcable (not supplied).
1.Read yourcomputer user guide and check it has a VGAconnector.
2.Turn the power off on yourTV and PC.
3.Connect aD type 15-pin VGA interface cable to the VGA video interface
connector on thePC. Connect the other end of the cable to the PC interface
connector on theTV. Tighten the screws on the VGA connectors and connect
the audio cable(not supplied) to the audio input socket on the back of the TV.
4.Turn on the powerof the TV firstly andthen the PC.
5.Press the button on the TV or TV remote control to setthe video input mode
to VGA.
6. Oncethe image shows, if there is noise present, change the VGA mode to
another resolution, changethe refresh rateto another rate or adjust the
brightness and contraston the menuuntil the picture is clear.
CONNECT ADVD PLAYER TO YOUR TV
Connect the DVD video outputs (Y, Pb, Pr) to the
COMPONENT (Y, Pb, Pr)
IN socket onyour TV.
1 . Turn on the DVD player and insert a DVD.
2 . Press the buttonto select .
3 . Refer to the DVD player user guide for operating
instructions.
BUSH | HD Ready LCD TV | User Manual | Helpline: 0845 604 0105
BUSH | HD Ready LCD TV | User Manual | Helpline: 0845 604 0105
CONNECT ADVD PLAYER OR VCR TO YOUR TV
There are twoways in whichyou can connect a DVD player or VCR to your TV.
Make sure that both the TV and DVD player or VCR are switched off before you
connect them.
Connection Option 1
1.Connect theaudio and S-VIDEOcables from theVCR output jacks to the TV
input jacks.
2.Insert a video tapeinto the VCR and press PLAY on the VCR.
3.Turn on the power of the TV first, then the VCR.
4.Press theSOURCE button on the TV to set the video input mode to S-VIDEO.
Connection Option 2
1.Connect theAV DVD/VCR outputsto the AV IN socket onyour TV.
2.Press theSOURCE button on the TV to set the video input mode to AV.
SCART INPUT
1.Connect the scart lead from the external device (DVD player, Set-top box
or games console)to the TV scart socket.
2.Press the SOURCE button to select SCART mode.
3.Press the PLAY button on the external device.
HDMI INPUT
1.Connect thecable from theHDMI device to the TV HDMI socket.
2.Press the SOURCE button to select HDMI mode.
3.Refer to the HDMI device user guide for how to operate.
MOUNT YOUR TV ONTO THE WALL
You can mount your TV onto the wall byusing a wall bracket (not supplied).
Use M4/M6 machine screws (4 pcs) to screw the TV onto the bracket (not
supplied).

BATTERY INSTALLATION
1.Place the remote control face down, then open
the cover ofthe battery compartment.
2.Install two AAA batteries. (The + and- symbol
of the battery must match with the marks on the
remote).
3.Close thecover of the battery compartment.
BATTERY CAUTION
Confirm there isno object betweenthe remote
control and theremote sensor ofthe TV set.
Sunshine or otherstrong light willinterfere with
the signal sent by the remote control. In this
situation turn the TV set to avoid the direct light
source.
Do not put the remote control in direct heat or in
a damp place as you may damage the remote.
Please use two AAA 1.5V batteries. Do not mix
battery types. Install the batteries at the correct
polarities. Do notuse rechargeable batteries.
If your TV is to be stored for a period of time,
remove the batteries from the remote control.
PREPARATION OF YOUR REMOTE CONTROL
BUSH | HD Ready LCD TV | User Manual | Helpline: 0845 604 0105
03 Getting Started
BUSH | HD Ready LCD TV | User Manual | Helpline: 0845 604 0105
LOCATION
You will need toplace your TV near yourplug socket (so the power cable can comfortably
reach) and withinreach of your aerial socket orextension lead.
CONNECTION
1. Insert yourTV aerial lead into theAntenna inputat the side of the TV.
2. Insert thebatteries into the remote control. Make sure they are inserted the right
way around, matchingthe polarity as indicated inside the battery compartment.
SWITCHING YOUR TV ON
1.Press the STANDBY button on theright side ofthe TV once. Ared flashing light will
appear in thecorner of the screen.
2.Press STANDBY on the remotecontrol. The TV will turn on and the red lightwill turn
blue. This may take a few moments.
3.Select your chosenlanguage when prompted from the list that will appear on
screen. Use the button to scrollto the language you want and press to confirm.
Setting up

BUSH | HD Ready LCD TV | User Manual | Helpline: 0845 604 0105
1. Press MENU button.
2. Press button to select Tuning menu, press button to enter.
3. Press button to select Country item.
Press button to select you needed.
4. Press button to select Auto Search item, press OK button to
enter.
Press button to select the OK option, and press OK button
to start searching.
Press the MENU button ,you can choose to skip the TV /DTV
Search or not.
5. Press EXIT button to stop auto search during searching.
Note: It may take a few moments to complete the Auto
Search.
1. Press MENU button.
2. Press button to select Tuning menu, press button to enter.
3. Press button to select Digital Manual Search item,
press button to enter.
4. Press button to select the Channel.
Press OK button to start searching.
5. Once a channel is located, you can press OK button to save it.
Press EXIT button to exit.
DIGITAL MANUAL SEARCH
If you have attached a DVD player or similar external device
to the TV, you will need to tell the TV to display the content
from it. Simply press SOURCE which will bring up the source
menu in the left corner of the screen, Use the and button
to highlight the required source and press OK select.
For details of how to plug in other equipment see GET TO KNOW
YOUR TV on page 6.
AUTO SEARCH
TUNING YOUR TV
SWITCHING TO AN EXTERNALSOURCE OTHER THAT TV
Input Source
TV
AV
SCART1
SCART2
S-Video
Component1
Component2
PC
HDMI1
HDMI2
HDMI3
USB
TV
AV
SCART1
SCART2
S-Video
Component1
Component2
PC
HDMI1
HDMI2
HDMI3
USB
Input Source
TV
AV
SCART1
SCART2
S-Video
DVD
Component
PC
HDMI1
HDMI2
HDMI3
USB
TV
AV
SCART1
SCART2
S-Video
DVD
Component
PC
HDMI1
HDMI2
HDMI3
USB
OK
OK
OK
OK
OK
OK
Menu
OK
EXIT OK MENU
OK
OK
OK
OK
OK
OK CANCEL
OK
OK
OK
OK
OK
OK
Menu
OK
UHF CH 26
OK
OK
OK
OK
OK
OK
Menu
OK

EXIT SAVE
Sound System
Current CH
Press button toselect the channel number to edit.
Storage To
Press button to select the program number you
want to storageto.
Fine tune
Press button toselect "Sound System", then press
button to select the correct sound system.
1 Repeat abovesteps 1-3, thenpress button toselect
the Fine Tuneitem.
2 Press buttonrepeatedly to carryout fine tune, till the
best picture andsound are obtained, then loosen the button.
If the pictureand/or sound are poor, try using the FINE
TUNE feature. Donot use this feature unless reception
is poor.
Analog Manual Search
Follow the belowsteps when you need to have a manual search.
1. Press MENUbutton.
2. Press button to select Tuning menu, press button to enter.
3. Press buttonto select Analog Manual Search item,
Press button toenter.
4. Press buttonto select Search item, press button is used
to select thehigher frequency channel.
Press button isused to select the lower frequency channel.
5. Andthen select Storage To,press button to select the position
number you wantthe channel on. Once a channel is located,
you can pressred button to save it. Press EXIT button to exit.
TUNING YOUR TV
BUSH | HD Ready LCD TV | User Manual | Helpline: 0845 604 0105
OK
OK
OK
OK
OK
OK
Menu
OK

NAME MOVE SKIP FAV
Channel Edit
Using this function,you can rename, move, set favorite
channel and skipthe channel in the analogue mode.
1.Press MENU button.
2.Press button toselect TUNING menu, press button
to enter.
3.Press button toselect CHANNEL EDIT item,
Press button toenter the sub-menu.You can press red,
green , yellow or blue button to enter the menu you need.
RENAME
1.Press button toselect the channel , and press green
button to rename.
2.Press button toselect the number position of channel
name, Press buttonto select number.
3.You can press the EXIT button to cancel the changes
at anytime.
NOTES:The RENAME functionis only available in ATV program.
MOVE
1.Press button toselect the channel any press yellow button to select the position.
2.Press button toselect the number position you want to remove to, press
yellow button to confirm.
3.You can press the EXIT button to cancel the changes at anytime.
Setting favourite channel
1.Press button toselect the channel ,press Red button to set your favourite channel.
2.You can press the Red button to cancel the changes at anytime.
3.Press FAV button on the remote control and Favourite List will be displayed.
4.Press button toselect the channel, and press OK button to enter.
SKIP
1.Press button toselect the channeland press blue button to skip the current channel.
2.You can press the blue button to cancel the changes at anytime.
GUIDE (Electronic ProgramGuide)
Using this function,you can access the DTV program
information
1.Press MENU button.
2.Press button toselect TUNING menu.press
button to enter.
3.Press button toselect the guide item.
Press OK button to enter thesubmenu, the electronic
program guide is displayed.
You can quickly callup Guide menu by GUIDE
button on the remote control.
Notes: Only DTVmode.
TUNING YOUR TV
BUSH | HD Ready LCD TV | User Manual | Helpline: 0845 604 0105
BBC ONE Wales
INFO Record Schedule DATE REMIND OK
OK
OK
OK
OK
OK
OK
Menu
OK
OK
OK
OK
OK
OK
OK
Menu
OK

COMMON INTERFACE
The common interface(CI) slot is designed to
accept the Conditional Access (CA) Module and
Smart card inorder to view the pay TV programmes
and additional services.Contact your Common
Interface service provider to getmore information
about the modulesand subscription. Please noted
that CAmodules and smart cards are neither
supplied nor optionalaccessories from us.
Warning: switch off your TVbefore any module is inserted inthe
Common Interface slot.
1 Insert the CAM correctly, then Smart Card to the
CI slot thatis located at the side of the TV.
2 Turnon the TV and itwill display the below
message if the CA module is detected. Wait
for few moments until thecard is activated.
3 Press the MENUbutton to display the Main
Menu and usethe and buttonto highlight
the "Common Interface"line and press
the "OK" button.
4 Detailed information on theCI card in use is displayed.
5 Press OKbutton to access the cardmenu. Refer to the module
instruction manual for setting details
6 When moduleis removed, the following message will appear on
the screen.
OK
OK
OK
OK
OK
OK
Menu
OK
CI module removed
Main Menu
Module information
Smart card information
Language
Software Download
Press OK to select,or Exit toquit
CI Module Insert
BUSH | HD Ready LCD TV | User Manual | Helpline: 0845 604 0105
OK
OK
OK
OK
OK
OK
Menu
OK
OK
OK
OK
OK
OK
OK
Menu
OK
Software Update function
When you get the updating news from the TV shop's web,
you can update the operating software using the Download
menu. The data for various units are transferred consecutively
on a special receiving channel.
You need to search the channel with updating code stream.
Note: You can get information from the TV shop or internet.
1 Press MENU button.
2 Press button to select TUNING menu,
press button to enter.
3 Press button to select Software Upgrade item.
4 Press button to set it as On. The default is Off
5 If the updating code stream of the channel is suitable for
your set, Do System Update option can be selected. Otherwise
the Do System Update option is grey and cannot be selected.
6 Press button to select the System Update option and
use OK button to enter. Then the TV will restart and search
the upgrade information.
NOTES: If the upgrade information is received, the TV will begin
to upgrade. Or else, the TV will be back the DTV source.
7
you can press EXIT button to cancel the download
and your TV set will be standby.
8 After the download has finished, your TV set will enter burning
state and the indicator light is shining. The menu 4 of right appears.
The set will be standby when the update is completed.
Load the receiver identification. This process may also take
several minutes.
Operation
Are you sure?
BUSH | HD Ready LCD TV | User Manual | Helpline: 0845 604 0105
USING YOUR TV
How to select the TV program
1.Using Program numberbutton Enter the channel number with the number keypad on
the remote control.
2.Using P+/P- button
Press the P+/P-button to select a channel number.
HOW to adjust volume
Press V+/V-button on the remote control or the side of the TV to adjust thevolume level.
CH.LIST function
Press CH.LIST button on the remote control willdisplay Channel List menu, and then
press button to enter.
Press button toselect the channel, and then press OK button to enter.
BUSH | HD Ready LCD TV | User Manual | Helpline: 0845 604 0105
This manual suits for next models
5
Table of contents
Other Bush LCD TV manuals