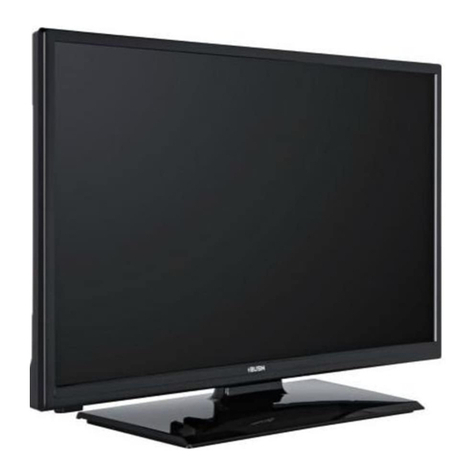
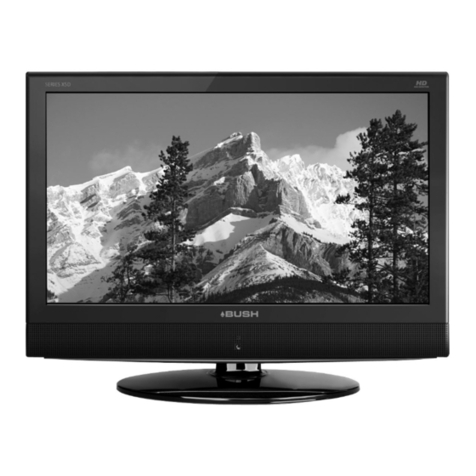
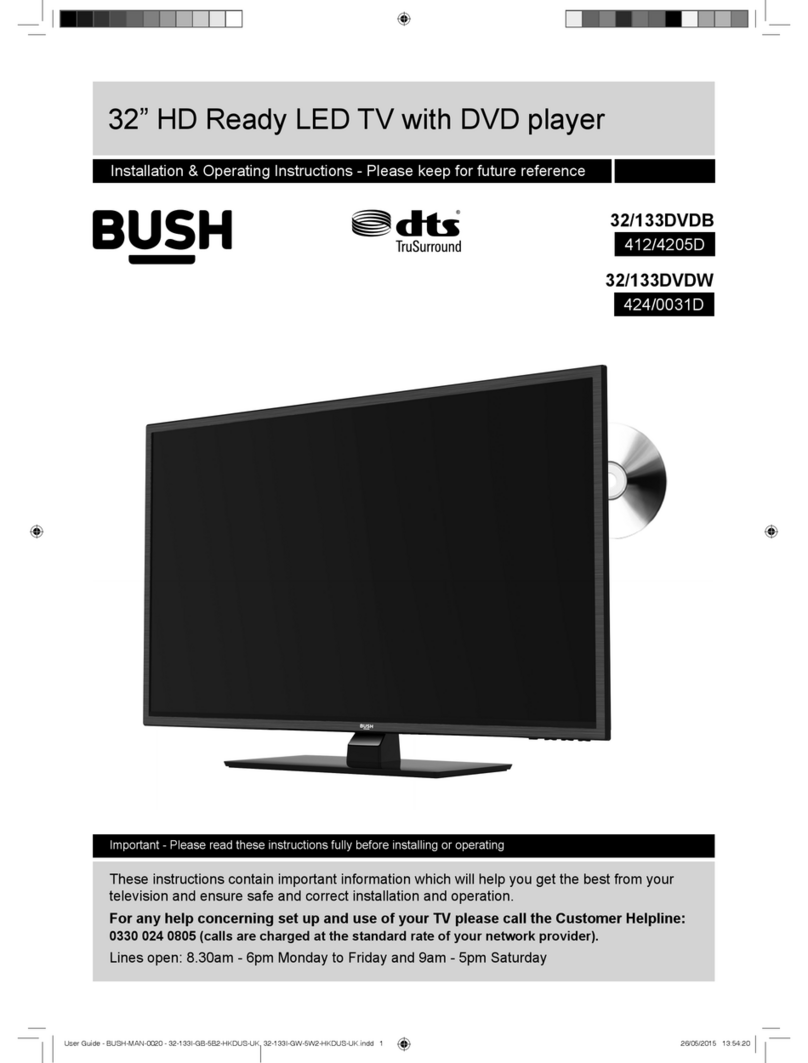
Bush IDLED2601 User manual

INSTRUCTION MANUAL
IDLED2601
IDLED3201
The Gold Technical Support Line:1902 215 259
Personal Product Support
(Charges will applyat $2.95 perminute)
LED LCD TV

-1-
INTRODUCTION
Thank you forbuying this Bushproduct, which isdesigned to giveyou many yearsof
trouble-free service.
You may already befamiliar with using a similar unit,but please take time to read
these instructions. They are designed to familiarise youwith the unit s many features
and to ensureyou get the very best fromyour purchase.
Safety is important
Your safety and thesafety of others is important. Therefore, please ensureyou read
the Safety Instructions before you operatethis unit.
Warranty
In the unlikelyevent that yourproduct fails towork normally, please callthe below
Bush warranty numberto discuss theproblem with oneof our qualifiedservice
engineers.
Australia
Bush Warranty: 1800 509 394
New Zealand
Bush Warranty: 0800 450 259

Contents
-2-
INTRODUCTION...............................................................................1
SAFETY INSTRUCTIONS...............................................................3-4
BASE STAND INSTALLATION
.................................................... 6
INSTALLATION..........................................................................7 -10
REMOTE CONTROL..................................................................11-12
OPERATION..............................................................................13-18
TROUBLESHOOTING.....................................................................19
TECHNICAL SPECIFICATIONS...................................................20-21
WARRANTY....................................................................................22
.......................................................... 5
WALL MOUNTING INSTALLATION

-3-
SAFETY INSTRUCTIONS
1. Do notuse this TV near dripping or splashing water. Do notuse any liquidsnear this TV.
2. Clean withadry cloth only.
3. Do notblock any ventilation openings and install in accordance withthe manufacturers
instructions.
4. Do placethis TV near any heat radiating sources, suchas; heaters, stoves,or other
devices (including amplifiers)that produce heat.
5. Please ensurethat the power cord is protectedfrom damage (i.e.being walked on, cut
or split) especiallyat the inputs.
6. Only useattachments/accessories specified in this manual.
7. Unplug theTV during lightning storms or when the unitwill be unusedfor long periods of
time.
8. Refer allservicing to a qualified service personnel. Servicing is requiredwhen the TV
has been damagedin any way, such as;if the power-supply cord or plug is damaged, if
liquid has beenspilled or objects have fallen into the TV, if theTV has been exposed to
rain or moisture,if does not operate as perthis manual, orif it has been dropped.
9. The TV should not be exposedto dripping or splashing and noobjects filled withliquids,
Such as vases,should be placed on the apparatus.
10.If the televisionis to be built into acabinet or similarenclosure, a small amount of
distance should bemaintained to ensure ventilation. Heat build-up will reduce the
service life ofyour television, and can also be dangerous.
ADDITIONAL SAFETY NOTES
Never tamper withany components insidethe TV, or anyother adjustment controls not
mentioned in thismanual.
All LED LCD-TVsare high voltageinstruments. When youclean the unitor cabinet turnoff
the power anduse a dry soft cloth.
During thunder andlighting, unplug thepower cord andantenna cord to prevent damage to
your TV.
All repairs tothis TV should only beperformed by qualifiedTV service personnel.
SAFETY AND WARNINGS
Important Safety Instructions
Warning: To reduce therisk of electric shock, do notremove the coveror back as there
are no user-serviceableparts inside. Refer all servicing to a qualified technician.
Warning: To prevent fireor electric shock hazard, do notexpose the unitto any liquids or
moisture.
Do not exposethe TV and power adaptor to water (drippingor splashing) andno objects
filled with anyliquids, such as vases, should beplaced on ornear the unit.
Please ensure thatthis product is kept away fromdirect sunlight andheat sources.
Do not blockthe any of the ventilation openings.Slots and openingson the unit are
provided for ventilation.The openings should never be blocked.
Do not placethe product on any unstable surfacesas this maycause the unit to fall and
may cause possibledamage or injury.
Never place heavyor sharp objects on the panelor frame.
Only use theAC adapter included with product.Using any other adaptor will voidyour
warranty.
This marking indicatesthat this product should not be disposed with otherhousehold
wastes. To prevent possibleharm to theenvironment or human health from uncontrolled
waste disposal, recycleit responsibly to promote the sustainable reuse of material
resources. To dispose ofyour LED LCDTV contact your retailer where the product was
purchased for tipson safe disposal when the time comes.
-4-
This symbol indicatesthat this unitis a ClassII double insulated
appliance and thereforean earth connection is not required.

ACCESSORIES

200mm
100mm

INSTALLATION
-7-
Front panel
1: Remote Control Sensor.
2: Indicator LCD LED:
BLUE POWER ON.
RED STANDBY.
3: Side buttons (refer to image below)
4: Main power switch
Side Buttons
1 SOURCE
Press the SOURCE Button to display the Input Source list.
STANDBY
Press this button to turn the unit ON from STANDBY mode.
Press it again to turn the set back to STANDBY.
2 MENU
Press the MENU Button to display the Main Menu.
3 CH+/CH-
Press the CH+/CH- Buttons to change the channel.
In the SOURCE Menu, press the CH+/CH- Buttons scroll through the Input Source List.
In the MAIN MENU, press the CH+/CH- Buttons to scroll through the Menu options.
4 VOL+/VOL-
Press the Vol+/Vol- Buttons to adjust the Volume level.
Press the Vol+/Vol- Buttons to confirm your selection in the Input Source Menu.
5.
SOURCE
MENU
CH+
CH-
VOL+
VOL-
STANDBY
30 30
1
3
2
4

INSTALLATION
-8-
STEPS:
PC
Ensure the TV and yourcomputer are bothset
to power off before your connect.
1.Connect the VGAInput & PCAudio Inputas
above.
2.Connect power supplyagain to yourTV set.
3.Turn on the TV and then pressthe SOURCE
Buttons to select PC mode.
4.Then turn thePC power on.
ANTENNA
Note:
Aerial Connections: IEC(female).
Input Impendance: 75 unbalanced.
Rear Sockets
Outlined below isthe Rear Socketsprovided -
AV Input, R/LAudio Input,YPbPr Input and HDMI2 Input.AC POWER INPUT,
Note: 1. The AV Input andYPbPr Input share one audio channel.
2. When theHDMI2 Input receivesa DVI signal,the audio signalis received
from the R/Laudio input.
Side Sockets
Outlined below isthe Side Socketsprovided -
HDMI1 Input, USBInput, PCAudio Input,AV Output, VGA Input and RFInput.
Note: When theVGA Inputreceives a DVIsignal ,the audiosignal is receivedfrom the
PC AudioChannel.
USB
HDMI1 PC AUDIO AV LR
AV OUTPUT
VGA RF
AV LRAV LRYPb PrYPb Pr HDMI2
100-240V~ 50/60Hz
AC-INPUT
USB
HDMI1 PC AUDIO AV LR
AV OUTPUT
VGA RF

PRESET MODE
PC
-9-
INSTALLATION
1
2
3
4
5
6
7
720*400
640*480
800*600
800*600
800*600
1024*768
1024*768
70
60
56
60
72
60
70
31.47
31.47
35.156
37.88
48.08
48.36
56.48
RESOLUTION V.Freq.(Hz) H.Freq.(KHz)
AV LRAV LRYPb PrYPb Pr HDMI2
100-240V~ 50/60Hz
AC-INPUT

INSTALLATION
-10-
Please follow one of the below instructions when connecting your TV to other devices.
AV EQUIPMENT
Yellow (video)
White(audio L)
Red(audio R or Pr)
Y
W
R
W R
GBR
Blue(Pb)
Green(Y)
B
G
VIDEO EQUIPMENT with YPbPr
WR
GBR
WR
W R
YPbPr Connection can support these video formats: 480i, 576i, 480p, 576p, 720p, 1080i and
1080P.
HDMI
TO AUDIO OUTPUTS
VIDEO EQUIPMIENT
TO VIDEO
OUTPUTS
HDMI
W
R
WR
TO AUDIO INPUTS
VIDEO EQUIPMIENT
TO VIDEO
INPUTS
USB
HDMI1 PC AUDIO AV LR
AV OUTPUT
VGA RF
AV LRAV LRYPb PrYPb Pr HDMI2
100-240V~ 50/60Hz
AC-INPUT

-11-
REMOTE CONTROL
1
OK
23
456
7890
+
CH
_
+
_
VOL
POWER MUTE
AUDIO
RECALL
TV MENU SOURCE
CH.LIST SOUND EXIT
PIC
SLEEP ASPECT
TEXTTV/RADIOFREEZE
INFOFAVEPG
REVEAL HOLD LIST INDEX
SUBPAGE SIZE MIX SUBTITLE
REC/REP
25
14
15
20
18
16
13
17
19
21
23
24
22
8
2
3
4
5
7
12
1
6
9
10
11
26
27
28
29
30
31
32
33
1:POWER:Press to turnthe unit onor off.
2:NUMERIC KEY:Press for directaccess to channels.
3:TV MENU:Press to displayTV Main Menu.
4:CURSOR:Press to scrollthrough the Menu.
5:CH.LIST:Press to displaythe channel list.
6:VOL+/- :Press to adjustthe sound level.
7:PIC:Press to switchbetween picture modes.
8:SLEEP:Press to setSleep Timer.
9:FREEZE :Press to freezethe picture youare
watching.
10:EPG:Press to displaythe 7 DayElectronic
Program Guide forinformation on theshow you are
watching.
11: FAV:Press to accessyour favourite channels list
in TV or DTV mode
12:TELETEXT KEYS:Refer to page12.
13:MUTE:Press to disableor enable the sound output.
14: AUDIO:Press to changethe available audio
/language for theprogram you are watching.
15: RECALL:Press to returnto the previously viewed
channel.
16: SOURCE:Press to displaythe Input Source List.
17: OK:Press to confirmMenu selections.
18: EXIT:Toexit the main menu, press theExit Button
or to cancelsetting selections.
19: SOUND:Press to switchbetween the sound modes.
20: CH+/CH-:Press to scrollthrough your Channel List.
21: ASPECT:Press to changethe picture aspect ratio.
22:TV/RADIO:Press to switchbetween TV and Radio
modes.
23: TEXT:Press to enteror exit TELETEXT mode.
24: INFO:Todisplay the program information of the
show you arewatching, press the Info Button.
25: SUBTITLE:Toturn on Subtitles press the Subtitle
Button in DTVmode.
26: SKIP FORWARD:Press to skip the next fileor
track in USBMode.
27: SKIP BACKWARD:Press to skip the previous
file or Track in USB Mode
28: REC/REP:Press to recordthe TV program you
are watching inDTV Mode or press to repeatplay
in USB Mode.
29: STOP:Press to Stopplay in USBMode.
30: REWIND:Press to rewindplay in USB Mode
and TimeshiftMode.
31: FAST FORWARD:Press to Fast Forward play
in USB modeor Timeshift Mode.
32:PLAY:Press the PlayButton in USB Mode or
Time Shift Mode to beginor continue Playback.
33: PAUSE:Press the Pause Button to pauseplay
in TimeShift or USB Mode or pauserecording in
Record Mode.
REMOTE CONTROL

-12-
REMOTE CONTROL
TEXT
SELECTING A PAGE
DIRECT ACCESS
TO THE ITEMS
INDEX
SUB PAGE
HOLD
REVEAL
Press: You will obtain:
LIST
TELETEXT
Toview a specificpage enter the page number requiredby using the
Numeric Buttons. Thenumber will be displayed on thetop left. The
page counter willturn until thepage is displayed.Repeat this operation
to view anotherpage. If thecounter continues tosearch, this means
that the pageis not transmitted.
The coloured buttonscorrespond to thecolour options atthe bottom of
the screen. Thefour coloured keys are used to access the itemsor
corresponding pages. Thecoloured areas flash when the item or the
page is notyet available.
This button willopen/return you tothe contents page.
Certain pages containsub-pages which areautomatically displayed.
This key is used to stopor resume sub-pageacquisitionThe indication
appears top left.
To freeze the page.
To display or hide the concealed information.
The user canset four favouritepages to bedirectly linked to the four
color keys. Whilelist mode isactivated, it isnot possibility to use TOP
or FLOF navigationwith the colourkeys. The favouritepage numbers
should be storedand restored to/fromnonvolatile memory foreach
channel by thesystem software.
This is usedto access and/orexit the Teletext mode.Asummary will
appear with alist of itemsthat can beaccessed. Each item has a 3digit
page number.If the channelselected does notbroadcast teletext, 100
will be displayedand the screenwill remain blank (in this case, exit
teletext and selectanother channel).
Teletextis an informationsystem broadcasted bycertain channels whichwill provide
detailed program information.It also offers access tosubtitles for viewerswith hearing
problems or whoare not familiarwith the transmissionlanguage(cable networks,
satellite channels, etc.)

-13-
OPERATION
Installation Guide
This will appear during the firsttime installation and when you resetthe TV.You canchoose any of the above
languages or countries.
The TV will then automaticallyscan for all available stations and store the in the station list.
1.CHANNEL MENU
Press the TVMENU Button todisplay the ChannelMenu.
1)Auto Tuning:
An Auto Scan willsearch for all availableATV and DTV Stations and store them in thestation list.
ATV Manual Tuning
Programme Edit
Signal Information
< >< >
CHANNEL
Auto Tuning
DTV Manual Tuning
Software Update(USB)
Dansk
Deutsch
Hrvatski
Italiano
Please select an OSD Language
OK
Magyar
Nederlands
Norsk
PolskiEnglish
Cesky
E k
Espanol
~
Fran ais
Portugues
Pycck
Austria
Belgium
Country
OK
Australia
Croatia Finland Greece Luxembourg
Czech France Hungary Netherlands
Bulgaria Denmark Germany Italy
Tune Type DTV+ATV
MENU
Austria
Belgium
Australia
Croatia
Czech
Bulgaria
Finland
France
Denmark
Channel Tuning
TV : 0 Programme(s)
DTV : 0 Programme(s)
Radio : 0 Programme(s)
96% UHF CH 68 DTV
Toconduct anAuto Scan, pressthe arrow buttons to select the Auto Scan Setting and press OK to
confirm. To stop scanningat anytime, press the Menu or Exit Button.

2)DTV Manual Tuning - Select the DTV Manual Tune option in the Channel Menu, to conduct a Manual
scan. Use the Buttons manually scan through the DTV Manual Tune channels, then press OK to search.
OPERATION
3)ATV Manual Tuning - Select the ATV Manual Tune option in the Channel Menu and follow the above
steps. ATV Manual Tuning
Storage To 1
System BG
Current CH 1
Search
Fine-Tune
Frequency 255.25 MHz
Save MENU
__++
DTV Manual Tuning
VHF CH 5
__++
Bad Nomal Good
Press OK to search
Rename:
This feature isonly available forATVprograms. Use the to the selectthe channel/ programyou
wish to rename.Then press theGreen Teletext Button to Rename. Use the Buttons to selectthe
character to renameand then pressOK to confirm.Press the MENUButton or EXITButton to exitthis
option.
Note: ATV programs canonly be 5characters.
Use theArrow Buttons toselect the channelyou wish tomove. Then pressthe Yellow Button to select
Move function. Onceactive use theArrow Buttonsto move andthen press OKto confirm.
Use the Buttonsto highlight thechannel/program you wishto set toSkip. Then pressthe Blue
TeletextButton and theSkip icon willbe displayed nextto the programand it willbe skipped inthe
program list. Pressthe Blue Buttonagain to cancelthe skip setting.
NOTE:
Press the RedTeletext Button tosave and store the channel youhave manual scanned.
4). Program Edit:
Delete
Press the Red Teletext Button to delete a programor channel in the channel list.
-14-
Prorgram Edit
1-- DTV
2-- ATV
Delete
MENU
OK
Rename Move Skip
Favourite

-15-
OPERATION
Favourite
Use the Buttonsto select theprogram you wishto set toyour favourites listand press theFAV
Button to set.The favourite Iconwill then bedisplayed next tothe program. Pressthe FAV Button again
to cancel setting.
To enterthe Picture mode, press the MENUbutton and then press or buttons to select the Picture Menu.
Once in the Picture mode, pressthe or buttons to select thepicture settings you wish to adjust.Toreturn
to the Main Menu, press theMENU Button.
2. PICTURE MENU
Color Temperature
Aspect Ratio
Noise Reduction
Screen
Picture Mode Standard
< >< >
PICTURE
MENU
Picture Mode Standard
Contrast 82
Brightness 50
Color 50
Sharpness 50
Tint 50
Color Temperature Medium
Red 40
Green 31
Blue 50
MENU
NOTE:
1) Youcan change the screen position inPC Mode only. You can adjust to horizontal, vertical, size and phase.
3.SOUND MENU
Toenter the SoundMenu, press MENUbutton and thenpress or buttonsto select theSOUND Menu.
Once in theSound Mode, press or buttons to select the settings you wish to adjust. Press MENU
button to returnto the MainMenu.
< >< >
Balance
Auto Volume
Sound Mode Standard
SOUND
Note:
Auto Volume is onlyavailable when the input signal volume is too large or distorted.
4.TIME MENU
Toenter the Time Menu, press MENU button & then press or buttons to selectthe TimeMenu.
NOTE:
When you set theAuto Sleep option to ON, yourTV will automatically enter into Standby Mode,
when there
has been no signal for 15minutes.
Off Time
On Time
Sleep Timer
Auto Sleep
Time Zone
Clock -- -- -- --
TIME
< >< >

-16-
OPERATION
5.OPTION MENU
Toenter the OptionMenu, press MENUbutton and thepress or buttonsto select theOption Menu.
Once in OptionMenu, press or buttons to selectthe settings youwish to adjust.Press MENU button
to return tothe Main Menu.
< >< >
PVR File System
OSD Language English
OPTION
Audio Languages
Subtitle Languages
Country Australia
Restore Factory Default
Check PVR File System Start
USB Disk
Format
Time Shift Size
Speed
Free Record Limit 6 Hr.
Select Disk C:
In PVR FileSystem Menu you will be asked to format your USB Disk or Hard Disc for PVR Operation.
Select Disc
Toview and selectthe USB fileor the allocatedspace on yourHard Disc thatyou would liketo record to,
press OK buttonto enter the Select Disc Sub-Menu and thenpress or buttons on your remote control
to select theparticular partition/file forrecording.
Press the MenuButton to returnto the MainMenu.
Check PVR FileSystem
Press the OKButton to startchecking the filesystem of yourUSB storage orHard Disk. OnceSuccess
is shown afterchecking, you willthen be ableto begin recordingor or useTime Shiftfunction. If FAIL is
shown after checking,you then needto format yourUSB or HardDisc and tobe able torecord or use
Time Shift.
Format
When you formatyour USB or Hard Disc partitionany saved datawill be lost.Please ensure
that you startwith a blankpartition on yourHard Disc toensure you don'tlose any data.
PVR File SystemType
There are twotypes of formats: FAT32 and Hi Speed Format. You can press or buttons tochoose
the type offormatting. If FAT32 isselected, you willhave to formatwhole size ofyour USB orthe
allocated partition forrecording. If HiSpeed Format isselected, you willthen be ableto press or
buttons to selectthe size youwish to use(for example 1G,10G, 20G... orAll). Oncea particular sizeis
booked for recording,you will beable to usethe remaining spaceof your USBor Hard Discfor other data
storage.
Please note nomatter which sizeis booked forrecording, all thedata in theallocated partition ofthe
Hard Disc willbe lost afterformatting.
Speed
This will showthe supported speedof recording.
Record Limit
This will showthe approximate timeyou will beable to recordon to your USB or Hard Disc.
File System Size
PVR File System Type FAT32
MENU
PVR File System Size All
SD 13 Mins
HD 3 Mins

Press the OKbutton to enterthe DMP Menu.
PHOTO MUSIC MOVIE TEXT
OPERATION
-17-
6.LOCK MENU
Toenter the LOCKMenu, press MENUbutton and thenpress or buttonsto select the LOCK Menu.
The default passwordis 6666.
Please set anew password toso it iseasy to remember. Follow theon screen stepsto set.
FACTORYRESET NOTE:
If you wishto reset yourTV,please select theRestore Factory Defaultoption, this willclear all settings.
Set Password
Lock System
LOCK
< >< >
Block Program
Parental Guidance Off
7. APPLICATIONSMENU
Toenter theApplications Menu, pressMENU button andthen press or buttons to select the
Applications Menu. Thisis where youwill be able to view and play your USB files.
< >< >
APPLICATIONS
DMP
The supported formatsare as below:
Photo: JPEG, BMP, PNG
Music: MP3
Movie: AVI, MP4, MKV
Text:TXT

OPERATION
-18-
Schedule List 04:55 28th Apr Delete
Time Date Programme Title Channel Name
4.
Press the Blue Button to booka program for future viewing andadd to the schedule list.
Remind
3. Record
By pressing the Red Button you can book the program you would like to record. Please ensure a supported
USB or Hard Disc is connected with TV to ensureprogram will be recorded successfully.
802 SZTVM03
08 Minute
05 Hour
Apr Month
28 Date
Once Mode
Reminder setting
BACK
OK
__++
8.EPG Menu(Electronic ProgramGuide).
The EPG Menuis used tolook at whatis being broadcastedin DTV orRadio modes. Pressthe EPG
Button to accessthe EPG Menu.Youwill receive detailed program information ofthe channel you
are currently watchingas well asthe 7 Day Program guide.
Sample1.ts
Resolution: 720x576
Subtitle: 1/1
Size: 30574 KBytes
Close
AudioTrack: 1/2 ½
28 Apr 04:39
800 SZTVM01 No Information
801 SZTVM02
802 SZTVM03
803 SZTVM04
804 Date
No Information
No Information
No Information
No Information
PROGRAMME GUIDE TIME
ScheduleRecord INFO Remind
OK INDEX
2.
Press the Yellow Button to view the scheduled programs you have booked for watching or recording.
You can also press the Red button to delete the program from your scheduled programs list.
Schedule
1.
Use to select a program andthen press the Green Button or INFO key to display the highlighted
program's information.
INFO

Picture Audio
Snow Noise Check theAntenna Position
and that itis connected
Inspection Check
Interference Noise Check for electrical
interference
Normal Picture Mute
Check if mutefunction is on.
Check AV cables are
connected.
No picture Mute
Check is connectedand on
Check Cable connections
Adjust Contrast, Brightness
and VolumeSettings
No colour Normal audio Check TV ColourSettings
Picture
Breaking Up
Normal Audio
or Weak
Conduct a ChannelRescan
No Colour Irregular Check AV/Video settings
Normal audio
Check AntennaPosition and
that it isconnected correctly
Potential Issues
Ghost
-19-
TROUBLESHOOTING
No Display
Mosaic Irregular Check Antennaconnection
Check Video Cables
connected firmly.
Normal audio
This manual suits for next models
1
Table of contents
Other Bush LCD TV manuals

Bush
Bush Q41T2201672 1B User manual

Bush
Bush LY2211WCW User manual

Bush
Bush LED32K1 User manual

Bush
Bush IDLCD2205HDV User manual

Bush
Bush IDLCD3211HDV User manual

Bush
Bush LCD40883F1080P User manual

Bush
Bush 32in User manual

Bush
Bush LTF22M4 User manual

Bush
Bush S642F1 User manual

Bush
Bush IDLCD1904HD User manual