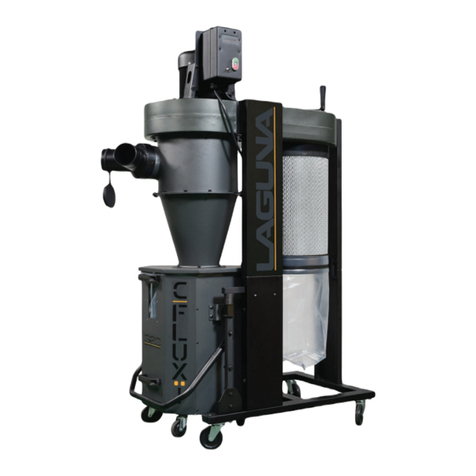
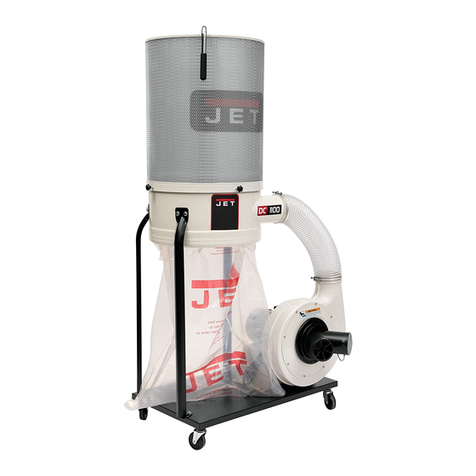
Busy Bee tools BBCY2 User manual

Cyclone Dust Collectors
v1.0
BBCY2
2 HP CYCLONE
BBCY3
3 HP CYCLONE
BBCY5
5 HP CYCLONE

2 |
Table of Contents
Introduction…………………………………………………………………….………………………………..……3
General Safety Instructions……………………………………………………………………………….………….4
Specific Safety Instructions ………………………………………………………………………….…………....…5
BBCY2 Specifications ……………………….……………………………………………………………………….6
BBCY3 Specifications…………………………………………………………………………………….………..…7
BBCY5 Specifications…………………………...…………………………………………...………….…………....8
Physical Features …………………………………………………………………………...………….………….... 9
Un-packing & Inventory…………………………….……………………………………………….…….…………12
Proper Grounding ………………………………………………….…………………………………..…………... 14
Assembly………………………………………………………….……………………………………..……………15
Service………………………...………………………………………………………………………………………24
Maintenance………………….………………………………….……………………………………..…….. ……..24
Emptying Replacing Collection Drum …………………………………………….…………………..…………...25
Cleaning Canister Filter………………….. ………………………………………….……………………………..26
Electrical……………………….………………………………………………………….…………………………..27
Troubleshooting………………………………...………………………………...................................................30
BBCY2 Parts Breakdown …………………………………………………….……….…………………...............33
BBCY3 Parts Breakdown ………………………………………………………...………………………………...38
BBCY5 Parts Breakdown …………………………………………………………….…………………………….43
Line Diagrams………………………………………………………………………………………………………..48
Warranty ……………………………………………………………………...……………………………..............51

3 |
Introduction
These machines have been specially designed to provide many years of trouble-free
service. Our thorough quality control program ensures a reliable safe machine that will
provide years of safe operation. Our intention is to provide you with this manual to
describe the basic information for safety, setup, operation, and maintenance of your
new machine. We at Busy Bee Tools are committed and pride ourselves in customer
satisfaction.
We stand behind our products! In the event that questions arise about your machine,
please contact Busy Bee Tools Customer Service at (905) 738-5115 or 1-800-461-
2879 or send e-mail to: cs@busybeetools.com.
Our knowledgeable staff will help you to troubleshoot problems and process warranty
claims when required.
We cannot stress enough how important your health and safety is. This manual has
been designed with the assembly, proper use and care as the focal point. Therefore,
we have introduced many warning signs throughout the manual to emphasize your
safety. So please read and adhere to these simple and important warnings.
We welcome you to the Busy Bee Tools family of quality woodworking machinery.

4 |
General Safety Instructions for Machines
Extreme caution should be used when operating all power tools. Know your power
tool, be familiar with its operation, read through the owner’s manual and practice
safe usage procedures at all times.
CONNECT your machine ONLY to the
matched and specific power source.
ALWAYS wear safety glasses
respirators, hearing protection and
safety shoes, when operating your
machine.
DO NOT wear loose clothing or
jewelry when operating your machine.
GROUND ALL TOOLS if tool is
equipped with three-prong plug, it
should be plugged into a matching
receptacle. If an adapter is
used to accommodate a two-prong
receptacle, the adapter plug must be
attached to a known ground. Never
remove the third prong.
A SAFE ENVIRONMENT is
important. Keep the area free of dust,
dirt and other debris in the immediate
vicinity of your machine.
KEEP CHILDREN AND VISITORS
AWAY. All children and visitors should
be kept a safe distance from work
area.
NEVER leave a tool unattended while
it is in operation.
DON’T OVERREACH. Keep proper
footing and balance at all times.
DISCONNECT the power source when
changing drill bits, hollow chisels,
router bits, shaper heads, blades,
knives or making other adjustments or
repairs.
SECURE WORK. Use clamps or a
vise to hold work when practical. It’s
safer than using your hand and frees
both hands to operate tool.
BE ALERT! DO NOT use prescription
or other drugs that may affect your
ability or judgment to safely use your
machine.
MAINTAIN TOOLS IN TOP
CONDITION. Keep the blades sharp
and aligned. Follow instructions for
lubricating and changing accessories.
DISCONNECT TOOLS before
servicing and when changing
accessories such as blades, bits,
cutters, etc.
ALWAYS keep all safety guards in
place and ensure their proper function.
WARNING: The dust generated by
certain woods and wood products can
be injurious to your health. ALWAYS
operate machinery in well ventilated
areas and provide for proper dust
removal. Use wood dust collection
systems whenever possible

5 |
Specific Safety Instructions
Read and understand the instruction manual before operating the dust collector.
Basic precautions listed below should always be followed when using your dust
collector to reduce the risk of injury, electrical shock or fire.
DO NOT leave the dust cyclone plugged
into the electrical outlet. Unplug dust
cyclone from outlet when not in use and
before servicing, changing canister,
unclogging and cleaning.
ALWAYS turn the power switch “OFF”
before unplugging the dust cyclone.
ALL electrical connections and wiring
should be made by qualified personnel
only.
DO NOT pull the dust cyclone by the
power cord. NEVER allow the power
cord to come in contact with sharp
edges, hot surfaces, oil or grease.
REPLACE a damaged cord
immediately. DO NOT use a damaged
cord or plug. If the dust cyclone is not
operating properly, or has been
damaged, left outdoors or has been in
contact with water, return it to an
Authorized Service Center for service.
ALWAYS be sure that the collection bags
and canister filter are securely fastened to the
collector body.
PERIODICALLY INSPECT dust bag and
Canister filter for any cuts, rips or tears.
Disconnect the machine from the
power source before servicing.
TO REDUCE the risk of electrical shock,
do not use the dust collector to pick up
flammable or combustible liquids, such
as gasoline.
NEVER use the dust cyclone to
dissipate fumes or smoke. Never pickup
anything that is burning or smoking,
such as cigarettes, matches or hot
ashes.
DO NOT use the dust cyclone as a toy.
Keep children away from the dust
collector.
ALWAYS Keep hair, loose clothing,
fingers, and all body parts away from
openings and moving parts of the dust
cyclone.
DO NOT use the dust cyclone without a
canister filter and dust collection bag in
place and properly secured.
DO NOT operate the dust cyclone with
unused dust intake ports uncapped.
ALWAYS cover exposed dust intake
ports.
CONNECT dust collector to a properly
grounded outlet only. See Grounding
Instructions.
NEVER attempt to use this dust cyclone
to collect metal materials such as screws,
nails or other metal parts

6 |
IMPORTANT: The safety instructions given on the previous page can not be complete because the environment in
every shop is different. Always consider safety first as it applies to your individual working conditions
BBCY CYCLONE DUST COLLECTORS
BBCY 2 HP CYCLONE DUST COLLECTOR
Motor........................................................……………..2 HP, 220-Volts, 60-Hz, Single Phase
Amp...................................................……..........………………………………………10 Amps
Motor Speed......................................……………........………………………………3450 RPM
Suction Capacity ...............................…………………............………………1720 / 1150 CFM
Static Pressure..................................………………………….......…………………….11” H2O
Impeller Size…………………………………………………………….........………………12-3/4”
Sound Rating ………………………………………………………………….........………….77dB
Switch................................................…………………………………....……. Magnetic Switch
Inlet Size ...........................................…………………………….......……….7” (with 4" Y-Inlet)
Made In.............................................………………………………….....……………….Taiwan
Warranty............................................……………………………………....…………….2 Years

7 |
BBCY 3 HP CYCLONE DUST COLLECTOR
Motor.................................................……….………….3 HP, 220-Volts, 60-Hz, Single Phase
Amp…………………………………………….......………………………………………..15 Amps
Motor Speed......................................……………..…………………………………..3450 RPM
Suction Capacity………………….…………………..........……………………2900 / 2280 CFM
Static Pressure………………………………………………....…………………………12.5” H2O
Impeller Size ……………………………………………………...………………..…………….16”
Sound Rating ……………………………………………………….....……………………….79 dB
Switch................................................……………………………….…………. Magnetic Switch
Inlet Size………………………………………………….……………...………..8” (with 4" Y-Inlet)
Country of Origin………………………………………………………….………..Made in Taiwan
Warranty.................................................…………………………………...………………..2 Years

8 |
BBCY 5 HP CYCLONE DUST COLLECTOR
Motor.................................................……….....……….5 HP, 240-Volts, 60-Hz, Single Phase
Amp...................................................…………....………………………………………25 Amps
Motor Speed......................................……………...………………………………….3450 RPM
Suction Capacity……………….……………………….......……………………4350 / .2450 CFM
Static Pressure………………………………………………....…………………………13.5” H2O
Sound Rating…………………………………………………….........……………………….78 dB
Impeller Size……………………………………………………………........……………………16”
Switch................................................………………………………........….… Magnetic Switch
Inlet Size ...........................................………………………………….....….10” (with 4" Y-Inlet)
Country of Origen ………………………………………………………….........…Made in Taiwan
Warranty ………………………………………………………………………………...….........2 Years

9 |
BBCY2
+2 HP DUST CYCLONE
PHYSICAL FEATURES
Fig. 1
Base
Castors
Canister
Filter
Quick-Lock
Levers
Canister Filter
Cleaning Handle
Canister Bag
(Not visible)
Cone
Collection
Drum
4" Y-Inlet
Adapter
2 HP Motor
Base
Vacuum Hose
Drum Release /
Locking Handle
Drum Castors
Main
Housing
Switch

10 |
BBCY3
3HP DUST CYCLONE
PHYSICAL FEATURES
Fig. 2
Base Casters
Drum Casters
Main
Housing
Quick-Lock
Levers
4" Y-Inlet
Adapter
3 HP Motor
Canister Filter
(Not Visible)
Base
Canister Filter Bag
(Not Visible)
ON/OFF Magnetic
Switch
Cone
Collection
Drum
Drum
Drum Release
/ Llock Handle
Filter Cleaning
Handle

11 |
BBCY5
5HP DUST CYCLONE
PHYSICAL FEATURES
Fig. 3
Base Casters
Canister
Filter (2)
Magnetic
Switch
Quick-Lock
Levers
4" Y-Inlet
Adapter
5 HP Motor
Base
Canister Filter
Bag
Filter Cleaning
Handle (2)
Cone
Drum
Casters
Drum
Main
Housing
Drum Release
/ Lock Handle
Collection
Drum
Drum
Collection
Drum Bag
Drum

12 |
2 & 3 HP Cyclone Dust Collectors
Un-packing & Inventory
Your Cyclone dust collector was properly
packaged and shipped complete in cartons for
safe transportation. When unpacking, carefully
inspect the carton and ensure that nothing has
been damaged during transit.
Fig. 4
The following unpacking and inventory section
will cover both the 2 and 3 hp models of the
cyclone dust collectors.
List of Contents Qty
A. Impeller Housing………………………………....1
B. Intake Barrel .....................................................1
C. Cyclone Funnel .................................................1
D. Base .................................................................1
E. Collection Drum Lid ………………………..........1
F. Drum Lock Handle ............................................1
G. Inlet Adapter......................................................1
H. Lock Handle Guides..........................................2
I. Vacuum Hose…………..…................................1
J. Flexible Hose Clamps .......................................2
K. Flexible Collection Drum Hose......................... 1
L. Hose Clamps 1-3/4”...........................................2
M. Locking Swivel Casters 2-1/2”...........................4
N. Filter Paddle Cover............................................1
O. Swivel Casters 2" ..............................................4
P. Filter Handle Spindle.........................................1
Q. Collection Drum Handle ....................................1
R. Collection Drum Dust Bag..................................1
S. Filter Dust Bag...................................................1
T. Support Legs.....................................................2
U. Reinforcement Plates……………………………2
V. Lining Plate…………………………………….....2
W. Dust Collection Drum ........................................1
X. Canister Filter ...................................................1
Y. Filter Cleaning Handle.......................................1
Z. Filter Dust Bag Clamp……………………………1
Fig. 5
List of Contents Qty
AB-Flange Bolt 5/16"-18 x 3/4".............................................................28
AC-Flange Bolt 5/16"-18 x 1/2".............................................................16
AD-Button Head Cap Screws5/16”-18 x 3/4"…………………...........…16
AE-Hex Nuts5/16”-18.....................................................................…….4
AF-Flange Nuts5/16”-18...............................................................……12
AG-Flange Screw3/16-24x3/8” .........................................…………….1
AH-Phillips Head Screws3/16”-24x3/4”……………………………………2
AI-Phillips Head Screws1/4”-20x5/8”……………………………………...2
AJ-Button Head Cap Screws1/4”-20x1/2”……………………………….28
AK-Fender Washers5/16”x Ø23mm…………………………………...…16
AL-Flat Washers5/16”x Ø16mm……………………………………………4
AM-Nut1/4-20……………………………………………………………....12
AN-Hex Nuts3/16”-24……………………………………………………….2
AO-Acorn Nuts1/4”-20……………………………………………..............2

13 |
BBCY 5 HP Cyclone Dust
Collector
Un-packing & Inventory
Your Cyclone dust collector was properly
packaged and shipped complete in cartons
for safe transportation. When unpacking,
carefully inspect the carton and ensure that
nothing has been damaged during transit.
Fig. 6
List of Contents Qty
A. Impeller Housing…………….………………. 1
B. Intake Barrel ............................................... 1
C. Cyclone Funnel............................................1
D. Base ............................................................1
E. Collection Drum Lid….…………..….............1
F. Drum Lock Handle ......................................1
G. Inlet Adapter.................................................1
H. Lock Handle Guides.....................................2
I. Vacuum Hose………………….....................1
J. Flexible Hose Clamps .................................2
K. Flexible Collection Drum Hose.................... 1
L. Hose Clamps 1-3/4”.....................................2
M. Locking Swivel Casters 2-1/2”......................4
N. Filter Paddle Cover..................................... 2
O. Swivel Casters 2" ........................................4
P. Filter Handle Spindle....................................2
Q. Collection Drum Handle ..............................1
R. Collection Drum Dust Bag............................1
S. Filter Dust Bag.............................................2
T. Support Legs................................................2
U. Reinforcement Plates…………………......…2
V. Lining Plate………………………………..…..2
W. Dust Collection Drum ..................................1
X. Canister Filter ..............................................2
Y. Filter Cleaning Handle..................................2
Z. Filter Dust Bag Clamp…………..……………2
Fig. 7
List of Contents Qty
AB-Flange Bolt 5/16"-18 x 3/4".............................................. ........36
AC-Flange Bolt 5/16"-18 x 1/2"......................................................16
AD-Button Head Cap Screws5/16”-18x3/4”…………………….........16
AE-Hex Nuts5/16”-18....................................................... …...........4
AF-Flange Nuts5/16”-18............................................................... 16
AG-Flange Screw 3/16"-24 x 3/8"..........................................……..1
AH-Phillips Head Screws3/16”-24x3/4”..................................……..2
AI-Phillips Head Screws1/4”-20x5/8”…………………………………..2
AJ-Button Head Cap Screw1/4”-20x1/2”……………………………..28
AK-Fender Washers5/16”……………………………………………...22
AL-Nut1/4”-20…………………………………………………………...12
AM-Hex Blot Screws5/16”-18x1 1/4…………………………………....6
AN-Hex Nuts3/4”-24……………………………………………………...2
AO-Acorn Nuts1/4”-20…………………………………………………...2

14 |
PROPER GROUNDING
Grounding provides a path of least resistance for
electric current to reduce the risk of electric shock.
The BBCY series of Cyclone dust collectors are
equipped with a 240-volt, single phase motor
which features a 3-conductor cord and a 3-prong
grounded plug to fit a grounded type receptacle.
Do not remove the grounding prong to fit it into a
2-pronged outlet. Always check with a qualified
electrician if you are in doubt.
Make sure the cord is plugged into a properly
installed and grounded power outlet.
To prevent electrical hazards, have a qualified
electrician ensure that the line is properly wired.
This machine is for use on a normal 220-volt circuit
and is factory-equipped with a specificelectric cord
and plug to permit connection to a proper electric
circuit. Make sure that the machine is connected
to an outlet having the same configuration as the
plug.
It is strongly recommended not to use extension
cords. Always try to position your machine close
to the power source so that you do not need to
use extension cords.
If you really find it necessary to use an extension
cord, make sure the extension cord does not
exceed 50-feet in length and the cord is 14-gauge
to prevent motor damage.
Fig. 8
WARNING!
Improper connection of the equipment-
grounding conductor can result in a risk of
electric shock. Check with a qualified
electrician if you are in doubt as to whether
the outlet is properly grounded.

15 |
ASSEMBLY
Note: The following assembly instructions
are for the BBCY2 andBBCY3 Cyclone Dust
Collector. The BBCY5 is also mostly the
same assembly except for the dual cannister
filters. Please see the section at the end of
the assembly instructions for the 5 HP
assembly.
Step 1 Attach (4) 2 1 ⁄ 2" locking swivel
casters to bottom of base, and secure each
caster with (4) 5 ⁄ 16"-18 x 1 ⁄ 2" flange
bolts. See fig 9.
Fig. 9
2. Attach each support leg to base, and
finger-tighten with 5 ⁄ 16”-18 x 3 ⁄ 4” button
head socket screw and 5 ⁄ 16”-18 fender
washers. See fig 10.
Fig. 10
Fig. 11
3. Attach reinforcing plate to each support
leg with 1 ⁄ 4”-20 x 1 ⁄ 2” button head
socket screw. See fig 12.
Fig. 12
Fig. 13

16 |
Fig. 14
Fig. 15
4. With help of two assistants, lift impeller
housing onto support legs, Secure impeller
housing to support legs with (8) 5⁄ 16”-18 x
1⁄ 2” button head screws and (8) 5 ⁄ 16”
fender washers, fully tighten all fasteners
installed in Steps 2–4. See fig 15
NOTE: Orientation of the main housing.
Ensure the motor is sitting over the front cut
out of the base where the collection drum
will be positioned. If main housing cannot
be lifted with helpers a forklift might be
necessary to ensure the operation can be
done safely.
Fig. 16
Fig. 17
5. Loosen (2) Phillips head screws and
remove magnetic switch cover, Install
magnetic switch on right support leg. See
fig 16.

17 |
NOTE: the mounting screws will go into the
existing holes for the screws that secure the
cover to the base of the magnetic switch
cover. See fig 18.
Fig. 18
6. Look for pre-drilled mounting holes and
secure with (2) 3/16”-24 X 3/4” Phillips head
screws and (2) 3/16”-24 hex nuts. See fig
18 and 19.
Fig. 19
Fig. 20
7. Then replace magnetic switch cover and
tighten (2) Phillips head screws See fig 20.
8. With the help of 2 assistants attach
intake barrel to impeller housing with (8) 5 ⁄
16”-18 x 3/4” flange bolts.
Fig. 21
Fig. 22

18 |
9. Attach cyclone funnel to intake barrel,
using 5 ⁄ 16”-18 x 3/4” flange bolts and 5 ⁄
16” flange nuts. See fig 23.
Fig. 23
10. Secure lock handle guides to support
legs.
Fig. 24
Fig. 25
11.Using fasteners attached to spring
bracket, place upper end of drum lock
handle over outer stud on spring bracket.
Then attach lock handle link to lower hole
on lock handle.
Fig. 26

19 |
Fig. 28
Fig. 27
Fig. 29
12. Attach 2”swivel casters to collection
drum, using (1) 5 ⁄ 16”-18 hex nut on
each. Adjust pre-installed flange nut and
hex nut until drum rolls evenly without
rocking or wobbling, then tighten both nuts
to secure caster in place.
Fig. 30
13. With collection drum lid mounting
brackets in the up position. Orient lid so
dust port, flexible hose, and spring brackets
align.
Fig. 31
NOTE: The hole on the drum cover is
extended it is located closer to the rear end
of the lid.

20 |
Fig. 32
14. Attach flexible 8” hose to cyclone funnel
and cyclone funnel then secure with hose
clamp.
Fig. 33
Fig. 34
Fig. 35
15. Secure the handle to the drum then
insert large plastic dust bag inside
collection drum, and fold excess length of
bag over top of collection drum.
Fig. 36
Fig. 37
16. Place 1 1 ⁄ 2” hose clamps on each end
of 1 1 ⁄ 2” x 67” vacuum hose, then connect
hose to ports on cyclone funnel and
collection drum.
Fig. 37
This manual suits for next models
2
Table of contents
Popular Dust Collector manuals by other brands

Rockler
Rockler Dust RIGHT instructions

V.Brøndum
V.Brøndum RONDA CF-502 Series user manual

Husqvarna
Husqvarna T 4000 Petrol Operator's manual

Grizzly
Grizzly G5954 owner's manual

Smith
Smith MV1000 Parts and operation manual

National Flooring Equipment
National Flooring Equipment DL3000P OPERATING & SERVICE MANUAL