Buzzard Models FOKKERish User manual

FOKKERish
Available from buzzardmodels.com
Please read and understand all steps to these instructions before beginning assembly. This plane is not a
toy and is potentially dangerous to operate. Children should not operate this aircraft without adult
supervision. Before you start, it may be a good idea to gather the required items to complete this plane. You
will need a sharp knife, some foam-safe glue, a sanding block, and some hinge tape. At the end of the
instructions you will find a list of the recommended electronic hardware.
Assemble firewall- locate the firewall,the three gear attach doublers, and the two landing gear legs. Glue together as
shown with 5min epoxy.
Assembly fuselage sides - Locate and glue the two fuselage side doublers into place, I like to use 3M super 77 spray
adhesive for this. Glue the two plywood upper wing attach struts into place with a small amount of 5min epoxy.
1

Install formers - Glue into place the three 3mm foam fuselage formers, and the servo tray.
Join fuselage sides - Do a dry run first. Sand a bevel in the rearmost vertical edges of the fuselage sides so
the come together at an approx. 3mm width at the rudder mounting point. This will be beveled later to form
the rudder hinge. Glue the two fuselage sides together using a slow curing and lightweight glue like an
alphatic resin glue, 30min epoxy with microballoons, slow foam safe CA with accelerator, or a polyurethane
glue. I like to use blue painters tape to hold everything together until the glue dries.
Install fuselage bottom - Again do a dry run first, then glue the fuselage bottom to the sides with your
favorite slow and light glue.
2

Install firewall - Glue firewall in place with a strong glue.
Install control horns and elevator joiner - Sand an approx. 45deg. bevel on the rudder hingeline on the
opposite side as the control horn notch (LH side). Glue the rudder control horn into the slot on the other side
(RHside). Glue the bamboo elevator joiner into place and the elevator control horn (the one with the notch).
Install horizontal - place one of the 12” music wire pushrods into middle hole of elevator control horn. Slide
pushrod into fuselage as you install the horizontal. Glue horizontal to fuselage. Slide rudder pushrod into
place as well.
3

Install servos - center servo horns and install the short 6” music wire pushrods into the center servo horn
hole, glue servos into place. Route servo wires down though servo tray. Slide the two pieces of heat-shrink
over the ends of the pushrods, do not shrink or glue yet.
Install middle wing - Make a cut on each of the middle wings with a hobby knife. Flex wing around cut to
allow it to slide around the plywood upper wing strut. Glue both wings into place.
Install fuselage top - glue fuselage top into place.
4

Glue upper and lower wing halves together - Glue center of upper and lower wings. Glue bamboo rods to
the outer wing struts.
Install upper wing - Slide outer wing struts into middle wing.vAssemble upper wing to fuselage struts and
outer wing struts and flip entire plane upside down. Place the 4” width of the alignment block unter the
horizontal stabilizer. “Tack” glue upper wing to fuselage struts and outer wing struts, and the outer wing
struts to the middle wing. Later you will glue these joints all of the way once you set the dihedral.
Install wing struts - Pierce fuselage sides at F1 intersection with diagonal wing strut bamboo skewers and
continue through outer wing strut middle wing intersection until the inboard end will clear the lower wing.
Glue ONLY the inboard end inside the fuselage.
5

Install lower wing - Glue lower wing to fuselage and tack glue to outer wing struts, let dry. With the
fuselage still upside down, place upper wing on dihedral jig, rotate the alignment block to the 5” width.
Push wing down until it conforms to the dihedral jig. Glue outboard ends of wing diagonal struts, once dry
trim outboard end of diagonal struts flush and add glue to all of the wing/strut intersections.
Install rudder - Slip rudder control horn over rudder pushrod into middle hole. Use a small piece flexible
tape on each side to form the hinge. A small piece of packaging tape will work. Now is also a good time to
glue on the tail skid.
Install speed controller, trim cowl, install motor - zip tie speed control to firewall either front or back.
Trim cowl and cut holes for motor mount screws and wires, put spacers on backside of cowl (you can make
retention washers from scraps you cut off the cowl, screw in place.
6

Install motor and wheels - Screw motor and cowl in place. Attach wheels with retainers, make a tool out of
a small block of wood with a ⅛ hole in it to push the retainer on by centering it over the hole.
Install receiver and battery - Now is the time to check your CG, make sure everything is done that may add
weight (paint, pilot, decals etc.). Install your prop, plug servos and speed controller into receiver, install a
battery and check your CG on the middle wing, it should be about 25% to 33% of the way back from the
leading edge. Move your battery around until you are happy with the CG or alternatively you can add tail
weight. The best location for durability is to have your battery velcroed to the firewall.
Finish controls - bind the receiver to your transmitter and power up the plane. Make sure your trims are all
centered, position the rudder and elevator so they are perfectly neutral. Shrink the heat shrink tubing over
the two halves of the pushrods with a soldering iron, or even a butter knife that you have heated up will
work. Test the controls and once you are satisfied that they are centered, wick some super glue into the
heat shrink to lock them in place. Rudder and elevator should travel approx. 45 degrees each way.
Go Fly- Have fun! Try to do the maiden in zero wind. This plane is not intended to fly in any wind.
7

RECOMMENDED HARDWARE
Hardware:
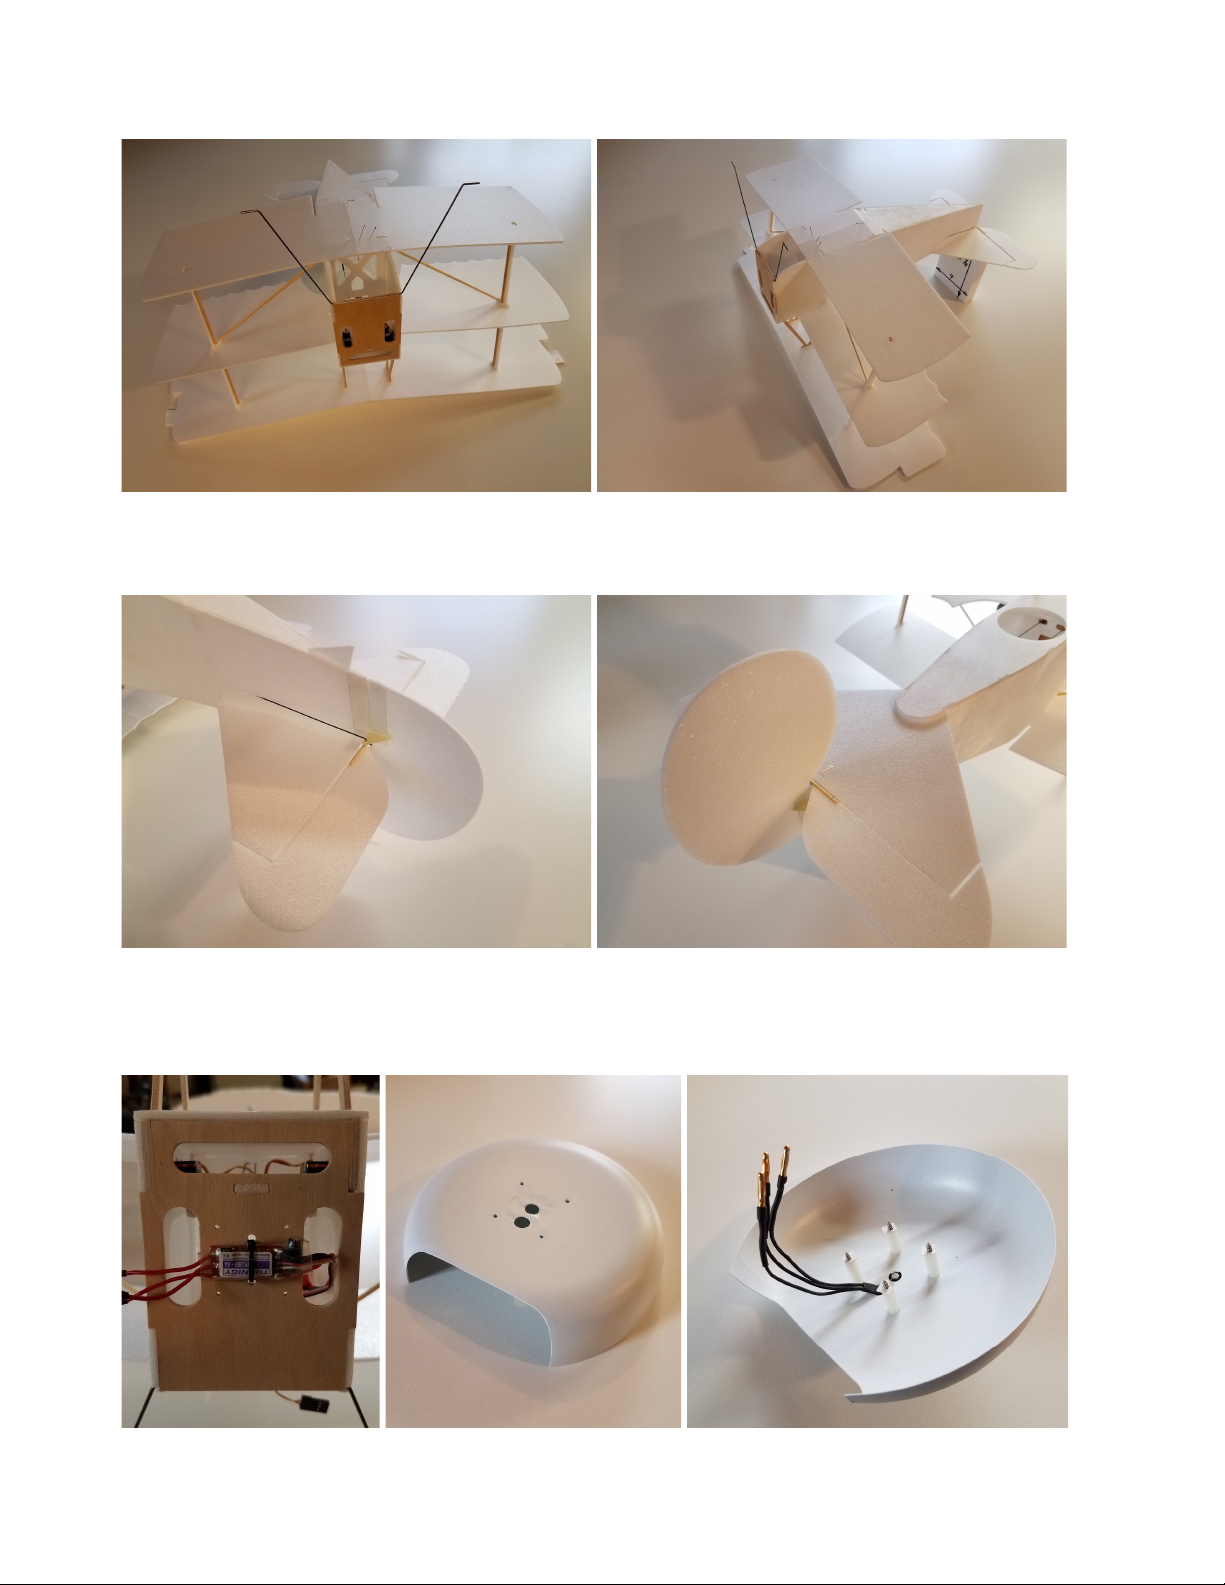
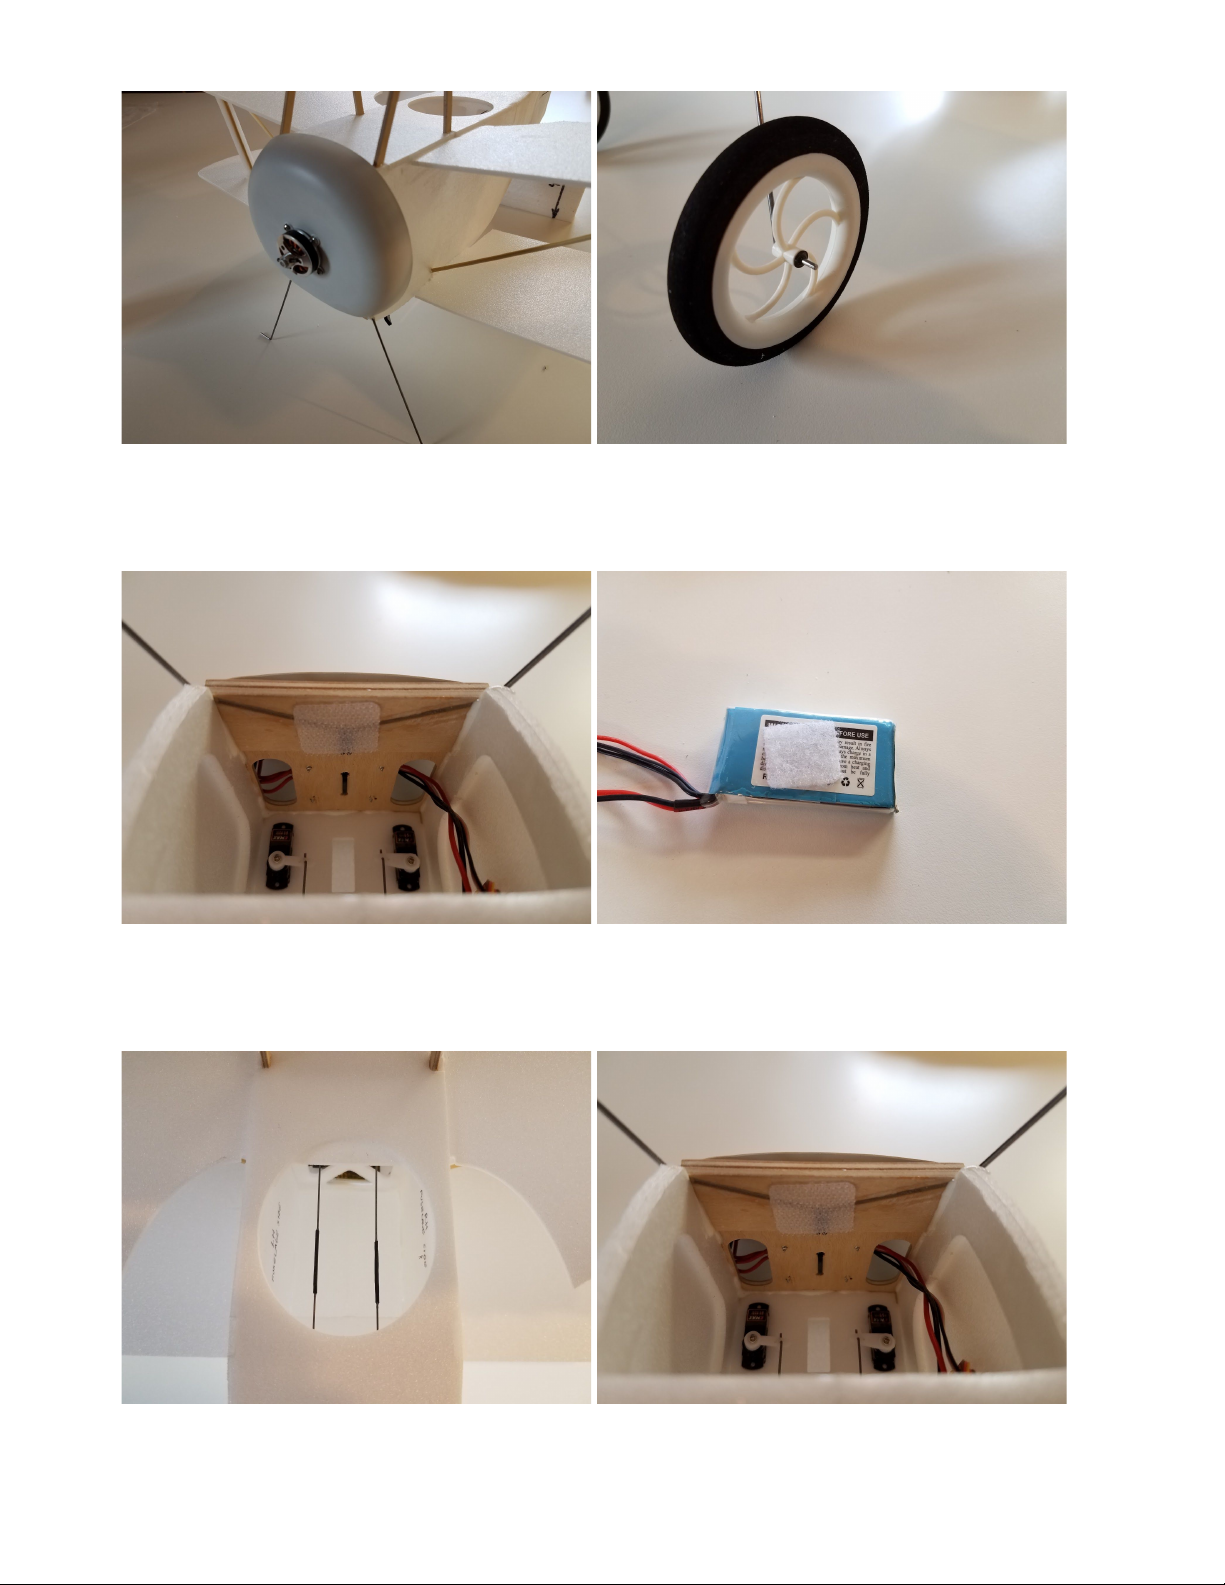
Motor: Any of the 250 series outrunner motors should work. Something in the 1000 to 2000kv range and around 15 to 20
grams in weight. You really want a low KV motor so you can swing a 9” or 10” prop.
Prop: A 9 or 10 inch prop with very low pitch, 3.7” or 3.8”
Speed control: Brushless 6-12 amp with BEC
Servos: Any micro servo around the 3.7 gram size.
Receiver: Needs to have at least three channels.
Battery: Any 2S lipo in the 400-600mah hour range.
Charger: Any charger that is capable of charging a small LiPo
battery
Transmitter: You will need at least three channels, throttle,
elevator, and rudder.
Transmitter setup: Refer to your transmitter’s instruction
manual for all settings.
1. Setup should result in 45 degrees of maximum
deflection for rudder and elevator.
2. Set exponential for rudder at 30%, and elevator at 50%.
Final Checklist:
1. Center of Gravity at between 25% and 33% behind leading edge of middle wing.
2. Check controls for proper direction and free movement.
3. Charge battery.
4. Range check transmitter, refer to transmitter instructions.
Flying Tips: The Fokkerish has a rather low wing loading and does not like much wind.
For your first flight, I would recommend flying either in a large indoor area such as a gymnasium, or wait for a dead
calm day outside. Once you get comfortable with the flying characteristics you will be able to fly in much smaller
areas, and outdoors in more wind.
8

9
Table of contents
Other Buzzard Models Toy manuals

Buzzard Models
Buzzard Models AERONKISH User manual

Buzzard Models
Buzzard Models MINI-HELLCAT User manual

Buzzard Models
Buzzard Models OMICRON User manual

Buzzard Models
Buzzard Models F-22 Gym Flyer User manual

Buzzard Models
Buzzard Models Mark 8 User manual

Buzzard Models
Buzzard Models OMICRON User manual