BYKO NW-LED40 User manual

OIL PANEL HEATER
Product code: 65105828 / 65105827 / 65105824
Number model: NW-LED40/ NW-LED80 / NW-A6-2LCD
MANUAL
Intended use
The following instructions are essential for proper installation, assembly, mounting
and operation. Please keep these instructions for future reference. The construction
of the product complies with European statutory technical requirements. Adherence
to all applicable standards has been proven during the conformity process. In order
to maintain the product in this condition, it is essential that you as the user follow
the advice given in these instructions. Always refer to the technical data on the
product, subject to technical alterations. Please read the instructions carefully!
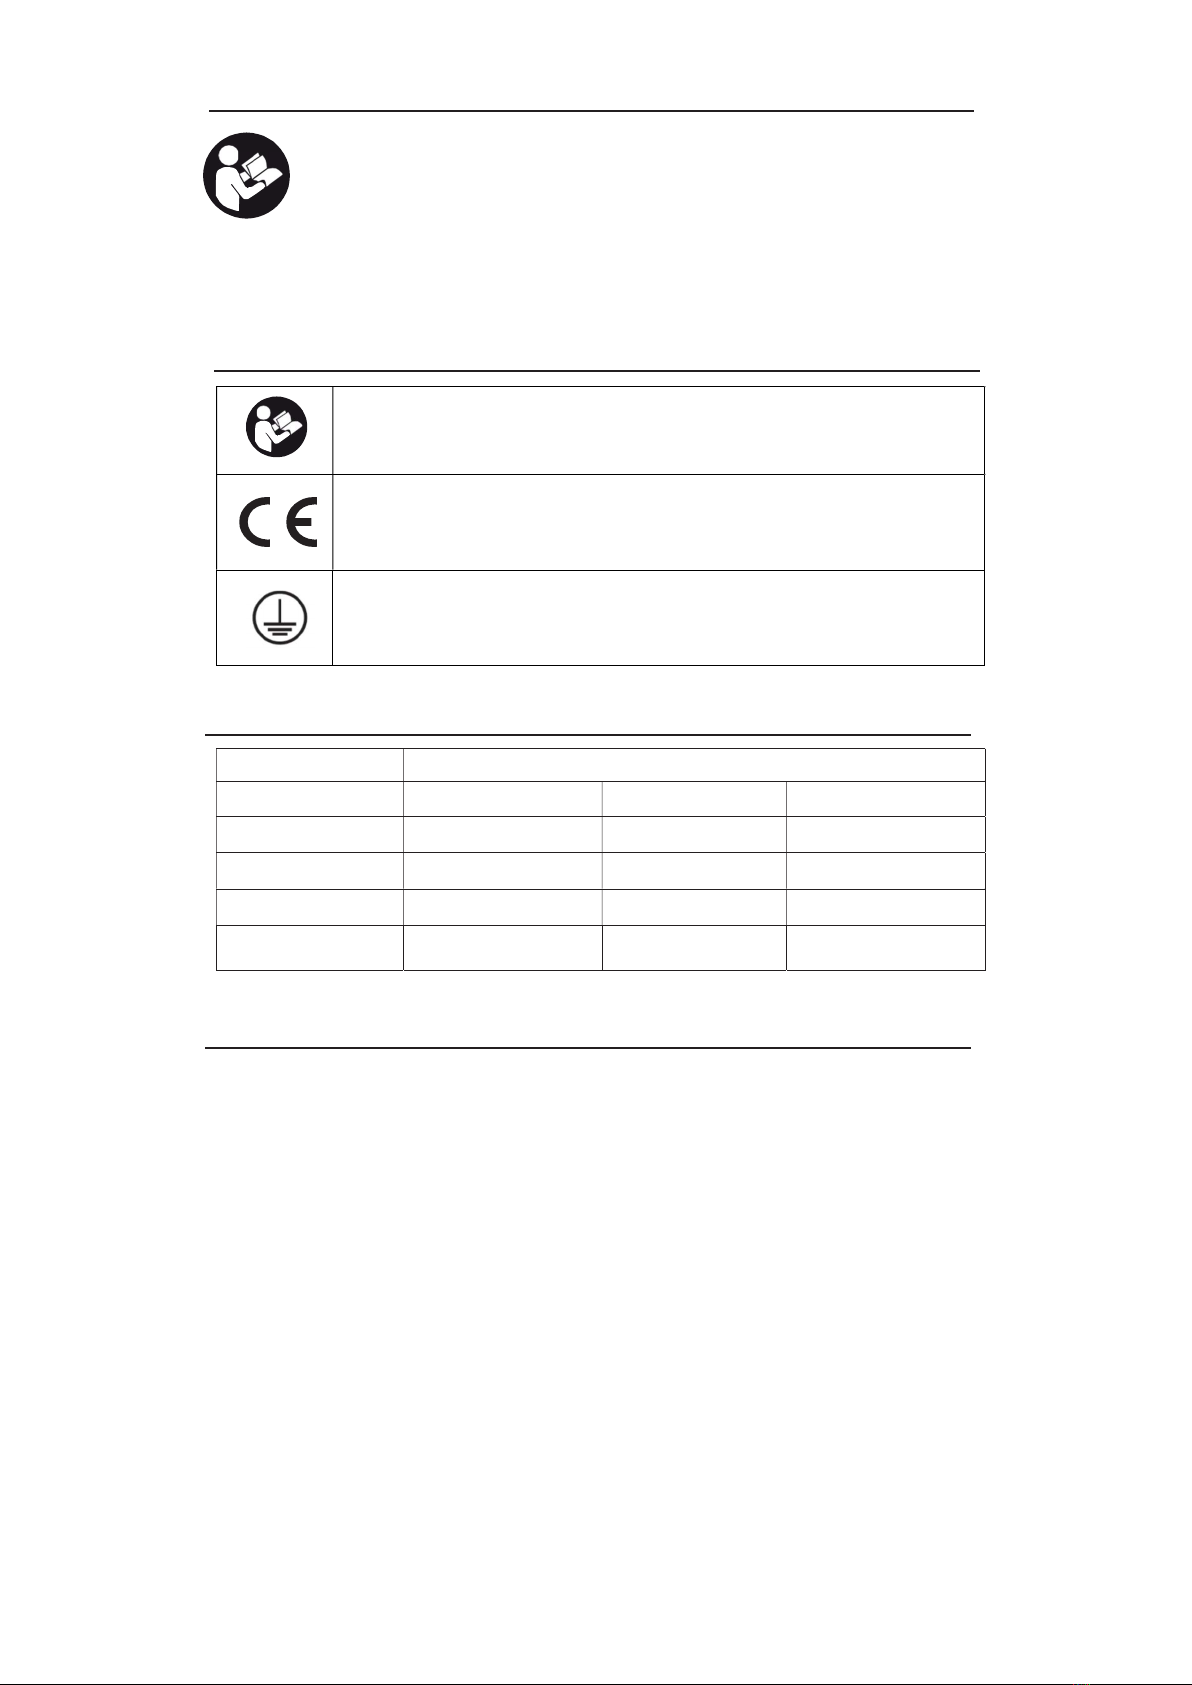
Explanation of symbols
Action symbol – Read this operating manual completely and carefully.
CE is an abbreviation of Conformité Européenne and indicates
compliance with EU directives. With a CE marking, the manufacturer confirms
that the product complies with the applicable European guidelines.
Protection class I
This product complies with protection class I and must be connected to the
protective conductor.
Technical data
Product description Oil Panel Heater
Article number 65105828 65105827 65105824
Rated voltage AC 220-240 V ~ 50/60 Hz AC 220-240 V ~ 50/60 Hz AC 220-240 V ~ 50/60 Hz
Rated power 400W 800W 600W
Protection class Class I Class I Class I
Dimensions XXX x XXX x XXX mm XXX x XXX x XXX mm
XXX x XXX x XXX mm
Scope of delivery
1 x heater
2 x feet
2 x wall mounted bracket
4 x screws
4 x plastic dowels

Safety directions
Make sure the voltage is the same as that indicated on the rating plate of the appliance.
Do not operate this appliance if the cable or plug becomes damaged.
If the cord is damaged, it must be replaced by the manufacturer, service agent or similarly
qualified person
Ensure the appliance is switched off before connecting to the mains power supply.
Switch off the power supply and disconnect from mains supply when not in use, before
cleaning or other maintenance.
To disconnect the appliance, switch it "OFF'': and then remove the plug from outlet. Do not
pull the cord to disconnect the plug.
The heater must not be located immediately below a socket-outlet.
Do not operate in areas where gasoline, paint or other flammable liquids are used or stored.
Indoor use only.
In order to avoid overheating, do not cover the heater.
Do not block air intakes or exhaust in any manner.
Don't touch the hot surfaces.
Always ensure that hands are dry before operating or adjusting any switch on the product
or touching the plug and socket-outlet.
This appliance can be used by children aged 8 years old and above. As well as persons with
reduced physical, sensory or mental capabilities or lack of experience and knowledge. If
they have been given supervision or instruction concerning use of the appliance in a safe
way and understand the hazards involved.
Children of less than 3 years should be kept away unless supervised.
Children younger than 8 years old should not operate the appliance.
CAUTION --- Parts of this product maybe hot and potentially and cause burns. Attention
must be given where children and vulnerable people are present.
The most common cause of overheating is deposits of dust or fluff in the appliance. Ensure
these deposits are removed regularly by disconnect the appliance and vacuum cleaning air
vents and grilles
Do not place the heater on carpet, don't place the cable under carpets. Arrange cord away
from traffic areas so that it will not be tripped over.
Do not use this heater in the immediate surroundings of a bath, a shower or a swimming
pool.
Do not store away until the heater cools down, store the heater in cool dry location when
not in use.
Do not mount this appliance Vertically
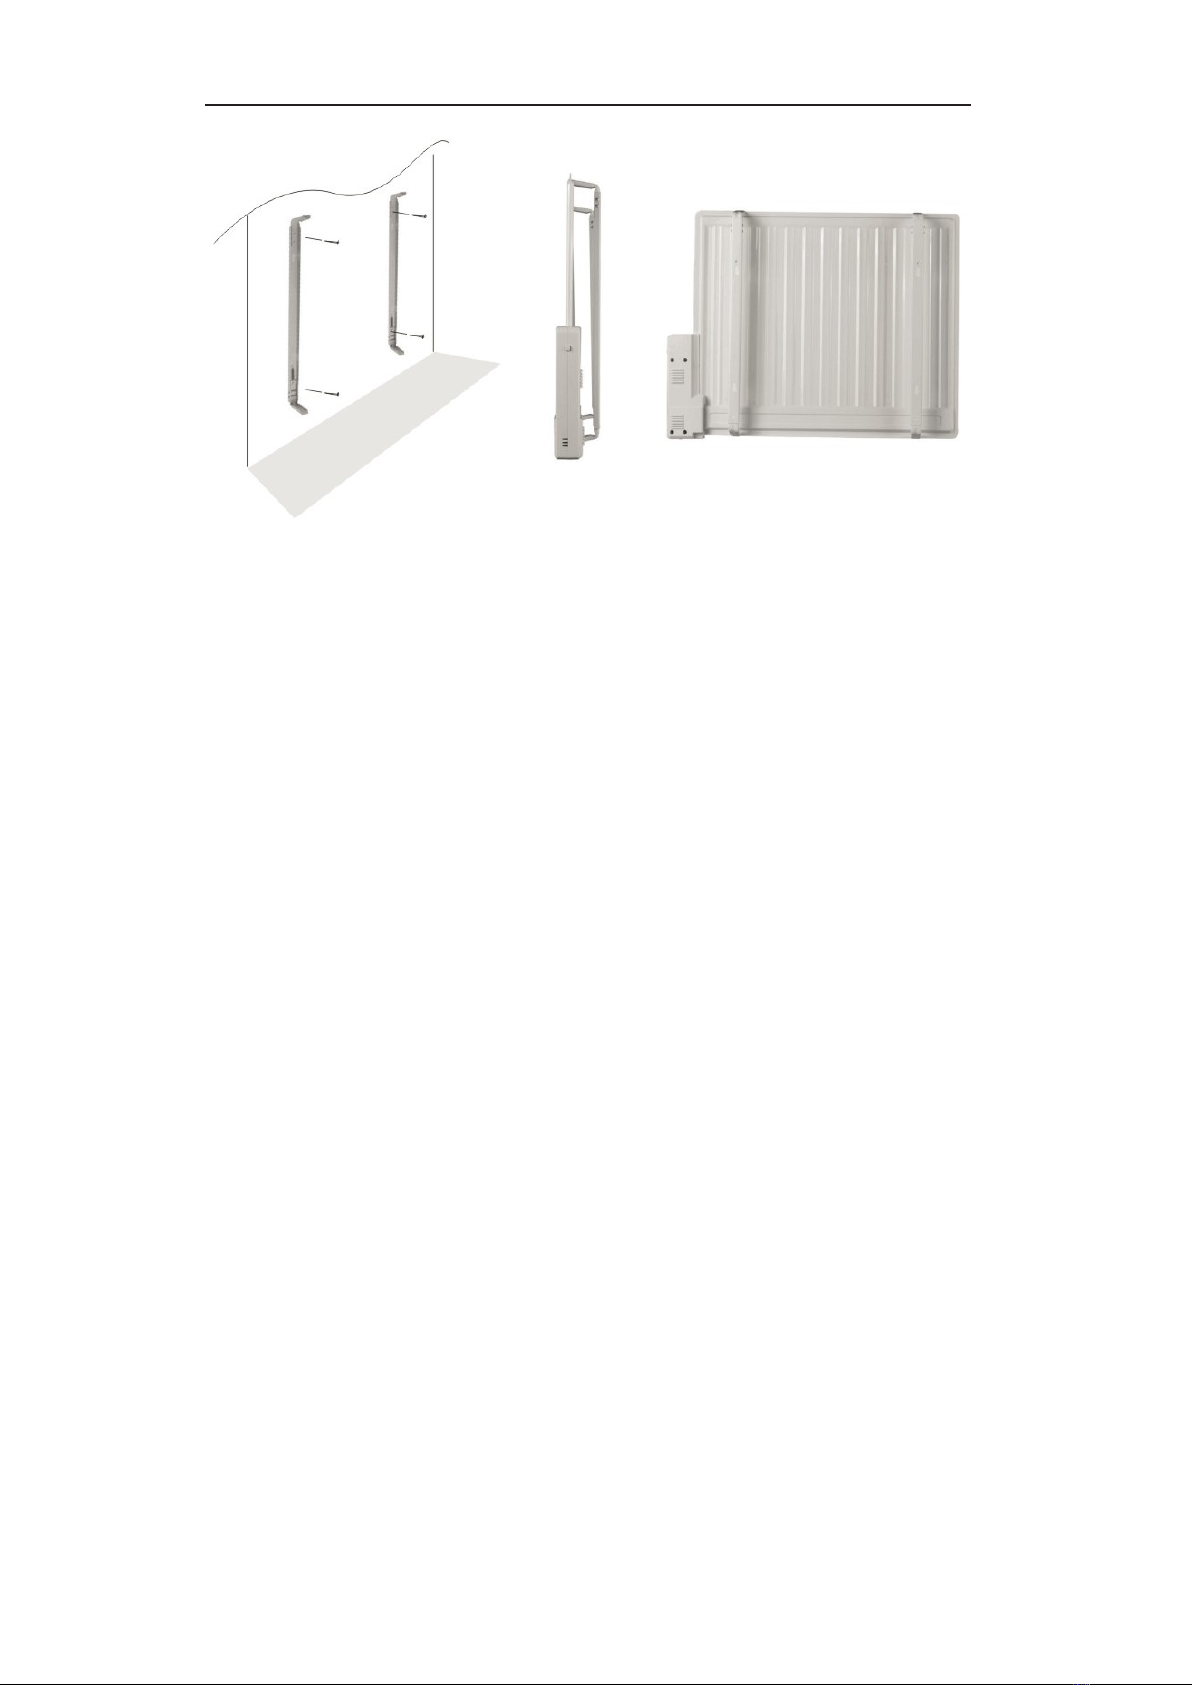
Installation
Please note: A gap of at least 60mm from the floor and 100mm to any window frame above
must be maintained. Minimum distance to any corner must also be 100mm. To the ceiling, the
distance should keep 650mm at least. Always check that the radiator is horizontal. The radiator
must Not be installed below a permanent wall socket.
1. Put the wall brackets on the wall as a guide ruler (please make sure the holes at parallel
level), Then mark the position of the holes
2. Drill holes on the wall with 8mm drill bit and insert the plastic wall plug
3. Fasten the hanging rack on the wall with the screws, make sure the hanging rack is in correct
direction
4. Insert the heater body of the bottom to the hanging rack first and then push the heater body
to be hooked on the whole hanging rack
Warning: When drilling holes, always check to ensure there is no wiring, pipework, etc. in the
area to be drilled
Warning: Before plugging in the unit make sure the radiator is properly attached to the wall.
Otherwise problems can occur.

Operation
Control panel
1. Status keypad: on/off
2. Radiator Status: light up-----heater work
3. Timer (1-24hours)
4. Child lock
5. Weekly timer
6. Open window function
7. Week day
8. Hour
9. Minute
10. Set on/off time (P3)
11. Room temperature
12. Setting temperature
Keypad
TO START USING
Plug the appliance to AC220-240V 50-60Hz socket.
Push “ ” switch on the side of heater. The display will then light up.
SETTING THE TIME AND DAY
Press “ON/OFF”, then “SET” to set temperature by press “+” or “-” when display is flashing.
Press “SET” 3 times ,“MO“ flashing, set the day by pressing “+”or “-”
Press “SET” 4 times, Hour flashing, set the hour by pressing “+”or “-”
Press “SET” 5 times, minute flashing, set the minute by pressing “+” or “-”
NOTE: The clock and calendar will be reset to the factory default mode if the power supply is
lost.
HEATING MODE
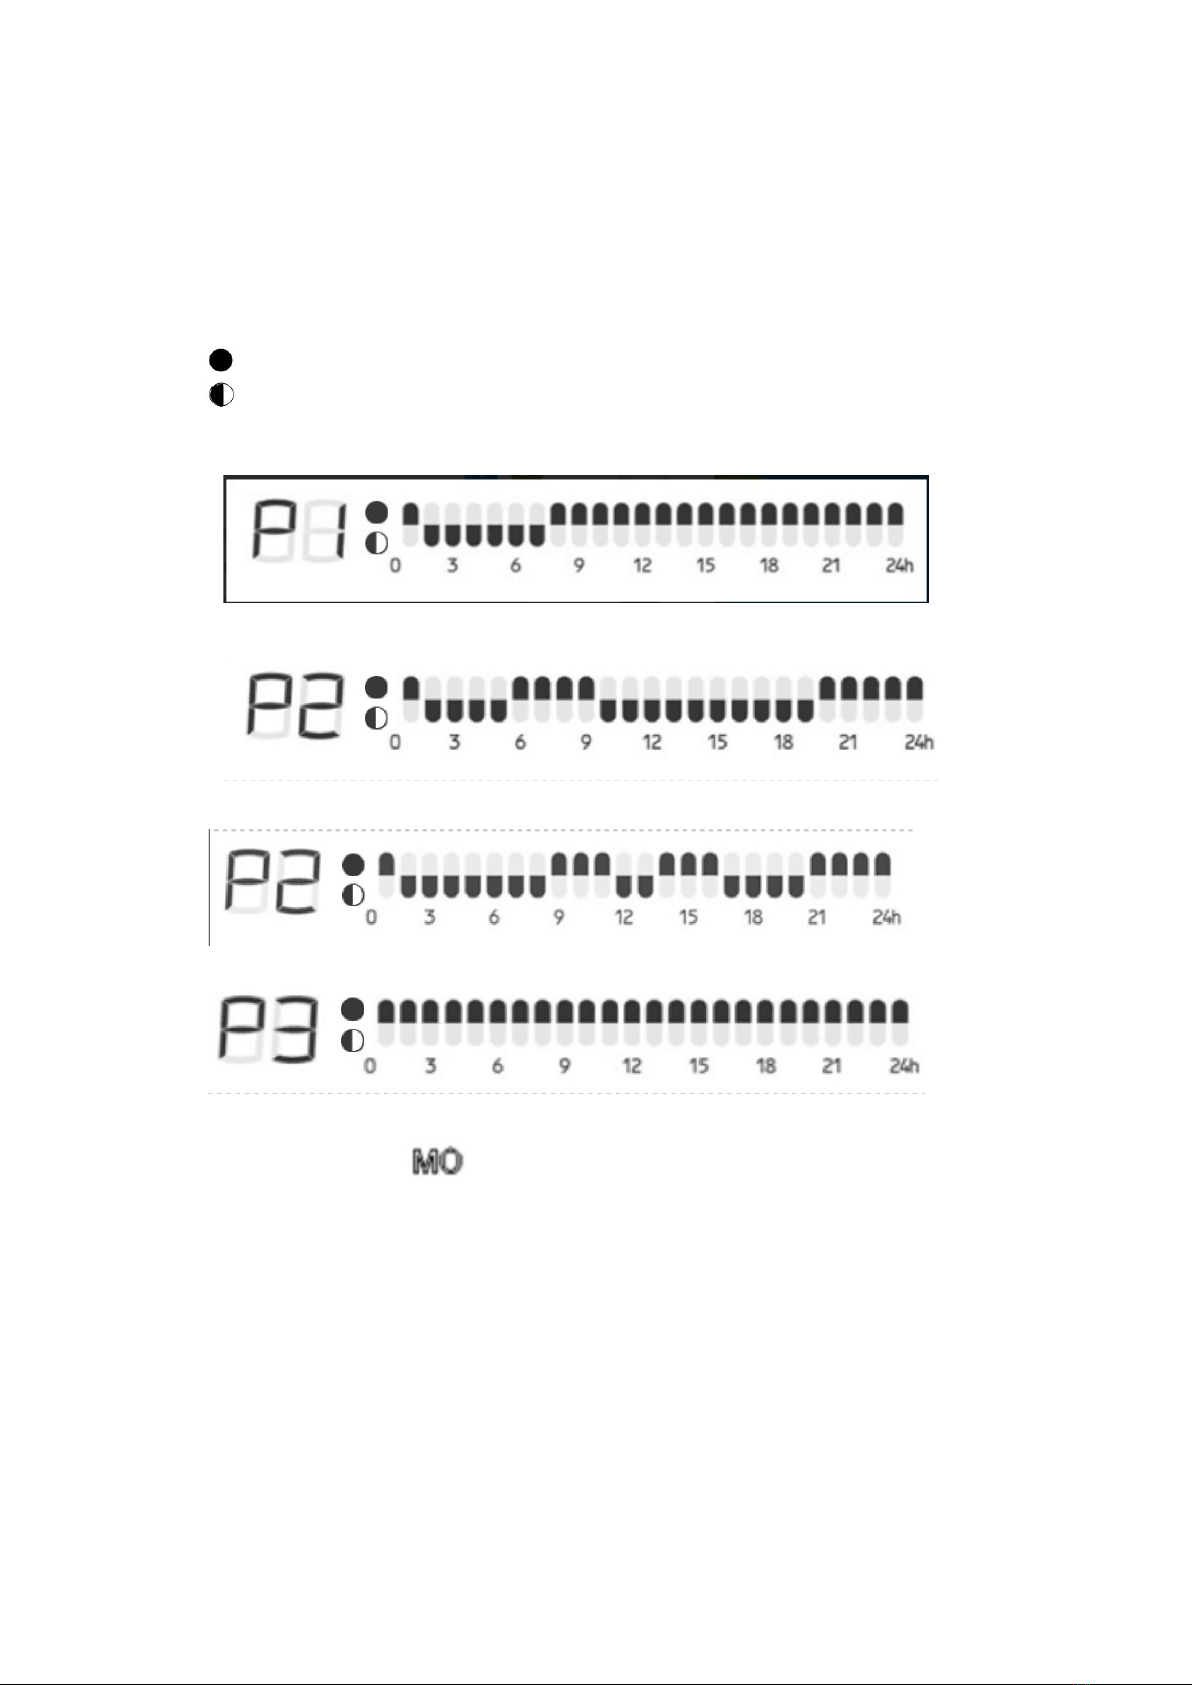
Press “MODE” choose P1, P2, P3, P4 by pressing “+”or “-”
:comfort mode is 22℃
:ECO mode is 18 ℃
P1:(Monday - Sunday) is a Preset program
P2: P2 will programme Monday – Friday as shown below
Then will programme Saturday – Sunday
P3:(Monday-Sunday) In this is the user’s own customised mode
Press “MODE” 1 time and choose P3 program by pressing “+”or “-”
Press “MODE” 2 times, “ ”flash” set the day by pressing ”+” or ”-”
Press “ MODE” 3 times to set the hour by pressing “+” or “-”
Press“ MODE” 4 times to set minute by pressing “+”or “-”
Set all days up to Sunday, then set temperature for each day
Press “MODE” 1 time and set the comfort temperature for Monday by pressing “+”or “-”
Press “ MODE” 2 times to set Tuesday’s temperature
Press “ MODE” 3 times to set Wednesday’s temperature
Set each day Untill Sunday
P4:Anti-frost, “P4 Fr” shows in screen 4-7℃, 24hour, 7days a week
Attention:In the above setting process, if you do not operate for 5 seconds, exit the setting
mode directly and retain the setting data.
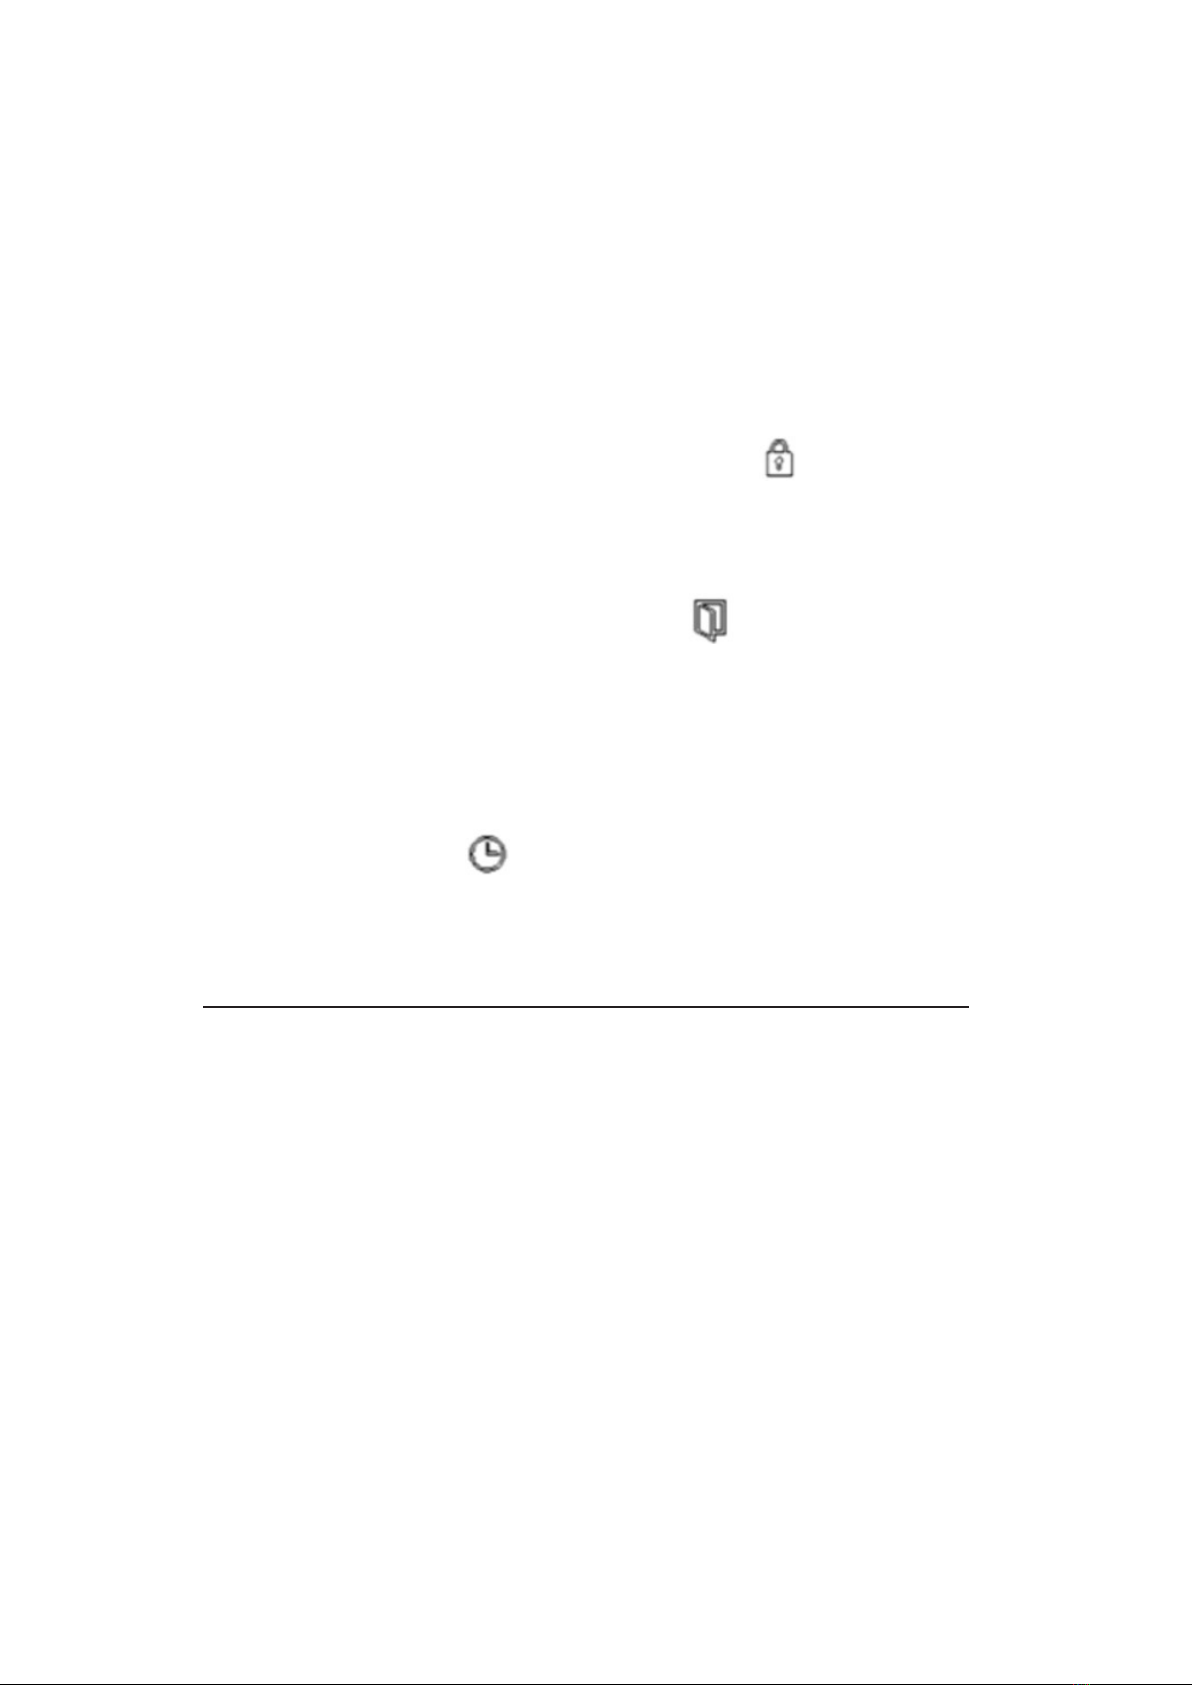
CHILD LOCK
Press “+”and “-” at the same time, child lock turn on, the indicator “ ”light.
Press “+” and “-” at the same time again, child lock turn off.
OPEN WINDOW FUNCTION
Press “ MODE” 3 second, the buzzer rings once, indicator “ ” on, open window function
turn on
Press “MODE” 3 second again, open window function turn off
When this function is activated, the heater will stop working when the room temperature is
dropping 3℃ in 1 minute.
DURATION TIMER 1-24HOURS
The heater can be operated be set into a duration timer for 1-24hours
Press “ SET” 2 times, indicator “ ” will light after you set on on duration hours by pressing
“+” or “-”. Eg. if set to 5, the heater will stay on for 5 hours
Note: When weekly timer mode is on, 1-24hours timer is not available.
Maintenance, cleaning
Always disconnect the appliance and let it completely before any maintenance.
Use a vacuum cleaner to remove dust on grilles.
Clean the outside of the unit with a damp cloth and then dry it with a dry cloth. Never
immerse the unit in water, not let water drip into the unit.
Always disconnect the appliance, let it completely cool and clean it before storing.
If you do not use the device for a long period, put back the unit and the instruction manual
to the original carton and store in a dry and ventilated place.
Do not place any heavy items on top of carton during storing as this may damage the
appliance.
The product is for household use only.
Disposal and environmental protection
Dispose of the product at the end of its lifetime according to relevant legal
regulations.
Electrical products such as electrical appliances, energy-saving lamps and
(rechargeable) batteries marked with a crossed-out garbage can may not be
disposed of with household waste.
Dispose of the product for disposal at a specialized waste disposal site. You thereby fulfill
the legal obligations and make your contribution to environmental protection.
Made in P.R.C
Imported by BYKO
Skemmuvegi 2a, 200 Kópavogur, Iceland
This manual suits for next models
5
Table of contents
Popular Heater manuals by other brands

oventrop
oventrop Regucor Series quick start guide

Blaze King
Blaze King CLARITY CL2118.IPI.1 Operation & installation manual

ELMEKO
ELMEKO ML 150 Installation and operating manual

BN Thermic
BN Thermic 830T instructions

KING
KING K Series Installation, operation & maintenance instructions

Empire Comfort Systems
Empire Comfort Systems RH-50-5 Installation instructions and owner's manual

Well Straler
Well Straler RC-16B user guide

EUROM
EUROM 333299 instruction manual

Heylo
Heylo K 170 operating instructions

Eterna
Eterna TR70W installation instructions

Clarke
Clarke GRH15 Operation & maintenance instructions

Empire Heating Systems
Empire Heating Systems WCC65 Installation and owner's instructions


