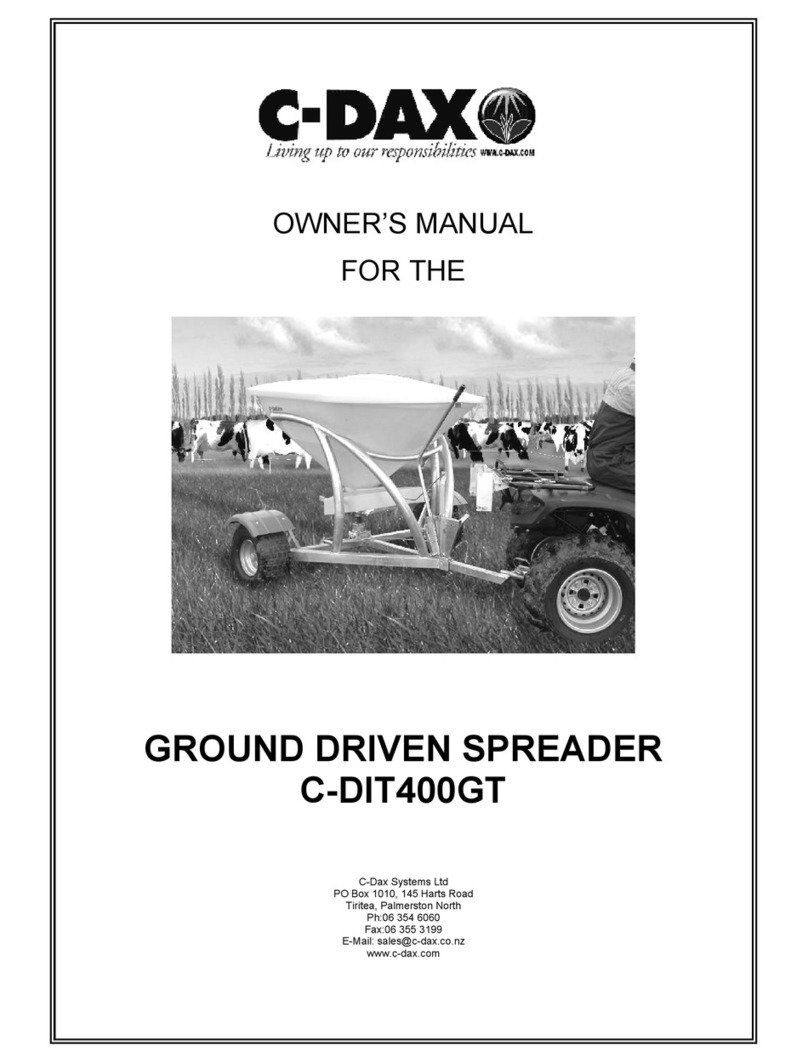
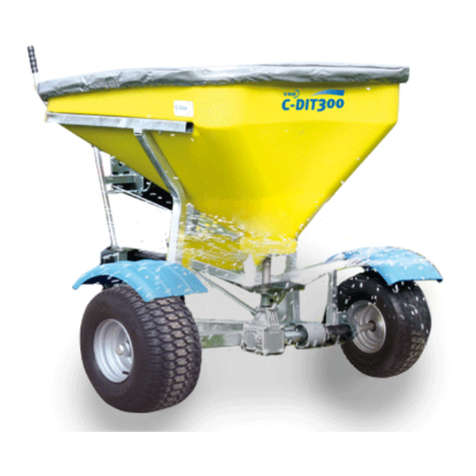
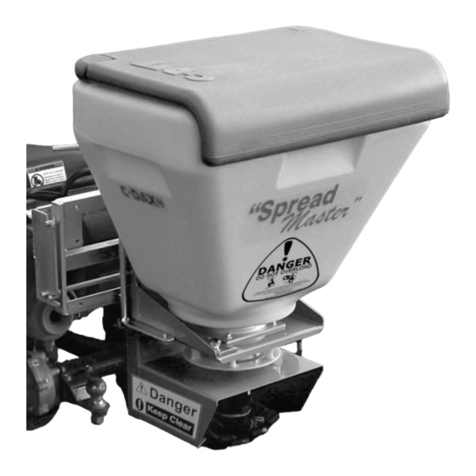
C-Dax C-DIT400 User manual

OWNER’S MANUAL
FOR THE
GROUND DRIVEN SPREADER
C-DIT400
C-Dax Ltd
PO Box 1010, 145 Hart Road
Tiritea, Palmer ton North
Ph:06 354 6060
Fax:06 355 3199
E-Mail: ale @c-dax.co.nz
www.c-dax.co.nz

2
SAFETY PRECAUTIONS
CDIT400
AN IMPORTANT MESSAGE FOR OWNERS & OPERATORS OF C-Dax
ATTACHMENTS/ACCESSORIES
Be warned of the danger of loading your ATV or other vehicle in exce of it carrying capacity. It i
important to under tand that any load or attachment whether fa tened to or placed on a vehicle or ATV will
alter the tability or handling characteri tic of that vehicle or ATV.
Spray tank or other equipment mu t be filled only to a level where the gro weight i within the load limit of
the ATV or other vehicle.
Safety i a primary concern in the de ign, manufacture, ale, and u e of pray tank and other equipment.
A manufacturer of pray tank and other equipment we want to confirm to you, our cu tomer , our
concern for afety. We take thi opportunity to remind you about the imple, ba ic and common en e rule
of afety when u ing pray tank and other equipment. Failure to follow the e rule can re ult in evere
injury or death to operator and by tander .
It i e ential that everyone involved in the a embly, operation, tran port, maintenance and torage of thi
equipment be aware, concerned, prudent and properly trained in afety.
Thi al o applie to equipment that i loaned or rented to omeone who ha not read the owner’ manual
and i not familiar with the operation of application equipment.
• NEVER EXCEED THE LOAD LIMIT CAPACITY OF THE ATV OR OTHER VEHICLE.
• ALL ATV AND TRAILED EQUIPMENT TYRES SHOULD BE INFLATED TO MANUFACTURERS
RECOMMENDED OPERATING PRESSURES.
• PLEASE NOTE THAT FILLING THE SPRAY TANK OR OTHER EQUIPMENT COMPLETELY AND OR
THE ATTACHMENT OF ADDITIONAL EQUIPMENT TO THE ATV MAY EXCEED THE ATV’S
MAXIMUM LOAD CAPACITY, AND ADVERSELY AFFECT THE STABILITY OF THE ATV OR OTHER
VEHICLE.
• CARGO SHOULD BE PROPERLY DISTRIBUTED AND SECURELY ATTACHED.
• REDUCE SPEED WHEN CARRYING CARGO OR PULLING A TRAILER OR TRAILED APPLICATION
EQUIPMENT AND ALLOW GREATER DISTANCE FOR BRAKING.
• NEVER ALLOW ANYONE TO RIDE ON YOUR SPRAYER OR OTHER EQUIPMENT.
• ALWAYS FOLLOW THE INSTRUCTIONS IN THE OWNER’S VEHICLE MANUAL FOR CARRYING
CARGO OR PULLING A TRAILER.
• PROPER MAINTENANCE IN LINE WITH MANUFACTURER’S RECOMMENDED MAINTENANCE
PROCEDURES IS ESSENTIAL.
• BEFORE APPLYING CHEMICALS, READ THE LABEL OF THE CHEMICAL MANUFACTURER OR
SUPPLIER FOR PERSONAL PROTECTIVE EQUIPMENT AND OPERATE AS RECOMMENDED.
• THE SAFETY OF ALL CHEMICALS USED IN AGRICULTURE IS UNDER THE JURISDICTION OF A
GOVERNMENT AGENCY, IE N.Z. MINISTRY FOR THE ENVIRONMENT; USA ENVIRONMENTAL
PROTECTION AGENCY. FURTHER LOCAL GOVERNMENT OR STATE LAWS MAY APPLY.

3
SAFETY PRECAUTIONS
Before attempting to in tall or operate the equipment, read and under tand the manual thoroughly. Failure to
comply with thi in truction con titute improper u e and will invalidate the warranty.
Throughout thi manual there are highlighted text boxe containing warning , caution and note .
Warning are mandatory in truction to prevent eriou injury or permanent damage.
Caution are advi ory in truction to en ure reliable operation of the equipment.
Note are for convenient operation.
Do not overload your preader. The maximum permi ible payload i 320 Kg.
Never u e dirty product or product with tone or lump .
En ure that your towing vehicle i adequate for the ta k. The maximum tare weight i 450 Kg.
If u ing the preader over hilly terrain the payload hould be reduced to en ure that the preader tability
i not compromi ed.
Never allow anyone to ride on the preader.
Keep the preader in good condition. Cleanline and maintenance are e ential for afe and trouble
free operation.
Never leave product in the hopper or tore the preader without cleaning it.
After u e alway clean and ervice clutch mechani m

4
C-Dax CDIT400
OWNER’S MANUAL
(Pt.No.2400-5610 I ue 8 Dated 02 Dec 2010)
TABLE OF CONTENTS
2 Safety Precaution
4 Table of Content
5 Introduction
De cription
Specification
Order Information
Warranty
6 Liability
7 Operation
8 Calibration
Magne ium Oxide
9 Operating the Spreader
Adju ting the Spread Pattern
Fitting the Cover
10 Maintenance
Before U e
After Each U e and Daily When in U e
Hint
11 Part Diagram
12 Part Li t

5
INTRODUCTION
Congratulation . You have ju t purcha ed an advanced preader from C-Dax Ltd. C-Dax Ltd i committed to
providing you, the farmer, with quality applicating y tem .
DESCRIPTION
The C-Dax C-DIT400 i a ground-driven preader de igned for application of pelleted fertili er . It can al o
be u ed for application of other product uch a gra eed and magne ium oxide. The uniquely de igned
400-litre tran lucent non-corro ive polyethylene hopper i pecially profiled for good product flow and ea e of
filling. The convenient polyethylene cover i ea y to remove, in tall and tore if not required. A high-quality
tainle teel agitator and hutter en ure even flow of product to the pinner. A unique pinner de ign
en ure wide, even pread of product over 180 degree (Urea). The heavy-duty galvani ed frame i fitted
with knobbly turf tyre a tandard equipment. The drive train u e high quality teel and a double ealed
elf-aligning bearing and heavy-duty gearbox for maximum durability. While eated, the operator ha acce
to the control handle. Thi handle allow di engagement and engagement of the clutch and etting of
product feed rate all in one motion. Al o tandard are mudguard , wivel tow-hitch and a fully hrouded
polyethylene front deflector to further protect the operator from product being thrown off the pinner.
Specification
(Specification ubject to change without notice)
Dry Weight 120 Kg
Dimen ion W1900mm, H1400mm, L1850mm
Capacity 400 litre (320Kg Urea)
Drive Ground driven ( ingle wheel)
Wheel 18x950x8 knobbly turf tyre
Tyre pre ure 15PSI (100Kpa)
Clutch Lever operated mechanical clutch
Control Adju table tainle teel lide with index handle
Agitator Mechanical arm, tainle teel
Spinner Galvani ed teel with three-po ition adju table vane
Hopper Non-corro ive polyethylene, ergonomically de igned for ea e of filling and
in pection
Hopper cover Polyethylene pla tic
Frame Galvani ed teel
Gearbox Heavy duty with double ealed bearing
Gearbox oil 400ml SAE30
Axle Bearing Sealed ball race
Clutch bearing Heavy-duty pho phor-bronze bu h
Axle grea e General Purpo e
Application Rate 140Kg per hectare @ 10 kph (nominal, Urea)
Spread width 18M (nominal, Urea @ 15 Kph)
Towing peed 15 Kph (Maximum recommended)
NZ , AUST & UK
Order Information
Standard CDIT400 P/N 3004
WARRANTY
C-Dax Ltd warrant to the original purcha er that the equipment i old free from defect in material and
workman hip for a period of 12 month from date of retail ale (6 Month from date of retail ale for all
equipment old in the U.K.).
Accordingly, C-Dax Ltd undertake to repair the equipment, or at our option replace, without co t to the
original purcha er either for material , part or labour, any part which within the pecified warranty period
from time of delivery i found to be defective. PROVIDED that the equipment ha been u ed for normal
purpo e in accordance with the in truction , and ha not been ubject to neglect, mi u e or accident, and
ha not been repaired, erviced or di mantled by any per on other than a ervice agent or per on authori ed
by C-Dax Ltd.
The warranty doe not extend to cover: con equential damage; repair or replacement of part due to fair
wear and tear; or damage re ulting from neglect, mi u e, accident or hireage. SPECIFICALLY the warranty
exclude battery damage, damage ari ing from chemical attack, and unit built to cu tomer pecification .
All good returned to C-Dax Ltd are freight paid by the ender and if ubject to a warranty claim, mu t be
accompanied by a completed warranty claim form. Warranty claim form are available from C-Dax dealer .

6
LIABILITY
The maximum liability, which i accepted by C-Dax Ltd, i limited to replacement of faulty good only. Every
care ha been taken in the manufacture of our good but becau e u e of the good i out ide the control of
the manufacturer, the end u er a ume all re pon ibility for the u e. Neither the manufacturer nor retailer
hall be liable for lo or damage re ulting from u e.
Any advice or recommendation given by C-Dax Ltd, it agent , or employee i given in good faith and
ba ed on the be t information available to u . No liability or re pon ibility i accepted or implied a a re ult of
any information or advice tendered by C-Dax Ltd, it agent or employee . The end u er accept all
re pon ibility ari ing from that advice.

7
OPERATION
The product to be pread i placed in the hopper. When the preader i towed forward, the right hand wheel
drive through the lever operated mechanical clutch and gearbox to turn the pinner in a clockwi e direction.
When the control handle i in the di engage po ition (fully back) the clutch i di engaged and the hutter i
clo ed. Pulling the handle forward (toward the operator) engage the clutch and rotate the hutter located
at the bottom of the hopper to an open po ition. The ize of the opening i et by a hutter top lever, which
locate into one of nine pre- et po ition .
An exten ion of the pinner bo i connected to a tainle teel agitator arm in ide the bottom of the
hopper. The agitator en ure that product flow continuou ly out of the hopper to the pinning di k.
A delivery chute on the bottom of the hopper en ure that product i delivered to the correct pot of the di k
o that the deflector di tribute the product over a wide angle behind and to each ide of the preader.
The clutch y tem can be engaged or di engaged at up to 5KPH while the preader i in motion.
The polyethylene cover can be fitted to prevent rain and debri from entering the hopper.
WARNING
To prevent premature failure or damage to the CDIT400 clutch y tem, do not engage or di engage the
clutch at peed in exce of 5 KPH.

8
CALIBRATION
1. En ure the control handle i fully back (clutch di engaged, hutter clo ed).
2. To calibrate your preader, place a mea ured amount of product (10 Kg) in the hopper.
1. Set the Shutter Stop Lever to the po ition (1-9) indicated in the Calibration Guide below. Hole po ition 9
( hutter fully open) i denoted by two hole vertically one above the other.
2. Tow the preader at the de ired peed and pull the control handle forward to engage the clutch and
open the hutter.
3. When the product ha been exhau ted, mea ure the di tance covered and band width in metre . It i
recommended that thi be done over an area where the product can be een on the ground o that the
pread width can be mea ured.
4. Check the application rate u ing the following formula:
Rate (Kg/ha) = product applied (Kg) x 10,000
di tance travelled (metre ) x pread width (metre ).
5. Adju t either the Shutter Stop Lever or the peed of travel until the de ired application rate i achieved.
NOTE
Becau e of variation in product characteri tic , peedometer calibration and driving peed, the information
in the calibration guide hould be regarded a a tarting point only. It i recommended that the preader be
calibrated before u e.
Calibration Guide
Urea or DAP Application Rate (Kg/ha), 10m Nominal Spread
Average Speed (Kph)
Application Rate (Kg/ha) for given Lever Po ition
3
4
5
6
7
8
9
10
14
52
85
138
165
167
171
11
13
47
77
125
150
151
155
12
12
43
71
115
138
139
142
13
11
40
65
106
127
128
131
14
10
37
61
98
118
11
9
122
15
10
35
57
92
110
111
114
16
9
32
53
86
103
104
107
17
8
30
50
81
97
98
100
18
8
29
47
77
92
93
95
19
8
27
45
73
87
88
90
20
7
26
42
69
83
83
85
Other Product , Average Speed 10Kph
Product
Rate
(Kg/ha)
Shutter Setting
(Lever Po ition)
Nomin
al Spread
(Metre )
Super pho phate
100
7
12
30% Pota ic Super
100
8
10
Rye Gra
30
3
4
Magne ium Oxide
Magne ium Oxide powder i applied at a rate determined by the number of cow to be treated. When
preading thi product, calculate the weight of powder to be applied and apply thi amount u ing hutter
etting 4 or 5. Becau e thi product may et hard if left expo ed to air, it mu t not be tored in the machine
even for a hort time. Load the preader only with the amount required to be pread and clean all trace of
product from the machine after u e.

9
OPERATING THE SPREADER
When the preader ha been correctly calibrated, the hopper may be filled to the required level and
preading commenced.
To reduce agitator damage to product and to en ure that product i not forced pa t the agitator haft when
towing the preader to the area to be treated, the drive to the gearbox hould be di connected by en uring
the control lever i in the di engage po ition (fully back).
WARNING
To prevent damage to the preader do not tow the preader at peed in exce of 15 Kph.
To prevent damage to the mechanical clutch do not engage or di engage the clutch on the CDIT400 at
peed in exce of 15 KPH.
CAUTION
The double roll pin pre ent in the clutch a embly are de igned to hear if ubject to exce ive u e
(preventing greater damage to the re t of the unit). If you find the e pin are continually breaking, engage
the clutch at a lower peed.
To prevent inadvertent operation of the hutter while the preader i in tran it it i recommended that the
Shutter Stop Lever be moved to Po ition 0 to lock the hutter clo ed.
To prevent the hutter from vibrating clo ed when the preader i operated over rough ground, the Control
Lever friction may be increa ed by tightening the adju tment nut at the bottom of the Handle.
Adju ting the Spread Pattern
The preader ha been et up for preading pelleti ed fertili er. When preading lighter product or product
with a high powder content it may be nece ary to adju t the deflector on the pinner to centrali e the
pread pattern. To hift the pattern to the left (facing forward) the in ide end of the vane hould be moved
anti-clockwi e. To hift the pattern to the right (facing forward) the in ide end of the vane hould be
adju ted clockwi e. The e po ition are highlighted in the following diagram.
Shift to the left etup (hole 5/5)
Default etup (hole 4/5)
Shift to the right etup (hole 1/5)
WARNING
To prevent damage to the pinner and hroud , do not operate the preader unle the crew are tight.
Fitting the Cover
To fit the rain cover to the hopper, lide the lid over the hopper, fir t locating the rear of the lid. Pull the lid
forward until it drop over the front edge of the hopper. Secure the lid by rotating the tainle teel latch 90°
(thi latch i located on the under ide of the lid at the front).

10
MAINTENANCE
The following maintenance action are mandatory for reliable u e of the preader.
Before U e
Check the tyre pre ure and charge with air a required. The correct pre ure i 15PSI (100Kpa).
Di engage the clutch by en uring the control lever i fully back then turn the pinner by hand to en ure that it
i free to turn without interference.
Check the hopper to en ure that no debri i in ide.
If the preader ha not been u ed for ome time, grea e the bearing . Pay particular attention to the
mechanical clutch engagement groove and bearing.
Check the gearbox for leak . If leak are detected it will be nece ary to drain and repleni h the gearbox with
400ml of SAE 30 oil.
CAUTION
To repleni h the gearbox, the preader may be inverted to place the filler plug uppermo t. However, in doing
o extreme care mu t be taken to prevent damage to the pinner and deflector .
After Each U e or Daily When In U e
Remove all trace of product from the preader by bru hing or wa hing. Pay particular attention to area
where product ha accumulated and built up. Remove by craping if nece ary taking care not to damage
the urface fini h of the preader or it component .
If wa hing, do not direct high-pre ure water onto the gearbox, axle or wheel bearing eal .
After wa hing, grea e the bearing (three place ) and apply water-di placing fluid uch a WD 40 or LPS3 to
all metal part .
Check for damaged or worn component and replace a required.
NOTE
To en ure trouble free operation of the mechanical clutch, pay particular attention to cleaning and
grea ing the drive clutch. Failure to do o will void warranty.
HINTS
When grea ing the pin clutch bearing in the axle a embly, leave the pin in place. Thi will a i t the grea e
to fully enter the croll in the axle and prevent the axle from being di placed if the bearing hou ing hould be
over pre uri ed with grea e.
If the drive axle i removed from the axle hou ing for any rea on care mu t be taken to en ure that both the
axle croll and bronze bu h are clean and free of debri before rea embly.
To remove the agitator from the hopper, remove the bolt, which attache the agitator haft to the pinner
flange a embly then withdraw the agitator from in ide the hopper.
When ordering replacement part alway quote the preader Serial Number and the Part Number of the
required part.
The mechanical clutch engage/di engage bolt, which operate the clutch head i intended a a replacement
item. If exce ive wear i noticed, remove the bolt and replace with part number #2890-0816.

11
PARTS DIAGRAM

12
PARTS LIST
Item
No. QTY. Part
No Description
1 1
2550-1400
Drawbar-ASY-CDIT400
2 1
3500-5700
CDIT400 Frame- L
3 1
7500-2160
Hopper-CDIT400 T-MDPE
4 1
7500-2500
Lid-Full-CDIT400 T-MDPE
5 1
9200-4600
WheelASY-18x950x8-Keyed-Knobbly
6 1
9200-4500
WheelASY-18x950x8-Bearing-Knobbly
7 2
7500-2590
MUD AURD-BLUE-MDPE-1/2
8 8
3240-0015
RIVET-3/16"x15-TRUSS HD-AL
9 1
3800-1000
earbox-Ferroni-RV10
10 5
2840-1120
Bolt-M10x120-ZP
11 4
3180-0010
NUT-M10-ZP
12 1
5200-6600
Shaft-Axle-CDIT400-ZP
13 1
3290-1225
Screw-HH-M12x25-ZP
14 1
3310-5012
Washer-Flat-M12x32x3- L
15 1
3150-5100
Nut-Nyloc-3/4UNF-ZP
16 1
3310-5021
Washer-Flat-Stub Axle-M20x29x3-ZP
17 2
2840-1290
Bolt-M12x90-ZP
18 5
3170-0012
NUT-NYLOC-M12-ZP
19 1
1140-4000
Block-Pillow-CDIT300 D
20 2
3290-1240
SCREW-HH-M12x40-ZP
21 2
3310-6012
Washer-Flat-M12-ZP
22 2
3330-8012
Washer-Spring-M12-ZP
23 1
1140-1200
Bearing-CDIT300 D
24 1
2150-0025
Collar-Shaft-ID25
25 1
8200-5200
Flange ASY-DD-CDIT300 D
26 3
3010-0810
SCREW- RUB-M8x10-SS
27 1
8200-2100
Disc-Spinner-CDIT300 D
28 4
6500-8950
Vane-Spinner-CDIT300 D
29 8
3290-0616
Screw-HH-M6x16-ZP
30 8
3170-0006
Nut Nyloc M6-ZP
31 6
3290-0820
SCREW-HH-M8x20-ZP
32 4
3330-8008
Washer-Spring-M8-ZP
33 13
3170-0008
Nut-Nyloc-M8-ZP
34 1
1036-8240
Shaft-A R-DD-CDIT400 T
35 5
3290-0850
Screw-HH-M8x50-ZP
36 1
2100-2300
Clutch-CDIT400-Engager-ASY
37 1
2100-6000
Clutch-CDIT400-PinPlate-ASY
38 1
3210-0840
Pin-Roll-M8x40-BK.SLDPRT
39 1
3210-0540
Pin-Roll-M5x40-BK
40 1
4600-6050
Label-CDIT400 T
41 2
4600-6030
Label-CDAX-30x140-Meyer
42 4
3170-0010
NUT-NYLOC-M10-ZP
43 1
3290-1025
SCREW HH M10x25 ZP
44 1
2250-1600
Storm Pipe-OD90mm-88L -DLD-PVC
45 2
3100-0512
Screw-CSK-PHIL-M5x12L -SS

13
46 4
2810-0880
Bolt-M8x80-SS
47 1
3290-1275
Screw-HH-M12x75-ZP
48 1
1300-3010
BKT-Clutch-CDIT400 T-ZP
49 9
3310-6010
WASHER-FLAT-M10-ZP
50 1
2000-3037
Clamp-Hose-Oetiker3740-ZP
51 2
2890-0816
Screw-Cap-M8x16- rade12.9
52 1
5270-0003
NIPPLE- REASE-M6x1x5-CP
53 2
2890-0812
Screw-Cap-M8x12- rade12.9
54 1
6500-9000
Washer-34.9IDx67ODx2SS304
55 1
6500-7770
Shutter-CDIT300 D-DLD
56 1
7500-2690
Shroud-CDIT400 T-MDPE
57 4
3240-5100
Rivet-5x5/8-SS
58 4
3310-9200
Washer-Flat-3/16x1/2-SS
59 1
7500-2830
Spout-CDIT400 T-MDPE
60 2
2840-0816
SCREW-HH-M8x16-ZP
61 1
5245-8000
Link-Hopper-CDIT400-LH-ZP
62 1
5245-8001
Link-Hopper-CDIT400-RH-ZP
63 1
5245-3900
Handle-Mount-CDIT400-ZP
64 3
8250-1800
Spring-COMP-Crinkle Plate
65 1
2840-1065
BOLT-M10x65-ZP
66 1
4050-4250
Arm-Indicator-400 T
67 2
5200-2801
Round-25x14L -DLD-ZP
68 1
8800-3800
Handle-Tow Hitch-1-7-8-ZP
69 1
5050-7980
Arm-Shutter-CDIT400 T-ZP
70 1
5050-1600
Arm - Clutch ASY - CDIT400 T - ZP
71 1
3865-3800
rip-Handle-7/8"-PVC-BK
72 1
1300-4800
Sheet-2x50x45-PD-BT-SS
73 1
1280-1600
Boot-CDIT400 T-Rubber
74 4
3220-0320
PIN-SPLIT-3.2x20L -ZP
75 3
3110-0512
Screw-PH-POZI-M5x12L -ZP
76 1
2250-7900
Pipe-COND/ELEC-320D-50L -UPVC
77 1
4050-1500
Handle-CDIT400-ZP
78 4
3330-8010
Washer-Spring-M10-ZP
79 1
5200-6300
Key-8x8-CDIT300 D
80 1
3070-0520
Screw-CSK-Phil-M5x20L -SS
81 1
3130-0105
NUT-NYLOC-M5-SS
82 1
3990-3900
Lever uide-CDIT 400-ZP
83 4
3310-2810
Washer-M10x32x2.5-316SS
84 1
1300-8550
Transit Plate-CDIT400
85 8
3310-6008
Washer-Flat-M8-ZP
86 4
3170-0008
Nut-Nyloc-M8-ZP
87 1
1300-6800
BKT-Mudguard-LH-CDIT300 T- L
88 1
1300-6801
BKT-Mudguard-RH-CDIT300 T- L
Table of contents
Other C-Dax Spreader manuals
Popular Spreader manuals by other brands

PRONAR
PRONAR T130 Operator's manual

Echo
Echo RB-85W Operator's manual

Agri-Fab
Agri-Fab 45-02143 owner's manual

Glasdon
Glasdon ICEMASTER 50 Instruction leaflet

Cub Cadet
Cub Cadet 125 lb Spreader & 10 Gallon Sprayer Operator's manual

Trynex International
Trynex International SnowEx Bulk Pro 1875 owner's manual