manuals.online logo
Brands
  1. Home
  2. •
  3. Brands
  4. •
  5. C.P. Electronics
  6. •
  7. Security Sensor
  8. •
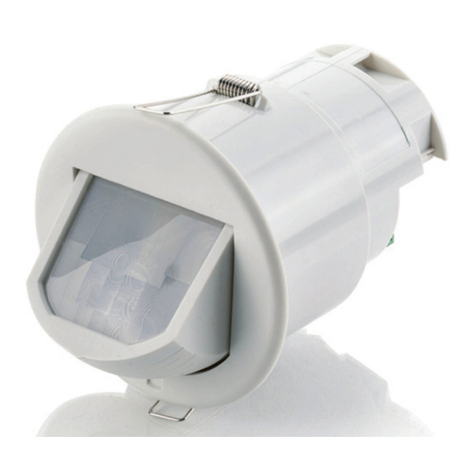
  9. C.P. Electronics GENB-IR User manual

C.P. Electronics GENB-IR User manual

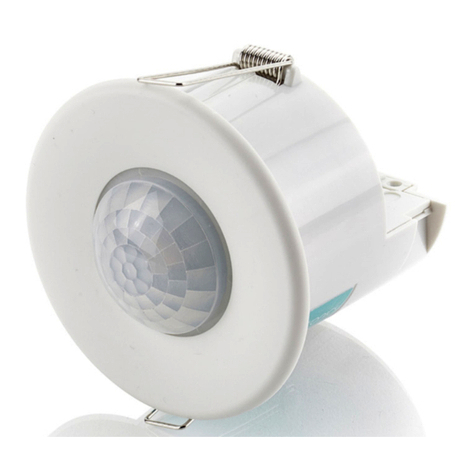
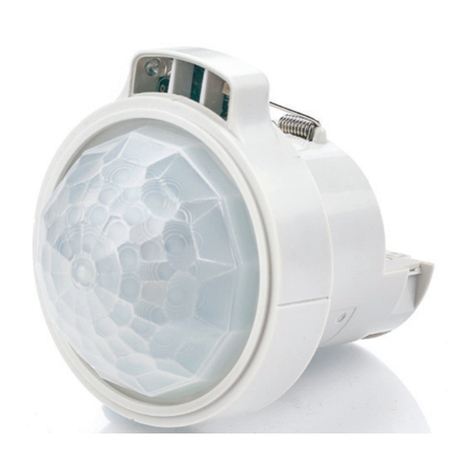
GENB-IR
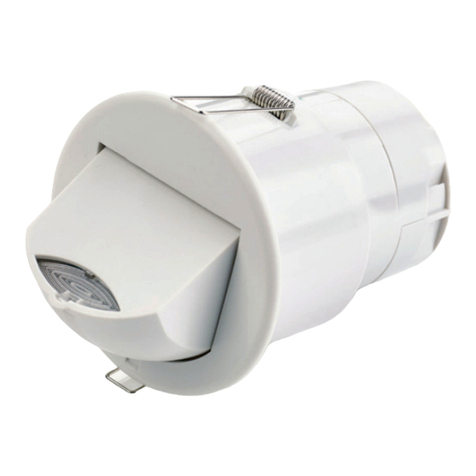
Adjustable head, ceiling PIR presence detector
Verstellbarer Kopf, Decken-PIR-Präsenzmelder
Cabeza ajustable, detector de presencia PIR de techo
Cabeça regulável, detector de presença PIR no teto
Tête ajustable, détecteur de présence PIR au plafond
Testa regolabile, rilevatore presenza PIR a sotto
Verstelbare kop, plafond PIR aanwezigheidsdetector
Warning | Warnung | Advertencia |
Aviso | Attention | Attenzione |
Waarschuwing
EN This device should
be installed by a qualied
electrician in accordance with
the latest edition of the IEE
wiring regulations.
DE Dieses Gerät ist
ausschließlich von qualizierten
Elektrofachkräen zu
installieren.
ES Sólo un electricista
cualicado debe instalar este
dispositivo.
PT Somente um eletricista
qualicado deve instalar este
dispositivo.
FR Seul un électricien
qualié peut installer ce
dispositif.
IT Il dispositivo deve
essere installato da un
elettricista qualicato.
NL Dit apparaat moet
worden geïnstalleerd door een
gekwaliceerde elektricien.
Dimensions (mm) | Abmessungen (mm) | Dimensiones (mm) | Dimensões (mm) | Dimensioni (mm) |
Dimensies (mm)
Downloads and Videos | Downloads und Videos | Descargas y Videos | Descargas e Videos |
Téléchargements & Vidéos | Downloads e Video | Downloads en Video’s
cpelectronics.co.uk/cp/A006
WDA006 Issue 2 Installation Guide
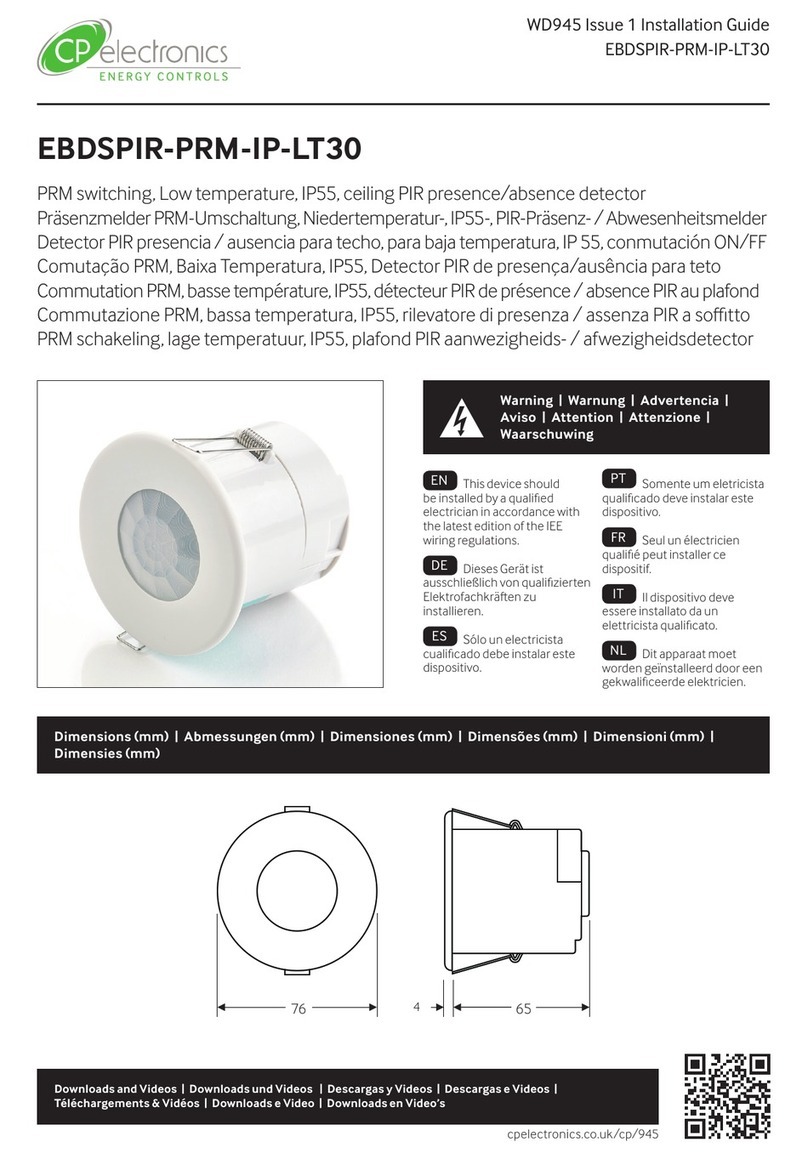
GENB-IR
85 92
0–90°
EN 74mm cut out
DE 74mm ausgeschnitten
ES Recorte de 74 mm
PT 74mm recortado
FR Découpe de 74 mm
IT Taglio da 74 mm
NL 74 mm uitgesneden
RU 74 мм вырезано
2
Detection pattern | Erfassungsbereich | Patrón de detección | Padrão de detecção |
Performance de détection | Modello di rilevazione | Detectie zone
high sensitivity low
N
L/Out
L
5
1
4
3
2
Wiring | Cableado | Chicote Elétrico | Verkabelung | Câblage | Cablaggio | Bedrading
3m 10m walk towards
24m walk across
2.8m
Sensitivity set to maximum
Detector head position must be set to 90°
EN Key
1. Neutral
2. Live
3. Switched output
4. 10A circuit protection if required
5. Load
Switching channel is L-Out
DE Zeichenerklärung
1. Neutral
2. Netzspannungsführend
3. Geschalteter Ausgang
4. 10A Kurzschlusssicherung, falls nötig
5. Last
Schaltkanal ist L-Out
ES Leyenda
1. Neutro
2. Fase
3. Salida conmutada
4. 10A protección de circuito,
en caso necesario
5. Carga
El canal de conmutación es L-Out
PT Legenda
1. Neutro
2. Fase
3. Saída relé
4. 10A proteção do circuito,
caso necessário
5. Carga
Mudar de canal é L-Out
FR Légende
1. Neutre
2. Phase
3. Phase coupée
4. 10A protection du circuit si nécessaire
5. Charge
Le canal de commutation est L-Out
IT Legenda
1. Neutro
2. Fase
3. Commutazione uscita
4. 10A protezione del circuito,
se necessario
5. Carico
Il canale di commutazione è L-Out
NL Legenda
1. Nul
2. Fase
3. Geschakelde uitgang
4. 10A beveiliging indien nodig
5. Belasting
Schakelkanaal is L-Out
3
Ø 74mm
1
Create cut out | Erstellen Sie einen Ausschnitt | Oricio de corte | Fixação no teto | Percer |
Creare il foro | Sparing maken
EN Cut a 74mm diameter
hole in the ceiling.
DE Deckenausschnitt
74mm.
ES Cortar un oricio de 74
mm de diámetro en el techo
PT Efectuar um corte de
diâmetro de 74mm no teto.
FR Percer un trou de
74mm de diamètre dans le
plafond
IT Realizzare un foro di
74mm di diametro a sotto.
NL Maak een 74mm
diameter sparing in het
plafond.
Installation | Instalación | instalação | Installazione | Installatie
EN This device is designed to be ush
ceiling-mounted. See page 12 for
additional mounting options.
• Do not site the unit where direct sunlight &
articial light might enter the sensor.
• Do not site the sensor within 1m of any
forced air heating or ventilation.
• Do not x the sensor to an unstable or
vibrating surface.
• Occupancy is best detected when the
ambient temperature is dierent to that
of the human body, thus, use within -20 to
35ºC ambient temperature.
DE Das Modell ist für den Deckeneinbau
vorgesehen. Siehe Seite 12 für weitere
Mntagemöglichkeiten.
• Einheit so anbringen, dass der Sensor vor
direkter Sonneneinstrahlung geschützt ist.
• Sensor mit Mindestabstand von 1m zu
Lichtquellen, Luheizung oder Ventilation
anbringen.
• Sensor nicht an einer instabilen oder
vibrierenden Oberäche montieren.
• Bezetting wordt het best gedetecteerd
wanneer de omgevingstemperatuur anders
is dan die van het menselijk lichaam, dus
gebruik binnen een omgevingstemperatuur
van -20 tot 35 ° C.
ES Este producto está diseñado para
montarse empotrado en techo. Ver pag.
12 para otras opciones de montaje.
• Evite que la luz del sol incida directamente
sobre el sensor.
• No coloque el sensor a menos de 1m
de fuentes de iluminación, salidas de
calefacción por aire forzado o ventilación.
• No je el sensor a supercies que vibren o no
sean estables.
• La ocupación se detecta mejor cuando la
temperatura ambiente es diferente a la del
cuerpo humano, por lo tanto, use dentro de
-20 a 35ºC de temperatura ambiente.
PT Este dispositivo foi projetado para ser
montado no teto. Veja a página 12 para
opções adicionais de montagem.
• Não instale a unidade num local onde a luz
solar direta possa incidir no sensor.
• Não coloque o sensor a menos de 1m de
qualquer iluminação, aquecimento ou
ventilação de ar forçado.
• Não xe o sensor em uma superfície instável
ou sujeito a vibrações.
• A ocupação é melhor detectada quando
a temperatura ambiente é diferente da do
corpo humano, portanto, use entre -20 a
35ºC.
FR Le produit est conçu pour être monté
au plafond en encastré. Voir page 12 pour
les options additionnelles de montage.
• Ne pas placer l’unité dans une position où la
lumière directe du soleil pourrait pénétrer
dans le capteur.
• Ne pas placer le capteur à moins d’unmètre
de tout dispositif d’éclairage, de chauage
ou de ventilation à air forcé.
• Ne pas xer le capteur sur une surface
instable ou vibrante.
• L’occupation est mieux détectée lorsque
la température ambiante est diérente de
celle du corps humain, utilisez donc entre
-20 et 35 ° C de température ambiante.
IT Questo dispositivo è progettato per
essere a lo sotto. Vedi pagina 12 per
opzioni di montaggio aggiuntive.
• Non collocare l’unità in una posizione in
cui la luce diretta del sole possa entrare nel
sensore.
• Non posizionare il sensore a meno di un metro
da un qualsiasi tipo di illuminazione, sistema di
riscaldamento o ventilazione.
• Non installare il sensore su superci instabili o
soggette a vibrazioni.
• L’occupazione viene rilevata meglio quando
la temperatura ambiente è diversa da quella
del corpo umano, quindi utilizzare entro -20
a 35 °
NL Dit apparaat is ontworpen voor
inbouwmontage in het plafond. Zie
pagina 12 voor optionele montage opties.
• Plaats het apparaat niet op een locatie
waar direct zonlicht de sensor kan
binnendringen.
• Plaats de sensor niet op minder dan 1
meter afstand van verlichting, geforceerde
luchtverwarming of ventilatie.
• Bevestig de sensor niet op een onstabiel of
trillend oppervlak.
• Bezetting wordt het best gedetecteerd
wanneer de omgevingstemperatuur anders
is dan die van het menselijk lichaam, dus
gebruik binnen een omgevingstemperatuur
van -20 tot 35 ° C.
4
Clamp cable | Zugentlastung | Abrazadera para el cable | Fixação do cabo | Serrer les câbles |
Morsetto per il cavo | Trekontlasting
EN Continue tightening the screws
until the clamp bar snaps out and is tightly
engaged against the cable/s. The cable
clamp must clamp the outer sheath only.
DE Ziehen Sie die Schrauben weiterhin
an, bis die Klemme einrastet und fest am
Kabel sitzt. Die Kabelklemme darf nur die
äußere Ummantellung einklemmen.
ES Continuar apretando los tornillos
hasta que la barra abrazadera salga y se
ajuste bien con el cable. La abrazadera para
cables solo debe sujetar la funda.
PT Apertar os parafusos até que a
barra de xação se encaixe totalmente e
prenda bem o cabo. O grampo do cabo
deve xar apenas o revestimento externo.
FR Continuez de serrer les vis jusqu’à
ce que la barre de xation sorte et se serre
fortement sur le câble. Le serre-câbles doit
uniquement serrer la gaine extérieure.
IT Continuare a stringere le viti no
a quando la barra del morsetto non scatti
e si ssi leggermente sul cavo. Applica il
morsetto alla sola guaina esterna del cavo.
NL Blijf de schroeven aandraaien
totdat de beugel los komt en de kabel
stevig vastklemt. De beugel moet alleen de
buitenmantel vastklemmen.
3
4
Wire in plugs & connect to detector | Verdrahtugn & Anschluß des Melders | Cableado y conexión del sensor |
Cablagem e ligação do sensor | Câbler le bornier et connecter au détecteur |
Cablaggio e connessione al rilevatore | Bedrading & aansluiten op detector
EN Wire in plug/s, using wiring
diagram on page 2 as a guide. Connect the
plug/s to the detector.
DE Zum Anschluß des Melders
verwenden Sie das Schaltbild. Verwenden
Sie dazu den /die beiliegenden Stecker.
ES Cablear siguiendo el esquema de
la página 2 como guía. Conectar las bornas
al sensor.
PT Efectuar as ligações seguindo o
esquema na pág.2 como indicação. Ligar
os bornes ao sensor.
FR Raccorder les câbles au bornier
débrochable en respectant le schéma
de câblage page 2. Connecter le bornier
au détecteur.
IT Collegare il morsetto usando il
cablaggio indicato a pagina 2 come guida.
Connetti il morsetto al rilevatore.
NL Aders aansluiten in de
aansluitklem(men), gebruik het
bedradingsschema op pagina 2 als
richtlijn. Steek de aansluitklem(men) in
de detector.
35mm
6mm
2
Wire stripping | Abisolieren | Pelado de cables | Descascamento do o | Dénudage des câbles |
Spelatura del lo | Kabelstrippen
EN Strip the wires as shown opposite.
Presence detector does not require
earth conductor.
DE Abisolieren Sie die Kabel wie dargestellt.
Der Melder benötigt keinen Erdanschluß.
ES Pele los cables como se muestra en el
dibujo. El detector no requiere cable de tierra.
PT Descarne os cabos como mostrado
ao lado. Este detector não requer conductor
de terra.
FR Dénudez les câbles comme indiqué ci-
contre. Le détecteur de présence ne nécessite
pas de conducteur de terre.
IT Spelare i li come mostrato. Il rilevatore
di presenza non richiede il cavo di terra.
NL Strip de aders zoals weergegeven op
de aeelding hiernaast. Aardingsdraad is niet
vereist.
5
EN Bend the springs up and push detector
through hole in ceiling. When fully inserted the
springs snap back to hold the device in place.
To avoid injury, take care when bending
springs.
DE Federn nach oben biegen und Detektor
durch die Önung in der Decke schieben.
Sobald der Detektor vollständig eingeschoben
ist, schnappen die Federn zurück und halten
das Gerät fest an Ort und Stelle.
Achten Sie auf die Spannfedern um
Verletzungen zu vermeiden
ES Doble los muelles hacia arriba e
introduzca el detector por el oricio del techo.
Cuando esté totalmente introducido, los
muelles saltan para mantener el dispositivo en
su lugar.
Doble los muelles con cuidado al
montar la unidad.
PT Dobre as molas para cima e empurre
detector através do furo no teto. Ao serem
totalmente inseridas as molas saltam de volta
para manter o dispositivo no lugar.
Para evitar ferimentos, tenha cuidado
quando manipule as molas.
FR Replier les ressorts vers le haut
et pousser le détecteur à travers le trou
dans le plafond. Quand les ressorts sont
complètement insérés, ils se remettent dans
leur position initiale pour maintenir le dispositif
en place.
Pour éviter toute blessure, faire
attention lors de la compression des
ressorts.
IT Piegare le molle verso l’alto e inserire il
rilevatore nel foro sul sotto. Una volta inserito,
le molle si riassestano ssando il dispositivo in
posizione.
per evitare infortuni, prestare
attenzione quando si piegano le molle.
NL Buig de veren omhoog en duw het
apparaat door de sparing in het plafond.
Wanneer de veren volledig door de sparing zijn
klappen deze terug om het apparaat op zijn
plek te houden.
Om letsel te voorkomen, wees
voorzichtig met het buigen van de
veren.
5
Install detector | Melder installieren | Instalación del detector | Instalaçao do detector | Installer le détecteur |
Installazione del sensore | Installeer detector
Head position & locking | Kopfposition & Verriegelung | Posición y bloqueo de la cabeza | Posição da cabeça e
travamento | Position de la tête et verrouillage | Posizione e bloccaggio della testa | Hoofdpositie & vergrendeling
1EN Remove metal locking clip from rear of
unit.
DE Entfernen Sie die Verriegelungs-Klemme
aus Metall von der Rückseite der Einheit.
ES Retire el clip de bloqueo metálico de la
parte trasera de la unidad.
PT Retirar o clipe de bloqueio de metal da
traseira da unidade.
FR Retirer le clip métallique de blocage à
l’arrière de l’unité.
IT Rimuovere la clip di blocco in metallo dal
retro dell’unità.
NL Verwijder de metalen montageveer van de
achterzijde.
6
2
3
EN Set sensor head position to 90º for
maximum detection range. Push clip into
position shown in the adjacent diagram to
lock head. To remove clip, lever out with a small
screwdriver.
Sensor head position < 90deg may result
in varying detection range & sensitivity.
DE Stellen Sie die Sensorkopfposition auf
90º ein, um den maximalen Erfassungsbereich
zu erreichen. Drücken Sie den Clip in die in der
nebenstehenden Abbildung gezeigte Position,
um den Kopf zu verriegeln. Zum Entfernen
des Clips mit einem kleinen Schraubendreher
heraushebeln.
Die Sensorkopfposition < 90 Grad kann
zu unterschiedlichen
Erkennungsbereichen und
Empndlichkeiten führen.
ES Establezca la posición del cabezal del
sensor en 90º para un rango de detección
máximo. Empuje el clip en la posición que
se muestra en el diagrama adyacente para
bloquear la cabeza. Para quitar el clip, haga
palanca con un destornillador pequeño.
La posición del cabezal del sensor <90
grados puede resultar en un rango de
detección y sensibilidad variables.
PT Dena a posição da cabeça do sensor em
90º para a faixa máxima de detecção. Empurre
o clipe para a posição mostrada no diagrama
adjacente para travar a cabeça. Para remover o
clipe, retire com uma pequena chave de fenda.
A posição da cabeça do sensor <90deg
pode resultar em faixa de detecção e
sensibilidade variadas.
FR Réglez la position de la tête du capteur
sur 90º pour une plage de détection maximale.
Poussez le clip dans la position indiquée sur le
schéma ci-contre pour verrouiller la tête. Pour
retirer le clip, faites levier avec un petit tournevis.
La position de la tête du capteur < 90
degrés peut entraîner une plage de
détection et une sensibilité variables.
IT Impostare la posizione della testa del
sensore su 90º per il massimo raggio di
rilevamento. Spingere la clip nella posizione
mostrata nel diagramma adiacente per bloccare
la testa. Per rimuovere la clip, fare leva con un
piccolo cacciavite.
La posizione della testa del sensore < 90
gradi può comportare una variazione del
campo di rilevamento e della sensibilità.
NL Stel de positie van de sensorkop in op 90º
voor een maximaal detectiebereik. Duw de clip
in de positie die wordt getoond in het diagram
hiernaast om de kop te vergrendelen. Om de
clip te verwijderen, hef hem uit met een kleine
schroevendraaier.
Positie van de sensorkop < 90 graden
kan resulteren in een variërend
detectiebereik en gevoeligheid.
EN Mount the detector centrally above the doorways for
optimum detection as shown in the above image.
DE Montieren Sie den Melder mittig über den Türen für eine
optimale Erkennung, wie in der obigen Abbildung gezeigt.
ES Monte el detector en el centro sobre las puertas para una
detección óptima como se muestra en la imagen de arriba.
PT Monte o detector centralmente acima das portas para
uma detecção ideal, conforme mostrado na imagem acima.
FR Montez le détecteur au centre au-dessus des portes pour
une détection optimale, comme indiqué dans l’image ci-dessus.
IT Montare il rilevatore centralmente sopra le porte per un
rilevamento ottimale come mostrato nell’immagine sopra.
NL Monteer de detector centraal boven de deuropeningen
voor een optimale detectie zoals in bovenstaande aeelding.
7
4EN Mount the detector as close to the doorway as possible for precise
movement detection and high sensitivity.
DE Montieren Sie den Melder so nah wie möglich an der Türönung für eine
präzise Bewegungserkennung und hohe Empndlichkeit.
ES Monte el detector lo más cerca posible de la puerta para una detección
de movimiento precisa y alta sensibilidad.
PT Monte o detector o mais próximo possível da porta para detecção precisa
de movimento e alta sensibilidade.
FR Montez le détecteur aussi près que possible de la porte pour une
détection précise des mouvements et une haute sensibilité.
IT Montare il rilevatore il più vicino possibile alla porta per un rilevamento
preciso del movimento e un’elevata sensibilità.
NL Monteer de detector zo dicht mogelijk bij de deuropening voor
nauwkeurige bewegingsdetectie en hoge gevoeligheid.
8
EN To turn the lights on.
(Press again to cancel).
DE Um die Beleuchtung. (Zum
Abbrechen erneut drücken).
ES Para encender las luces.
(Presione nuevamente para
cancelar).
PT Para ligar a illuminação.
(Pressione novamente para
cancelar).
FR Pour allumer les lumières.
(Appuyez à nouveau pour annuler).
IT Per accendere
l’illuminazione. (Premere di nuovo
per annullare).
NL Om de lichten aan te doen.
(Druk nogmaals om te annuleren).
EN To turn the lights o.
(Press again to cancel).
DE Um die Beleuchtung
auszuschalten. (Zum Abbrechen
erneut drücken).
ES Para apagar las luces.
(Presione nuevamente para
cancelar).
PT Desligar a illuminação.
(Pressione novamente para
cancelar).
FR Pour éteindre les lumières.
(Appuyez à nouveau pour annuler).
IT Per spegnere l’illuminazione.
(Premere di nuovo per annullare).
NL Om de lichten uit te
schakelen. (Druk nogmaals om te
annuleren).
Programming | Programmierung | Programación | Programação | Programmation |
Programmazione | Programming
EN To set the time-out
period.
DE Einstellung der
Timeout-Dauer.
ES Para establecer el
tiempo de espera.
PT Para denir o intervalo
de tempo.
FR Pour dénir la période
de temporisation.
IT Per impostare il periodo
do timeout.
NL De time-outperiode
instellen.
EN Ambient light level control. Sets the
ambient level that allows the lighting load to
turn ON.
DE Umgebungslichtregelung. Legt
den Umgebungspegel fest, mit dem die
Beleuchtungslast eingeschaltet werden kann
ES Control de nivel de luz ambiental.
Establece el nivel ambiente que permite que la
carga de iluminación se ENCIENDA.
PT Controle de nível de luz ambiente. Dene
o nível do ambiente que permite que a carga de
iluminação seja LIGADA.
FR Contrôle du niveau de lumière ambiante.
Dénit le niveau ambiant permettant à la charge
d’éclairage de s’allumer.
IT Controllo del livello di luce ambientale.
Imposta il livello ambientale che consente di
accendere il carico di illuminazione.
NL Niveau lichtregeling. Stelt het
omgevingsniveau in waarmee de
verlichtingsbelasting wordt ingeschakeld.
m = minutes | Minuten |
minutos | minuti
s = seconds | Sekundedn
| segundos | secondes |
secondi | seconden
352*5$00,1* _352*5$00,(581* _352*5$0$&,1 _352*5$0$2 _
352*5$00$7,21 _352*5$00$=,21(
((117R WXUQ WKH OLJKWV RQ
((663DUD HQFHQGHU ODV OXFHV
))553RXU DOOXPHU OHV OXPLqUHV
''((8P GLH %HOHXFKWXQJ
HLQ]XVFKDOWHQ
33773DUD OLJDU D LOXPLQDomR
,,773HU DFFHQGHUH OLOOXPLQD]LRQH
((117R WXUQ WKH OLJKWV RII
((663DUD DSDJDU ODV OXFHV
))553RXU pWHLQGUH OHV OXPLqUHV
''((8P GLH %HOHXFKWXQJ
DXV]XVFKDOWHQ
3377'HVOLJDU D LOXPLQDomR
,,773HU VSHJQHUH OLOOXPLQD]LRQH
((117R VHW WKH WLPHRXW SHULRG
((663DUD HVWDEOHFHU HO WLHPSR GH
HVSHUD
))553RXU GpILQLU OD SpULRGH GH
WHPSRULVDWLRQ
''(((LQVWHOOXQJ GHU 7LPHRXW
'DXHU
33773DUD GHILQLU R LQWHUYDOR GH
WHPSR
,,773HU LPSRVWDUH LO SHULRGR GL
WLPHRXW P PLQXWHV_ 0LQXWHQ _ PLQXWRV _ PLQXWRV_ PLQXWL
V VHFRQGV_ 6HNXQGHQ _ VHJXQGRV_ VHFRQGHV _ VHFRQGL
((117R VHW D WDUJHW OLJKW OHYHO
ZKHUH WKH OLJKWLQJ V\VWHP
UHVSRQGV WR DPELHQW OLJKW OHYHO
((663DUD HVWDEOHFHU XQ QLYHO GH
OX] REMHWLYR HO VLVWHPD GH
LOXPLQDFLyQ UHVSRQGH DO QLYHO GH
OX] DPELHQWH
))553RXU GpILQLU XQ QLYHDX GH
OXPLQRVLWp FLEOH OH V\VWqPH
GpFODLUDJH UpDJLVVDQW DX QLYHDX
GH OXPLQRVLWp DPELDQWH
''(((LQVWHOOXQJ HLQHV =LHO
/LFKWSHJHOV DQ GHP GDV
%HOHXFKWXQJVV\VWHP DXI GHQ
8PJHEXQJVOLFKWSHJHO UHDJLHUW
33773DUD XP QtYHODOYR GH
LOXPLQDomR HP TXH R VLVWHPD GH
LOXPLQDomR UHVSRQGH DR QtYHO GH
LOXPLQDomR GR DPELHQWH
,,773HU LPSRVWDUH XQ OLYHOOR GL
LOOXPLQD]LRQH GL GHVWLQD]LRQH LQ
FXL LO VLVWHPD GL LOOXPLQD]LRQH
ULVSRQGD DO OLYHOOR GHOOD OXFH
DPELHQWDOH
EN Allow 5 seconds
for the programmed
settings to take eect
before removing power to
the sensor!
DE Warten Sie
5 Sekunden, bis die
programmierten
Einstellungen wirksam
werden, bevor Sie
den Sensor von der
Stromversorgung trennen!
ES ¡Espere 5
segundos para que
la conguración
programada surta efecto
antes de desconectar la
alimentación del sensor!
PT Aguarde 5
segundos para que
as congurações
programadas entrem em
vigor antes de remover a
energia do sensor!
 FR Attendez 5
secondes pour que les
réglages programmés
prennent eet avant de
couper l’alimentation du
capteur!
IT Attendere
5 secondi anché
le impostazioni
programmate abbiano
eetto prima di togliere
l’alimentazione al sensore!
NL Wacht 5
seconden voordat de
geprogrammeerde
instellingen van kracht
worden voordat u de
stroom naar de sensor
uitschakelt!
9
Testing | Prüfen | Pruebas | Teste | Test | Veriche | Testen
7(67,1* _35)(1 _358(%$6 _7(67( _7(67 _9(5,),&+(

3UHVV _ 'UFN _ 3UHVLRQD
$SHUWH _ $SSXLH _ 3UHPL
((113RZHU XS WKH VHQVRU ² WKH ORDG VKRXOG FRPH RQ
LPPHGLDWHO\
''((6FKOLHHQ 6LH GHQ 6HQVRU DQ GLH 6WURPYHUVRUJXQJ DQ 
GDV 6\VWHP VROOWH VLFK VRIRUW HLQVFKDOWHQ
((66(QFLHQGD HO VHQVRU OD FDUJD GHEHUtD HQFHQGHUVH
LQPHGLDWDPHQWH
3377/LJXH R VHQVRU  D FDUJD GHYH VHU DWLYDGD
LPHGLDWDPHQWH
))55$OLPHQWHU OH FDSWHXU OD FKDUJH GHYUDLW VDOOXPHU
LPPpGLDWHPHQW
,,77$FFHQGL LO VHQVRUH LO FDULFR GRYUHEEH DWWLYDUVL
LPPHGLDWDPHQWH

((119DFDWH WKH URRP RU UHPDLQ YHU\ VWLOO DQG ZDLW IRU WKH ORDG WR
VZLWFK RII WKLV VKRXOG WDNH OHVV WKDQ  PLQXWHV
''((9HUODVVHQ 6LH GHQ 5DXP RGHU VWHKHQ 6LH JDQ] VWLOO XP ]X
SUIHQ RE GDV 6\VWHP VLFK DXVVFKDOWHW GLHV VROOWH ZHQLJHU DOV 
0LQXWHQ GDXHUQ
((666DOJD GH OD KDELWDFLyQ R SHUPDQH]FD PX\ TXLHWR \ HVSHUH D
TXH OD FDUJD VH DSDJXH GHEHUtDQ UHTXHULUVH PHQRV GH  PLQ
3377'HVRFXSH D VDOD RX SHUPDQHoD LPyYHO H DJXDUGH DWp D FDUJD
VHU GHVDWLYDGD LVWVR GHYH OHYDU PHQRV GH  PLQXWRV
))554XLWWHU OD SLqFH RX UHVWHU LPPRELOH HW DWWHQGUH TXH OD FKDUJH
VpWHLJQH FHFL GHYUDLW SUHQGUH PRLQV GH GHX[ PLQXWHV
,,77$EEDQGRQD OD VWDQ]D R FHUFD GL UHVWDUH LO SL IHUPR SRVVLELOH H
DWWHQGL OR VSHJQLPHQWR GHO FDULFR GRYUHEEH ULFKLHGHUH PHQR GL 
PLQXWL
((11(QWHU WKH URRP RU PDNH VRPH PRYHPHQW DQG FKHFN WKDW
WKH ORDG VZLWFKHV RQ
''((%HWUHWHQ 6LH GHQ 5DXP RGHU EHZHJHQ 6LH VLFK XP
VLFKHU]XVWHOOHQ GDVV GDV 6\VWHP VLFK HLQVFKDOWHW
((66(QWUH HQ OD KDELWDFLyQ R UHDOLFH DOJ~Q PRYLPLHQWR \
FRPSUXHEH TXH OD FDUJD VH HQFLHQGH
3377(QWUH QD VDOD RX IDoD DOJXP PRYLPHQWR H YHULILTXH VH D
FDUJD p DWLYDGD
))55(QWUHU GDQV OD SLqFH RX ERXJHU HW YpULILHU TXH OD FKDUJH
VDOOXPH
,,77(QWUD QHOOD VWDQ]D R HVHJXL TXDOFKH PRYLPHQWR SHU
YHULILFDUH FKH LO FDULFR VL DWWLYL
1
2
3
4
EN Press.
DE Drück.
ES Presiona.
PT Aperte.
FR Appuie.
IT Premi.
NL Druk op.
EN Power up the sensor - the load
should come on immediately.
DE Schließen Sie den Sensor an die
Stromversorgung an - das System sollte
sich sofort einschalten.
ES Encienda el sensor: la carga debería
encenderse inmediatamente.
PT Ligue o sensor - a carga deve ser
ativada imediatemente.
FR Alimenter le capteur : la charge
devrait s’allumer immédiatemente.
IT Accendi il sensore: il carico
dovrebbe attivarsi immediatemente.
NL Schakel de sensor in - de belasting
moet onmiddellijk aangaan.
EN Vacate the room or remain very
still and wait for the load to switch o (this
should take less than 2 minutes).
DE Verlassen Sie den Raum oder
stehen Sie ganz still, um zu prüfen, ob
das System sich ausschaltet (dies sollte
weniger als 2 Minuten dauern).
ES Salga de la habitacíon o
permanezca muy quieto y espere a que
la carga se apague (deberían requerirse
menos de 2 min).
PT Desocupe a sala ou permaneça
imóvel e aguarde até a carga ser
desativada (istso deve levar menos de 2
minutos).
FR Quitter la pièce ou rester immobile
et attendre que la charge s’éteigne (ceci
devrait prendre moins de 2 minutes).
IT Abbandona la stanza o cerca di
restare il piú fermo possibile e attendi
lo spegnimento del carico (dovrebbe
richiedere meno di 2 minuti).
NL Maak de kamer vrij of blijf heel stil
en wacht tot de belasting is uitgeschakeld
(dit duurt minder dan 2 minuten).
EN Enter the room or make some
movement and check that the load
switches on.
DE Betreten Sie den Raum oder
bewegen Sie sich, um sicherzustellen, dass
das System sich einschaltet.
ES Entre en la habitación o realice
algún movimiento y compruebe que la
carga se encienda.
PT Entre na sala ou faça algum
movimento e verique se a carga é ativada.
FR Entrer dans la pièce ou bouger et
vérier que la charge s’allume.
IT Entra nella stanza o esegui qualche
movimento per verifcare che il carico si
attivi.
NL Ga de kamer binnen of maak een
beweging en controleer of de lading wordt
ingeschakeld.
10
Compliance
IP rating
Insulation class
Material (casing)
Humidity
Operating Temperature
Rated impulse voltage
Time out range
Light detection range
Load Inrush rating
Fans and ventilation
equipment
Resistive heaters
LED lighting
Compact uorescent
lighting
Fluorescent lighting
Incandescent lighting
Max load:
Terminal capacity
Power consumption
parasitic
Supply frequency
Circuit Protection
Supply voltage AC
Weight
Part code
EN Technical Data
Eingehaltene
normen
IP-schutzklasse
Isolationsklasse
Material (gehäuse)
Feuchtigkeit
Betriebstemperatur
Bemessungsstoßspan-
nung
Zeitüberschreitungs-
bereich
Lichterkennungsbereich
Einschaltdauer laden
Induktiv/ventilatoren
und lüungssysteme
Widerstandsfähige
heizungen
LED-beleuchtung
Kompakte neonbe-
leuchtung
Neonbeleuchtung
Glühlampen
Max. Last:
Leiterkapazität
Parasitäre stromver-
brauch
Versorgungsfrequenz
Sicherung
Versorgungsspannung AC
Gewicht
Teile-code
DE Technische Daten
EMC-2014/30/EU,
LVD-2014/35/EU
40
2
Flammenhem-
mendes
ABS und PC/ABS
5 bis 95 %
Luftfeuchtigkeit,
nicht kondensierend
-20 bis +35°C
2500V
10 Sekunden bis
99 Minuten
Verwendbar 15-950
Lux
200A for 300μs
3A
8A
3A
3A
4A
8A
2.5mm²
840mW
50Hz
<=10A MCB Type B
230 VAC +/- 10%
0.2kg
GENB-IR
Conformidad
con normativas
Grado de protección IP
Clase de aislamiento
Material (carcasa)
Humedad
Temperatura de funcio-
namiento
Voltaje nominal de
impulso
Rango de tiempo fuera
Rango de detección
de luz
Clasicación de carga de
entrada
Inductivo/equipo
de ventilación y
ventiladores
Calentadores resistiva
Iluminación LED
Iluminación uores-
cente compacta
Iluminación
uorescente
Iluminación
incandescente
Carga máx.:
Capacidad del terminal
Consumo energético
parasitaria
Frecuencia de suministro
Protección del circuito
Voltaje de entrada de CA
Peso
Código de pieza
ES Datos Técnicos
EMC-2014/30/EU,
LVD-2014/35/EU
40
2
Ignífugo ABS y
PC/ABS
5 a 95 % sin
condensación
-20 a +35°C
2500V
10 segundos para
99 minutos
15-950 Lux utilizables
200A for 300μs
3A
8A
3A
3A
4A
8A
2.5mm²
840mW
50Hz
<=10A MCB Type B
230 VAC +/- 10%
0.2kg
GENB-IR
Compatibilidade
Classicação IP
Classe de isolamento
Material (caixa)
Umidade
Temperatura de operação
Tensão de impulso
nominal
Intervalo de tempo limite
Faixa de detecção de luz
Classicação de carga de
irrupção
Iindutivo/ventiladores
e equipamentos de
ventilação
Resistivas aquece-
dores
Lâmpada de LED
Lâmpada uorescente
compacta
Lâmpada uorescente
Iluminação incan-
descente
Carga max.:
Capacidade do terminal
Consumo de energia
parasitária
Freqüência de fornec-
imento
Proteção de circuito
Tensão de alimentação
CA
Peso
Código da peça
PT Dados Técnicos
EMC-2014/30/EU,
LVD-2014/35/EU
40
2
Retardante de
chamas
ABS e PC/ABS
5 a 95% sem
condensação
-20 a +35°C
2500V
10 segundos para
99 minutos
Utilizável 15-950 Lux
200A for 300μs
3A
8A
3A
3A
4A
8A
2.5mm²
840mW
50Hz
<=10A MCB Type B
230 VAC +/- 10%
0.2kg
GENB-IR
EMC-2014/30/EU,
LVD-2014/35/EU
40
2
Flame retardant
ABS and PC/ABS
5 to 95% non-
condensing
-20 to +35°C
2500V
10s–99m
Usable 15-950 Lux
200A for 300μs
3A
8A
3A
3A
4A
8A
2.5mm²
840mW
50Hz
<=10A MCB Type B
230 VAC +/- 10%
0.2kg
GENB-IR
11
Compatibilidade
Classicação IP
Classe de isolamento
Material (caixa)
Umidade
Temperatura de operação
Tensão de impulso
nominal
Intervalo de tempo limite
Faixa de detecção de luz
Classicação de carga de
irrupção
Iindutivo/ventiladores
e equipamentos de
ventilação
Resistivas aquece-
dores
Lâmpada de LED
Lâmpada uorescente
compacta
Lâmpada uorescente
Iluminação incan-
descente
Carga max.:
Capacidade do terminal
Consumo de energia
parasitária
Freqüência de fornec-
imento
Proteção de circuito
Tensão de alimentação
CA
Peso
Código da peça
Conformité
Indice IP
Classe d’isolation
Matériau (boîtier)
Humidité
Température de
fonctionnement
Tension nominale de
tenue aux chocs
Plage de temps mort
Plage de détection de
lumière
Indice d’appel de charge
Ventilateurs et équipe-
ments de ventilation
Réchaueurs résistif
Éclairage LED
Éclairage uorescent
compact
Éclairage uorescent
Éclairage
incandescent
Charge max.:
Capacité des terminaux
Consommation
électrique parasite
Fréquence
d’alimentation
Protection des circuits
Tension
d’alimentation CA
Poids
Code de la pièce
Conformità
Classicazione IP
Classe di isolamento
Materiale (rivestimento)
Umidità
Temperatura di esercizio
Tensione nominale a
impulso
Intervallo di tempo
Gamma di rilevamento
della luce
Valutazione del carico
di punta
Induttivo/ventole e
apparecchiature di
ventilazione
Resistivo
Illuminazione LED
Illuminazione uores-
cente compatta
Illuminazione
uorescente
Luce a incandescenza
Carico max:
Capacità del morsetto
Consumo di energia
parassita
Frequenza di alimen-
tazione
Protezione del circuito
Tensione di alimentazi-
one CA
Peso
Codice parte
EMC-2014/30/EU,
LVD-2014/35/EU
40
2
Agent Ignifuge
ABS et
PC/ABS
5 à 95 % non-
condensable
-20 à+35°C
2500V
10 secondes pour
99 minutes
Utilisable 15-950 Lux
200A for 300μs
3A
8A
3A
3A
4A
8A
2.5mm²
840mW
50Hz
<=10A MCB Type B
230 VAC +/- 10%
0.2kg
GENB-IR
EMC-2014/30/EU,
LVD-2014/35/EU
40
2
ABS ignifugo e
PC/ABS
Dal 5 al 95% senza
condensa
-20 al +35°C
2500V
10 secondi a
99 minuti
Utilizzabile 15-950
Lux
200A for 300μs
3A
8A
3A
3A
4A
8A
2.5mm²
840mW
50Hz
<=10A MCB Type B
230 VAC +/- 10%
0.2kg
GENB-IR
FR Données Techniques IT Speciche Tecnichev NL Technische data
Conformiteit
IP classicatie
Isolatieklasse
Materiaal (behuizing)
Luchtvochtigheid
Bedrijfstemperatuur
Nominaal
impulsspanning
Time-outbereik
Lichtdetectiebereik
Laad Inrush-classicatie
Ventilatoren en
ventilatieapparatuur
Resistent kachels
LED verlichting
Compacte
tl-verlichting
Tl-verlichting
Gloeilampverlichting
Max belasting
Eindcapaciteit
Energieverbruik in
ruststand
Voedingsfrequentie
Circuitbeveiliging
Voedingsspanning AC
Gewicht
Onderdeelcode
EMC-2014/30/EU,
LVD-2014/35/EU
40
2
Brandvertragend
ABS en PC/ABS
5 tot 95%, niet
condenserend
-20 a +35°C
2500V
10 seconden tot
99 minuten
Bruikbare 15-950 Lux
200A for 300μs
3A
8A
3A
3A
4A
8A
2.5mm²
840mW
50Hz
<=10A MCB Type B
230 VAC +/- 10%
0.2kg
GENB-IR
12
WDA006 Issue 2 Installation Guide, GENB-IR
20751
CP Electronics
A Business unit of Legrand Electric Limited,
Brent Crescent, London NW10 7XR, UK
t. +44 (0)333 900 0671
enquir[email protected]
www.cpelectronics.co.uk connect with us
Due to our policy of continual product improvement CP Electronics reserves the right to alter the specication of this product without prior notice.
Part Number | Artikelnummer |
Referencia | Referéncia | Référence |
Codice | Artikelnummer
Description | Beschreibung | Descripción | Descripção | Description |
Descrizione | Omschrijving
MWS3A-DBB Surface mounting box | Deckenauaudose | Caja para montaje en supercie |
Caixa para supercie | Accessoire pour montage en saillie | Scatola a supercie |
Opbouwdoos
MWS3A-DBB-EXT
Surface mount back box extender | Erweiterung für Deckenauaudose | Extensión
para montaje en supercie | Extensor de caixa de montagem em superfície | Extension
d’accessoire pour montage en saillie | Estensore per scatola per montaggio a supercie
| Verhogingsring
MWS3A-DBB-WBRKT Wall mount bracket | Halterung f. Wandmontage | Soporte de pared |
Suporte para montagem em parede | Fixation murale | Staffa di installazione a parete |
Wandmontagebeugel
GEFL-HS Compact, user handset | Kompakte Endanwender Fernbedienung | Mando de usuario
| Controle para usuário | Combiné compact de contrôle pour utilisateur | Telecomando
per utente | Compacte handset gebruikers
Accessories & associated products | Zubehör | Accesorios y productos asociados | Acessórios e productos
associados | Accessoires et produits associés | Accessori e prodotti associati | Toebehoren

Other manuals for GENB-IR

1

Other C.P. Electronics Security Sensor manuals

C.P. Electronics EBDHS-DNET1-LT30 User manual

C.P. Electronics

C.P. Electronics EBDHS-DNET1-LT30 User manual

C.P. Electronics EBDHS-DNET1 User manual

C.P. Electronics

C.P. Electronics EBDHS-DNET1 User manual

C.P. Electronics MWS3A-PRM User manual

C.P. Electronics

C.P. Electronics MWS3A-PRM User manual

C.P. Electronics MWS6-PRM-VFC-NC User manual

C.P. Electronics

C.P. Electronics MWS6-PRM-VFC-NC User manual

C.P. Electronics MWS3A-AT-PRM User manual

C.P. Electronics

C.P. Electronics MWS3A-AT-PRM User manual

C.P. Electronics EBDHS-B-CB-DD User manual

C.P. Electronics

C.P. Electronics EBDHS-B-CB-DD User manual

C.P. Electronics EBDHS-KNX User manual

C.P. Electronics

C.P. Electronics EBDHS-KNX User manual

C.P. Electronics MWS1A-PRM-VFC User manual

C.P. Electronics

C.P. Electronics MWS1A-PRM-VFC User manual

C.P. Electronics MWS3A-PRM-2CH User manual

C.P. Electronics

C.P. Electronics MWS3A-PRM-2CH User manual

C.P. Electronics MWS3A-PRM-VFC User manual

C.P. Electronics

C.P. Electronics MWS3A-PRM-VFC User manual

C.P. Electronics MWS6-PRM User manual

C.P. Electronics

C.P. Electronics MWS6-PRM User manual

C.P. Electronics EBDSPIR-KNX User manual

C.P. Electronics

C.P. Electronics EBDSPIR-KNX User manual

C.P. Electronics GENB-IR User manual

C.P. Electronics

C.P. Electronics GENB-IR User manual

C.P. Electronics EBDHS-DNET1 User manual

C.P. Electronics

C.P. Electronics EBDHS-DNET1 User manual

C.P. Electronics MWS6-KNX User manual

C.P. Electronics

C.P. Electronics MWS6-KNX User manual

C.P. Electronics EBDRC-AD User manual

C.P. Electronics

C.P. Electronics EBDRC-AD User manual

C.P. Electronics MWS6-AD User manual

C.P. Electronics

C.P. Electronics MWS6-AD User manual

C.P. Electronics MWS3A-DBB User manual

C.P. Electronics

C.P. Electronics MWS3A-DBB User manual

C.P. Electronics MWS1A-C-PRM-LV User manual

C.P. Electronics

C.P. Electronics MWS1A-C-PRM-LV User manual

C.P. Electronics MWS3A User manual

C.P. Electronics

C.P. Electronics MWS3A User manual

C.P. Electronics Green-i GESM User manual

C.P. Electronics

C.P. Electronics Green-i GESM User manual

C.P. Electronics EBDSPIR-DD User manual

C.P. Electronics

C.P. Electronics EBDSPIR-DD User manual

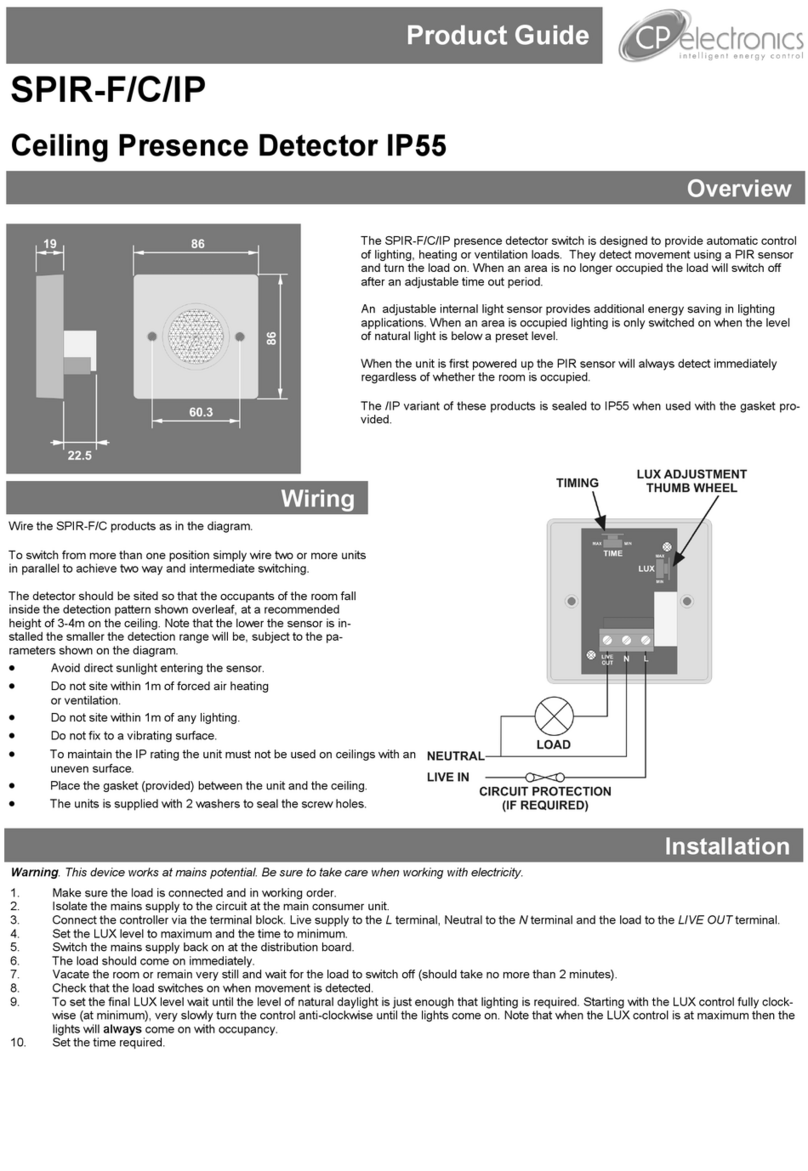
C.P. Electronics SPIR-F/C/IP User manual

C.P. Electronics

C.P. Electronics SPIR-F/C/IP User manual

C.P. Electronics MWS1A-C-PRM-VFC User manual

C.P. Electronics

C.P. Electronics MWS1A-C-PRM-VFC User manual

Popular Security Sensor manuals by other brands

GreyScan ETD-100 Operator's manual

GreyScan

GreyScan ETD-100 Operator's manual

Allen-Bradley GuardShield Micro 400 installation instructions

Allen-Bradley

Allen-Bradley GuardShield Micro 400 installation instructions

BBC Bircher AirMission 2.W2 Translation of the original operating instruction

BBC Bircher

BBC Bircher AirMission 2.W2 Translation of the original operating instruction

Vanderbilt ES 470 installation manual

Vanderbilt

Vanderbilt ES 470 installation manual

Orno OR-CR-265 quick start guide

Orno

Orno OR-CR-265 quick start guide

Reed Instruments R9200 instruction manual

Reed Instruments

Reed Instruments R9200 instruction manual

Bircher Reglomat EasyMotion operating instructions

Bircher Reglomat

Bircher Reglomat EasyMotion operating instructions

KUSSMAUL 091-45 instruction manual

KUSSMAUL

KUSSMAUL 091-45 instruction manual

Satel APMD-250 manual

Satel

Satel APMD-250 manual

AVE AF45 62 Series quick start guide

AVE

AVE AF45 62 Series quick start guide

Kanlux SENTO quick start guide

Kanlux

Kanlux SENTO quick start guide

IntelliSense FG-1508 installation instructions

IntelliSense

IntelliSense FG-1508 installation instructions

Datalogic SG4-14-030-OO-P instruction manual

Datalogic

Datalogic SG4-14-030-OO-P instruction manual

Simons Voss Technologies 3061 VdS manual

Simons Voss Technologies

Simons Voss Technologies 3061 VdS manual

Takex PB-30SU instruction manual

Takex

Takex PB-30SU instruction manual

Det-Tronics X9800 Addendum

Det-Tronics

Det-Tronics X9800 Addendum

Fellow Kogyo FOCAS-2000 instruction manual

Fellow Kogyo

Fellow Kogyo FOCAS-2000 instruction manual

TiTLEY Scientific Anabat Scout user manual

TiTLEY Scientific

TiTLEY Scientific Anabat Scout user manual

manuals.online logo
manuals.online logoBrands
  • About & Mission
  • Contact us
  • Privacy Policy
  • Terms and Conditions

Copyright 2025 Manuals.Online. All Rights Reserved.