manuals.online logo
Brands
  1. Home
  2. •
  3. Brands
  4. •
  5. C.P. Electronics
  6. •
  7. Security Sensor
  8. •
  9. C.P. Electronics EBDMR-PRM User manual

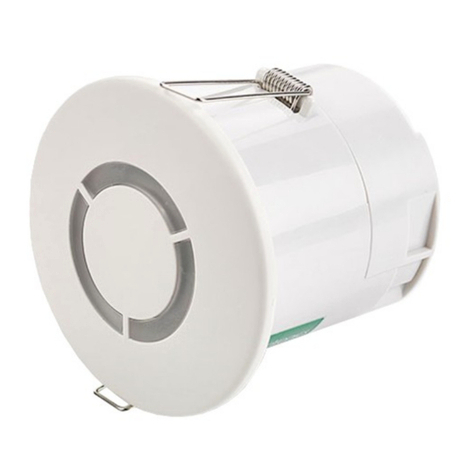
C.P. Electronics EBDMR-PRM User manual

EBDMR-PRM, 2CH, 2CH-LV, L3, LV, LV-
OC, VFC, VFC-NC, VFC-LV, VFC-LV-NC
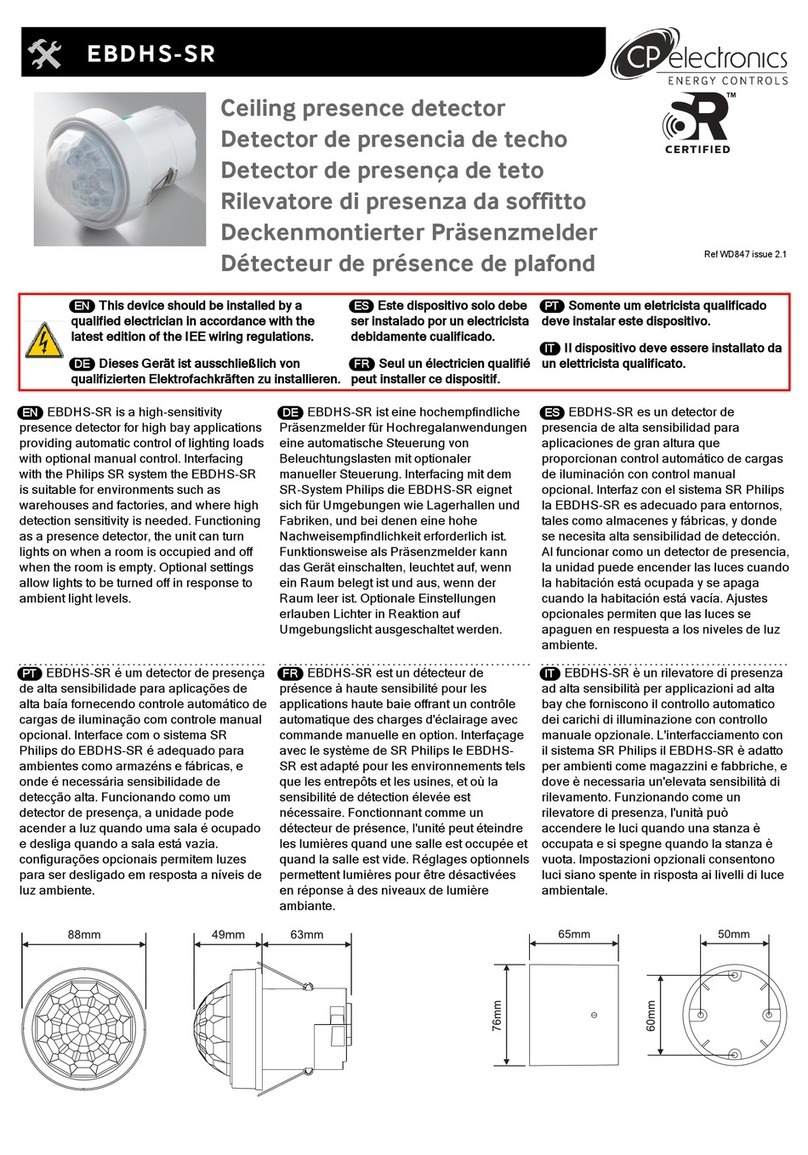
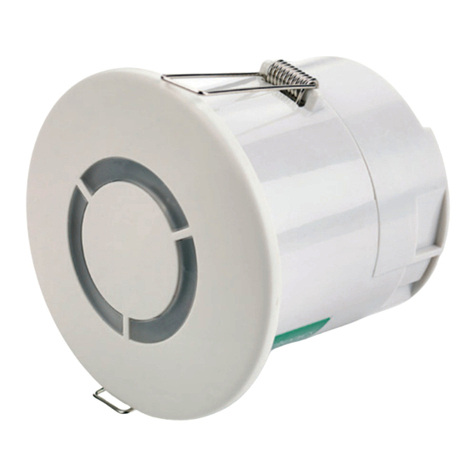
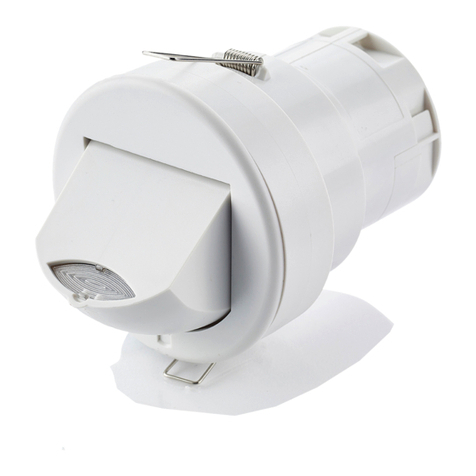
Ceiling presence detector
Deckenmontierter Präsenzmelder
Detector de presencia de techo
Detector de presença de teto
Détecteur de présence de plafond
Rilevatore di presenza da soffitto Ref WD869 issue 1
ENThis device should be installed by a
qualified electrician in accordance with the
latest edition of the IEE wiring regulations.
PTSomente um eletricista qualificado
deve instalar este dispositivo.
DEDieses Gerät ist ausschließlich
von qualifizierten Elektrofachkräften zu
installieren.
FRSeul un électricien qualifié peut
installer ce dispositif.
ESSomente um eletricista
qualificado deve instalar este
dispositivo.
ESIl dispositivo deve essere
installato da un elettricista qualificato.
76 mm76 mm
12 mm
64.8 mm64.8 mm
ENThis device is designed to be ceiling-
mounted.
lDo not site the unit where direct sunlight
might enter the sensor.
lDo not site the sensor within 1m of any
lighting, forced air heating or ventilation.
lDo not fix the sensor to an unstable or
vibrating surface.
DEDieses Gerät ist auf die Montage an
einer Decke ausgelegt.
lEinheit so anbringen, dass der Sensor
vor direkter Sonneneinstrahlung
geschützt ist.
lSensor mit Mindestabstand von 1m zu
Lichtquellen, Luftheizung oder
Ventilation anbringen.
lSensor nicht an einer instabilen oder
vibrierenden Oberfläche montieren.
ESEste dispositivo está diseñado para
montarse en el techo.
lEvite que la luz del sol incida
directamente sobre el sensor.
lNo coloque el sensor a menos de 1m
de luces, salidas de calefacción por aire
forzado o ventilación.
lNo fije el sensor a superficies que
vibren o no sean estables.
Walk towards |Caminar hacia |Andar
através |In Richtung gehen |Aller vers |
Avvicinamento
2.8m
6m
Walk across |Cruzar |Andar através |
Hindurch gehen |Traverser |
Attraversamento
2.8m
15m
PTEste dispositivo foi concebido para ser
montado no teto.
lNão instale a unidade num local onde a
luz solar direta possa incidir no sensor.
lNão coloque o sensor a menos de 1m
de qualquer iluminação, aquecimento
ou ventilação de ar forçado.
lNão fixe o sensor em uma superfície
instável ou sujeito a vibrações.
FRCe dispositif est conçu pour un
montage au plafond.
lNe pas placer l'unité dans une position
où la lumière directe du soleil pourrait
pénétrer dans le capteur.
lNe pas placer le capteur à moins
d’unmètre de tout dispositif d’éclairage,
de chauffage ou de ventilation à air
forcé.
lNe pas fixer le capteur sur une surface
instable ou vibrante.
ITIl dispositivo è adatto al montaggio a
soffitto.
lNon collocare l'unità in una posizione in
cui la luce diretta del sole possa entrare
nel sensore.
lNon posizionare il sensore a meno di un
metro da un qualsiasi tipo di
illuminazione, sistema di riscaldamento
o ventilazione.
lNon installare il sensore su superfici
instabili o soggette a vibrazioni.
INSTALLATION |INSTALACIÓN |INSTALLAZIONE |INSTALAÇÃO
ENBe careful bending springs when
mounting unit.
PTTenha cuidado para não dobrar as
molas ao montar a unidade.
DEVorsicht beim Biegen von Federn
bei der Montage der Einheit.
FRFaire attention à la compression
des ressorts lors du montage de l'unité.
ESDoble los muelles con cuidado al
montar la unidad.
ITPiegare le molle con cautela
durante il montaggio dell'unità.
Flush fixing | Fixation encastrée |
Einbau Montage | Montaggio a filo |
Montaje a ras | Montagem encastrada
1 2
3
6 mm
35 mm
ENContinue tightening the screws until
the clamp bar snaps out and is tightly
engaged against the cable. The cable
clamp must clamp the outer sheath only.
ESContinuar apretando los tornillos
hasta que la barra abrazadera salga y se
ajuste bien con el cable. La abrazadera
para cables solo debe sujetar la funda.
FRContinuez de serrer les vis jusqu'à ce
que la barre de fixation sorte et se serre
fortement sur le câble. Le serre-câbles doit
uniquement serrer la gaine extérieure.
DEZiehen Sie die Schrauben
weiterhin an, bis die Klemme einrastet
und fest am Kabel sitzt. Die
Kabelklemme darf nur die äußere
Abschirmung einklemmen.
PTContinue o aperto dos parafusos
até que a barra de fixação se encaixe
totalmente e prenda bem o cabo. O
grampo do cabo deve fixar apenas o
revestimento externo.
ITContinuare a stringere le viti fino a
quando la barra del morsetto non scatti
e si fissi leggermente sul cavo. Applica
il morsetto alla sola guaina esterna del
cavo.
4
Ø
64mm
ENBend the springs up and push detector
through hole in ceiling. When fully inserted
the springs snap back to hold the device in
place.
ESDoble los muelles hacia arriba e
introduzca el detector por el orificio del
techo. Cuando esté totalmente introducido,
los muelles saltan para mantener el
dispositivo en su lugar.
FRReplier les ressorts vers le haut et
pousser le détecteur à travers le trou dans le
plafond. Quand les ressorts sont
complètement insérés, ils se remettent dans
leur position initiale pour maintenir le
dispositif en place.
DEFedern nach oben biegen und
Detektor durch die Öffnung in der Decke
schieben. Sobald der Detektor vollständig
eingeschoben ist, schnappen die Federn
zurück und halten das Gerät fest an Ort
und Stelle.
PTDobre as molas para cima e empurre
o detector através do furo no teto. Ao
serem totalmente inseridas as molas
saltam de volta para manter o dispositivo
no lugar.
ITPiegare le molle verso l'alto e inserire
il rilevatore nel foro sul soffitto. Una volta
inserito, le molle si riassestano fissando il
dispositivo in posizione.
Surface fixing |
Oberflächenmontage | Ajuste de
superficie | Montagem aparente |
Fixation apparente | Montaggio
superficiale
1ENSurface mounting box: part code DBB,
sold separately
DEDose zur Oberflächenmontage: (Art.-
Nr. DBB, separat erhältlich
ESCaja de montaje: código de pieza
DBB; se vende por separado
PTCaixa de montagem na superficie:
DBB. Vendida separadamente
FRBoîtier de montage en surface: code
pièce DBB, vendu séparément
ITScatola di montaggio superficiale:
codice DBB, venduta separatamente
2ENPull out the ends of both springs and bend
them so that they do not stick out over the
sensor head bezel.
DEZiehen Sie die Enden beider Federn
heraus und biegen Sie sie so um, dass sie nicht
über den Rahmen des Sensorkopfs ragen.
ESExtraiga y doble los extremos de ambos
muelles para que no sobresalgan del cabezal
del sensor.
PTRetire as pontas e dobre ambas as molas
para que não fiquem fora sobre o painel da
cabeça do sensor.
3
FRExtraire les extrémités des deux
ressorts et les plier de sorte qu'elles ne
ressortent pas sur la lunette de la tête
du capteur.
ITEstrarre le terminazioni di entrambe le
molle e piegarle in modo che non fuoriescano
dalla ghiera della testa del sensore.
4
6 mm
35 mm
ENContinue tightening the screws until the
clamp bar snaps out and is tightly engaged
against the cable.The cable clamp must
clamp the outer sheath only.
ESContinuar apretando los tornillos hasta
que la barra abrazadera salga y se ajuste
bien con el cable.La abrazadera para cables
solo debe sujetar la funda.
FRContinuez de serrer les vis jusqu'à ce
que la barre de fixation sorte et se serre
fortement sur le câble.Le serre-câbles doit
uniquement serrer la gaine extérieure.
DEZiehen Sie die Schrauben weiterhin
an, bis die Klemme einrastet und fest am
Kabel sitzt. Die Kabelklemme darf nur
die äußere Abschirmung einklemmen.
PTContinue o aperto dos parafusos
até que a barra de fixação se encaixe
totalmente e prenda bem o cabo.O
grampo do cabo deve fixar apenas o
revestimento externo.
ITContinuare a stringere le viti fino a
quando la barra del morsetto non scatti e
si fissi leggermente sul cavo.Applica il
morsetto alla sola guaina esterna del
cavo.
5 6
WIRING |CABLEADO |CHICOTE ELÉTRICO |VERKABELUNG |CÂBLAGE |CABLAGGIO
EBDMR-PRM
ENKey
1. Neutral
2. Live
3. Switched output
4. 10A circuit protection if required
5. Load
6. Momentary push-to-make switch, 230V
DEZeichenerklärung
1. Neutral
2. Netzspannungsführend
3. Geschalteter Ausgang
4. 10A Kurzschlusssicherung, falls nötig
5. Last
6. Moment-Taster, 230 V
ESExplicación
1. Neutro
2. Live
3. Salida conmutada
4. 10A protección de circuito, en caso
necesario
5. Carga
6. Interruptor con botón de activación
momentáneo, 230V
PTLegenda
1. Neutro
2. Fase
3. Saída comutada
4. 10A proteção do circuito, caso necessário
5. Carga
6. Interruptor de pressão momentânea, 230 V
FRLégende
1. Neutre
2. Plus
3. Sortie commutée
4. 10A protection du circuit si nécessaire
5. Charge
6. Commutateur poussoir à marche
momentané, 230V
ITLeggenda
1. Neutro
2. Live
3. Commutazione uscita
4. 10A protezione del circuito, se necessario
5. Carico
6. Interruttore temporaneo, 230 V
EBDMR-PRM-2CH
ENUse the L/In Ch1 connection to
supply the detector with power.The CH1
and CH2 plugs are coded. Insert the
plugs correctly and do not apply
excessive force.
The circuits must be on the same phase
when controlling two circuits.
DEZur Stromversorgung des Detektors
den Anschluss L/In Ch1 verwenden. Die
Stecker CH1 und CH2 sind kodiert. Stecker
ordnungsgemäß und ohne übermäßige
Kraftanwendung einführen. Bei der
Regelung von zwei Schaltkreisen müssen
diese phasengleich sein.
ESUtilice la conexión L/In Ch1 para
suministrar energía al detector. Las clavijas
CH1 y CH2 están codificadas. Introduzca
las clavijas correctamente y no aplique una
fuerza excesiva. Los circuitos deben estar
en la misma fase al controlar dos circuitos.
PTUse a ligação L/In Ch1 para
alimentar o detector. Os plugues CH1 e
CH2 estão codificados. Insira os plugues
corretamente, sem forçar demais.
Ao se controlar dois circuitos, eles
deverão estar ligados à mesma fase.
FRUtilisez la connexion L/In Ch1 (Entrée
Plus Canal 1) pour alimenter le détecteur.
Les prises CH1 et CH2 sont codées.
Insérez les prises correctement sans
appliquer une force excessive. Les circuits
doivent être sur la même phase pour
contrôler deux circuits.
ITUtilizza la connessione L/In Ch1 per
fornire alimentazione al rilevatore. I
connettori CH1 e CH2 utilizzano la codifica.
Inserire i connettori correttamente senza
applicare una forza eccessiva.Per
controllare due circuiti, questi devono
trovarsi nella medesima fase.
1 X circuit |Schaltkreis |circuito |
circuito |circuit |circuito
2 X circuit |Schaltkreis |circuito |
circuito |circuit |circuito
ENKey
1. Neutral
2. Live
3. Switched output - channel 1
4. Switched output - channel 2
5. 10A circuit protection if required
6. Load - channel 1
7. Load - channel 2
8. Momentary push-to-make switch, 230V
9. Neutral - channel 2
10. Live - channel 2
DEZeichenerklärung
1. Neutral
2. Netzspannungsführend
3. Geschalteter Ausgang - Kanal 1
4. Geschalteter Ausgang - Kanal 2
5. 10A Kurzschlusssicherung, falls nötig
6. Last - Kanal 1
7. Last - Kanal 2
8. Moment-Taster, 230 V
9. Neutral - Kanal 2
10. Netzspannungsführend - Kanal 2
ESExplicación
1. Neutro
2. Live
3. Salida conmutada - canal 1
4. Salida conmutada - canal 2
5. 10Aproteccióndecircuito,encasonecesario
6. Carga - canal 1
7. Carga - canal 2
8. Interruptor con botón de activación
momentáneo, 230V
9. Neutro - canal 2
10. Live - canal 2
PTLegenda
1. Neutro
2. Fase
3. Saída comutada - Canal 1
4. Switched output - Canal 2
5. 10A proteção do circuito, caso necessário
6. Carga - Canal 1
7. Carga - Canal 2
8. Interruptor de pressão momentânea, 230
V
9. Neutro - Canal 2
10. Fase - channel 2
FRLégende
1. Neutre
2. Plus
3. Sortie commutée - canal 1
4. Sortie commutée - canal 2
5. 10A protection du circuit si nécessaire
6. Charge - canal 1
7. Charge - canal 2
8. Commutateur poussoir à marche
momentané, 230V
9. Neutre - canal 2
10. Plus - canal 2
ITLeggenda
1. Neutro
2. Live
3. Commutazione uscita - Canale 1
4. Commutazione uscita - Canale 2
5. 10A protezione del circuito, se necessario
6. Carico - channel 1
7. Carico - channel 2
8. Interruttore temporaneo, 230 V
9. Neutro - Canale 2
10. Live - Canale 2
EBDMR-PRM-2CH-LV
ENUse the L/In Ch1 connection to supply
the detector with power.The CH1 and CH2
plugs are coded. Insert the plugs correctly
and do not apply excessive force.The
circuits must be on the same phase when
controlling two circuits.
DEZur Stromversorgung des Detektors
den Anschluss L/In Ch1 verwenden. Die
Stecker CH1 und CH2 sind kodiert. Stecker
ordnungsgemäß und ohne übermäßige
Kraftanwendung einführen. Bei der
Regelung von zwei Schaltkreisen müssen
diese phasengleich sein.
ESUtilice la conexión L/In Ch1 para
suministrar energía al detector. Las clavijas
CH1 y CH2 están codificadas. Introduzca las
clavijas correctamente y no aplique una
fuerza excesiva. Los circuitos deben estar
en la misma fase al controlar dos circuitos.
PTUse a ligação L/In Ch1 para alimentar
o detector. Os plugues CH1 e CH2 estão
codificados. Insira os plugues
corretamente, sem forçar demais. Ao se
controlar dois circuitos, eles deverão estar
ligados à mesma fase.
FRUtilisez la connexion L/In Ch1 (Entrée
Plus Canal 1) pour alimenter le détecteur.
Les prises CH1 et CH2 sont codées.
Insérez les prises correctement sans
appliquer une force excessive. Les circuits
doivent être sur la même phase pour
contrôler deux circuits.
ITUtilizza la connessione L/In Ch1 per
fornire alimentazione al rilevatore. I
connettori CH1 e CH2 utilizzano la codifica.
Inserire i connettori correttamente senza
applicare una forza eccessiva. Per
controllare due circuiti, questi devono
trovarsi nella medesima fase.
1 X circuit |Schaltkreis |circuito |circuito
|circuit |circuito
Out
Ch1
+/In
Ch1
Switch
Out
Ch2
In
Ch2
COM
5
4
2
3
1
2 X circuit |Schaltkreis |circuito |circuito
|circuit |circuito
Out
Ch1
+/In
Ch1
Switch
Out
Ch2
In
Ch2
COM
4
23
5
16
ENKey
1. DC supply 11.5-35V or AC supply 10-26.5V
2. Switched line - channel 1
3. Switched line - channel 2
4. Momentary push-to-make switch, 230V
5. Supply - channel 2
6. DC supply 11.5-35V or AC supply 10-26.5V
DEZeichenerklärung
1. DC-Versorgung 11,5 - 35 V oder AC-
Versorgung 10 - 26,5 V
2. Geschaltete Leitung - Kanal 1
3. Geschaltete Leitung - Kanal 2
4. Moment-Taster, 230 V
5. Versorgung - Kanal 2
6. DC-Versorgung 11,5 - 35 V oder AC-
Versorgung 10 - 26,5 V
ESExplicación
1. Entrada de CC de 11,5-35V o entrada de CA
de 10-26,5V
2. Cable conmutado - canal 1
3. Cable conmutado - canal 2
4. Interruptor con botón de activación
momentáneo, 230V
5. Suministro - canal 2
6. Entrada de CC de 11,5-35V o entrada de CA
de 10-26,5V
PTLegenda
1. Alimentação de 11,5 a 35 VCC ou
alimentação de 10 a 26,5 VCA
2. Linha comutada - Canal 1
3. Linha comutada - Canal 2
4. Interruptor de pressão momentânea, 230 V
5. Alimentação - Canal 2
6. DC supply 11.5-35V or AC supply 10-26.5V
FRLégende
1. Alimentation CC 11,5-35V ou Alimentation
CA 10-26,5V
2. Ligne commutée - canal 1
3. Ligne commutée - canal 2
4. Commutateur poussoir à marche
momentané, 230V
5. Alimentation - canal 2
6. Alimentation CC 11,5-35V ou Alimentation
CA 10-26,5V
ITLeggenda
1. Alimentazione CC 11,5-35 V o CA 10-26,5 V
2. Linea commutazione - Canale 1
3. Linea commutazione - Canale 2
4. Interruttore temporaneo, 230 V
5. Alimentazione - Canale 2
6. Alimentazione CC 11,5-35 V o CA 10-26,5 V
EBDMR-PRM-L3
COM •
OUT •
+ •
•
SW
•
2
3
4
2
3
4
EBDMR-PRM-LV & EBDMR-PRM-LV-OC
COM •
OUT •
+ •
•
SW
•
1
5
3
42
PRM-LV
6
PRM-LV-OC
ENKey
1. DC supply 11.5-35V or AC supply 10-26.5V
2. Common
3. Load
4. Switched output
5. Momentary push-to-make switch, 230V
6. Open collector output
DEZeichenerklärung
1. DC-Versorgung 11,5 - 35 V oder AC-
Versorgung 10 - 26,5 V
2. Allgemein
3. Last
4. Geschalteter Ausgang
5. Moment-Taster, 230 V
6. Open-Collector-Ausgang
ESExplicación
1. Entrada de CC de 11,5-35V o entrada de
CA de 10-26,5V
2. Común
3. Carga
4. Salida conmutada
5. Interruptor con botón de activación
momentáneo, 230V
6. Salida de colector abierto
PTLegenda
1. Alimentação de 11,5 a 35 VCC ou
alimentação de 10 a 26,5 VCA
2. Comum
3. Carga
4. Saída comutada
5. Interruptor de pressão momentânea, 230 V
6. Saída do coletor aberto
FRLégende
1. Alimentation CC 11,5-35V ou Alimentation
CA 10-26,5V
2. Commun
3. Charge
4. Sortie commutée
5. Commutateurpoussoiràmarchemomentané,230V
6. Sortie collecteur ouvert
ITLeggenda
1. Alimentazione CC 11,5-35 V o CA 10-26,5 V
2. Comune
3. Carico
4. Commutazione uscita
5. Interruttore temporaneo, 230 V
6. Collettore aperto
EBDMR-PRM-VFC, EBDMR-PRM-VFC-NC
EBDMR-PRM-VFC
EBDMR-PRM-VFC-NC
For failsafe operation
Für den ausfallsicheren Betrieb
Para un funcionamiento a prueba de fallos
Para uma operação à prova de falhas
Fonctionnement de secours
Per un funzionamento a prova di errore
ENKey
1. Neutral
2. Live
3. 10A circuit protection if required
4. Momentary push-to-make switch, 230V
5. Normally closed
6. Common
7. Normally open
DEZeichenerklärung
1. Neutral
2. Netzspannungsführend
3. 10A Kurzschlusssicherung, falls nötig
4. Moment-Taster, 230 V
5. Normalerweise geschlossen
6. Allgemein
7. Normalerweise geöffnet
ESExplicación
1. Neutro
2. Live
3. 10A protección de circuito, en caso necesario
4. Interruptor con botón de activación
momentáneo, 230V
5. Normalmente cerrada
6. Común
7. Normalmente abierta
PTLegenda
1. Neutro
2. Fase
3. 10A proteção do circuito, caso necessário
4. Interruptor de pressão momentânea, 230 V
5. Normalmente fechado
6. Comum
7. Normalmente aberto
FRLégende
1. Neutre
2. Plus
3. 10A protection du circuit si nécessaire
4. Commutateur poussoir à marche
momentané, 230V
5. Normalement fermé
6. Commun
7. Normalement ouvert
ITLeggenda
1. Neutro
2. Live
3. 10A protezione del circuito, se necessario
4. Interruttore temporaneo, 230 V
5. Normalmente chiuso
6. Comune
7. Normalmente aperto
EBDMR-PRM-VFC-LV
EBDMR-PRM-VFC-LV
NC •
COM •
NO •
• +
• -
• SW
2
3
5
41
EBDMR-PRM-VFC-LV-NC
For failsafe operation
Für den ausfallsicheren Betrieb
Para un funcionamiento a prueba de
fallos
Para uma operação à prova de falhas
Fonctionnement de secours
Per un funzionamento a prova di
errore
• +
• -
• SW
1
2
NC •
COM •
3
4
ENKey
1. DC supply 11.5-35V or AC supply 10-
26.5V
2. Momentary push-to-make switch, 230V
3. Normally closed
4. Common
5. Normally open
DEZeichenerklärung
1. DC-Versorgung 11,5 - 35 V oder AC-
Versorgung 10 - 26,5 V
2. Moment-Taster, 230 V
3. Normalerweise geschlossen
4. Allgemein
5. Normalerweise geöffnet
ESExplicación
1. Entrada de CC de 11,5-35V o entrada de CA
de 10-26,5V
2. Interruptor con botón de activación
momentáneo, 230V
3. Normalmente cerrada
4. Común
5. Normalmente abierta
PTLegenda
1. Alimentação de 11,5 a 35 VCC ou
alimentação de 10 a 26,5 VCA
2. Interruptor de pressão momentânea, 230
V
3. Normalmente fechado
4. Comum
5. Normalmente aberto
FRLégende
1. Alimentation CC 11,5-35V ou Alimentation
CA 10-26,5V
2. Commutateur poussoir à marche
momentané, 230V
3. Normalement fermé
4. Commun
5. Normalement ouvert
ITLeggenda
1. Alimentazione CC 11,5-35 V o CA 10-26,5 V
2. Interruttore temporaneo, 230 V
3. Normalmente chiuso
4. Comune
5. Normalmente aperto
TESTING |PRÜFEN |PRUEBAS |TESTE |TEST |VERIFICHE
1 2
i
SHIFT 1 SHIFT 2
SHIFT
ii
i
Standalone >
Select Product >
DD/PRM > Detector Params
(Ch. 1 & 2) > Timeout
(mins) > 0
ii
S
ENPower up the sensor — the load should come on
immediately.
DESchließen Sie den Sensor an die Stromversorgung an -
das System sollte sich sofort einschalten.
ESEncienda el sensor: la carga debería encenderse
inmediatamente.
PTLigue o sensor - a carga deve ser ativada imediatamente.
FRAlimenter le capteur: la charge devrait s'allumer
immédiatement.
ITAccendi il sensore: il carico dovrebbe attivarsi
immediatamente.
ENSet a time-out period of 10 seconds using a handset.
DETimeout-Dauer von 10 Sekunden mittels Handset
einstellen.
ESEstablezca un tiempo de espera de 10s con un mando.
PTDefina um intervalo de 10 segundos usando um
dispositivo.
FRDéfinissez une période de temporisation de 10secondes
avec un combiné.
ITImposta un periodo di timeout di 10 secondi con il
telecomando.
3 4
ENVacate the room or remain very still and wait for the load to
switch off (this should take less than 2 minutes).
DEVerlassen Sie den Raum oder stehen Sie ganz still, um zu
prüfen, ob das System sich ausschaltet (dies sollte weniger als
2 Minuten dauern).
ESSalga de la habitación o permanezca muy quieto y espere
a que la carga se apague (deberían requerirse menos de 2
min).
PTDesocupe a sala ou permaneça imóvel e aguarde até a
carga ser desativada (istso deve levar menos de 2 minutos).
FRQuitter la pièce ou rester immobile et attendre que la
charge s'éteigne (ceci devrait prendre moins de deux minutes).
ITAbbandona la stanza o cerca di restare il più fermo
possibile e attendi lo spegnimento del carico (dovrebbe
richiedere meno di 2 minuti).
ENEnter the room or make some movement and check that the
load switches on.
DEBetreten Sie den Raum oder bewegen Sie sich, um
sicherzustellen, dass das System sich einschaltet.
ESEntre en la habitación o realice algún movimiento y
compruebe que la carga se enciende.
PTEntre na sala ou faça algum movimento e verifique se a
carga é ativada.
FREntrer dans la pièce ou bouger et vérifier que la charge
s'allume.
ITEntra nella stanza o esegui qualche movimento per
verificare che il carico si attivi.
CONTROLLING WITH HANDSET |STEUERUNG MIT HANDSET |CONTROL CON EL MANDO |CONTROLE COM O APARELHO |CONTRÔLE AVEC
COMBINÉ |CONTROLLO MEDIANTE TELECOMANDO
ENPoint the handset at the device and press the buttons
shown.An LED in the device flashes when it receives a
command.
PTAponte o telecomando para o detector e pressione os
botões mostrados. Um LED do dispositivo pisca ao receber um
comando.
DERichten Sie das Handset auf den Detektor und drücken Sie
die angezeigten Tasten. Eine LED im Gerät blinkt, wenn ein
Befehl empfangen wird.
FRPointer le combiné vers le détecteur et appuyer sur les
boutons indiqués. Un voyant LED clignote sur le dispositif
lorsqu'il reçoit une commande.
ESApunte con el mando al detector y pulse los botones que se
indican. Un LED parpadea en el detector cuando recibe una orden.
ITIndirizzare il telecomando verso il rilevatore e premere i
pulsanti indicati. Il LED del dispositivo lampeggerà una volta
ricevuto un comando.
Initialisation |Initialisierung |Inicialización |Inicialização |Initialisation |Inizializzazione
* default |Voreinstellung |predeterminado |padrão |défaut |predefinito
UHS5 UNLCDHS
ENTo test the detector is working within
range (walk test)
ESPara probar que el detector funciona
dentro del rango (prueba caminando)
FRPour vérifier que le détecteur est à portée
et fonctionne (test de marche)
DEFunktionsprüfung, ob der Detektor
innerhalb der Reichweite arbeitet
(Gehprüfung)
PTPara testar se o detector está funcionando
(teste de caminhada)
ITPer testare il funzionamento del rilevatore
all'interno della distanza massima (test della
camminata)
Detector Params (Ch. 1 & 2) >
Walk Test LED
= On
ENTo stop the LED flashing after a walk test
ESPara detener el parpadeo de LED tras
una prueba
FRPour arrêter le clignotement de la LED
après un test
DEAnhalten des LED-Blinkens nach einer
Prüfung
PTPara que o LED pare de piscar após o
teste
ITPer arrestare il lampeggiamento del LED
dopo un test
SHIFT 1 SHIFT 2
SHIFT
ð
Detector Params (Ch. 1 & 2) >
Walk Test LED
= Off
ENTo reset the unit to the factory defaults
ESPara restablecer los valores de fábrica
de la unidad
FRPour rétablir les valeurs par défaut
d'usine de l'unité
DEZurücksetzen der Einheit auf
Werkseinstellungen
PTPara retornar a unidade aos padrões de
fábrica
ITPer riportare l'unità alle impostazioni di
fabbrica
SHIFT 1 SHIFT 2
SHIFT
ð
Config > Factory Reset
Light levels |Lichtpegel |Niveles de luz |Níveis de iluminação |Niveaux de lumière |Livelli
della luce
* default |Voreinstellung |predeterminado |padrão |défaut |predefinito
UHS5 UNLCDHS
ENTo turn the lights on
ESPara encender las luces.
FRPour allumer les lumières.
DEUm die Beleuchtung einzuschalten.
PTPara ligar a iluminação.
ITPer accendere l'illuminazione.
User > Manual Override On
ENTo turn the lights off
ESPara apagar las luces.
FRPour éteindre les lumières.
DEUm die Beleuchtung auszuschalten.
PTDesligar a iluminação.
ITPer spegnere l'illuminazione.
User > Manual Override Off
ENTo cancel an "on" or "off" override and
resume normal operation
ESPara cancelar una anulación de
«encendido» o «apagado» y reanudar el
funcionamiento normal
FR Pour annuler une commande de
dépassement «marche» ou «arrêt» et
reprendre un fonctionnement normal
DEAbbrechen einer „An-“oder „Aus“"
Überschreibung und Aufnahme des
Normalbetriebs
PTPara cancelar o comando de "ligar" ou
"desligar" e reiniciar a operação normal
ITPer annullare un override "on" o "off" e
riprendere il funzionamento normale
SHIFT 1 SHIFT 2
SHIFT
ð
or | oder | o | ou | ou | o
User > Manual Override Cancel
ENTo set an ambient light level below which
lights can be switched on
ESPara establecer un nivel de luz ambiente
por debajo del cual se puedan encender las
luces
FRPour définir un niveau de luminosité
ambiante au-dessous duquel les éclairages
peuvent être allumés.
DEEinstellung eines Umgebungslichtpegels,
bei dessen Unterschreitung die Beleuchtung
eingeschaltet werden kann
PTPara definir um nível de iluminação
ambiente em que a luzes não se acendem
IT Per impostare un livello della luce
ambientale al di sotto del quale sarà possibile
accendere le luci
2→9 = Low →High | Niedrig →Hoch | Bajo →Alto
Baixo →Alto | Faible →Haut | Basso →Alto
2, 5, 7:
4, 6, *9:
SHIFT 1 SHIFT 2
SHIFT
ð
Output Ch. 1 (switching | Schalter |
conmutación | redutores de iluminação |
commutation | commutazione )
or |oder |o|ou |ou |o
Output Ch. 2 (dimming | dimmungs |
atenuación | redutores de iluminação |
gradation | regolazione )
> Lux On Level =
1-9* Low→High | Niedrig→Hoch
Bajo→Alto | Baixo →Alto
Faible →Haut | Basso →Alto
101-
199 higher resolution | höhere Auflösung
resolución más alta | maior resolução
plus haute résolution | a risoluzione
più elevata
ENTo set an ambient light level above which
lights switch off
ESPara establecer un nivel de luz ambiente
por encima del cual se apaguen las luces
FRPour définir un niveau de luminosité
ambiante au-dessus duquel les éclairages
s'éteignent.
DEEinstellung eines Umgebungslichtpegels,
bei dessen Überschreitung die Beleuchtung
ausgeschaltet wird
PTPara definir um nível de iluminação
ambiente acima do qual as luzes se apagam
ITPer impostare un livello della luce
ambientale al di sopra del quale spegnere le
luci
2→9 = Low→High | Niedrig→Hoch | Bajo→Alto
Baixo →Alto | Faible →Haut | Basso →Alto
2, 5, 7:
4, 6, *9:
SHIFT 1 SHIFT 2
SHIFT
ð
Output Ch. 1 (switching | Schalter |
conmutación | redutores de iluminação |
commutation | commutazione )
or |oder |o|ou |ou |o
Output Ch. 2 (dimming | dimmungs |
atenuación | redutores de iluminação |
gradation | regolazione )
> Lux Off Level =
1-9* Low→High | Niedrig→Hoch
Bajo→Alto | Baixo →Alto
Faible →Haut | Basso →Alto
101-
199 higher resolution | höhere Auflösung
resolución más alta | maior resolução
plus haute résolution | a risoluzione
più elevata
Detection |Erkennung |Detección |Detecção |Détection |Rilevamento
* default |Voreinstellung |predeterminado |padrão |défaut |predefinito
UHS5 UNLCDHS
ENTo switch between presence and
absence detection
ESPara cambiar entre detección de
presencia y de ausencia
FRPour basculer entre détection de
présence et d'absence
DESchaltung zwischen Anwesenheits- und
Abwesenheitserkennung
PTPara alternar entre detecção de presença
e ausência
ITPer alternare il rilevamento di presenza e
assenza
* Presence | Präsenz | Presencia | Presença |
Présence | Presenza
Absence | Abwesenheit | Ausencia | Ausência |
Assenza
SHIFT 1 SHIFT 2
SHIFT
ð
Output Ch. 1 (switching | Schalter |
conmutación | redutores de iluminação |
commutation | commutazione )
or |oder |o|ou |ou |o
Output Ch. 2 (dimming | dimmungs |
atenuación | redutores de iluminação |
gradation | regolazione )
> Detection Mode =
Pres
*Presence | Präsenz | Presencia |
Presença | Présence | Presenza
Abs Absence | Abwesenheit | Ausencia |
Ausência | Absence | Assenza
ENTo set the time-out period
ESPara establecer el tiempo de espera
FRPour définir la période de temporisation
DEEinstellung der Timeout-Dauer
PTPara definir o intervalo de tempo
ITPer impostare il periodo di timeout
1, 10, *20 minutes | Minuten | minutos | minutos |
minuti:
5, 15, 30 minutes | Minuten | minutos | minutos | minuti:
SHIFT 1 SHIFT 2
SHIFT
ð
10 seconds | Sekunden | segundos | secondes |
secondi:
SHIFT 1 SHIFT 2
SHIFT
ð
Detector Params (Ch. 1 & 2) >
Timeout (mins) =
1-99 minutes | Minuten | minutos | minutos
| minuti
10* default | Voreinstellung
predeterminado | padrão
défaut | predefinito
010 seconds | Sekunden | segundos |
secondes | secondi
ENTo change the sensitivity to movement
ESPara cambiar la sensibilidad al
movimiento
FRPour modifier la sensibilité au
mouvement
DEÄnderung der Bewegungsempfindlichkeit
PTPara alterar a sensibilidade ao
movimento
ITPer modificare la sensibilità al movimento
2→9 = Low →High | Niedrig →Hoch | Bajo →Alto
Baixo →Alto | Faible →Haut | Basso →Alto
1, 5, *9:
3, 6, 8:
SHIFT 1 SHIFT 2
SHIFT
ð
Detector Params (Ch. 1 & 2) >
Sensitivity On / Sensitivity
Off =
1-9* Low→High | Niedrig→Hoch
Bajo→Alto | Baixo →Alto
Faible →Haut | Basso →Alto
ENTechnical Data
Device: EBDMR-PRM EBDMR-PRM-2CH EBDMR-PRM-2CH-LV EBDMR-PRM-L3 EBDMR-PRM-VFC EBDMR-PRM-VFC-NC EBDMR-PRM-LV
EBDMR-PRM-LV-OC
EBDMR-PRM-VFC-LV EBDMR-PRM-VFC-LV-NC
Weight kg 0.10 0.12 0.15 0.40 0.10 0.10 0.10 0.10 0.10
Supply voltage AC at 50Hz 230 +/- 10% 230 +/- 10% Min 10, max 26.5 230 +/- 10% 230 +/- 10% 230 +/- 10% Min 10, max 26.5 Min 10, max 26.5 Min 10, max 26.5
Supply voltage DC N/A N/A Min 11.5, max 36 N/A N/A N/A Min 11.5, max 36 Min 11.5, max 36 Min 11.5, max 36
Parasitic power consumption mW 840 1400 590 840 810 820 590 590 590
Terminal capacity 2.5mm² 2.5mm² 2.5mm² N/A 2.5mm² 2.5mm² 2.5mm² 2.5mm² 2.5mm²
Cable N/A N/A N/A 4 core 1mm² LSF N/A N/A N/A N/A N/A
Min load N/A N/A N/A N/A 100 mA 100 mA N/A 100 mA 100 mA
Max load:
Incandescent lighting 10 A 6 A N/A 10 A 10 A 2 A N/A 10 A 2 A
Fluorescent lighting 10 A 6 A N/A 10 A 6 A (6 fittings max) 2 A N/A 6 A (6 fittings max 2 A
Compact fluorescent lighting 10 A 6 A N/A 10 A 3 A 2 A N/A 3 A 2 A
LED lighting 10 A 6 A N/A 10 A 3 A 2 A N/A 3 A 2 A
Resistive (heaters) 10 A 6 A N/A 10 A 10 A 2 A N/A 10 A 2 A
Fans and ventilation equipment 10 A 6 A N/A 10 A 3 A 2 A N/A 3 A 2 A
Low voltage supply with open collector output N/A N/A 50mA, 30V DC max (-OC only) N/A N/A N/A 50mA, 30V DC max (-OC only) N/A N/A
Max power factor correction capacitance N/A N/A N/A N/A 40 μF 40 μF N/A 40μF 40 μF
Rated impulse voltage 2500 V 2500 V N/A 2500 V 2500 V 2500 V N/A N/A N/A
Purpose Sensing control
Construction Independent, flush mounted, electronic control
Type of action Type 1.Baction (micro disconnection)
Pollution Degree 2
Software Class A
2500 V
Operational temp. ºC -10 to 30
Humidity 5 to 95% non-condensing
Material (casing) Flame retardant ABS and PC/ABS
IP rating IP40 (EBDMR-XX-IP = IP55)
Compliance EMC-2014/30/EU, LVD-2014/35/EU
DETechnische Daten
Device: EBDMR-
PRM
EBDMR-PRM-
2CH
EBDMR-PRM-2CH-LV EBDMR-PRM-L3 EBDMR-PRM-VFC EBDMR-PRM-VFC-
NC
EBDMR-PRM-LV
EBDMR-PRM-LV-OC
EBDMR-PRM-VFC-
LV
EBDMR-PRM-VFC-LV-
NC
Gewicht kg 0.10 0.12 0.15 0.40 0.10 0.10 0.10 0.10 0.10
Versorgungsspannung AC bei 50 Hz 230 +/- 10% 230 +/- 10% Min. 10, max. 26,5 230 +/- 10% 230 +/- 10% 230 +/- 10% Min. 10, max. 26,5 Min. 10, max. 26,5 Min. 10, max. 26,5
Versorgungsspannung DC n.v. n.v. Min. 11,5, max. 36 n.v. n.v. n.v. Min. 11,5, max. 36 Min. 11,5, max. 36 Min. 11,5, max. 36
Parasitäre Stromverbrauch 840 1400 590 840 810 820 590 590 590
Leiterkapazität 2.5mm² 2.5mm² 2.5mm² n.v. 2.5mm² 2.5mm² 2.5mm² 2.5mm² 2.5mm²
Kabel n.v. n.v. n.v. Vierleiterkabel 1mm²
LSF
n.v. n.v. n.v. n.v. n.v.
Min. Last n.v. n.v. n.v. n.v. 100 mA 100 mA n.v. 100 mA 100 mA
Max. Last:
Glühlampen 10 A 6 A n.v. 10 A 10 A 2 A n.v. 10 A 2 A
Neonbeleuchtung 10 A 6 A n.v. 10 A 6 A (Max. 6
Anschlüsse)
2 A n.v. 6 A (Max. 6 Anschlüsse 2 A
Kompakte Neonbeleuchtung 10 A 6 A n.v. 10 A 3 A 2 A n.v. 3 A 2 A
LED-Beleuchtung 10 A 6 A n.v. 10 A 3 A 2 A n.v. 3 A 2 A
Widerstandsfähige (Heizungen) 10 A 6 A n.v. 10 A 10 A 2 A n.v. 10 A 2 A
Induktiv/Ventilatoren und Lüftungssysteme 10 A 6 A n.v. 10 A 3 A 2 A n.v. 3 A 2 A
Niederspannung Versorgung mit Open-Collector-
Ausgang
n.v. n.v. 50mA, 30V DC max. (nur -
OC)
n.v. n.v. n.v. 50mA, 30V DC max. (nur -
OC)
n.v. n.v.
Max. Kapazität der Blindleistungskompensation n.v. n.v. n.v. n.v. 40 μF 40 μF n.v. 40μF 40 μF
Bemessungsstoßspannung 2500 V 2500 V n.v. 2500 V 2500 V 2500 V n.v. n.v. n.v.
Zweck Steuerung
Bauweise Separatmontierte Steuerung für bündige Montage
Aktionsart Aktionstyp 1.B (Mikro-Abschaltung)
Verschmutzung Grad 2
Software Klasse A
2500 V
Betriebstemperatur ºC -10 bis 30
Feuchtigkeit 5 bis 95% nicht-kondensierend
Material (Gehäuse) Brandverzögerndes ABS und PC/ABS
IP-Schutzklasse IP40 (EBDMR-XX-IP = IP55)
Eingehaltene Normen EMC-2014/30/EU, LVD-2014/35/EU
ESDatos Técnicos
Device: EBDMR-
PRM
EBDMR-PRM-
2CH
EBDMR-PRM-2CH-LV EBDMR-PRM-L3 EBDMR-PRM-VFC EBDMR-PRM-VFC-
NC
EBDMR-PRM-LV
EBDMR-PRM-LV-OC
EBDMR-PRM-VFC-LV EBDMR-PRM-VFC-LV-
NC
Peso (kg) 0.10 0.12 0.15 0.40 0.10 0.10 0.10 0.10 0.10
Voltaje de entrada de CA a 50 Hz 230 +/- 10% 230 +/- 10% Mín. 10, máx. 26,5 230 +/- 10% 230 +/- 10% 230 +/- 10% Mín. 10, máx. 26,5 Mín. 10, máx. 26,5 Mín. 10, máx. 26,5
Voltaje de entrada de CC N/A N/A Mín. 11,5, máx. 36 N/A N/A N/A Mín. 11,5, máx. 36 Mín. 11,5, máx. 36 Mín. 11,5, máx. 36
Consumo energético parasitaria 840 1400 590 840 810 820 590 590 590
Capacidad del terminal 2.5mm² 2.5mm² 2.5mm² N/A 2.5mm² 2.5mm² 2.5mm² 2.5mm² 2.5mm²
Cable N/A N/A N/A Cable de 4 hilos 1mm²
LSF
N/A N/A N/A N/A N/A
Carga mín. N/A N/A N/A N/A 100 mA 100 mA N/A 100 mA 100 mA
Carga máx.:
Iluminación incandescente 10 A 6 A N/A 10 A 10 A 2 A N/A 10 A 2 A
Iluminación fluorescente 10 A 6 A N/A 10 A 6 A (máx. 6 conectores de
iluminación)
2 A N/A 6 A (máx. 6 conectores de
iluminación
2 A
Iluminación fluorescente compacta 10 A 6 A N/A 10 A 3 A 2 A N/A 3 A 2 A
Iluminación LED 10 A 6 A N/A 10 A 3 A 2 A N/A 3 A 2 A
Calentadores - resistiva 10 A 6 A N/A 10 A 10 A 2 A N/A 10 A 2 A
Inductivo/equipo de ventilación y ventiladores 10 A 6 A N/A 10 A 3 A 2 A N/A 3 A 2 A
Bajo voltaje suministro con salida de colector
abierto
N/A N/A 50 mA, 30 V DC máx. (solo
-OC)
N/A N/A N/A 50 mA, 30 V DC máx. (solo
-OC)
N/A N/A
Capacitancia máx. de corrección del factor de
potencia
N/A N/A N/A N/A 40 μF 40 μF N/A 40μF 40 μF
Voltaje nominal de impulso 2500 V 2500 V N/A 2500 V 2500 V 2500 V N/A N/A N/A
Finalidad Control de sensores
Construcción Control instalado de forma independiente para instalación a ras
Tipo de acción Acción de tipo 1.B(microdesconexión)
Contaminación Grado 2
Software Clase A
2500 V
°C de temperatura operativa De -10 a 30
Humedad Del 5 al 95% sin condensación
Material (carcasa) ABS y PC/ABS retardantes de llama
Grado de protección IP IP40 (EBDMR-XX-IP = IP55)
Conformidad con normativas EMC-2014/30/EU, LVD-2014/35/EU
PTDados Técnicos
Device: EBDMR-
PRM
EBDMR-PRM-
2CH
EBDMR-PRM-2CH-LV EBDMR-PRM-
L3
EBDMR-PRM-
VFC
EBDMR-PRM-VFC-
NC
EBDMR-PRM-LV
EBDMR-PRM-LV-OC
EBDMR-PRM-VFC-
LV
EBDMR-PRM-VFC-LV-
NC
Peso (kg) 0.10 0.12 0.15 0.40 0.10 0.10 0.10 0.10 0.10
Tensão de alimentação CA, 50 Hz 230 +/- 10% 230 +/- 10% 10 (mín.); 26,5 (máx.) 230 +/- 10% 230 +/- 10% 230 +/- 10% 10 (mín.); 26,5 (máx.) 10 (mín.); 26,5 (máx.) 10 (mín.); 26,5 (máx.)
Tensão de alimentação CC N/A N/A 11,5 (mín.); 36 (máx.) N/A N/A N/A 11,5 (mín.); 36 (máx.) 11,5 (mín.); 36 (máx.) 11,5 (mín.); 36 (máx.)
Consumo de energia parasitária 840 1400 590 840 810 820 590 590 590
Capacidade do terminal 2.5mm² 2.5mm² 2.5mm² N/A 2.5mm² 2.5mm² 2.5mm² 2.5mm² 2.5mm²
Cabo N/A N/A N/A 4 vias 1 mm² LSF N/A N/A N/A N/A N/A
Carga min. N/A N/A N/A N/A 100 mA 100 mA N/A 100 mA 100 mA
Carga max.:
Iluminação incandescente 10 A 6 A N/A 10 A 10 A 2 A N/A 10 A 2 A
Lâmpada fluorescente 10 A 6 A N/A 10 A 6 A(6 conexões,
máx.)
2 A N/A 6 A (6 conexões, máx. 2 A
Lâmpada fluorescente compacta 10 A 6 A N/A 10 A 3 A 2 A N/A 3 A 2 A
Lâmpada de LED 10 A 6 A N/A 10 A 3 A 2 A N/A 3 A 2 A
Resistivas (aquecedores) 10 A 6 A N/A 10 A 10 A 2 A N/A 10 A 2 A
Indutivo/ventiladores e equipamentos de ventilação 10 A 6 A N/A 10 A 3 A 2 A N/A 3 A 2 A
Baixa tensão alimentar com a saída do coletor aberto N/A N/A 50 mA, 30 V DC máx. (somente -
OC)
N/A N/A N/A 50 mA, 30 V DC máx. (somente -
OC)
N/A N/A
Capacitância máxima de correção do fator de
potência
N/A N/A N/A N/A 40 μF 40 μF N/A 40μF 40 μF
Tensão de impulso nominal 2500 V 2500 V N/A 2500 V 2500 V 2500 V N/A N/A N/A
Objetivo Controle de sensibilidade
Construção Controle instalado de maneira independente para instalação nivelada
Tipo de ação Ação Tipo 1.B (microdesconexão)
Poluição Nivel 2
Software Classe A
2500 V
Temperatura operacional (ºC) -10 a 30
Umidade 5%a 95%,sem condensação
Material (caixa) ABS e PC/ABS retardante de chamas
Classificação IP IP40 (EBDMR-XX-IP = IP55)
Compatibilidade EMC-2014/30/EU, LVD-2014/35/EU
FRDonnées Techniques
Device: EBDMR-
PRM
EBDMR-PRM-
2CH
EBDMR-PRM-2CH-LV EBDMR-PRM-L3 EBDMR-PRM-
VFC
EBDMR-PRM-VFC-
NC
EBDMR-PRM-LV
EBDMR-PRM-LV-OC
EBDMR-PRM-VFC-
LV
EBDMR-PRM-VFC-LV-
NC
Poids kg 0.10 0.12 0.15 0.40 0.10 0.10 0.10 0.10 0.10
Tension d'alimentation CA à 50Hz 230 +/- 10% 230 +/- 10% Min 10, max 26,5 230 +/- 10% 230 +/- 10% 230 +/- 10% Min 10, max 26,5 Min 10, max 26,5 Min 10, max 26,5
Tension d'alimentation CC S/O S/O Min 11,5, max 36 S/O S/O S/O Min 11,5, max 36 Min 11,5, max 36 Min 11,5, max 36
Consommation électrique parasite 840 1400 590 840 810 820 590 590 590
Capacité des terminaux 2.5mm² 2.5mm² 2.5mm² S/O 2.5mm² 2.5mm² 2.5mm² 2.5mm² 2.5mm²
Câble S/O S/O S/O 4 conducteurs 1 mm²
LSF
S/O S/O S/O S/O S/O
Charge min. S/O S/O S/O S/O 100 mA 100 mA S/O 100 mA 100 mA
Charge max.:
Éclairage incandescent 10 A 6 A S/O 10 A 10 A 2 A S/O 10 A 2 A
Éclairage fluorescent 10 A 6 A S/O 10 A 6 A (max 6
installations)
2 A S/O 6 A (max 6 installations 2 A
Éclairage fluorescent compact 10 A 6 A S/O 10 A 3 A 2 A S/O 3 A 2 A
Éclairage LED 10 A 6 A S/O 10 A 3 A 2 A S/O 3 A 2 A
Réchauffeurs - résistif 10 A 6 A S/O 10 A 10 A 2 A S/O 10 A 2 A
Inductif/ventilateurs et équipements de ventilation 10 A 6 A S/O 10 A 3 A 2 A S/O 3 A 2 A
Basse tension alimentation avec sortie collecteur
ouvert
S/O S/O 50 mA, 30 V DC max (-OC
uniquement)
S/O S/O S/O 50 mA, 30 V DC max (-OC
uniquement)
S/O S/O
Capacitance max. de correction du facteur de
puissance
S/O S/O S/O S/O 40 μF 40 μF S/O 40μF 40 μF
Tension nominale de tenue aux chocs 2500 V 2500 V S/O 2500 V 2500 V 2500 V S/O S/O S/O
Rôle Contrôle de détection
Construction Commande indépendante à encastrer
Type d'action Action Type 1.B (micro déconnexion)
Pollution Niveau 2
Logiciel Classe A
2500 V
Température de fonctionnement ºC -10 à 30
Humidité 5 à 95% sans condensation
Matériau (boîtier) F ABS et PC/ABS ignifuges
Indice IP IP40 (EBDMR-XX-IP = IP55)
Conformité EMC-2014/30/EU, LVD-2014/35/EU
ITSpecifiche Tecniche
Device: EBDMR-
PRM
EBDMR-PRM-
2CH
EBDMR-PRM-2CH-LV EBDMR-PRM-
L3
EBDMR-PRM-
VFC
EBDMR-PRM-VFC-
NC
EBDMR-PRM-LV
EBDMR-PRM-LV-OC
EBDMR-PRM-VFC-
LV
EBDMR-PRM-VFC-LV-
NC
Peso in kg 0.10 0.12 0.15 0.40 0.10 0.10 0.10 0.10 0.10
Tensione di alimentazione CA a 50 Hz 230 +/- 10% 230 +/- 10% Min 10, max 26,5 230 +/- 10% 230 +/- 10% 230 +/- 10% Min 10, max 26,5 Min 10, max 26,5 Min 10, max 26,5
Tensione di alimentazione CC N/D N/D Min 11,5, max 36 N/D N/D N/D Min 11,5, max 36 Min 11,5, max 36 Min 11,5, max 36
Consumo di energia parassita 840 190 240 840 200 200 240 240 240
Capacità del morsetto 2.5mm² 2.5mm² 2.5mm² N/D 2.5mm² 2.5mm² 2.5mm² 2.5mm² 2.5mm²
Cavo N/D N/D N/D 4 fili 1 mm² LSF N/D N/D N/D N/D N/D
Carico min N/D N/D N/D N/D 100 mA 100 mA N/D 100 mA 100 mA
Carico max:
Luce a incandescenza 10 A 6 A N/D 10 A 10 A 2 A N/D 10 A 2 A
Illuminazione fluorescente 10 A 6 A N/D 10 A 6 A(6 supporti max) 2 A N/D 6 A (6 supporti max 2 A
Illuminazione fluorescente compatta 10 A 6 A N/D 10 A 3 A 2 A N/D 3 A 2 A
Illuminazione LED 10 A 6 A N/D 10 A 3 A 2 A N/D 3 A 2 A
Riscaldatori resistiva 10 A 6 A N/D 10 A 10 A 2 A N/D 10 A 2 A
Induttivo/ventole e apparecchiature di ventilazione 10 A 6 A N/D 10 A 3 A 2 A N/D 3 A 2 A
Bassa tensione alimentazione con uscita a collettore aperto N/D N/D 50 mA, 30 V DC max (solo -
OC)
N/D N/D N/D 50 mA, 30 V DC max (solo -
OC)
N/D N/D
Capacitanza di correzione del fattore di alimentazione
massima
N/D N/D N/D N/D 40 μF 40 μF N/D 40μF 40 μF
Tensione nominale a impulso 2500 V 2500 V N/D 2500 V 2500 V 2500 V N/D N/D N/D
Scopo Controllo sensori
Costruzione Controllo con montaggio indipendente per il montaggio a incasso
Tipo di azione Azione di tipo 1.B (micro disconnessione)
Inquinamento Grado 2
Software Classe A
2500 V
Temperatura di esercizio ºC Da -10 a 30
Umidità da 5 a 95% senza condensa
Materiale (rivestimento) ABS e PC/ABS ignifugo
Classificazione IP IP40 (EBDMR-XX-IP = IP55)
Conformità EMC-2014/30/EU, LVD-2014/35/EU
CP Electronics - a business unit of
Legrand Electric Limited
Brent Crescent, London NW10 7XR UK
Tel: +44 (0)333 900 0671
Fax: +44 (0)333 900 0674
www.cpelectronics.co.uk
enquiry@cpelectronics.co.uk
Due to our policy of continual product improvement, CPElectronics reserves the right to alter the specification of this product without prior notice.
Ref WD869 issue 1

This manual suits for next models

9

Other C.P. Electronics Security Sensor manuals
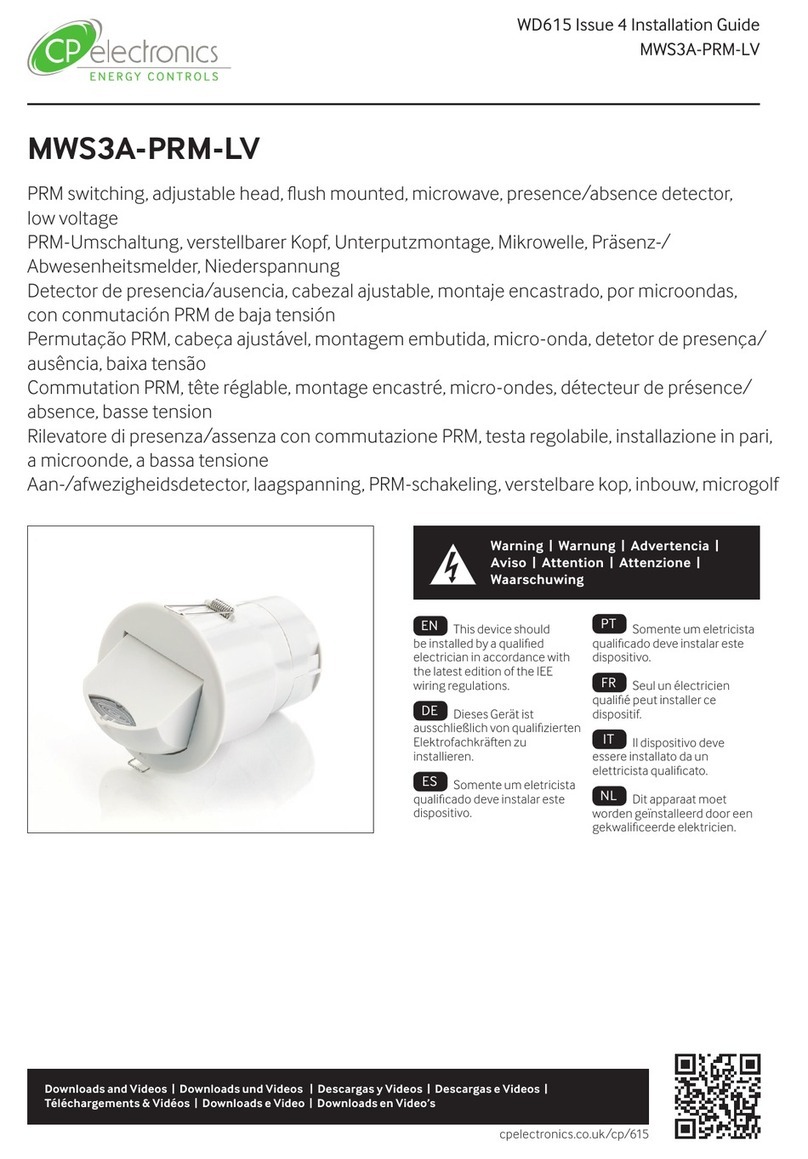
C.P. Electronics EBDSPIR-KNX User manual

C.P. Electronics

C.P. Electronics EBDSPIR-KNX User manual

C.P. Electronics VITMR-MWS6-PRM User manual

C.P. Electronics

C.P. Electronics VITMR-MWS6-PRM User manual

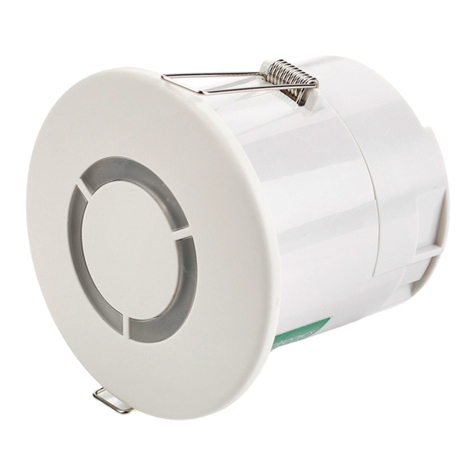
C.P. Electronics MWS3A-PRM-LV User manual
C.P. Electronics

C.P. Electronics MWS3A-PRM-LV User manual

C.P. Electronics EBMPIR-MB-PRM User manual

C.P. Electronics

C.P. Electronics EBMPIR-MB-PRM User manual

C.P. Electronics EBDHS-KNX User manual

C.P. Electronics

C.P. Electronics EBDHS-KNX User manual

C.P. Electronics EBMHS series User manual

C.P. Electronics

C.P. Electronics EBMHS series User manual

C.P. Electronics MWS1A-C-PRM-LV User manual

C.P. Electronics

C.P. Electronics MWS1A-C-PRM-LV User manual

C.P. Electronics SPIR-F/C/IP User manual

C.P. Electronics

C.P. Electronics SPIR-F/C/IP User manual

C.P. Electronics MWS5-DD-SA-C User manual

C.P. Electronics

C.P. Electronics MWS5-DD-SA-C User manual

C.P. Electronics MWS6-PRM-VFC-LV User manual

C.P. Electronics

C.P. Electronics MWS6-PRM-VFC-LV User manual

C.P. Electronics SPIR-PRM User manual

C.P. Electronics

C.P. Electronics SPIR-PRM User manual

C.P. Electronics MWS6-PRM-VFC User manual

C.P. Electronics

C.P. Electronics MWS6-PRM-VFC User manual

C.P. Electronics MWS1A-PRM-LV User manual

C.P. Electronics

C.P. Electronics MWS1A-PRM-LV User manual

C.P. Electronics EBDRC-PRM User manual

C.P. Electronics

C.P. Electronics EBDRC-PRM User manual

C.P. Electronics MWS1A-PRM-VFC User manual

C.P. Electronics

C.P. Electronics MWS1A-PRM-VFC User manual

C.P. Electronics MWS6-PRM-2CH-NC User manual

C.P. Electronics

C.P. Electronics MWS6-PRM-2CH-NC User manual

C.P. Electronics MWS3A-PRM-2CH User manual

C.P. Electronics

C.P. Electronics MWS3A-PRM-2CH User manual

C.P. Electronics MWS1A-C-PRM-LV User manual

C.P. Electronics

C.P. Electronics MWS1A-C-PRM-LV User manual

C.P. Electronics EBDHS-DNET1-LT30 User manual

C.P. Electronics

C.P. Electronics EBDHS-DNET1-LT30 User manual

C.P. Electronics EBMHS-AD-SA-C User manual

C.P. Electronics

C.P. Electronics EBMHS-AD-SA-C User manual

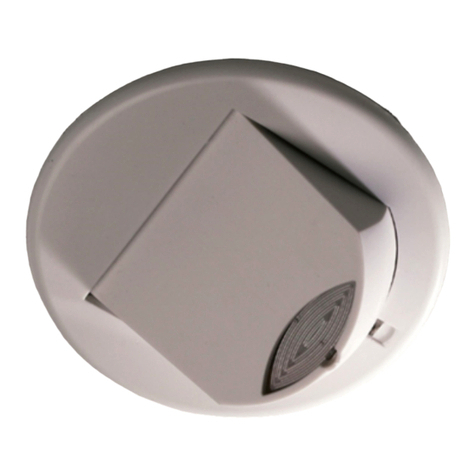
C.P. Electronics MWS6-PRM-VFC-NC User manual
C.P. Electronics

C.P. Electronics MWS6-PRM-VFC-NC User manual

C.P. Electronics MWS3A-PRM-VFC-NC User manual

C.P. Electronics

C.P. Electronics MWS3A-PRM-VFC-NC User manual

C.P. Electronics MWS6-DD User manual

C.P. Electronics

C.P. Electronics MWS6-DD User manual

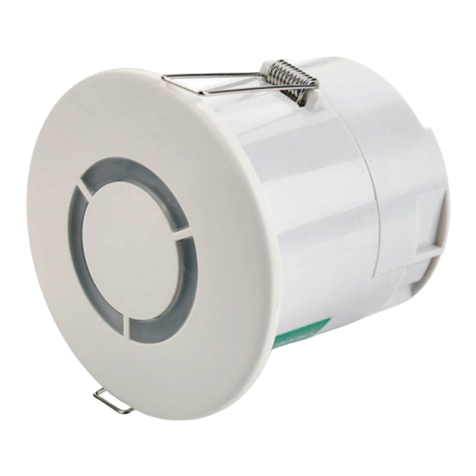
C.P. Electronics EBMHS-PRM-SA-C User manual
C.P. Electronics

C.P. Electronics EBMHS-PRM-SA-C User manual

Popular Security Sensor manuals by other brands
Gardigo 60035 operating instructions

Gardigo

Gardigo 60035 operating instructions

Tecnar accuraspray CS Quick setup guide

Tecnar

Tecnar accuraspray CS Quick setup guide

RKI Instruments 35-3001A-02 Operator's manual

RKI Instruments

RKI Instruments 35-3001A-02 Operator's manual

Cooper safety CEAG Brillant 1883 LED GGLine Mounting and operating instructions

Cooper safety

Cooper safety CEAG Brillant 1883 LED GGLine Mounting and operating instructions

SPX Radiodetection RD7000+ Operation manual

SPX

SPX Radiodetection RD7000+ Operation manual

Bircher Reglomat RBM 2 Translation of the original operation instruction

Bircher Reglomat

Bircher Reglomat RBM 2 Translation of the original operation instruction

SOMFY 1875108 manual

SOMFY

SOMFY 1875108 manual

Xtralis VIS-IR Product guide

Xtralis

Xtralis VIS-IR Product guide

DSC MAXSYS RF4164-433 instruction manual

DSC

DSC MAXSYS RF4164-433 instruction manual

Allen-Bradley GuardShield Micro 400 installation instructions
Allen-Bradley

Allen-Bradley GuardShield Micro 400 installation instructions
Clare Controls ClareOne CLR-C1-PIR Installation sheet

Clare Controls

Clare Controls ClareOne CLR-C1-PIR Installation sheet

Wavetronix SmartSensor Matrix Quick reference guide

Wavetronix

Wavetronix SmartSensor Matrix Quick reference guide

Bircher Reglomat EasyMotion operating instructions

Bircher Reglomat

Bircher Reglomat EasyMotion operating instructions

Argus Security Taurus TW-DO-01/916 manual

Argus Security

Argus Security Taurus TW-DO-01/916 manual

Honeywell SiXGB installation instructions
Honeywell

Honeywell SiXGB installation instructions

netvox RA0708 user manual

netvox

netvox RA0708 user manual

Satel VD-1 user manual

Satel

Satel VD-1 user manual

TOOLCRAFT OG08 operating instructions

TOOLCRAFT

TOOLCRAFT OG08 operating instructions

manuals.online logo
manuals.online logoBrands
  • About & Mission
  • Contact us
  • Privacy Policy
  • Terms and Conditions

Copyright 2025 Manuals.Online. All Rights Reserved.