Calian SatService sat-nms ACU2-19V2 User manual

Antenna Controller
sat-nms ACU2-19V2
User Manual
Version 2.0.014
© Copyright
SatService Gesellschaft für Kommunikationssysteme mbH
Hardstrasse 9
D-78256 Steisslingen
satnms-support@satservicegmbh.de
www.satnms.com
www.satservicegmbh.de
Tel +49 7738 99791-10

Table Of Contents
1Table Of Contents ...............................................................................................................................
3sat-nms ACU2-19V2 User Manual .....................................................................................................
51 Introduction ......................................................................................................................................
72 Safety Instructions ...........................................................................................................................
73 The sat-nms ACU19V2 ....................................................................................................................
83.1 Frontpanel Display ....................................................................................................................
83.2 Frontpanel Keyboard .................................................................................................................
83.3 Drive cabinet interfaces ............................................................................................................
93.4 Analog beacon level input ..........................................................................................................
93.5 Angle encoder interfaces ...........................................................................................................
93.6 Alarm interfaces ........................................................................................................................
93.7 Remote interfaces .....................................................................................................................
93.8 Mains input ................................................................................................................................
93.9 Serial interface angle display ....................................................................................................
94 Installation ........................................................................................................................................
104.1 Mechanical installation ............................................................................................................
104.2 Interfaces to the Antenna, Pin descriptions .............................................................................
104.2.1 Connector Layout ..............................................................................................................
104.2.2 Pin descriptions ................................................................................................................
174.3 Start-up ....................................................................................................................................
184.3.1 Setting the IP Address .......................................................................................................
194.3.2 Angle detectors .................................................................................................................
204.3.3 Driver Interface ..................................................................................................................
204.3.4 Pointing/ Tracking ..............................................................................................................
204.3.5 Backup of ACU settings ....................................................................................................
215 Operation .......................................................................................................................................
225.1 The Web-based User Interface ...............................................................................................
235.2 Antenna Pointing ......................................................................................................................
255.3 Target Memory .........................................................................................................................
275.3.1 How to make a new target ................................................................................................
285.4 Tracking Parameters ...............................................................................................................
355.5 Test Page ................................................................................................................................
365.6 Setup .......................................................................................................................................
425.7 Handheld/ Frontpanel Operation .............................................................................................
425.7.1 LCPH (Local Maintenance Controller) ..............................................................................
425.7.2 LCPHD-PT (Local Maintenance Controller with Display) .................................................
435.7.3 RCPH (ACU Handheld Controller) ....................................................................................
435.7.4 RCPH19 (ACU Handheld Controller 19") ..........................................................................
445.7.5 Handheld Terminal ............................................................................................................
455.8 Target Editor ............................................................................................................................
505.9 Orbital Data Editor ...................................................................................................................
515.9.1 TLE Dataset Editor ...........................................................................................................
535.9.2 I11 Dataset Editor ..............................................................................................................
556 Frontpanel operation ......................................................................................................................
566.1 Display mode ..........................................................................................................................
(C) 2022, SatService GmbH www.satnms.com ACU2-19V2-UM-2209 Page 1/99

576.2 The main menu .......................................................................................................................
586.3 Select targets ..........................................................................................................................
586.4 Set tracking mode ...................................................................................................................
586.5 Step move ...............................................................................................................................
596.6 Jog mode .................................................................................................................................
596.7 Standby ...................................................................................................................................
596.8 Set az, el, pl by editing Numeric Parameters .........................................................................
607 Remote Control .............................................................................................................................
607.1 General command syntax .......................................................................................................
617.2 The TCP/IP remote control interface ......................................................................................
617.3 The RS232 remote control interface .......................................................................................
627.4 Parameter list ..........................................................................................................................
817.5 One line read via TCP/IP .........................................................................................................
817.6 SNMP Remote Control ............................................................................................................
828 Theory of Operation .......................................................................................................................
828.1 Angle Measurement .................................................................................................................
838.2 Pointing / Motor Control ...........................................................................................................
858.3 Steptrack .................................................................................................................................
858.3.1 The sat-nms Steptrack Algorithm .....................................................................................
868.3.2 ACU and Beacon Receiver ...............................................................................................
878.3.3 Smoothing .........................................................................................................................
888.3.4 Steptrack Parameters .......................................................................................................
898.4 Adaptive Tracking ....................................................................................................................
908.4.1 The sat-nms Adaptive Tracking Algorithm ........................................................................
928.4.2 The Tracking Memory .......................................................................................................
938.4.3 Adaptive Tracking Parameters ..........................................................................................
948.4.4 Hardware Protective Mode (Spindle Save Mode) .............................................................
948.5 Program Tracking ....................................................................................................................
958.5.1 Practical Usage .................................................................................................................
958.5.2 File Format ........................................................................................................................
968.6 Memory Tracking .....................................................................................................................
968.7 Prediction Tracking with Ephemeris Data ...............................................................................
968.7.1 Intelsat eleven Parameter Prediction (I11) ........................................................................
978.7.2 Two Line Elements Prediction (TLE) ................................................................................
978.8 Polarization Prediction ............................................................................................................
988.9 Faults and Tracking .................................................................................................................
999 Specifications ................................................................................................................................
(C) 2022, SatService GmbH www.satnms.com ACU2-19V2-UM-2209 Page 2/99

sat-nms ACU2-19V2 User Manual
Version 2.0.014 -- 2021-07-29 -- (C) 2020-2021 SatService GmbH
Abstract
The sat-nms ACU19V2 is an advanced automatic tracking antenna controller. It can be used
as a cost efficient antenna tracking system to replace the Vertex / General Dynamics
Satcom Technologies Model 7200 Antenna Control Unit keeping the outdoor 7150 Antenna
Drive Unit as it is. The replacement is simple plug & play by reusing the existing cables. The
system is based on the sat-nms ACU-ODM Module and provides Model 7200 ACU fully
compatible rear panel connectors in the 19inch 1RU chassis. The sat-nms ACU19V points
any antenna size precisely on the satellite and performs a fully automatic and accurate
inclined orbit satellite tracking with an improved adaptive tracking algorithm. The sat-nms
ACU19V records the tracked positions over several days and calculates based on this data
a precise mathematical model, which is used to predict the antenna position. This reduces
the step-track failures and provides continuous operation in case of a beacon receive
failure. In the Program Tracking Mode the antenna follows a path defined by a file that
contains time stamped azimuth, elevation and polarization values. These values have
usually been calculated by external software.
This document describes how to install, setup and operate this antenna controller.
Table Of Contents
1 Introduction
2 Safety Instructions
3 The sat-nms ACU19V2
3.1 Frontpanel Display
3.2 Frontpanel Keyboard
3.3 Drive cabinet interfaces
3.4 Analog beacon level input
3.5 Angle encoder interfaces
3.6 Alarm interfaces
3.7 Remote interfaces
3.8 Mains input
3.9 Serial interface angle display
4 Installation
4.1 Mechanical installation
4.2 Interfaces to the Antenna, Pin descriptions
4.2.1 Connector Layout
4.2.2 Pin descriptions
4.3 Start-up
4.3.1 Setting the IP Address
4.3.2 Angle detectors
4.3.3 Driver Interface
4.3.4 Pointing/ Tracking
4.3.5 Backup of ACU settings
5 Operation
(C) 2022, SatService GmbH www.satnms.com ACU2-19V2-UM-2209 Page 3/99

5.1 The Web-based User Interface
5.2 Antenna Pointing
5.3 Target Memory
5.3.1 How to make a new target
5.4 Tracking Parameters
5.5 Test Page
5.6 Setup
5.7 Handheld/ Frontpanel Operation
5.7.1 LCPH (Local Maintenance Controller)
5.7.2 LCPHD-PT (Local Maintenance Controller with Display)
5.7.3 RCPH (ACU Handheld Controller)
5.7.4 RCPH19 (ACU Handheld Controller 19")
5.7.5 Handheld Terminal
5.8 Target Editor
5.9 Orbital Data Editor
5.9.1 TLE Dataset Editor
5.9.2 I11 Dataset Editor
6 Frontpanel operation
6.1 Display mode
6.2 The main menu
6.3 Select targets
6.4 Set tracking mode
6.5 Step move
6.6 Jog mode
6.7 Standby
6.8 Set az, el, pl by editing Numeric Parameters
7 Remote Control
7.1 General command syntax
7.2 The TCP/IP remote control interface
7.3 The RS232 remote control interface
7.4 Parameter list
7.5 One line read via TCP/IP
7.6 SNMP Remote Control
8 Theory of Operation
8.1 Angle Measurement
8.2 Pointing / Motor Control
8.3 Steptrack
8.3.1 The sat-nms Steptrack Algorithm
8.3.2 ACU and Beacon Receiver
8.3.3 Smoothing
8.3.4 Steptrack Parameters
8.4 Adaptive Tracking
8.4.1 The sat-nms Adaptive Tracking Algorithm
8.4.2 The Tracking Memory
8.4.3 Adaptive Tracking Parameters
8.4.4 Hardware Protective Mode (Spindle Save Mode)
8.5 Program Tracking
8.5.1 Practical Usage
8.5.2 File Format
8.6 Memory Tracking
8.7 Prediction Tracking with Ephemeris Data
(C) 2022, SatService GmbH www.satnms.com ACU2-19V2-UM-2209 Page 4/99

8.7.1 Intelsat eleven Parameter Prediction (I11)
8.7.2 Two Line Elements Prediction (TLE)
8.8 Polarization Prediction
8.9 Faults and Tracking
9 Specifications
1 Introduction
The sat-nms Antenna Control Unit is an antenna controller / positioner with optional satellite
tracking support. It may be operated as a standalone unit or in conjunction of the sat-nms ACU-
IDU, a PC based indoor unit which offers extended tracking capabilities and a full featured
visualization interface.
The sat-nms ACU is available as:
sat-nms ACU-ODM: only the core-module integrated in a compact case prepared for
mounting on a 35mm DIN rail
sat-nms ACU-ODU: complete antenna controller system for AC- or DC-Motors integrated in
an outdoor cabinet that could be mounted directly to the antenna. By mounting a sat-nms
LBRX beacon receiver into this cabinet, you have a complete antenna tracking system in a
compact cabinet directly at your antenna.
sat-nms ACU-RMU: complete antenna controller system for AC-Motors integrated in a 6RU
19inch rack mount case for indoor use
sat-nms ACU19: complete antenna controller system for DC-Motors integrated in a 1RU
19inch rack mount case for indoor use
For detailed description please refer to the sat-nms documentation CD or www.satnms.com
Main benefits of the sat-nms ACU are:
The ACU outdoor unit is able to act as a standalone antenna control and tracking system
without an indoor unit required.
The ACU provides an Ethernet interface using the TCP/IP and HTTP Internet protocols. It
can be controlled using any PC providing an Ethernet interface and a web browser like the
Microsoft Internet Explorer. The ACU runs a web server which acts as a user interface to the
antenna controller.
The ACU is prepared to read the receive level of a sat-nms beacon receiver through the
TCP/IP interface.
The flexible interface design of the ACU enables it to control most types of motor driving
antennas for geostationary satellites. Supported motor controllers are (configurable in the
field):
Power relays: This simple solution is suitable for antennas using 2-speed AC motors.
Freque ncy inv erters: Speed and acceleration ramps are programmed into the inverter
module with this solution.
Servo controllers: Used for DC motors at small antennas. Supported position sensors are
(separate hardware interface modules for each axis:
Resolver Interface: The resolver interface module contains a resolver to digital chip which
(C) 2022, SatService GmbH www.satnms.com ACU2-19V2-UM-2209 Page 5/99

does the decoding of the resolver sin/cos signals.
SSI Interface : SSI is a high speed serial interface used by modern digital position encoders.
DC Voltage Interface: The third position encoder interface module contains an A/D
converter which is suited to measure the DC voltages produced by simple inductive angle
encoders. This application is for small antennas especially in the SNG business.
The paragraphs below give a short overview to the contents of the documentation. A subset of
this documentation is stored on the device itself, the complete documentation is available on the
sat-nms documentation CD and at www.satnms.com .
Safety Instructions : This chapter gives an overview about the safety precautions that have
to be observed during installation, operation and maintenance.
Unit Overview : The installation chapter gives informations about the different modules that
are integrated in the ACU (not ACU-ODM and ACU19).
Installation/Start-up : The installation chapter guides through the installation and setup of the
ACU outdoor module. It describes the mechanical concept of the ACU and the assignment of
the ACU's connectors. It gives you informations about the starting up procedure. Finally you
learn in this chapter how to set the ACU's IP address, which is a essential precondition to
operate the ACU by means of a web browser.
Operation : The sat-nms ACU is operated using a standard web browser like the Internet-
Explorer on MS Windows based computers. The user interface design is straight forward and
clearly structured. Operating the ACU is mostly self-explanatory. Nevertheless, the
'Operation' chapter outlines the map of web pages which make up the ACU user interface
and elaborately describe the meaning of each alterable parameter.
Frontpanel Operation : The sat-nms ACU19 and the sat-nms ACU-RMU optionally are
equipped with a frontpanel Human-Machine-Interface. This chapter describes how to use this
interface.
Remote Control : The ACU outdoor module provides a versatile remote control interface. A
monitoring & control software may fully operate the ACU either through a TCP/IP network
connection or through the RS232 interface of the ACU. This chapter describes the
communication protocol used for remote control and lists all parameters accessible through
the remote interface.
Theory of Operation : This chapter gives a short overview how the ACU works. It also
describes the different tracking algorithms and their parameters. The interaction with a
beacon receiver is described as well. Knowing about the theory regarding this functions
helps to find the best parameter settings for a given application.
Specifications : At the end of the document, the specifications applicable to the sat-nms ACU
are summarized in this chapter.
Support and Assistance
If you need any assistance regarding our ACU, don't hesitate to contact us. We would be pleased
to help you by answering your questions.
SatService GmbH
Hardstrasse 9
78256 Steisslingen
(C) 2022, SatService GmbH www.satnms.com ACU2-19V2-UM-2209 Page 6/99

Germany
phone +49 7738 99791-10
www.satnms.com
2 Safety Instructions
Safe ty
The mains shall only be connected provided with a protective earth wire. Any interruption of the
protective wire, inside or outside the sat-nms ACU, is likely to make the unit dangerous.
Intentional interruption is prohibited.
The unit described in this manual is designed to be used by properly-trained personnel only.
Adjustment, maintenance and repair of the exposed equipment shall be carried out only by
qualified personnel who are aware of hazards involved.
Refer servicing to qualified personnel.
To prevent electrical shock, do not remove covers.
For the correct and safe use of the instrument, it is essential that both operating and servicing
personnel follow generally accepted safety procedures in addition to the safety precautions
specified in this manual.
Whenever it is likely that safety protection is impaired, the unit must be made in-operative and
secured against unintended operation. The appropriate servicing authority must be informed. For
example, safety is likely to be impaired if the unit fails to perform the intended measurements or
shows visible damage.
Ensure that the cabinet is proper connected to the protective earth conductor.
The circuit breaker, that fuses the mains for the sat-nms ACU has to switch off all phases AND the
neutral wire as well.
WARNINGS
The outside of the equipment may be cleaned using a lightly dampened cloth. Do not use
any cleaning liquids containing alcohol, methylated spirit or ammonia etc.
Follow standard Electrostatic Discharge (ESD) procedures when handling the Unit.
Apply the appropriate voltage according to the attached schematic.
In case of switching off all the circuit breakers is still voltage available at the mains terminals!
Only use shielded cable to connect the AZ- and EL-Motor. The other components in the
cabinet might be jammed through the harmonic waves the frequency inverters inject into the
motor wires.
Use only double shielded twisted pair cables (e.g. CAT7 Ethernet cable) to connect the
resolvers to the sat-nms ACU
Only ACU-ODU : If the Unit is equipped with an optional air ventilation, avoid direct contact
with jets of water, normal rain is no problem.
3 The sat-nms ACU19V2
The sat-nms ACU19V2 is an advanced automatic tracking antenna controller. It can be used as a
cost efficient antenna tracking system to replace the Vertex / General Dynamics Satcom
(C) 2022, SatService GmbH www.satnms.com ACU2-19V2-UM-2209 Page 7/99

Technologies Model 7200 Antenna Control Unit keeping the outdoor 7150 Antenna Drive Unit as it
is. The replacement is simple plug & play by reusing the existing cables. The system is based on
the sat-nms ACU-ODM Module and provides Model 7200 ACU fully compatible rear panel
connectors in the 19??? 1RU chassis. The sat-nms ACU19V points any antenna size precisely
on the satellite and performs a fully automatic and accurate inclined orbit satellite tracking with an
improved adaptive tracking algorithm. The sat-nms ACU19V records the tracked positions over
several days and calculates based on this data a precise mathematical model, which is used to
predict the antenna position. This reduces the step-track failures and provides continuous
operation in case of a beacon receive failure. In the Program Tracking Mode the antenna follows
a path defined by a file that contains time stamped azimuth, elevation and polarization values.
These values have usually been calculated by external software.
This chapter gives a short overview to the interfaces of sat-nms ACU19V2. For more detailed
informations refer to the chapters below. The following pictures show the front and rear view of
the unit.
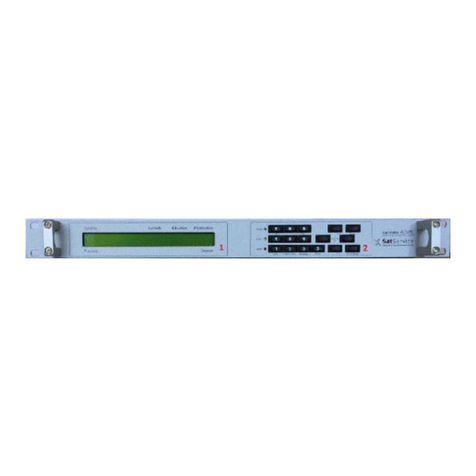
sat-nms ACU19V2 Front panel view
sat-nms ACU19V2 rear view
No. component No. component
1frontpanel display 6alarm interfaces
2frontpanel Keyboard 7remote interfaces
3drive cabinet interfaces 8mains input
4analog beacon level input 9serial interface angle display
5angle encoder interfaces
3.1 Frontpanel Display
The Display together with the keyboard is your interface for local operation without using e.g. an
external computer. It shows all of the desired parameters and gives a quick overview to the actual
state of your sat-nms ACU19V2. Please refer to chapter 6 Frontpanel Operation for detailed
informations.
3.2 Frontpanel Keyboard
The keyboard together with the display is your interface for local operation without using e.g. an
external computer. Besides the keyboard you find 3 LEDs that show the actual state of the ACU-
RMU (fault state / limit switch state / motor movement) Please refer to chapter 6 Frontpanel
Operation for detailed informations.
3.3 Drive cabinet interfaces
(C) 2022, SatService GmbH www.satnms.com ACU2-19V2-UM-2209 Page 8/99

The sat-nms ACU19V contains a Vertex / General Dynamics Satcom Technologies Model 7200
compatible drive Interface. This interface commands the external driver unit to move the antenna
in 3-axis. Please refer to chapter Interfaces to the antenna/Pin descriptions for more detailed
informations.
3.4 Analog beacon level input
For connecting a third party beacon receiver, the sat-nms ACU19V provides an analog 0-10V
interface input. If you use a sat-nms LBRX beacon receiver, the level informations as well as the
beacon frequency and alarm bits are transmitted by UDP packages via http. Please refer to
chapter Interfaces to the antenna/ Pin descriptions for more detailed informations.
3.5 Angle encoder interfaces
The sat-nms ACU19V provides the possibility to connect two different types of angle encoders:
optical SSI encoders (S) and Resolvers (R). Please refer to chapter Interfaces to the antenna/ Pin
descriptions for more detailed informations. You have to decide at point of order which variant
you want to have. The angle encoder type is specified by an add-on to the name of the unit. The
sequence is azimuth, elevation, polarisation An example: ACU19-SSR contains SSI interfaces at
azimuth and elevation axis and a resolver interface at polarisation axis.
3.6 Alarm interfaces
The sat-nms ACU19V2 provides a dry contact Alarm interface. Please refer to chapter Interfaces
to the antenna/ Pin descriptions for more detailed informations.
3.7 Remote interfaces
The sat-nms ACU19V2 provides an ethernet (http) interface for remote controlling. An internal
webserver provides a clearly arranged webpage where all settings and states can be monitored
and controlled. Please refer to chapter Operation and Remote control for more detailed
information. A serial interface (RS232) is available on demand.
3.8 Mains input
The sat-nms ACU19V2 already contains all internal needed power supplies. As they are wide-
range types it is possible to connect nearly all worldwide available single phase mains. Please
refer to chapter Specifications for more detailed informations.
3.9 Serial interface angle display
The sat-nms ACU19V2 provides via a serial RS422 interface the angle information to an external
control unit e.g. PMCU from GD Satcom or sat-nms LCPD. Please refer to chapter Interfaces to
the antenna/ Pin descriptions for more detailed informations.
4 Installation
The following chapter describes how to install the ACU19V2 mechanically and electrically.
Additional a detailed start-up procedure is given in this chapter.
(C) 2022, SatService GmbH www.satnms.com ACU2-19V2-UM-2209 Page 9/99

4.1 Mechanical installation
The sat-nms ACU19V2 is completely integrated into a 1RU 19inch case with standard mounting
holes. The case of the sat-nms ACU19V2 is not strong enough to carry the complete unit only on
the front mounting holes! Because of that, take care that the sat-nms ACU19V2 is placed onto a
bar guide that carries the complete weight of the sat-nms ACU19V2. The screws have to be fixed
properly to keep the sat-nms ACU19V2 in its position.
4.2 Interfaces to the Antenna, Pin descriptions
ATTENTION! Electrical installation shall be carried out only by qualified personnel who are
instructed and aware of hazards of electrical shocks.
All connectors of the sat-nms ACU19V2 are located at the rear side of the case. The following
chapters show the standard pin configuration. If you have a non-standard version, please refer to
the documentation enhancement that shows the pin descriptions of it.
4.2.1 Connector Layout
Below the connector layout of the ACU19V2 is shown. The connector type is described together
with the corresponding pin description in the following chapter. The given connector type says
which connector you need on your cable !
4.2.2 Pin descriptions
J10 Drive Interface
Connector Type: D-Sub25 female
The ACU19V2 provides a digital signal interface based on 24V signal level for an external drive
cabinet.
pin signal description type
1 Az CW Azimuth CW Cmd OUT
2 Az Com Azimuth Common (0V) IN
3 Az CCW Azimuth CCW Cmd OUT
4 El UP Elevation Up Cmd OUT
5 El Com Elevation Common (0V) IN
6 El DWN Elevation Down Cmd OUT
7 Pl CW Pol CW Cmd OUT
8 Pl Com Pol Common (0V) IN
9 Pl CCW Pol CCW Cmd OUT
(C) 2022, SatService GmbH www.satnms.com ACU2-19V2-UM-2209 Page 10/99

10 Sum Lim Sum Limit (+) IN
14 Az FLT Az Fault (+) IN
15 El FLT El Fault (+) IN
16 E-Stop E-Stop (-) IN
17 Com FLT Az El Fault Common(-) IN
18 Sum Lim Sum Limit (-) IN
19 E-Stop E-Stop (+) IN
21 Az HSP Azimuth high Sp Cmd OUT
22 El HSP Elevation high Sp Cmd OUT
23 DRV EN Az/El Drive Enable Cmd OUT
24 MAINT Maintenance (+) IN
25 MAINT Maintenance (-) IN
J21 Analog beacon level input
Connector Type: D-Sub9 female
The ACU19V2 preferably is used together with the sat-nms LBRX beacon receiver. With the sat-
nms LBRX the ACU talks though UDP or TCP over IP, no additional cabling is required in this
case. At J21 the ACU19V2 provides an analog interface to third party beacon receivers.
pin signal description type
2 IN+ Analog In (0..10V) IN
3 IN- Analog In GND OUT
7 SHLD Shield
J6, J7 and J8 Polarisation and Az/ El Angle encoders
Connector Type: J7,J8 D-Sub25 male, J6 D-Sub9 male
The sat-nms ACU19V2 provides the possibility to connect two different types of angle encoders
at the azimuth and elevation axis: optical SSI encoders (S) and Resolvers (R). The polarisation
axis is always a Resolver (R) type
You have to decide at point of order which variant you want to have. The angle encoder type is
specified by an add-on to the name of the unit. The sequence is azimuth, elevation, polarisation
An example: ACU19V2-SSR contains SSI interfaces at azimuth and elevation axis and an resolver
interface at polarisation axis.
SSI encoder interface J7, J8
The SSI positional encoder may be powered from the ACU internal power supply. +24V is
provided as standard at the connector. To avoid ground loops, the cable shield should be
(C) 2022, SatService GmbH www.satnms.com ACU2-19V2-UM-2209 Page 11/99

connected either to pin xxx at the ACU or to the ground at the encoder housing, never at both
ends. The power supply outputs are internally fused. Be aware not to cause a short circuit. If this
happens, the unit has to be opened and the fuse has to be replaced. Do not open the unit by
yourself, you will loose warranty in that case.
pin signal description type
15 Clk+ SSI clock OUT
16 Clk- SSI clock OUT
17 SHLD Shield
21 Data+ SSI data IN
22 Data- SSI data IN
23 SHLD Shield
24 +24V encoder power supply
25 0V
Resolver interface J7, J8
The ACU resolver interface is designed for resolvers with an impedance of 100 Ohms or more
and transfer factor 0.5. The interface applies 4Veff / 2000Hz to the resolver drive coil. It expects
2Veff at the sine / cosine inputs at the maximum positions.
When connecting a resolver to the ACU, please consider the following:
Use a shielded, twisted pair cable.
Connect the cable shield either to the case of the DSub9 connector or to the ground at the
resolver housing. Never connect the shield at both ends, this will introduce a ground loop
and cause a significant degradation of the resolver's accuracy.
pin signal description type
1 SHLD Shield
2 REF drive signal to resolver OUT
3 COS- resolver COS IN
4 SIN- resolver SIN IN
5 COS resolver COS IN
6 SHLD Shield
(C) 2022, SatService GmbH www.satnms.com ACU2-19V2-UM-2209 Page 12/99

7 SHLD Shield
8 REF- drive signal to resolver OUT
9 SIN resolver SIN IN
J5 Resolv er interface (Option 4th Axis)
Connector Type: D-Sub9 female.
The ACU resolver interface is designed for resolvers with an impedance of 100 Ohms or more
and transfer factor 0.5. The interface applies 4Veff / 2000Hz to the resolver drive coil. It expects
2Veff at the sine / cosine inputs at the maximum positions.
When connecting a resolver to the ACU, please consider the following:
Use a shielded, twisted pair cable.
Connect the cable shield either to the case or pin 1,6,7 of the DSub9 connector or to the
ground at the resolver housing. Never connect the shield at both ends, this will introduce a
ground loop and cause a significant degradation of the resolver's accuracy.
pin signal description type
1 SHLD Shield
2 REF drive signal to resolver OUT
3 COS- resolver COS IN
4 SIN- resolver SIN IN
5 COS resolver COS IN
6 SHLD Shield
7 SHLD Shield
8 REF- drive signal to resolver OUT
9 SIN resolver SIN IN
Resolver interface J6
The ACU resolver interface is designed for resolvers with an impedance of 100 Ohms or more
and transfer factor 0.5. The interface applies 4Veff / 2000Hz to the resolver drive coil. It expects
2Veff at the sine / cosine inputs at the maximum positions.
(C) 2022, SatService GmbH www.satnms.com ACU2-19V2-UM-2209 Page 13/99

When connecting a resolver to the ACU, please consider the following:
Use a shielded, twisted pair cable.
Connect the cable shield either to the case or pin 1,6,7 of the DSub9 connector or to the
ground at the resolver housing. Never connect the shield at both ends, this will introduce a
ground loop and cause a significant degradation of the resolver's accuracy.
pin signal description type
1 SHLD Shield
2 REF drive signal to resolver OUT
3 COS- resolver COS IN
4 SIN- resolver SIN IN
5 COS resolver COS IN
6 SHLD Shield
7 SHLD Shield
8 REF- drive signal to resolver OUT
9 SIN resolver SIN IN
TB1 Alarm
Connector Type: D-Sub9 female
TB1 provides a dry contact Alarm Interface for ACU-Alarms and Tracking Alarms
pin signal description type
1 ACU_FLT_NC acu alarm (connected to 2 if OK) RELAY
2 ACU_FLT_C RELAY
3 ACU_FLT_NO (connected to 2 if there is a FAULT) RELAY
6 TRK_FLT_NC tracking alarm (connected to 7 if OK) RELAY
7 TRK_FLT_C RELAY
8 TRK_FLT_NO (connected to 7 if there is a FAULT) RELAY
TB1-2 Linear/ Circular Switch interface (Option CP/LP)
Connector Type: D-Sub9 female.
(C) 2022, SatService GmbH www.satnms.com ACU2-19V2-UM-2209 Page 14/99

The ACU Linear (LP)/ Circular(CP) Switch interface is designed to control the mode switching of
an antenna by providing a switch command via relay output and indication inputs via
optocouplers. The indication polarity (NC or NO) can be defined in the ACU setup.
When connecting a CP/LP Switch to the ACU, please consider the following:
The relay outputs are designed for 30VDC/ 2A maximum.
If the load for the output is inductive, please don't forget the free-wheeling circuit.
The optocoupler inputs are designed for 24V only, with an input current of about 10mA.
pin signal description type
1 CP Cmd COM CP Command Common IN
2 CP Cmd OUT CP Command Output OUT
3 LP Cmd COM LP Command Common IN
4 LP Cmd OUT LP Command Output OUT
5 n.c. not connected
6 CP Ind A CP Indicator Anode IN+
7 CP Ind K CP Indicator Cathode IN-
8 LP Ind A LP Indicator Anode IN+
9 LP Ind K LP Indicator Cathode IN-
J16, J17 RS422
Connector Type: D-Sub9 female
J16, J17 provides the interface to the external Handheld LCPD (or GD Satcom PMCU with
Display)
pin signal description type
1 RS422 GND RS422 GND OUT
6 RS422 Tx- RS422Tx- Angle Info OUT
19 RS422 Tx+ RS422Tx+ Angle Info OUT
20 SHLD Shield
J11 Digital Inputs
Connector Type: D-Sub25 male
The ACU provides digital auxiliary inputs for additional signal detection (e.g. Deice status, ..).
When connecting these Inputs to the ACU, please consider the following:
The optocoupler inputs are designed for 24V only, with an input current of about 10mA.
pin signal description type
(C) 2022, SatService GmbH www.satnms.com ACU2-19V2-UM-2209 Page 15/99

1 AUX 3 A Aux 3 Input Anode IN+
2 AUX 4 A Aux 4 Input Anode IN+
3 AUX 5 A Aux 5 Input Anode (only 4th Axis Option) IN+
4 AUX 6 A Aux 6 Input Anode (only 4th Axis Option) IN+
5 AUX 7 A Aux 7 Input Anode (only 4th Axis Option) IN+
6 AUX 8 A Aux 8 Input Anode (only 4th Axis Option) IN+
7 Az-Limit CW Az-Limit CW IN
8 Az-Limit Common Az-Limit Common OUT
9 Az-Limit CCW Az-Limit CCW INT
10 El-Limit UP El-Limit UP INT
11 El-Limit Common El-Limit Common OUT
12 El-Limit DWN El-Limit DWN IN
13 +24V Ext +24V Ext OUT
14 AUX 3 K Aux 3 Input Cathode IN-
15 AUX 4 K Aux 4 Input Cathode IN-
16 AUX 5..8 K Aux 5..8 Input Cathode (only 4th Axis Option) IN-
17 AUX 5..8 K Aux 5..8 Input Cathode (only 4th Axis Option) IN-
18 AUX 5..8 K Aux 5..8 Input Cathode (only 4th Axis Option) IN-
19 AUX 5..8 K Aux 5..8 Input Cathode (only 4th Axis Option) IN-
20 Pl-Limit CW IPl-Limit CW IN-
21 Pl-Limit Common Pl-Limit Common OUT
22 Pl-Limit CCW Pl-Limit CCW IN
23 Pl2-Limit CW Pl2-Limit CW IN
24 Pl2-Limit Common Pl2-Limit Common OUT
25 Pl2-Limit CCW Pl2-Limit CCW IN
J14 RS232
Connector Type: D-Sub9 female.
These RS232 interface is used to control the ACU from remote where the TCP/IP remote control
is not usable. The pin-out is configured as a standard RS232 , which work with a 1:1 Interface
cable to the PC. The baud rate can be configured in the ACU Setup. The other protocol settings
are: no parity,1 Stop bit.
pin signal description type
1 n.c. not connected
(C) 2022, SatService GmbH www.satnms.com ACU2-19V2-UM-2209 Page 16/99

2 TX ACU RS232 TX OUT
3 RX ACU RS232 RX IN
4 n.c. not connected
5 GND Signal Ground I/O
6..9 n.c. not connected
J9 LAN Connector
Connector Type: RJ45 mal
J9 is the Ethernet 10Base-T / RJ45 connector. Use a standard network cable to connect the sat-
nms ACU-RMU to an Ethernet hub. If you want to connect your computer and the ACU directly
without using a hub, you need a crossover cable for this with swapped RX/TX lines.
pin signal description type
1 TX+ default Ethernet cabling (10Base-T) OUT
2 TX- OUT
3 RX+ IN
4
5
6 RX- IN
7
8
J12 Mains input connector
Connector type: IEC male
The sat-nms ACU19V2 already contains all internal needed power supplies. Use any standard
cable type with IEC connector. As they are wide-range types it is possible to connect nearly all
worldwide available single phase mains. Please refer to chapter Specifications for more detailed
informations.
4.3 Start-up
This chapter describes how to install and start-up the sat-nms ACU19V2. It is a step-by-step
description without detailed description. If you need more detailed description for e.g. some
parameter settings, please refer to chapter 5 Operation , all of the parameters are described
here.
Before you start, please first read the Safety Instructions chapter. It contains some important
recommendations to prevent damage from the ACU.
Then, we strongly recommend to do a first setup of the ACU on a lab desk before installing it at
it's final location. This is mainly for the following reason:
(C) 2022, SatService GmbH www.satnms.com ACU2-19V2-UM-2209 Page 17/99

To setup the ACU's IP parameters, the PC used for configuring and the ACU must either be
connected to the same Ethernet hub or must be connected directly with a crossover cable. The
initialization program does not work through routers or intelligent network switches.
Hence, the typical sequence of tasks when putting an sat-nms ACU19V2 into operation is as
follows:
1. Read the chapter 2 Safety Instructions .
2. Set the ACU's 4.3.1 IP address .
3. 4.1 Mechanically mount the ACU19V2.
4. 4.2 Connect the ACU to the antenna (position encoders, motor driver interface). Finally
connect the mains power supply and the Ethernet network.
5. Start up the system and set the parameters as described below.
6. As last step enable the drive interface and start them up as described below.
4.3.1 Setting the IP Address
Before you can operate the sat-nms ACU19V2, you need to set the ACU's IP address. There is a
special configuration program on the documentation CD shipping with the ACU for this purpose.
We recommend to configure the ACU's TCP/IP settings before you install the sat-nms ACU19V2
at it's final place. To configure the ACU, the following equipment is required:
The sat-nms ACU19V2 itself.
Mains power at connector J12.
A Computer running a Microsoft Windows operating system equipped with CD-ROM drive
and Ethernet network card.
A CAT5 crossover network cable or an Ethernet hub and standard network cables to
connect the ACU and the computer.
The CD-ROM shipping with the sat-nms ACU19V2.
Setting the ACU's IP parameters now is easily done within a few minutes.
1. First install a network cable between the ACU and your computer. If you have a crossover
cable available, this is very easy: simply put the cable into the network connectors of
computer and ACU. Without a crossover cable, you need to connect both, the computer and
the ACU to the same network hub using two standard network cables. It is essential, that the
computer and the ACU are connected to the same network segment, the configuration
program is not able to find the ACU through routers or network switches.
2. Now power on your computer and connect the ACU19V2 to the Mains supply (J12).
3. Insert the CD-ROM into the computer's drive and inspect it's contents through the 'My
Computer' icon on your desktop. Double-click to the 'ChipTool.exe' program in the 'ChipTool'
directory.
4. When the ChipTool program is running, the program shows a list containing at least one
entry describing the actual network parameters of the sat-nms ACU19V2.
(C) 2022, SatService GmbH www.satnms.com ACU2-19V2-UM-2209 Page 18/99

5. The serial number of the core module shown in the first column of the list. If the list stays
empty, the ACU is not connected properly. If there are more entries in the list, the
configuration program has found other devices in this network segment which use the same
technology.
6. Now open with a right-click the sub-menu 'IP configuration' to open the IP configuration
window of the program. In this form the ACU's MAC address is shown on top, below you find
the fields to configure the new IP address and network mask. If the ACU later shall be
operated through a router, enter the address of the router on the gateway field, otherwise
leave this field blank. Be sure, that the 'DHCP' mark is unchecked, the other values have to
be set as shown on the picture. Finally click to the 'Yes' button to set the new parameters at
the ACU.
Now the IP configuration of the ACU is completed. You may finally want to test if the ACU is
reachable now. Start your web browser and type the ACU's IP address into the URL field of the
browser. The ACU should reply with it's main page, provided that the ACU and your computer are
configured for the same subnet.
4.3.2 Angle detectors
Connect the angle detectors to the sat-nms ACU19V2 as described in chapter 4.2.2 Pin
description .
1. Configure the desired type of detector on the setup-page.
2. Set the soft-limits to the expected values (at first it is ok if you do this approximately, later on
(C) 2022, SatService GmbH www.satnms.com ACU2-19V2-UM-2209 Page 19/99
Table of contents
Other Calian Controllers manuals
Popular Controllers manuals by other brands

Sunricher
Sunricher SR-ZV9002T3-CCT-US manual

PEELLE
PEELLE 266-EN INSTALLATION & INTERFACE GUIDE

AudioCodes
AudioCodes Mediant 4000 E-SBC Hardware installation manual

Rotac
Rotac 26R OVERHAUL INSTRUCTIONS

ARCA
ARCA ARCAPAQ 812-DWK Series Operating and maintenance manual

DEEP SEA ELECTRONICS
DEEP SEA ELECTRONICS DSE5560 operating manual