DX / LOCAL - Set reception sensitivity
TurntheVOLknobtoalignthereceptionsensitivitytonationalstations(DX)orregionalstations(LOCAL).
ADJ - Set the time
TurntheVOLknobtotherighttosettheminutesandtothelefttosetthehours.
Note: The device has an RDS-controlled clock. The clock sets itself automatically when the RDS function is enabled
and continues to run when the radio is switched off . If you do not receive any RDS signal, you can set the time of
day manually.
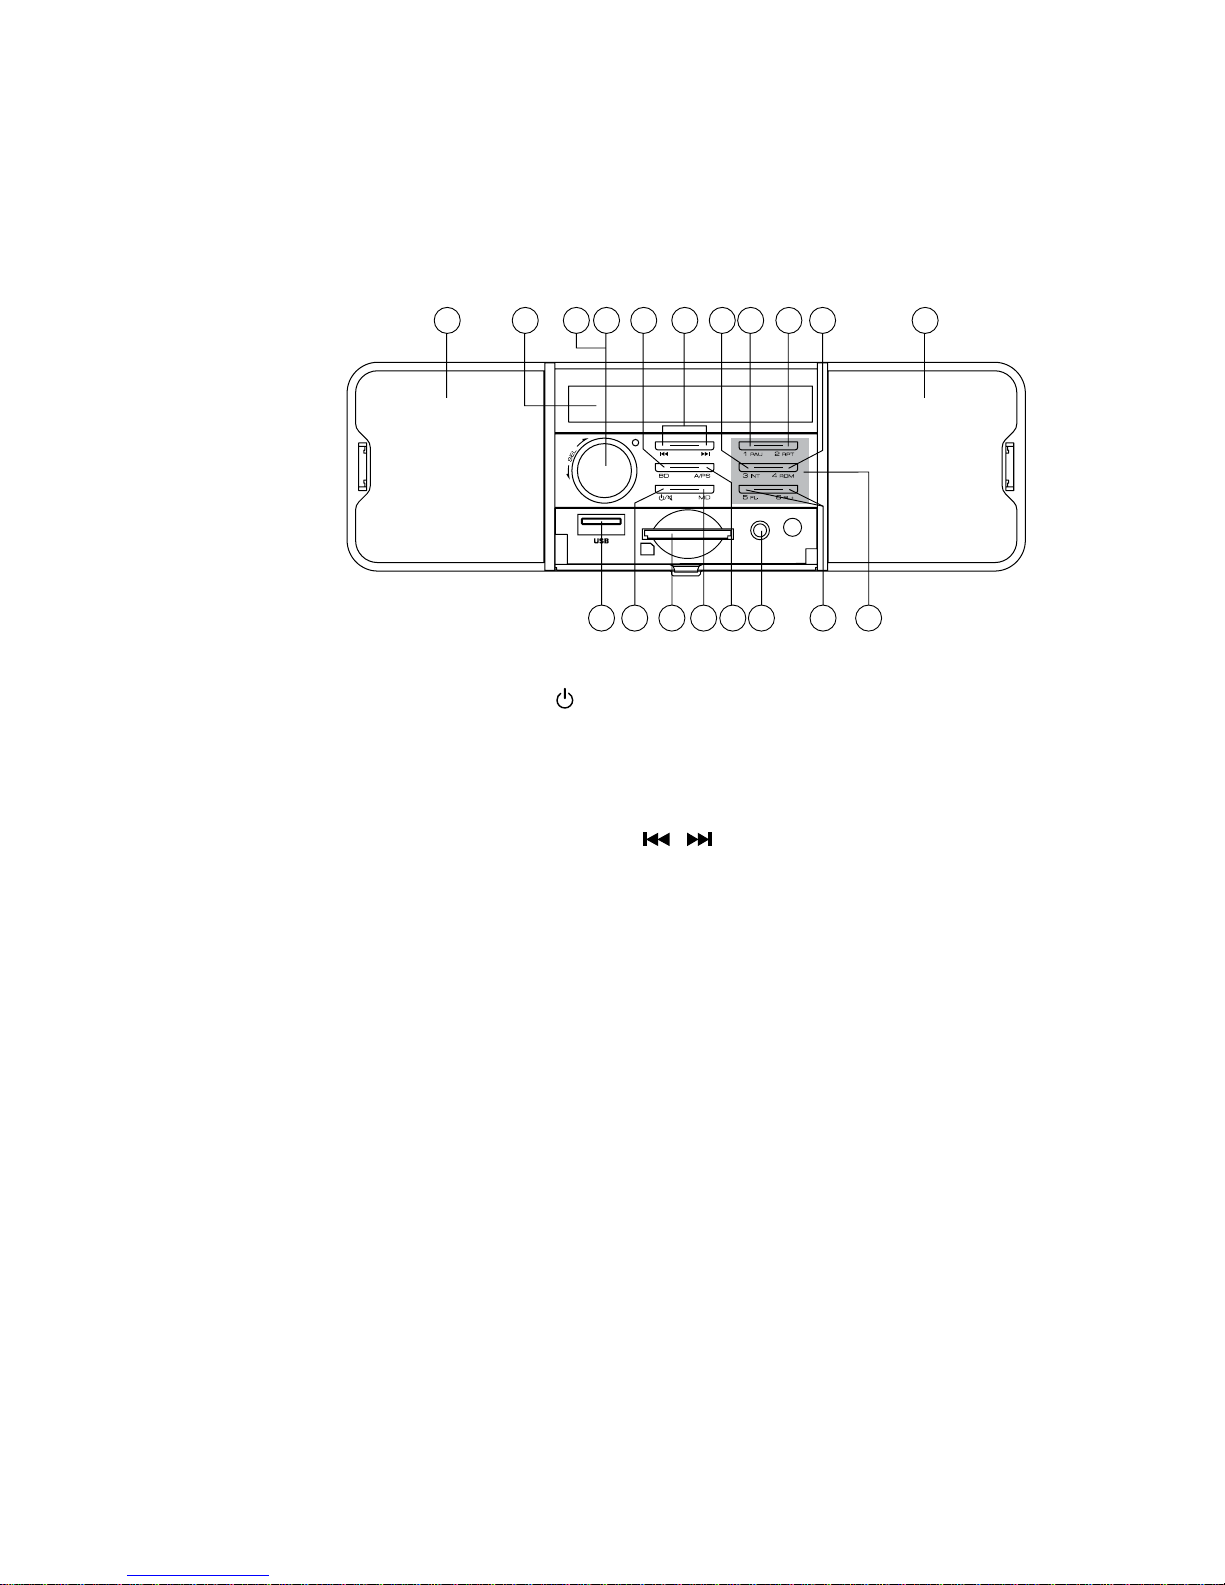
Radio functions
Selecting the station memory band
PresstheBDbuttontoswitchbetweenstationmemorybands(FM1,FM2,FM3).Eachstationmemorybandcovers
thesamefrequencyrangeandhas6memorylocations.
Automatic station search
Keepthe or buttonpressedtostartautomaticstationsearch.Thesearchstopswhenastationisfound.
Manual station selection
Pressthe or buttonbrieytochangethefrequencyuntiltherequiredfrequencyisset.
Storing radio stations
Keeponeofthe 1to 6buttonspressedforabout3secondstostorethestationcurrentlyselected.Theshowing
ofnumbers1to6onthedisplayindicatesasuccessfulstore.
Selecting stations stored
UseBDtoselectthestationmemoryband(FM1, FM2, FM3).Pressoneofthe 1to6buttonstoselectthestation
stored.
Automatic storing
Keepthe A/PS buttonpressedfor3seconds.Asearchstartsimmediatelyandstaysforabout5secondsateach
stationfound.Thestationindicatorand/orthestationfrequencyashesandthememoryslotisdisplayed.The
searchcontinuesautomaticallywhenweakstationsarefound.
Run through the stations stored
Pressthe A/PS buttonbriey.Allstationsareselectedbriey.Whenyouheartherequiredstation,pressthe A/
PS button.Thestationchosenremainsselected.
Programme type (PTY)
Youcanusethisfunctiontosearchforaparticulartypeofstation.Thefollowingsettingsareavailable:
POPM,ROCKM,NEWS,AFFAIRS,INFO,EASYM,LIGHTM,SPORT,EDUCATE,DRAMA,CLASSICS,OTHER
M,CULTURESCIENCE,VARIED,JAZZ,COUNTRY,WEATHER,FINANCE,CHILDREN,NATIONM,OLDIES,
SOCIAL,RELIGION,PHONEIN,FOLKM,TRAVEL,LEISURE,DOCUMENT
Note: Please note that this information is dependent on region, broadcasting corporation and station.
Setting the PTY ID
• KeeppressingtheMDbuttonuntilthePTYmessageisshownatthebottomofthedisplay.
• Thenpressoneofthe1to6buttonstoselecttherequiredPTYentry.
• Tochangebetweenthe“Musicalstyle”and“Vocalstyle”PTYentries,presstheMDbuttonagainwhentherst
PTYentryisdisplayed.
Buttons 1to6areassignedasfollows:
Musical genre
1 Pop M, Rock M 2 Easy M, Light M 3 Classics, Other M
4 Jazz, Country 5 Nation M, Oldies 6 Folk M
Vocal style
1 News, Affairs, Info 2 Sport, Educate, Drama 3 Culture, Science, Varied
4 Weather, Finance, Children 5 Social, Religion, Phone IN 6 Travel, Leisure, Document
If there is no further input for 2 seconds, an automatic search for stations matching the PTY entry starts. The search
stops when the first station is found.