corresponding receiver receives the information and prompts vibration/buzzer/light for 15 times, 5
sec later, it prompts vibration/buzzer/light 3 times, 5 sec later again and 5 sec later again, in total 3
times additional to avoid ignoring it. After that only the 3 LED indicators flicker.
When there is a calling...
Press the “Power/Reset” button or plug back to charging slot to reset charging/standby status.
5. The client gives back the receiver to service people, the service people put the receiver to charging
slot and provide service.
Note:
1) In daily working, the receiver can be powered on all the time. If long time not use, power off the
receiver please.
2) For a long time the receiver is not used, charge it for a while before giving to the client.
3) The receiver must be paired to the keypad before using. About how to do pairing, please refer to
the pairing method below.
Vibration/buzzer
15 times
5s
Vibration/buzzer
3 times
5s
Vibration/buzzer
3 times
5s
Vibration/buzzer
3 times
3 LED indicators
flicker
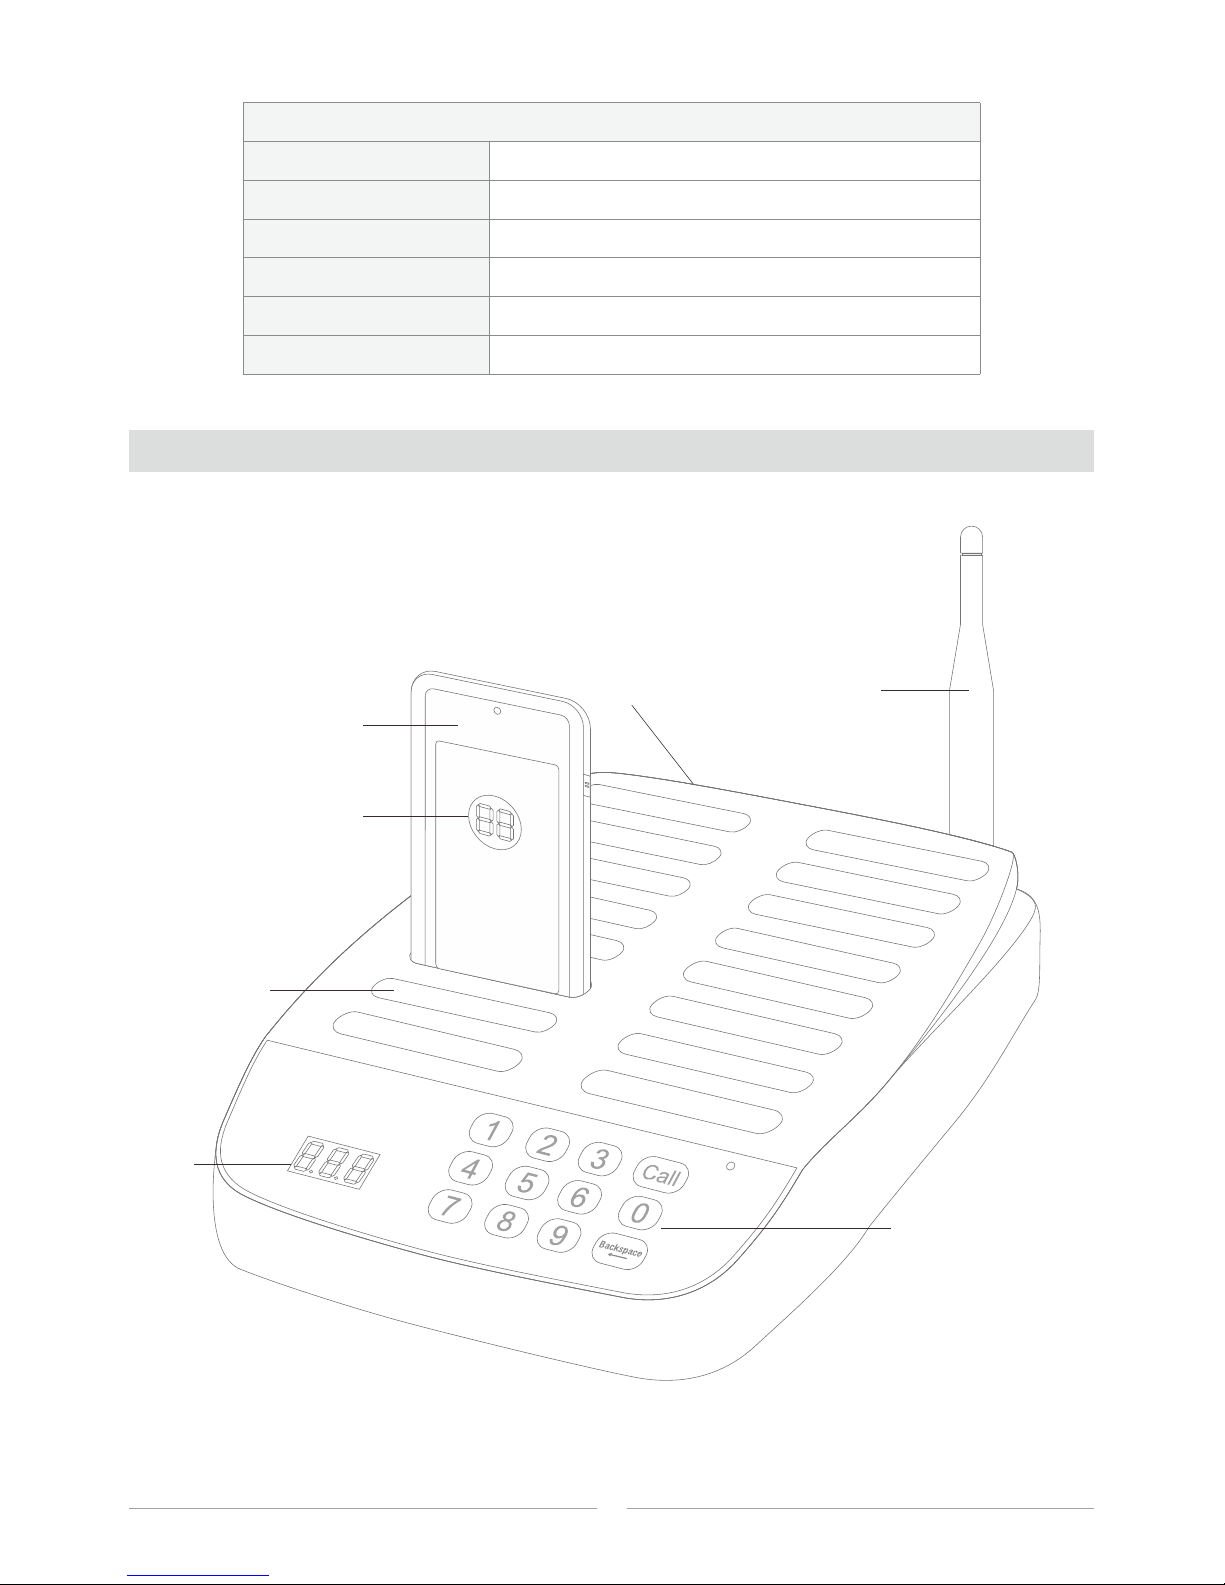
Pairing method
1. Paring – Press and hold on the “Pairing” button for 3 sec, the LED1 indicator will be on, then press
the call number on the keypad. The receiver receives the signal and vibrates 3 times. The pairing is
successful.
2. Deleting – Press and hold on the “Pairing” button for 5 sec, the LED1 indicator will be ON-OFF,
release the button, then all the paired call buttons are deleted.
Change number paper
Take out the transparent plexiglass cover in the front of the receiver, then put a number paper inside
the paper slot. And then put back the cover.
Note: While do the pairing operation, take out the cover and paper firstly.
4