CallingSYS ZJ-41E User manual

WATCH WIRELESS
CALLING RECEIVER
USER MANUAL

I Preface ----------------------------------------------------------------------1
II Feature ---------------------------------------------------------------------1
III Technical data ------------------------------------------------------------2
IV Diagram -------------------------------------------------------------------2
V Using method -------------------------------------------------------------3
VI Settings --------------------------------------------------------------------3
1. Pair & Delete ----------------------------------------------------------5
2. Working Mode --------------------------------------------------------6
3. Cycle Time -------------------------------------------------------------7
4. Auto clear Time -------------------------------------------------------7
5. Timeout Alert ----------------------------------------------------------7
6. Call button mode -----------------------------------------------------8
7. Display Order ---------------------------------------------------------8
8. Display Mode ---------------------------------------------------------8
9. Date & Clock ----------------------------------------------------------8
10. Language -------------------------------------------------------------9
11. Prompt Mode --------------------------------------------------------9
12. Default Set -----------------------------------------------------------9
VII Other functions ---------------------------------------------------------9
VIII FAQ ---------------------------------------------------------------------10
IX Pack List -----------------------------------------------------------------10
Content

User manual of
watch wireless calling receiver
I Preface
The product concentrates the technology of wireless transportation,
digital identify, dot matrix LCD display and microprocessor together to
realize the functions of time display and wireless calling. The receiver
adopts the chipset that contains millions of learning codes, makes the
products very safe and stable performance, as well as avoiding wrong
calling and incorrect display.
The product uses removable rechargeable battery with long standby
time and safe charging circuit.
The fashionable watch design makes it widely used in restaurants,
bars, cafes, hospitals, hotels, and factories and so on.
II Feature
Dot matrix LCD screen
Fashionable watch design
Accurate time display
RF wireless technology
Vibration/Buzzer prompt
Low-power indication
Built-in removable rechargeable battery
Used for restaurant, café, hotel, hospital, bank, factory...
1

III Technical Data
1) Working voltage: DC3.7V rechargeable Li-ion battery
2) Working frequency: 433.92MHz
3) Working current: 57mA±10mA (buzzer mode)
95mA±10mA (vibration mode)
4) Standby current: <8mA
5) Power-off current: 180±5μA
6) Receiving sensitivity: -108dBm
7) Decoding: learning code
8) Modulation: AM
IV Diagram
1. Diagram of function
(Up)
(Down)
(Set/OK)
(Pow/Back)
Power capacity
Power in Date&Time
Prompt mode
LED Indicator
2
Battery cover
(back side)

Press the button 2 sec to enter settings;
In pairing status, press the button 2 sec to change the cursor
position;
In pairing status, press the button to delete one paired call button.
Press the button 1~2 sec to power ON/OFF the receiver;
In standby status, press the button 2 sec to switch on/off the
receiver module;
in settings, press the button to back last class menu or quit settings;
In calling status, press the button to delete one calling record.
In pairing/deleting settings, press UP/DOWN to select the number
from 0 ~ 9, A ~ Z, :, -
in calling status, press the button to browse the calling records.
Note: in standby status, press any button 2s to wake up the screen.
2. Diagram of display
Note: for different software versions, the interface may be different.
3
16:20
0009
0008
0123
08call
order
satisf.
03
01
call times 16:15
16:14
16:13
01/05
15
16:20 01/05
Order 16:15 call time
call number
call function
call num.
call time
call function
clock call records call records
Single display mode
List display mode
clock

V Using method
1. Wear the watch receiver to the wrist, and put the call buttons in
suitable place.
2. Press "POW" button to power on.
3. Pair the call buttons with the watch receiver. (refer to below
instruction)
4. When need calling service, press the call buttons, the watch
receiver will receive the message, and display number on the
screen with vibrate or buzzer prompt.
If customer pressed wrong or no need just called service, press
“Cancel” button to cancel the calling service. The calling record
will be deleted from the calling records list on the screen.
Note: before calling service, the transmitter should be paired to the
receiver according its numbers.
VI Settings
Press the “Pow” button 1 sec to power on the watch receiver, then
the LCD screen will be on and display the date and time and other
information. In standby status, press “SET” button 2 sec to enter
4

settings. The main settings are:
1. Pair & Delete
1) Pairing call button
Select the “Pair & Delete” then press “SET” button to enter the
pairing or deleting settings. The screen shows 0000 as below:
In the middle of the screen, there are 4 characters position. Press
“SET” button 2 sec to change the cursor among the 4 characters.
Each character value can be “0, 1, 2, 3, 4, 5, 6, 7, 8, 9, A, B, C, D,
E, F, G, H, I, J, K, L, M, N, O, P, Q, R, S, T, U, V, W, X, Y, Z, :, -”.
5
Settings
Prompt Mode
Cycle Time
1/12
Pair & Delete
Autoclear Time
Timeout Alert
Working Mode
Button Mode
Settings
Display Mode
Date & Clock
Display Order
Language
Default Set
10/12
Pair & Delete
Not paired
0000
Pair & Delete
Paired
0001

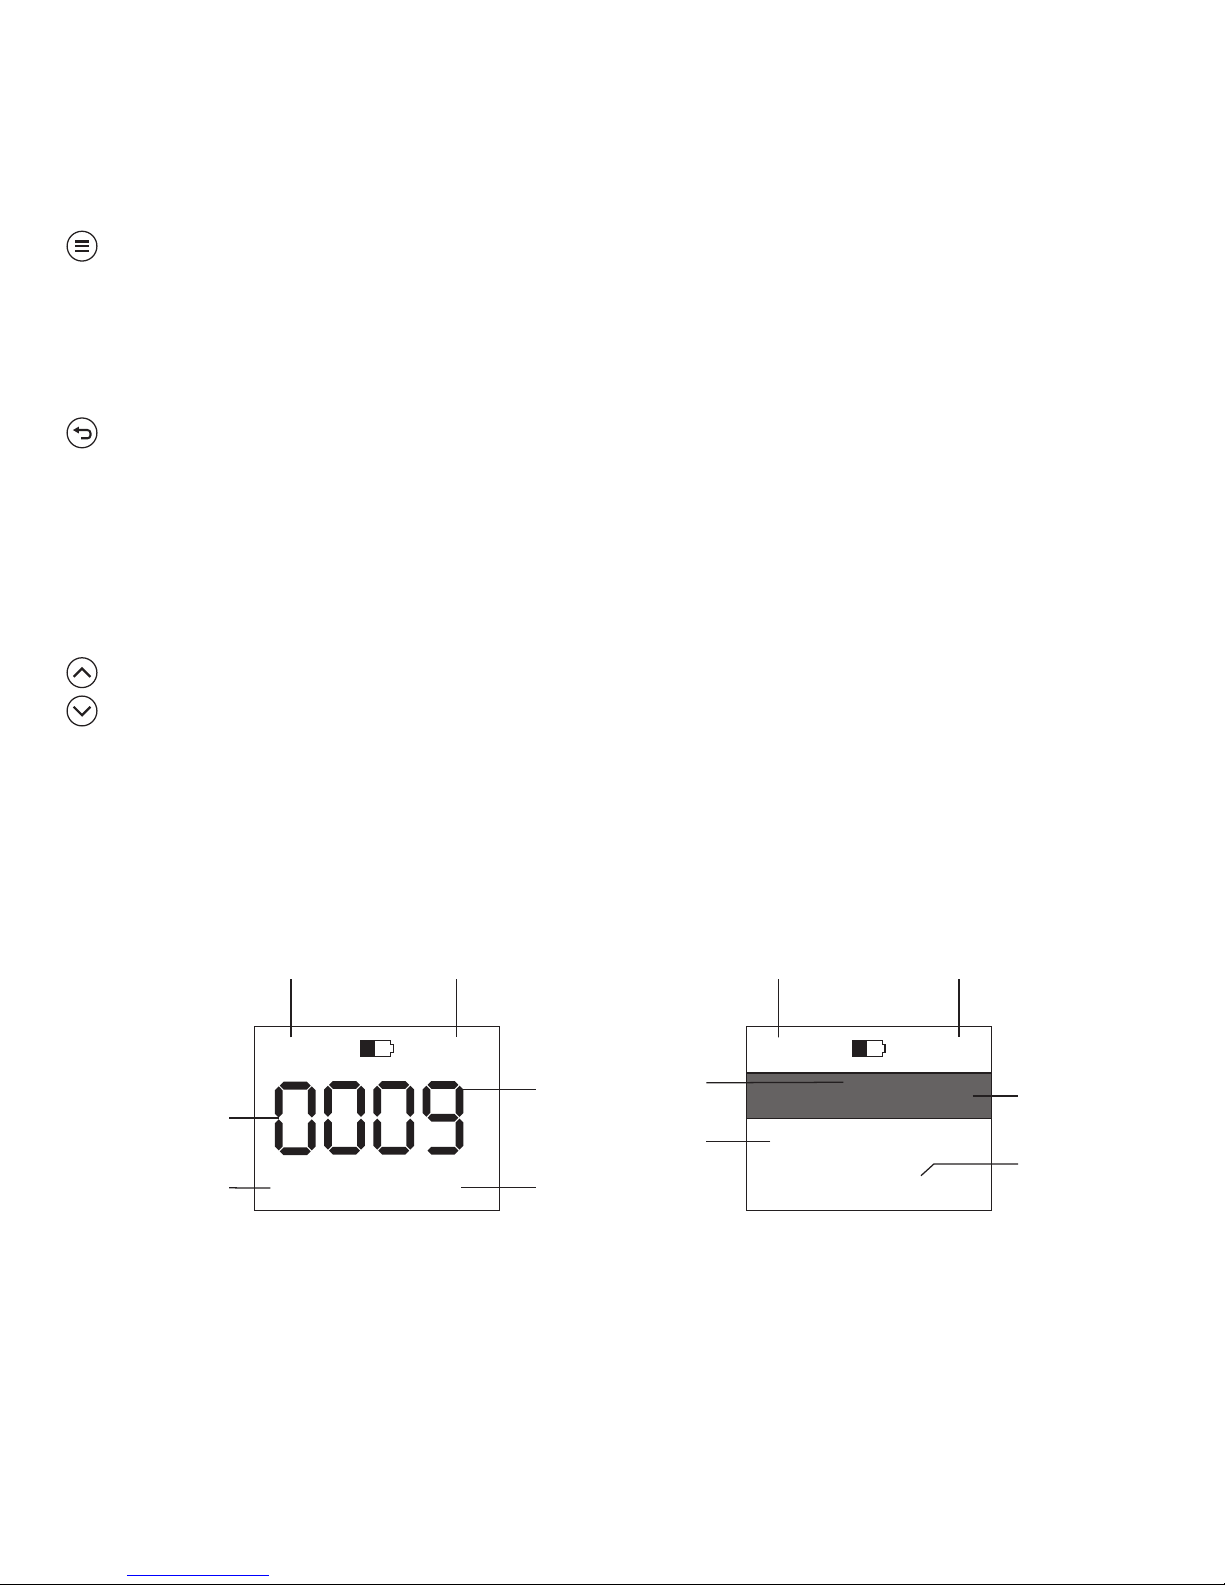
Pres s“UP/DOWN” to adjust the value.
So finally the call button can be a digital number or a word or the
combination of them, for example, “0010", “8673", “ROOM”,
“HELP”, “BED7”, “10-1”, “A-88”, “86:1” and so on...
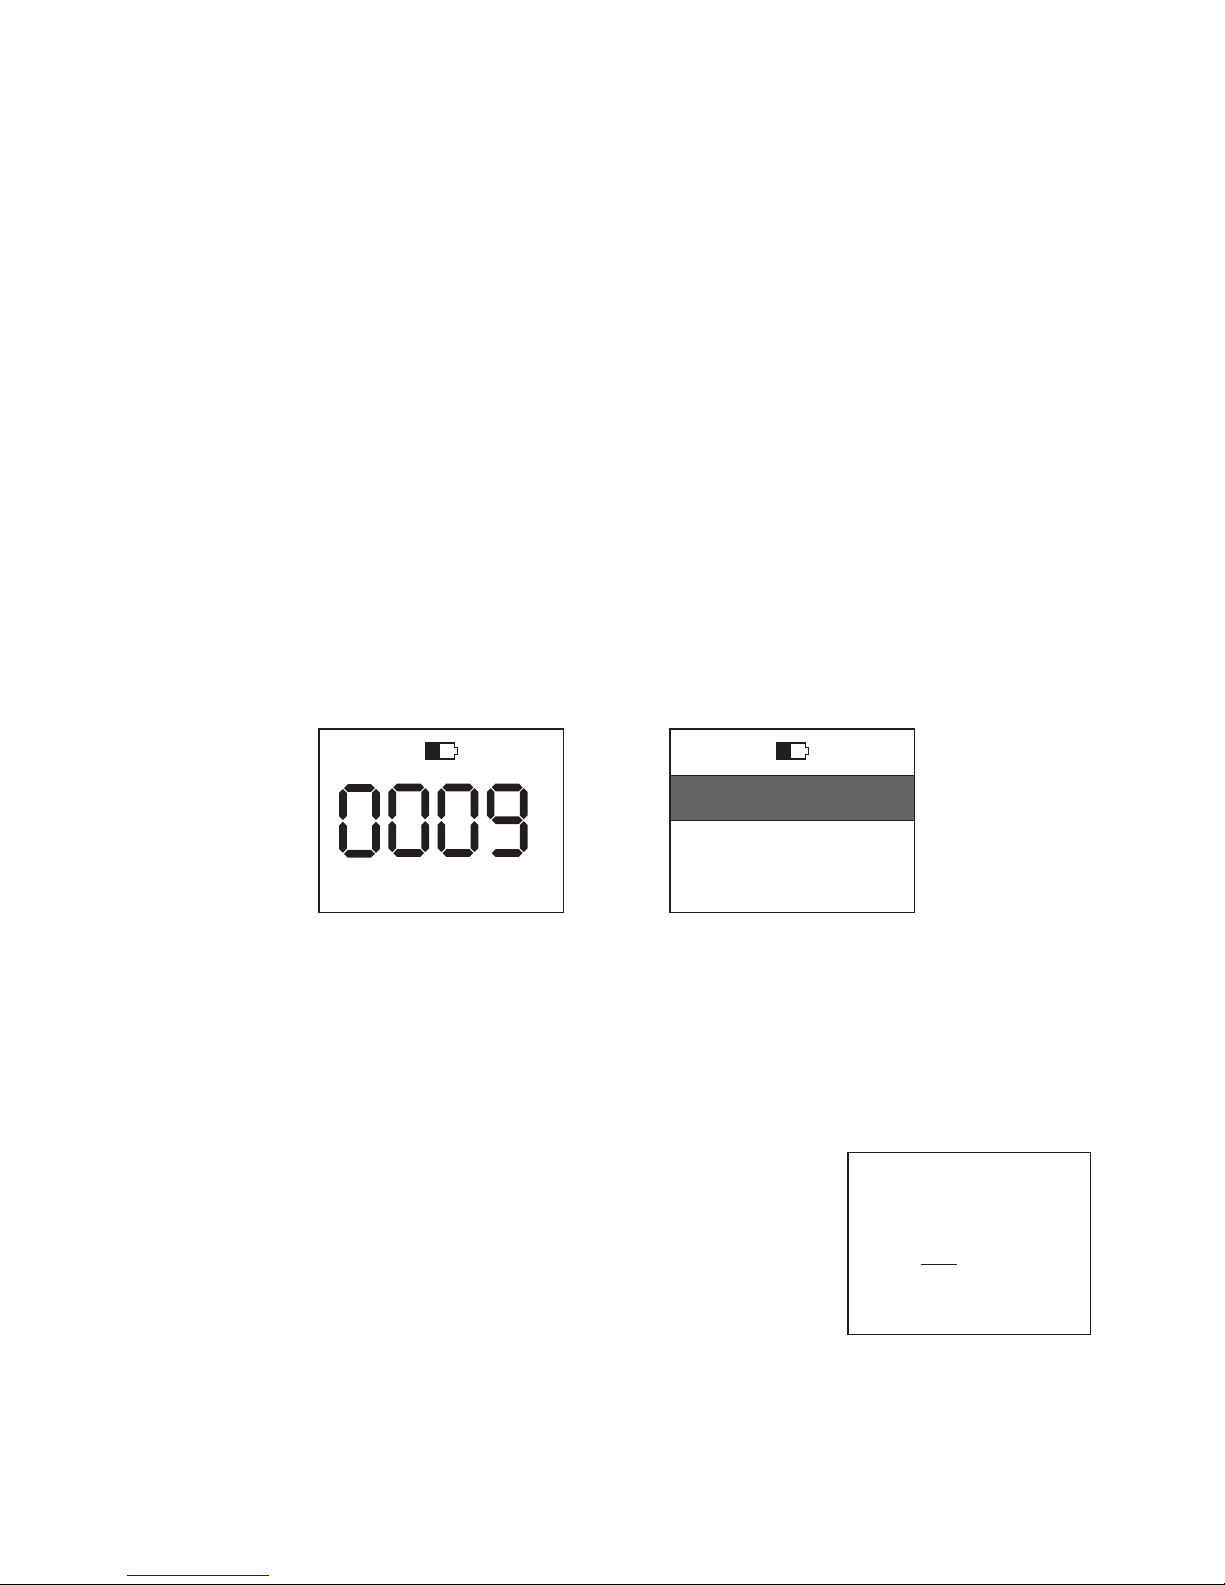
If the number selected is empty, the status shows “Not paired”, then
press any button on the wireless calling button (transmitter), the
watch will receive the wireless signal and record it on this number,
the status will turn to “Paired” and jumps to next number
automatically.
Note: Each number can be only paired one call button. If press the
call button which has been paired, it will jump to the paired number.
2) Deleting call buttons
In the pairing status, select the number which want to delete. The
status shows “Paired”, then press the “SET” button, it will delete the
paired call button and turn to “Not paired”.
If want to delete all the paired call buttons, go to “Default set”
setting to restore factory default setting, all the paired call buttons
can be deleted at one time.
Note: The pair & delete setting is operated by administrator only.
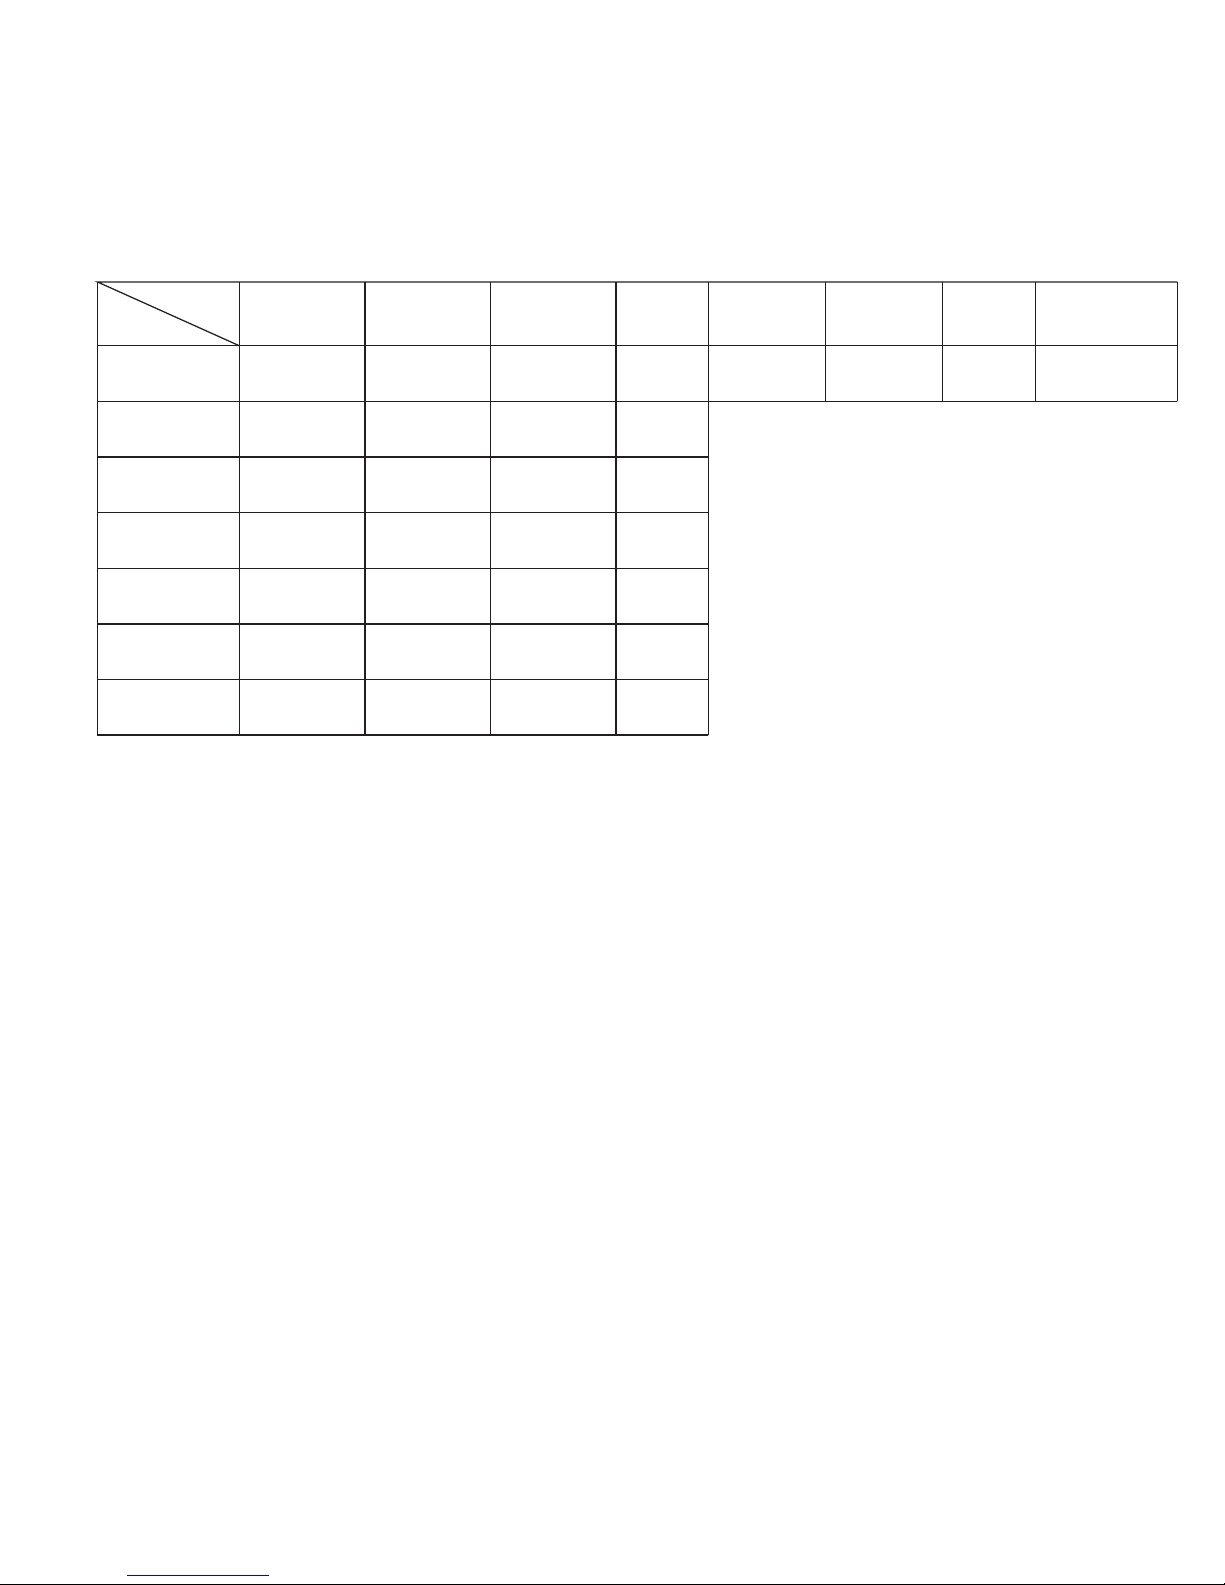
2. Working Mode
Each call button has only one ID (i.e. call number), but the call
button may have one or several buttons on it. Each button has its
meaning, like “Order”, “Call”, “Pay”, “Cancel” (restaurant mode) etc.
In different working occasions, the meanings are different.
There are 7 working modes and the corresponding meanings are:
6

3. Cycle Time
When there are 4 or more calling records, they can cyclically
display on the screen automatically. The cyclical time is from 1 to
180s. Press “UP/DOWN” to adjust the value.
Note: the default time is 0, that means no start cyclical function.
4. Auto clear Time
The calling record can be cleared automatically from the calling list,
the time is from 1 to 240s. Press “UP/DOWN” to adjust the value.
Note: the default time is 0, that means no start auto clear function.
5. Timeout Alert
If set the timeout alert, when the calling service is not dealt in the
time, the watch will alert to prompt. The time is from 1 to 180s.
Note: the default time is 0, that means no start timeout alert function
General
Restaurant
Hospital
Help
Factory
Parking
Bank
Mode
Data
Order Call Pay
CallCallCall
Medicine
Call
Emergency
Stop Come Go
Material Call Support
Park Car Help
D0 D1 D2 D3 D0+D1 D0+D2 ...
D0+D1+D2+D3
A B CxD E ... N
x
x
x
x
x
x
Call button pin data definition table
x: cancel function
7

6. Call Button Mode
4-button mode is used for 1/2/3/4/6-button call buttons, the data D3
is the cancel function. 2-button mode is compatible for the old call
buttons, the data D1 is the cancel function.
7. Display Order
The calling records display has 2 sequences:
1) Ascend – the latest calling record is shown in the below.
2) Descend – the latest is calling record shown on the top.
Note: the default is descend order.
8. Display Mode
The calling records display has 2 modes.
1) Single – on each page, there is only display one record, press
“UP/DOWN” button to browse others.
2) List – all the calling records display in the list, each page displays
3 records. press “UP/DOWN” button to page up/down.
9. Date & Clock
Press the “SET” button to change the cursor
position, then press “UP/DOWN” button to
adjust the value.
16:20
0009
0008
0123
08call
order
satisf.
03
01
16:15
16:14
16:13
01/05
15
16:20 01/05
Order 16:15
Single display mode
List display mode
20:08 Friday
Date & Clock
2014-06-20
8

10. Language
The watch receiver supports multiple languages, select and press
“BACK” button to quit.
11. Prompt mode
There are 3 prompt modes when there is calling coming.
1) Vibration
2) Buzzer
3) Vibration & Buzzer
Press “UP/DOWN” button to adjust the value.
12. Default set
In this setting, press “UP/DOWN” button to select restore option,
and then press “BACK” button to standby status, the receiver will
restore to factory default settings. There are 3 options:
1) No – Nothing restored.
2) Part restore – only system settings are restored to factory default
except the pairing information.
3) All restore – all settings will be restored to factory default.
Note: when you move the cursor to the restore option and back to
standby status, the restore operation will take effect, please do this
operation carefully.
VII Other Functions
1) Receiver ON/OFF
When the watch receiver is not in use, the receiver module can be
turned off to avoid receiving the calling message.
Press “POW” button 2s, there is receiver ON/OFF options. Select
and press “SET” button to turn off and back to standby status. On
9

the top of main interface, the signal icon shows X.
2) Low power indication and battery charging
When the power capacity icon is close to empty, please charge the
battery in time.
While connect to the power adapter, the red indicator in the below
of the screen will be on, when the charging is finished, the LED
indicator turns off.
Note: in first 3 times, suggest charging 8~12 hours; in normal use,
the charging time is about 4 hours.
VIII FAQ
IX Packing List
1) Watch receiver 1pc 3) USB cable 1pc
2) Power adapter 1pc 4) User manual 1pc
Some call button
has less distance
Battery of call button
is close to empty
The watch receiver
cannot be charged
Call buttons cannot
be paired
The frequency is not
same or OSC resistor
is correct.
Change the correct
frequency and OSC
resistor.
LCD has no display
Check the bat voltage;
Check the screen cable
Charge the battery;
Change the screen cable
Change the battery
of call buttons
Check power adapter;
The battery is broken
Change power adapter;
Change the battery
10
Table of contents
Other CallingSYS Watch manuals
Popular Watch manuals by other brands

V-tech
V-tech Kidizoom camera Connect user manual

Luminox
Luminox 7051 Specification sheet

V-tech
V-tech KidiZoom Smartwatch DX3 instruction manual

HERO
HERO Band III user manual

BOSSCO
BOSSCO Watches Care and maintenance, operating instructions warranty and service guide

Accusplit
Accusplit AX605 operating instructions