Calphalon 1859693 User manual

6 Qt. Stainless Steel
Pressure Cooker
USER GUIDE

Thank you for choosing a Calphalon®6 Qt. Stainless Steel Pressure Cooker,
designed to cook foods approximately 50 percent faster -- saving you energy
and time.
We know you are excited to begin using your pressure cooker; this User Guide is
provided to help you make the most of your new appliance. Use it to learn the steps
for operating your pressure cooker, including the unique one-button locking lid that
attaches to the base without any aligning or threading.
Be sure to carefully review this guide before using your pressure cooker and keep
it handy for future reference should you have any questions about your pressure
cooker’s operation.
TABLE OF CONTENTS
Safety Instructions ..........................................................................................................page 2
Getting to Know Your 6 Qt. Stainless Steel Pressure Cooker.......................page 4
Parts and Features
Operating Your 6 Qt. Stainless Steel Pressure Cooker ...................................page 5
Before First Use
Loading the Pressure Cooker
Operating the Controls
Releasing Pressure After Cooking
Tips for Successful Operation..................................................................................page 10
Adapting Traditional Recipes
Canning
Cooking Guide................................................................................................................page 12
Cleaning and Care ........................................................................................................page 15
Before Cleaning
Disassembling the Pressure Cooker
Cleaning the Pressure Cooker
Storage..............................................................................................................................page 15
Frequently Asked Questions ....................................................................................page 15
Warranty .........................................................................................................................page 17
Customer Service...........................................................................................................page 18
Recipes...............................................................................................................................page 19
NOTE: If you have additional questions or concerns, or wish to return product(s), please
contact Calphalon Customer Service at 1-800-809-7267. Please do not return this
product to the store.
1

SAFETY INSTRUCTIONS
The safety instructions appearing in this guide are not meant to cover all possible
situations that may occur. Caution must be exercised when installing, maintaining or
operating this product. Contact Calphalon Customer Service with any issues you do
not understand.
Recognize Safety Symbols, Words & Labels
Always read and obey the safety messages included in this guide. Look for the
following safety symbols, which will alert you to potential hazards:
WARNING – Hazards or unsafe practices which COULD result in severe
personal injury or death.
CAUTION – Hazards or unsafe practices which COULD result in minor
personal injury.
IMPORTANT SAFEGUARDS
When using your pressure cooker, basic safety precautions should always be
observed, including the following:
1.
READ ALL INSTRUCTIONS in this guide before attempting to operate
the pressure cooker.
2. Do not touch hot surfaces. Use handles or knobs.
3. Close supervision is necessary when the pressure cooker is used
near children.
4. Do not place the pressure cooker in a heated oven.
5. Extreme caution must be used when moving a pressure cooker
containing hot liquids.
6. Do not use pressure cooker for other than intended use.
7. This product cooks under pressure. Improper use may result in scalding
injury. Make certain unit is properly closed before operating. See
Loading the Pressure Cooker on page 5.
8. Do not fill the unit over 2/3full. When cooking foods that expand during
cooking such as rice or dried vegetables, do not fill the unit over ½ full.
Over filling may cause a risk of clogging the vent pipe and developing
excess pressure. See Loading the Pressure Cooker on page 5.
WARNING
CAUTION
2

9. Be aware that certain foods, such as applesauce, cranberries, pearl
barley, oatmeal or other cereals, split peas, noodles, macaroni,
rhubarb or spaghetti can foam, froth and sputter, and clog the pressure
release device (steam vent). These foods should not be cooked in a
pressure cooker.
10. Always check the pressure release devices for clogging before use.
11. Do not open the pressure cooker until the unit has cooled and all
internal pressure has been released. If the Open button is difficult to
push, this indicates that the cooker is still pressurized – do not force it
open. Any pressure in the cooker can be hazardous. See Releasing
Pressure after Cooking on page 8.
12. Do not use this pressure cooker for pressure frying with oil.
13. When the normal operating pressure is reached (between 8 and 15
psi), turn the heat down so all the liquid, which creates the steam, does
not evaporate.
14. Do not use (or not recommended for use) on an open fire (campfires),
barbeque grills or charcoal fires.
15. Always lift pressure cooker vessel securely with both loop handles.
Never attempt to lift pressure cooker with only the cover handle
.
If this pressure cooker malfunctions during use, immediately discontinue
use and remove from heat. Do not use or attempt to repair the unit. Contact
Calphalon Customer Service at 1-800-809-PANS (7267) for
examination, repair or adjustment.
SAVE THESE INSTRUCTIONS
FOR FUTURE REFERENCE.
3

7
GETTING TO KNOW YOUR
6 QT. STAINLESS STEEL PRESSURE COOKER
Quarts
5
4
3
2
1
M
a
x
i
m
u
m
-
2
/
3
M
i
n
i
m
u
m
-
1
/
3
4
Parts and Features
1. Stay-Cool Handles – Wrapped in silicone for comfort and safety and welded
to the base for durability
2. One Button Lock & Unlock – Easily opens (or securely locks) the lid in place
with one touch of a button
3. Pressure Indicator – Raises up when pressure builds inside the pressure
cooker, releasing a small amount of steam, to signal the beginning of the
cooking time
4. Pressure Valve – May be turned to select the desired pressure setting for
cooking or to release steam after cooking is complete
5. Safety Valve – This valve releases excess pressure if it builds up inside the
pressure cooker
6. Lid – The unique locking rim secures the lid in any position with no threading or
aligning needed
7. Gasket – This silicone ring provides an airtight seal between the lid and the base
8. Base – Features a beautiful and durable heavy duty stainless steel exterior with
an impact bonded base that is suitable for gas, electric, and induction cook tops
5
1
23 6
4
8

5
OPERATING YOUR 6 QT.
STAINLESS STEEL PRESSURE COOKER
Pressure cooking offers several advantages over traditional cooking methods. It
saves time (up to approximately 50 percent) and it tenderizes foods in the process.
Foods typically made using moist heat cooking methods, such as those simmered in
a slow cooker, adapt well to pressure cooking.
The Calphalon 6 Qt. Stainless Steel Pressure Cooker is designed for your safety
and convenience. Remember, the contents inside the base are under pressure, so
releasing the pressure before opening the lid is critical.
Thanks to the uniquely designed lid with its one button locking system and the easy-
to-use pressure regulating controls, operating a pressure cooker is easier than ever
before. Simply use the following steps as your guide.
Before the First Use
1. Place the pressure cooker on a dry, level, stable surface such as a countertop.
2. Remove all packing material.
3. Carefully wash the base in the dishwasher or in warm, sudsy water with a non-
abrasive sponge. Rinse and dry thoroughly.
4. Wash the lid and the silicone gasket in warm sudsy water. Ensure the lid is
“open” when cleaning to avoid water accumulation in the lid. Always remove
the gasket when hand washing the components of the pressure cooker lid.
Rinse and dry thoroughly.
5. Lightly coat the entire gasket with cooking oil, such as olive oil or vegetable
oil, after every time you wash the pressure cooker. This extends the life of the
gasket and also helps seal the gasket between the lid and the base.
Loading the Pressure Cooker
Step 1: PREPARE THE INGREDIENTS
In general, for even cooking results, cut quicker-cooking ingredients into larger
pieces and slower-cooking ingredients into smaller pieces. Use the following tips for
specific types of ingredients.
Dried Beans/Legumes
•Rinse dried beans or legumes (except dried split lentils) with warm water and
remove any foreign particles.
•Soak the beans in four times their volume of warm water for at least four hours
or overnight.
•Remove any floating beans and shells from the water.
•Drain the water from the beans.

Fruits
•Wash and core fresh fruit. If desired, peel and cut into pieces.
•If using dried fruit, add 1 cup of water or fruit juice for each cup of dried fruit.
•Add seasonings and/or sugar.
Grains
•Rinse whole grains with warm water and remove any foreign particles.
•Soak the grains (except rice) in four times their volume of warm water for at least
four hours or overnight.
•Remove any floating grains and shells from the water.
•Drain the water.
•Rinse the grains with warm water.
Meats/Poultry
•Trim away visible fat.
•Cut meat/poultry into pieces that will fit into the pressure cooker base without
touching the sides of the pan.
•Brown the meat/poultry in a couple tablespoons of vegetable oil in the base
(without the lid) on the stovetop. Cook in batches, if needed, to brown the
meat/poultry evenly and quickly.
Seafood/Fish
•Clean the fish and remove any visible bone.
•Rinse shellfish under cold water and scrub.
•Place clams and mussels in a combination of cold water and the juice of one
lemon. Soak about one hour to remove any sand.
Vegetables
•Wash fresh vegetables.
•Peel root vegetables, such as potatoes and carrots, and pierce any large pieces
several times with a fork.
•When using frozen vegetables, extend the cooking time by 1 to 2 minutes.
Step 2: PLACE FOOD IN BASE
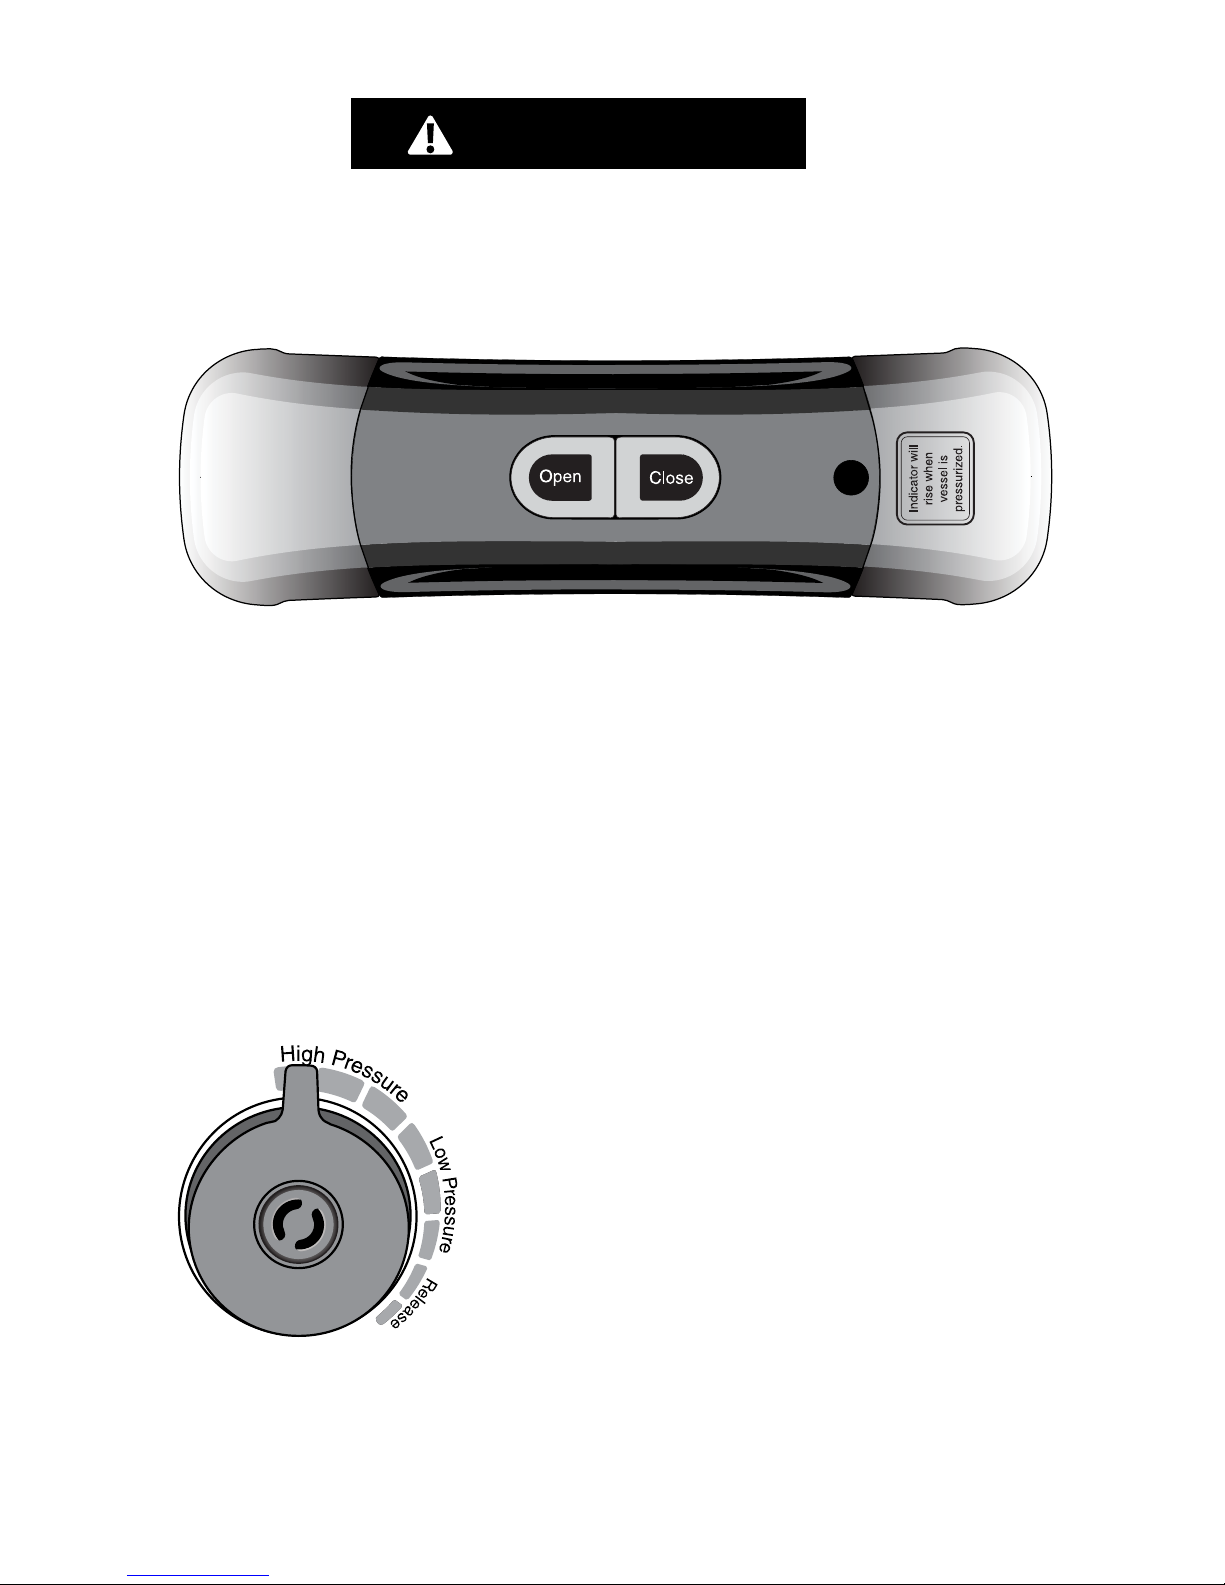
• Fill the pressure cooker base no more than 2/3full. The maximum fill line in the
pressure cooker should never be exceeded.
• When cooking foods that expand during cooking such as rice or dried
vegetables, or when making soups or stocks, do not fill over ½ full.
• The pressure cooker does not work well for foods that foam or froth while
cooking. Do not use the pressure cooker to cook foods such as pasta,
applesauce, cranberries, pearl barley, oatmeal or other cereals, split peas,
noodles, macaroni, rhubarb or spaghetti.
Step 3: ADD LIQUID
•Follow your recipe regarding how much liquid to add. NEVER use less than
½ cup liquid.
•If the approximate cooking time is more than 10 minutes, use 2 cups of liquid.
6

7
Over filling the pressure cooker base may cause a risk of clogging the vent pipe
and developing excess pressure. Excess steam may cause burns if the pressure
cooker is overfilled.
Step 4: SECURE THE LID ON THE BASE.
Make sure the silicone gasket is positioned around the underside of the lid. Center
the lid on the base and press the One Button Lock to attach the two pieces together.
(Note: The lid does not need to thread into place or be positioned using a certain
orientation to attach securely.)
Never use the pressure cooker without the gasket in place. If the gasket is worn
or damaged and does not create a proper seal between the lid and the base,
replace it. Contact Calphalon Customer Service at 1-800-809-7267 or
visit www.calphalon.com to purchase a replacement gasket.
WARNING
Operating the Controls
Step 1: SELECT THE PRESSURE LEVEL
Turn the Pressure Valve to the desired setting. Refer
to the Cooking Guide on pages 12-14 for
suggested settings.
Choose from the following options:
High Pressure – 2 to 15 psi*
Low Pressure – 1 to 8 psi
Release – to release steam from
the pressure cooker
* Pounds of pressure per square inch
Step 2: HEAT THE PRESSURE COOKER ON THE COOK TOP
Center the pressure cooker on a gas, electric (coil or ceramic) or induction cook
top element. Choose a cooking surface that matches the diameter of the pressure

8
WARNING
cooker base or is slightly smaller. Avoid sliding the pressure cooker on glass-top
ceramic surfaces.
Heat the pressure cooker on medium-high heat until the Pressure Indicator pops up
and begins to release a small amount of steam.
Step 3: ONCE STEAMING BEGINS, REDUCE HEAT TO SIMMER
When the pressure cooker warms up, the contents inside will
begin to boil and generate steam. The Pressure Indicator will
pop up and release steam. When this occurs, reduce the heat
to medium low to maintain a steady level of pressure.
Note: A hissing sound during cooking is completely normal, and
not an indication of a malfunction with the pressure cooker.
If the temperature drops too much and the pressure indicator
drops back down, increase the heat slightly to maintain a
steady simmer.
If at any time during the cooking process an excessive amount of steam is being
released, adjust the heat under the pressure cooker by turning it down to maintain a
steady, gentle release of steam. Also, do not shake the pressure cooker at any time,
as this may cause a drop in pressure.
Once the Pressure Indicator activates (by popping up), this indicates there is
pressure built up inside the pressure cooker. The lid may not be opened at this time.
Removing the lid may result in burns and serious injury.
Electric cook top users: Electric cook top elements hold their heat more than
gas or induction during this process, making it take longer to reduce from high heat
to a simmer.
So, use medium heat (instead of high) for warming the pressure cooker contents to
the point of steaming. Continue, as directed, by reducing to a lower temperature
that maintains a steady level of steam.
Step 4: START COOKING TIME
Once the Pressure Indicator pops up and steam is releasing in a steady stream,
begin the cooking time. Refer to the Cooking Guide on pages 12-14 for
suggested cooking times.
Releasing Pressure after Cooking
Refer to your recipe (or the Cooking Guide on pages 12-14) for the
recommended release method. There are three basic methods:

9
Method 1 – NATURAL RELEASE:
Carefully remove the pressure cooker from the hot cook top and allow it to cool
naturally. Depending on the volume of food and liquid in the pressure cooker, this
takes approximately 10 to 15 minutes.
Once the pressure is released, the Pressure Indicator is down, and the Pressure
Valve is no longer emitting steam, the lid is ready to be removed.
Press the One Button Unlock to release the lid from the base. Lift the lid, being
careful to direct any residual heat and steam away from your face.
Method 2 – QUICK RELEASE:
To automatically release pressure from the pressure cooker, turn the Pressure Valve
slowly and incrementally to the release position. Steam will loudly escape from the
pressure cooker through the valve, so be careful to keep your hands away from the
top of the valve, or use an oven mitt for protection.
Once the steam is completely released, the Pressure Indicator is down, and the
Pressure Valve is no longer emitting steam, the lid is ready to be removed.
Press the One Button Unlock to release the lid from the base. Lift the lid being
careful to direct any residual heat and steam away from your face.
Some residual heat and steam may be released when opening the pressure cooker.
Prevent potential burns by protecting your hands with oven mitts and using the lid as
a shield to direct the steam away from your face and hands. If the lid is adhering to
the base and won’t come off easily, it is a sign there may still be pressure built up
inside. Do not force it open. Allow more time for the unit to cool before attempting
to remove the lid.
CAUTION

10
TIPS FOR SUCCESSFUL OPERATION
Adapting Traditional Recipes
Traditional recipes using moist heat methods of cookery (such as braising, stewing
or slow cooking) are often easily adapted to pressure cooking.
In general, the Calphalon 6 Qt. Stainless Steel Pressure Cooker reduces traditional
cooking times by approximately 50 percent. As a starting point refer to the
Cooking Guide on pages 12-14. It provides a list of common ingredients and
their suggested cooking times.
Doubling or Tripling Recipes
When doubling or tripling a recipe for the pressure cooker, keep a couple of things
in mind. First, fill the pressure cooker NO MORE than 2/3full. When cooking foods
that expand during cooking, such as rice or dried vegetables, or when making
soups or stocks, DO NOT fill more than ½ full.
Secondly, cooking times for doubled or tripled recipes are the same as the original
recipe. However, the time it takes to heat the pressure cooker up (to the point of
steaming) and cool it down takes longer. Be sure to begin timing recipes once the
steaming begins.
Here are a few general pressure cooker tips:
• Cut ingredients into uniform pieces for even cooking.
• Consider cutting slower-cooking ingredients into smaller pieces and longer-
cooking ingredients into larger pieces.
• Brown ingredients before adding them to the pressure cooker, if desired, to
caramelize and add flavor. The pressure cooker is a moist heat cooking method,
so it does not tend to brown ingredients during the cooking process.
• When cooking delicate, tender ingredients (such as seafood, fresh fruits, and
vegetables) use the Quick Release Method for releasing the steam to
avoid overcooking.
• If foods are not tender enough at the end of the cooking time, you may simmer
ingredients in the base on the cook top with the lid removed. Cook until tender.
• When cooking dried beans and legumes, add a tablespoon of vegetable oil for
each cup of water to prevent any potential foaming.
• Beans and rice expand to approximately double in volume as they cook. So, if
you start with 1 cup of rice, the recipe will yield approximately two cups.
Pot Roast and Vegetables
• Look at the Cooking Guide on pages 12-14. Find the cooking time for the
meat you are preparing. Next, find the cooking time for your longest cooking
vegetable (such as potatoes). Subtract the cooking time for the vegetable from
the cooking time for the meat. This is your adjusted cooking time for the first stage
of cooking.

• Insert the meat and at least 2 cups cooking liquid in the pressure cooker, lock lid
in place, and cook for the adjusted cooking time. Use the Quick Release Method.
• Add the longer cooking vegetable(s), lock lid in place, and continue cooking
for the recommended time. Use the Quick Release Method and add any
quick cooking vegetables. Simmer, with the lid removed, on the stove top until
complete.
Meats
• Brown the meat in a couple of tablespoons of oil. Briefly remove the meat and
brown the aromatic vegetables (i.e., onion, celery, garlic) in the pan drippings, if
desired.
• Return the meat to the pan and add at least 2 cups of cooking liquid.
• Refer to the Cooking Guide on pages 12-14 for suggested cooking times
and settings.
Tomato Sauce
• Brown the aromatic vegetables (i.e., onion, garlic) in a couple of tablespoons of
oil. Add the pureed tomatoes.
• Fill the pressure cooker only ½ full. Lock lid in place.
• Cook for approximately 20 minutes on Low.
• Use the Natural Release method of releasing steam.
• Season, as desired.
Fruit Preserves
• Place the fruit pieces in the pressure cooker base along with the sugar.
• Set aside for one hour to release the natural juices of the fruit.
• Bring to a boil, uncovered. Stir in remaining ingredients.
• Lock lid in place and cook for 8 minutes on Low.
• Use the Natural Release method of releasing steam.
Canning
The Calphalon 6 Qt. Stainless Steel Pressure Cooker is primarily designed for meal
preparation rather than canning. The pressure cooker base accommodates up to 4
(½-quart) canning jars.
For complete pressure canning guidelines, contact the National Center for Home
Food Preservation at http://nchfp.uga.edu/.
Or, reference the “USDA Complete Guide to Home Canning” which is a spiral
bound book available for purchase via The Education Store, Purdue Extension,
700 Ahlers Road, West LaFayette, IN 47907, (765) 494-6794. The content is also
posted on-line at the web site listed above.
11

12
Cooking Guide
Food Pressure Approx. Type of
Level Cooking Time Steam Release
Dried Beans/Legumes*
Beans (black) High 8 to 10 minutes Natural release
Beans (colored) High 4 to 6 minutes Natural release
Beans (red) High 10 to 12 minutes Natural release
Beans (white) High 5 to 7 minutes Natural release
Chick peas High 10 to 12 minutes Natural release
Lentils (green) High 8 to 10 minutes Natural release
Lentils (red) High 7 to 9 minutes Natural release
Lentil soup High 8 to 10 minutes Natural release
* Beans are soaked before cooking.
Fresh/Dried Fruits
Apples (dried) High 3 minutes Quick release
Apples (slices or pieces) Low 2 to 3 minutes Quick release OR
Natural release (for
puree or conserve)
Apricots (dried) High 4 minutes Quick release
Apricots (fresh Low 2 to 3 minutes Quick release OR
whole/halves) Natural release (for
puree or conserve)
Peaches (dried) High 4 to 5 minutes Quick release
Peaches (fresh halves) Low 3 minutes Quick release OR
Natural release (for
puree or conserve)
Pears (dried) High 4 to 5 minutes Quick release
Pears (fresh halves) Low 3 to 4 minutes Quick release OR
Natural release (for
puree or conserve)
Prunes High 4 to 5 minutes Quick release
Raisins High 4 to 5 minutes Quick release
Grains
Rice (1 c. basmati plus High 5 to 7 minutes Natural release
1½ c. water)
Rice (1 c. brown plus High 15 to 20 minutes Natural release
1½ c. water)
Rice (1 c. long grain plus High 5 to 7 minutes Natural release
1½ c. water)
Rice (1 c. wild rice plus High 22 to 25 minutes Natural release
3 cups water)
Continued next page.

Cooking Guide - continued
Food Pressure Approx. Type of
Level Cooking Time Steam Release
Meats/Poultry
Beef (cured) High 50 to 60 minutes Natural release
Beef (2 lbs., dressed) Low 10 to 15 minutes Natural release
Beef/veal roast or brisket High 40 to 45 minutes Natural release
Beef/veal shanks High 25 to 30 minutes Natural release
(1½ in. wide)
Beef/veal (1½ lb., High 10 to 15 minutes Natural release
1 in. cubes)
Chicken (3 lb., pieces) High 10 minutes Natural release
Chicken (2 to 3 lb., High 12 to 18 minutes Natural release
whole)
Cornish game hens (2) High 10 to 12 minutes Natural release
Ham (pieces) High 20 to 25 minutes Natural release
Lamb (1½ lb., High 10 to 18 minutes Natural release
1 in. cubes)
Lamb (leg) High 35 to 40 minutes Natural release
Meatballs (1 to 2 lb.) Low 5 to 10 minutes Natural release
Pork (2 lb. smoked leg) High 20 to 25 minutes Natural release
Pork (3 lb. ribs) High 25 minutes Natural release
Pork (roast) High 40 to 45 minutes Natural release
Soup/Stock High 10 to 15 minutes Natural release
Seafood/Fish
Crab Low 2 to 3 minutes Quick release
Fish filet (1½ to 2 lb.) Low 2 to 3 minutes Quick release
Fish soup/stock High 5 to 6 minutes Quick release
Fish (whole, gutted) Low 5 to 6 minutes Quick release
Lobster (1½ to 2 lb.) Low 2 to 3 minutes Quick release
Mussels Low 2 to 3 minutes Quick release
Prawns/shrimp Low 1 to 2 minutes Quick release
Note: Cooking times will vary depending on the size and thickness of the food.
Adjust cooking times, as needed, to make sure foods are thoroughly cooked.
13

Vegetables
Acorn squash (half) High 7 minutes Quick release
Artichoke (large, High 9 to 11 minutes Quick release
no leaves)
Artichoke (medium, High 6 to 8 minutes Quick release
no leaves)
Asparagus spears High 1 to 2 minutes Quick release
Beets (¼ in. slices) High 4 minutes Quick release
Beets (small whole) High 12 minutes Quick release
Broccoli (florets) High 2 minutes Quick release
Broccoli (stalks) High 5 to 6 minutes Quick release
Brussels sprouts (whole) High 4 minutes Quick release
Cabbage (¼ in. slices) High 1 to 2 minutes Quick release
Cabbage (quartered) High 3 to 4 minutes Quick release
Carrots (¼ in. slices) High 1 minute Quick release
Carrots (1 in. slices) High 4 minutes Quick release
Cauliflower (florets) High 2 to 3 minutes Quick release
Collard High 5 minutes Quick release
Corn (kernels) High 1 minute Quick release
Corn (on the cob) High 3 minutes Quick release
Endive (coarsely cut) High 1 to 2 minutes Quick release
Fresh spinach High 2 minutes Quick release
Green beans (whole) High 2 to 3 minutes Quick release
Kale (coarsely cut) High 3 to 5 minutes Quick release
Okra (pods) High 2 to 3 minutes Quick release
Onion (medium) High 2 to 3 minutes Quick release
Peas (in pod) High 1 minute Quick release
Potatoes (1½ in. slices) High 6 minutes Quick release
Potatoes (small whole) High 5 minutes Quick release
Pumpkin (2 in. slices) High 3 to 4 minutes Quick release
Spinach (fresh) Low 2 minutes Quick release
Summer squash High 8 minutes Quick release
(1 in. slices)
Sweet potato High 5 minutes Quick release
(1½ in. slices)
Swiss chard (thick slices) High 2 minutes Quick release
Tomatoes (quartered) High 2 minutes Quick release
Turnip (1½ in. slices) High 3 minutes Quick release
Cooking Guide - continued
Food Pressure Approx. Type of
Level Cooking Time Steam Release
14

15
CLEANING AND CARE
Before Cleaning
• Cool the pressure cooker completely.
• Once the steam is completely released, the Pressure Indicator is down, and the
Pressure Valve is no longer emitting steam, the lid is ready to be removed.
Disassembling the Pressure Cooker
• Press the One Button Unlock to release the lid from the base. Lift the lid being
careful to direct any residual heat and steam away from your face.
• Storeordiscardtheremainingcontentsinthepressurecooker.
Cleaning the Pressure Cooker
• Carefully wash the base in the dishwasher OR in warm, sudsy water. Rinse and
dry thoroughly.
• Hand wash the lid and the silicone gasket in warm sudsy water. Always remove
the gasket when washing the components of the pressure cooker lid. Rinse and
dry thoroughly.
• Lightly coat the entire gasket with cooking oil, such as olive oil or vegetable oil,
after every time you wash the pressure cooker. This extends the life of the gasket
and also helps seal the gasket between the lid and the base.
• To maintain the look of the stainless steel, and remove cooked-on grease, we
recommend using Bar Keeper’s Friend with a non-abrasive sponge or cloth.
STORAGE
• Make sure the pressure cooker is clean and dry.
• Invert the lid and place it upside down on top of the base for storage.
• Storing the pressure cooker sealed with the gasket in place could cause odors.
FREQUENTLY ASKED QUESTIONS
1. My pressure cooker is not emitting any steam; what am I doing
wrong? Check to make sure you have added enough liquid to the pressure
cooker. Use a minimum of ½ cup liquid. If the cooking time is more than
10 minutes, use at least 2 cups liquid. Liquid is needed to form the steam for
cooking. Also, ensure the lid is locked, and that the pressure level is set on the
pressure valve.
Also, verify that the size of the cook top element matches the diameter of your
base. If the element is several inches smaller, choose a larger element that
better suits your pressure cooker. Finally, make sure your cooking surface is set
on medium or high to generate enough heat to boil the liquid in the base and
create steam.

16
2. My pressure cooker is sputtering and emitting a generous amount
of steam. What should I do? Begin by turning off or turning down the heat
on the cook top. This should slow the rate of steam. It is ideal to have a gentle,
steady release of steam through the Pressure Valve throughout the cooking
process.
If this does not work, verify that you have not overloaded the pressure cooker.
Refer to page 5 for tips on Loading the Pressure Cooker. Depending on
the ingredients being used, the pressure cooker should be NO MORE than ½
to 2/3full.
If your pressure cooker is properly loaded, next determine if you are
inadvertently using ingredients that create excessive foaming and frothing, such
as applesauce, cranberries, pearl barley, oatmeal or other cereals, split peas,
rhubarb, or pasta.
3. My pressure cooker started emitting steam through the safety
valve while I was cooking. Do I need to remove the pressure
cooker from the heat source? What should I do? It is not necessary
to remove the pressure cooker from the heat source. Simply turn the heat down
slightly. The pressure cooker will adjust and the amount of steam being released
will reduce, as well. This release of excess pressure (and steam) is built in as a
safety precaution.
4. Is it okay to use frozen vegetables in the pressure cooker? Yes.
When using frozen vegetables in place of fresh, add 1 to 2 minutes to the
overall cooking time.
5. I would like to cook both meat and vegetables in the pressure
cooker. How do I determine the cooking time? Look at the Cooking
Guide on pages 12-14. Find the cooking time for the meat you are
preparing. Next, find the cooking time for your longest cooking vegetable (such
as potatoes). Subtract the cooking time for the vegetable from the cooking time
for the meat. This is your adjusted cooking time for the first stage of cooking.
Insert the meat and at least 2 cups of cooking liquid in the pressure cooker, lock
the lid in place and cook for the adjusted cooking time. Use the Quick Release
Method. Add the longer cooking vegetable(s), lock the lid in place and continue
cooking for the recommended time. Use the Quick Release Method and add
any quick cooking vegetables. Simmer, with the lid removed, until complete.
6. I used my pressure cooker to cook dried beans. When I opened
the pressure cooker, they were not soft enough for serving. What
should I do? Not soaking the beans before cooking them could be the culprit.
Refer to the instructions for Loading the Pressure Cooker on page 5 for
specific tips related to dried beans and legumes.

17
WARRANTY
Register your 6 Qt. Stainless Steel Pressure Cooker - It’s Easy!
Please register your product to ensure that we have the correct information in our
system for any warranty inquiries. Retain the original sales receipt.
Without registering your product or having the original sales
receipt, we will consider the warranty start date to be the date of
manufacture.
Taking a few moments to register your product helps us continue to develop new
products and services that make your culinary experience even better. Please visit
www.calphalon.com for complete details.
Limited Ten Year Warranty
Calphalon will repair or replace any pressure cooker found defective in
material or workmanship within ten years of the original purchase with the
original sales receipt. This warranty applies only when the pressure cooker is
put to normal household use and is operated and cared for according to the
instructions. The rubber gasket is excluded from this warranty. This warranty
also excludes damage from misuse or abuse, such as improper cleaning,
neglect, accident, alteration, fire, theft, or use in a commercial establishment.
Minor imperfections, surface markings as a result of shipping, and slight color
variation are normal and are not covered by this warranty. This warranty
excludes all incidental and consequential damages. Some states do not
allow the exclusion or limitation of incidental or consequential damages, so
the above limitation may not apply to you. Without an original sales receipt
or having registered your product with Calphalon, the warranty start date
will be considered the date of manufacture. This warranty gives you specific
legal rights, and you may have other rights that vary from state to state. For
more information on Calphalon products use and care, warranties, claims and
returns, please visit calphalon.com or call 1-800-809-7267. DO NOT
RETURN PRODUCTS TO THE STORE.
If you already soaked the beans, you may simply need to cook the beans a bit
longer. Place the pressure cooker base on the cook top (with the lid removed)
and simmer the beans until tender. Add water, if needed.
7. Are there any foods NOT suitable for the pressure cooker? Yes.
There are a few foods that tend to foam, froth and sputter in the pressure cooker.
Therefore, we recommend that you avoid applesauce, cranberries, pearl barley,
oatmeal and other cereals, split peas, rhubarb or pasta.

Customer Service
We at Calphalon want to hear from you. If you have a question or comment, please
contact us via our web site, phone, fax or mailing address.
Please do not return the product to the store. Please contact us
directly with questions or comments about your pressure cooker.
Thank you!
Web site
www.calphalon.com
Toll Free Phone
1-800-809-7267
(Monday-Friday 8:00am – 5:00pm EST)
Fax
419-666-2859
Write Us
Calphalon Customer Service
PO Box 583
Toledo, Ohio 43697-0583
(Please, DO NOT send returns to this address)
18

RECIPES
Jalapeno Peach BBQ Pork Ribs
Ingredients:
1 Tbsp. vegetable oil
3 pounds boneless country-style pork ribs
Salt and pepper, to taste
1 c. yellow onion, chopped
1 jalapeno pepper, seeded and finely chopped
½ cup spicy tomato-based barbecue sauce
1 (12 oz.) jar peach preserves
2 Tbsp. fresh lemon juice
2 Tbsp. brown sugar
½ tsp. pepper
Method:
Heat vegetable oil in pressure cooker base over medium heat. Season pork
with salt and pepper. Add pork, cooking in batches, until brown on all sides.
In a large bowl stir together remaining ingredients. Pour over browned pork.
Place the lid on the base. Press Close to seal the lid onto the base. Turn
the pressure valve to High Pressure and place the pressure cooker over
medium-high heat. Once steam begins releasing from the pressure indicator,
cook for 25 minutes. If needed, reduce the heat slightly to maintain a
steady level of pressure.
At the end of the cooking time remove the pressure cooker from the heat.
Allow the pressure cooker to cool naturally (approximately 10 minutes).
Press the One Button Unlock to release the lid from the base. Remove
the ribs to a serving bowl or platter; cover and keep warm. Meanwhile,
simmer the sauce, uncovered, over medium heat until it thickens slightly.
Spoon over ribs.
Serves 8
19
Other manuals for 1859693
1
Table of contents
Other Calphalon Electric Pressure Cooker manuals