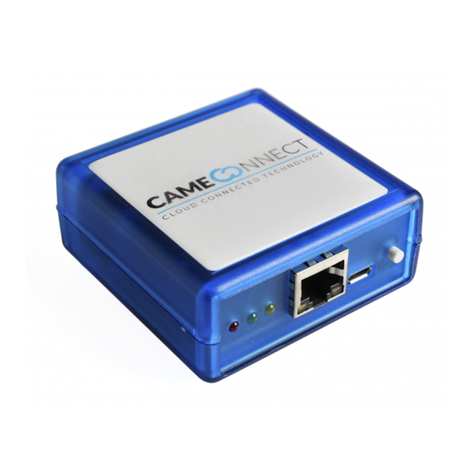
CAME CONNECT RETH001 User manual

RETH001RETH001
FA01698M4A
IT
Italian
o
EN
Engl
i
s
h
FR
Fran
ç
a
i
s
RU
P
у
сски
й

1
1
2
2
3
3
4
4
5
5
6
6
7
7
8
8
1
1
2
2
3
3
4
4
5
5
6
6
7
7
8
8
Pag. 2- Pag. 2- FA01698M4A - 06/2022- © CAME S.p.A.

NON CRP
AUTOMATION
(x2 max)
CRP
AUTOMATION
(x3 max)
CRP
AUTOMATION
(x3 max)
NON CRP
AUTOMATION
(x2 max)
SLAVE
RSLV001
(x5 max)
SLAVE
RSLV001
MASTER
RETH001
ROUTER
NON CRP
AUTOMATION
(x2 max)
CRP
AUTOMATION
(x3 max)
CRP
AUTOMATION
(x3 max)
NON CRP
AUTOMATION
(x2 max)
SLAVE
RSLV001
(x5 max)
SLAVE
RSLV001
MASTER
RETH001
ROUTER
Pag. 3- Pag. 3- FA01698M4A - 06/2022- © CAME S.p.A.

Pag. 4- Pag. 4- FA01698M4A - 06/2022- © CAME S.p.A.

Pag. 5- Pag. 5- FA01698M4A - 06/2022- © CAME S.p.A.

Pag. 6- Pag. 6- FA01698M4A - 06/2022- © CAME S.p.A.

ITALIANO
Avvertenze generali
• Leggere attentamente le istruzioni prima di iniziare
l’installazione ed eseguire gli interventi come specificato dal
costruttore. • L’installazione, la programmazione, la messa
in servizio e la manutenzione devono essere eettuate da
personale qualificato ed esperto e nel pieno rispetto delle
normative vigenti. • Prima di eettuare qualunque operazione di
pulizia o di manutenzione, togliere l’alimentazione al dispositivo.
• Il prodotto deve essere destinato solo all’uso per il quale è
stato espressamente studiato e ogni altro uso è da considerarsi
pericoloso. • Came S.p.A. non è responsabile per eventuali
danni causati da usi impropri, erronei ed irragionevoli.
Riferimenti normativi
Il prodotto è conforme alle direttive applicabili, vigenti al momento
della fabbricazione.
RED
CAME S.p.A. dichiara che il prodotto descritto in questo manuale
è conforme alla Direttiva 2014/53/UE e al documento Radio
Equipment Regulations 2017.
I testi completi delle dichiarazioni di conformità UE (CE) e UK
(UKCA) sono disponibili su www.came.com.
Dismissione e smaltimento
Non disperdere nell’ambiente l’imballaggio e il dispositivo alla fine
del ciclo di vita, ma smaltirli seguendo le norme vigenti nel paese
di utilizzo del prodotto. I componenti riciclabili riportano simbolo e
sigla del materiale.
I DATI E LE INFORMAZIONI INDICATE IN QUESTO MANUALE
SONO DA RITENERSI SUSCETTIBILI DI MODIFICA IN QUALSIASI
MOMENTO E SENZA OBBLIGO DI PREAVVISO.
LE MISURE, SE NON DIVERSAMENTE INDICATO, SONO IN
MILLIMETRI.
Descrizione
Modulo per la gestione da remoto di una o più automazioni CAME,
mediante CAMEConnect. Il dispositivo deve essere utilizzato
come modulo master e gestire uno o più moduli slave (5 massimo)
ad esso associabili, che a loro volta possono gestire una o più
automazioni.
Descrizione delle parti
❶LED POWER (rosso).
❷LED NETWORK (verde).
❸LED CONNECT (giallo).
❹Presa LAN per la connessione del modulo ad una rete ethernet.
❺Connettore alimentazione.
❻PULSANTE P1.
Pag. 7- Manuale FA01698-IT - 06/2022- © CAME S.p.A. - Istruzioni originali
I contenuti del manuale sono da ritenersi suscettibili di modifica in qualsiasi momento senza obbligo di preavviso.

Premuto per 10 secondi riporta il modulo alle condizioni di
fabbrica (reset).
Premuto per 3 secondi, riavvia il modulo.
Per avviare il modulo con IP statico predefinito 192.168.6.6,
procedere come segue. Con modulo NON alimentato,
premere e mantenere premuto il pulsante P1; alimentare
il modulo mantenendo premuto il pulsante P1 per circa 4
secondi; rilasciare il pulsante quando il led verde (❷LED
NETWORK) lampeggia rapidamente.
❼Alimentatore con connettore micro-USB.
❽Cavo ETH (LAN).
LED di segnalazione
Legenda simbologia LED
Spento, Acceso,
Lampeggia 1 volta al secondo,
Lampeggia 2 volte al secondo,
Significato delle segnalazioni
❶LED POWER (rosso)
Modulo non alimentato,
Modulo alimentato e configurato,
Pulsante P1 premuto.
❷LED NETWORK (verde).
Modulo non registrato alla rete,
Modulo registrato alla rete,
Acquisizione indirizzo IP in corso,
Modulo avviato con IP statico predefinito 192.168.6.6.
❸LED CONNECT (giallo).
Modulo connesso ad internet e a CAMEConnect,
Modulo non connesso ad internet e a CAMEConnect,
Modulo connesso ad internet,
Aggiornamento firmware in corso.
Nota: Quando il modulo viene acceso o riavviato, per un breve
istante tutti i LED sono accesi fissi.
❶, ❷ , ❸.
Dati tecnici
Tipo RETH001
Alimentazione DC (V) 5
Consumo (mA) 200
Potenza segnale radio 869,5MHz (dBm) 14
Portata segnale radio 869.5MHz in area libera (m) 100
Lunghezza massima cavo ethernet cat. 5 (m) 100
Temperatura di esercizio (°C) 0 ÷ 40
Pag. 8- Manuale FA01698-IT - 06/2022- © CAME S.p.A. - Istruzioni originali
I contenuti del manuale sono da ritenersi suscettibili di modifica in qualsiasi momento senza obbligo di preavviso.

Installazione del modulo
Identificare la tipologia di rete sulla quale verrà installato il
dispositivo e procedere con l'opportuna configurazione:
A) Avvio del modulo per reti con DHCP,
B) Avvio del modulo per reti prive di DHCP.
A) Avvio del modulo per reti con DHCP (IP dinamico)
1. Collegare il modulo alla rete dati (router/modem di casa)
attraverso il cavo di rete ethernet in dotazione.
2. Connettere l'alimentatore al connettore micro USB del
dispositivo e alla rete elettrica.
3. Il modulo si avvia in modalità DHCP (default); una volta ottenuto
un indirizzo IP proverà a connettersi a CAMEConnect.
Se il modulo è collegato e configurato correttamente su una rete
con accesso ad internet, i led si accendono nel seguente modo:
❶LED POWER (rosso) .
❷LED NETWORK (verde) .
❸LED CONNECT (giallo) .
Nota: Al termine di questa fase, se il modulo non era mai stato
precedentemente acceso o se è stato riportato alla configurazione
di fabbrica, si riavvia; tutti i led si accendono contemporaneamente
per un secondo
.
Identificazione IP del modulo
L'indirizzo IP del modulo può essere identificato attraverso un PC
Windows collegato e configurato sulla stessa rete, utilizzando la
seguente procedura.
1. Premere il pulsante di "Avvio" di Windows e scegli "Esegui...".
Nella casella di testo digitare "cmd" e premere "Ok" per aprire
un prompt DOS.
2. Nella finestra DOS digitare il comando "ping CAMEXXXXXX",
dove XXXXXX sono le ultime 6 cifre/lettere del MAC address
riportate sull'etichetta posta sulla parte inferiore del modulo.
Per esempio, se il MAC address impresso sull'etichetta
è "A1.B2.C3.D4.E5.F6", il comando da digitare è "ping
CAMED4E5F6".
Nota: la mappatura tra indirizzo IP e MAC Address viene
immagazzinata nel PC in una tabella denominata ARP (Address
Resolution Protocol). Fare riferimento alla documentazione del
proprio Sistema Operativo o al proprio amministratore di rete
su come aggiornare la tabella ARP del PC collegato al modulo.
B) Avvio del modulo per reti prive di DHCP o che
richiedono un IP statico
Questa modalità deve essere utilizzata solo per impostare un IP
statico fornito dal proprio amministratore di rete.
1. Spegnere il modulo togliendo l'alimentazione.
2. Premere e mantenere premuto il pulsante P1 mentre si
alimenta il modulo (circa 4 secondi), fino a quando i LED
assumono la seguente configurazione:
❶LED POWER (rosso) acceso fisso.
❷LED NETWORK (verde) lampeggia rapidamente.
❸LED CONNECT (giallo) spento.
3. Ora il modulo è raggiungibile all'IP 192.168.6.6. Procedere alla
configurazione manuale dell'interfaccia di rete (vedi capitolo
"Configurazione del modulo via web" alla sezione "La pagina
[Network]"
Pag. 9- Manuale FA01698-IT - 06/2022- © CAME S.p.A. - Istruzioni originali
I contenuti del manuale sono da ritenersi suscettibili di modifica in qualsiasi momento senza obbligo di preavviso.

In caso di riavvio, il modulo esce dalla modalità "IP statico
predefinito".
Ripristino delle condizioni di fabbrica
1. Premere il pulsante P1 per 10 secondi.
2. Rilasciare il pulsante P1 quando il modulo si riavvia
(spegnimento e successiva riaccensione di tutti i LED).
3. Il modulo si riavvia in modalità DHCP con la configurazione di
fabbrica.
Se il modulo sul quale viene eseguito il reset alle condizioni
di fabbrica è già stato registrato e configurato su un account
CAMEConnect, il modulo e tutti i dispositivi ad esso associati
devono essere rimossi dall'account.
Configurazione del modulo via web
Se si conosce l'indirizzo IP del modulo, o il modulo è in modalità
IP statico predefinito 192.168.6.6, è possibile eseguire la
configurazione utilizzando un browser da un PC collegato e
configurato sulla stessa rete o connesso direttamente al modulo
(in caso di IP statico predefinito).
1. Aprire un browser ed inserire l’indirizzo IP del modulo.
2. Inserire username e password nella pagina di login . Le
credenziali di fabbrica sono:
Username = admin Password = admin
Una volta inserite le credenziali di accesso, sarà possibile
accedere alle seguenti pagine di gestione.
La pagina [Network]
Riporta informazioni relative alla modalità di accesso alla rete del
modulo, quali:
• MAC address,
• Modalità di assegnazione IP (statico/DHCP),
• IP, maschera di rete, gateway di rete.
Le varie impostazioni (tranne il MAC address) posso essere
modificate per installare il modulo nella propria rete.
Le modifiche apportate avranno eetto solamente
in seguito ad un riavvio del dispositivo; una errata
configurazione dei parametri di rete può richiedere un reset
alle condizioni di fabbrica.
La pagina [Info]
Riporta informazioni sullo stato di connessione del modulo al
Cloud e informazioni relative ai moduli RSLV001 associati (serial
number, livello del segnale radio, versione firmware).
Nota: Le informazioni relative alla qualità del segnale ed alla
versione del firmware sono disponibili solo se il modulo è
connesso a CAMEConnect.
La pagina [User]
Permette di modificare la password dell’utente che ha eettuato
l'accesso.
Nota: La password deve essere di almeno 4 caratteri (max 16).
Pag. 10 - Manuale FA01698-IT - 06/2022- © CAME S.p.A. - Istruzioni originali
I contenuti del manuale sono da ritenersi suscettibili di modifica in qualsiasi momento senza obbligo di preavviso.

La pagina [System]
La pagina è divisa in 3 sezioni.
[System info]
Riporta il keycode del dispositivo e la versione firmware
[Maintenance]
Il pulsante [Restart] riavvia il modulo; il pulsante [Factory Reset]
riporta il modulo alla configurazione di fabbrica (equivale alla
pressione di P1 per 10 secondi).
Se il modulo sul quale viene eseguito il reset alle condizioni
di fabbrica è già stato registrato e configurato su un account
CAMEConnect, il modulo e tutti i dispositivi ad esso associati
devono essere rimossi dall'account.
[Firmware Update]
Permette di aggiornare il firmware del modulo RETH001 e/o
relativi slave RSLV001.
Procedura di aggiornamento firmware del modulo
RETH001 o di moduli RSLV001 ad esso collegati
Prima di eseguire un aggiornamento FW verificare che
il modulo RETH001 e i moduli RSLV001 siano correttamente
registrati al server CAMEConnect. Per maggiori informazioni
consultare i manuali CAMEConnect Automazioni disponibili
nella sezione Documentazione del sito www.cameconnect.net.
1. Scaricare dal sito http://www.cameconnect.net/came/
pages/download.html i nuovi firmware. I file destinati
all'aggiornamento del modulo RETH001, saranno
nominati per es.: RETH001_1_0_6HE.bin, i file destinati
all'aggiornamento del modulo RSLV001, saranno nominati per
es.: RSLV001_1_0_17HE.bin.
2. Accedere alla pagina [System] . Nella sezione [Firmware
Update] è presente un collegamento che permette di scaricare
l'applicazione “CAME_CtUpload” (il PC deve essere connesso
a internet).
3. Una volta installata e avviata l’applicazione CAME_CtUpload,
digitare all'interno dell'apposito campo, l'IP del modulo
RETH001; aprire il menù File -> Open File e selezionare il file
di aggiornamento precedentemente scaricato .
4. Premendo il pulsante "Start" il file viene trasferito alla pagina
[Firmware Update].
Se il file di aggiornamento firmware trasferito è destinato
all'aggiornamento del modulo RETH001 l'aggiornamento viene
eseguito automaticamente ed è suciente riavviare il modulo per
rendere operativo il nuovo firmware .
Se il file di aggiornamento firmware trasferito è destinato
all'aggiornamento di un modulo RSLV001, è necessario indicare
all'applicazione l'ID del modulo (nella pagina System del
modulo RETH001) che deve essere aggiornato prima di avviare
l'aggiornamento . L'ID del modulo può essere rilevato alla pagina
[Info] .
Al termine dell'aggiornamento è possibile scegliere un nuovo
modulo da aggiornare o rendere operativo l'aggiornamento
riavviando il dispositivo RETH001.
http://www.cameconnect.net/came/pages/documentazione_
elenco.html
Pag. 11 - Manuale FA01698-IT - 06/2022- © CAME S.p.A. - Istruzioni originali
I contenuti del manuale sono da ritenersi suscettibili di modifica in qualsiasi momento senza obbligo di preavviso.

Guida alla risoluzione dei problemi
Problema Possibili cause Soluzioni
Il modulo non
si accende. Manca
alimentazione. Verificare i collegamenti
e la presenza di
alimentazione
Il LED
NETWORK
rimane
spento ed il
modulo non
si connette al
cloud.
Cavo di rete
non connesso o
danneggiato.
Verificare o sostituire il
cavo di rete.
IL LED
CONNECT
rimane
spento ed il
modulo non
si connette al
cloud.
Assenza di
connettività
verso internet.
Porte 8884 e
8883 bloccate.
Verificare le impostazioni
della propria rete.
Eventualmente contattare
l’amministratore di rete.
Verificare le impostazioni di
sicurezza della propria rete
(firewall). Eventualmente
contattare l’amministratore
di rete.
Pag. 12 - Manuale FA01698-IT - 06/2022- © CAME S.p.A. - Istruzioni originali
I contenuti del manuale sono da ritenersi suscettibili di modifica in qualsiasi momento senza obbligo di preavviso.
ENGLISH
General precautions
• Read the instructions carefully before beginning the installation
and carry out the procedures as specified by the manufacturer.
• Installation, programming, commissioning and maintenance
must only be carried out by qualified, expert technicians and in
full compliance with the applicable law. • Before carrying out
any cleaning or maintenance, disconnect the device from the
power supply. • Only use this product for its intended purpose.
Any other use is hazardous. • Came S.p.A. is not liable for any
damage caused by improper, erroneous or unreasonable use.
Legislative references
This product complies with the applicable standards in force at the
time of manufacturing.
RED
CAME S.p.A. declares that the product described in this manual
complies with Directive 2014/53/EU and the Radio Equipment
Regulations 2017.
The full EC declaration of conformity and UK Conformity Assessed
(UKCA) marking information can be found at www.came.com.
Decommissioning and disposal
Dispose of the packaging and the device at the end of its life
cycle responsibly, in compliance with the laws in force in the
country where the product is used. The recyclable components
are marked with a symbol and the material's ID marker.
THE DATA AND INFORMATION SHOWN IN THIS MANUAL ARE
TO BE CONSIDERED AS SUBJECT TO CHANGE AT ANY TIME
AND WITHOUT THE NEED FOR ANY ADVANCE WARNING.
MEASUREMENTS, UNLESS OTHERWISE INDICATED, ARE IN
MILLIMETRES.
Description
Module for remotely controlling one or more CAME operators, via
CAMEConnect. This device must be used as master module and
can control up to five slave modules associated to it, which in turn
can control one or more operators.
Description of parts
❶red, POWER LED
❷green, NETWORK LED
❸yellow, CONNECT LED
❹LAN socket for connecting the module to an Ethernet network.
❺Power-supply connector.
Page 13 - Manual FA01698-EN - 06/2022- © CAME S.p.A. - Translation of the original instructions
The contents of this manual may be changed, at any time, and without notice.

❻P1 BUTTON.
When pressed for 10 seconds it resets the module to its
factory settings.
When pressed for three seconds, it restarts the module.
To start the module with the preset 192.168.6.6 static IP,
proceed as follows. With the module powered OFF, press and
keep pressed the P1 button; power on the module by keeping
the P1 button pressed for about four seconds; release the
button when the green LED (❷NETWORK LED) flashes
quickly.
❼Power-supply unit with micro-USB connector.
❽ETH (LAN) cable.
Alert LED
Legend of LED symbology
O, On,
Flashes once per second,
Flashes twice per second,
Meanings of the alerts
❶POWER LED (red)
Module is powered o,
Module is powered on and configured,
P1 button pressed.
❷green, NETWORK LED
Module is not registered on the network,
Module is registered on the network,
Acquiring IP address,
Module is operating with 192.168.6.6 preset static IP.
❸yellow, CONNECT LED
Module connected to the internet and to CAMEConnect,
Module is disconnected from the internet and from
CAMEConnect,
Module is connected to the internet,
Firmware update underway.
N.B.: When the module is powered on or restarted, all of the
LEDs will light up briefly.
❶, ❷ , ❸.
Technical data
Type RETH001
Power supply DC (V) 5
Consumption (mA) 200
Radio signal power at 869.5MHz (dBm) 14
Range of the 869.5MHz radio signal in an open
area (m) 100
Maximum length of the Ethernet Cat. 5 cable (m) 100
Operating temperature (°C) 0 ÷ 40
Page 14 - Manual FA01698-EN - 06/2022- © CAME S.p.A. - Translation of the original instructions
The contents of this manual may be changed, at any time, and without notice.

Installing the module
Establish the type of network on which you will install the device
and configure accordingly:
A) Starting the module for networks with DHCP,
B) Starting the module for networks with no DHCP.
A) Starting the module for networks with DHCP
(dynamic IP)
1. Connect the module to the data network (router/modem at
home) by using the supplied Ethernet cable.
2. Connect the power-supply unit to the device's USB micro
connector and to the power grid.
3. The module starts in DHCP default mode; once the IP address
is established, it will try to connect to CAMEConnect.
If the module is properly connected and configured on an internet
linked network, the LEDs will light up as follows:
❶POWER LED (red) .
❷NETWORK LED (green) .
❸CONNECT LED (yellow). .
N.B.: Once this phase is over, if the module has never previously
been powered on, or if it has been restored to its default, factory
settings, it will restart; all of the LEDs will light up simultaneously
for one second
.
Identifying the module's IP
The module's IP address can be identified on a Windows PC that
is connected and configured on the same network, by using the
following procedure.
1. Press the Window "Start" button and select "Run...". In the
text box, enter "cmd" and press "OK" to open a DOS prompt.
2. In the DOS window, enter the "ping CAMEXXXXXX" command,
whereXXXXXXarethelastsixcharacters/digitsoftheMACaddress
which appear on the label axed on the bottom of the module.
For example, if the MAC address printed on the label is "A1.
B2.C3.D4.E5.F6", the command that you need to enter is
"ping CAMED4E5F6".
N.B.: the mapping between the IP address and MAC address
is stored in the PC in a table called ARP (Address Resolution
Protocol). Please read the literature of your Operating System
or contact your network administrator about how to update the
ARP table of the PC that is connected to the module.
B) Starting the module for networks with no DHCP or
ones that require a static IP
This mode must only be used to set a static IP supplied by your
own network administrator.
1. Switch o the module by disconnecting the power supply.
2. Press and keep pressed the P1 button while the module is
powering up. This should take about four seconds, until the
LEDs appear as follows:
❶POWER LED (red) stays on.
❷NETWORK LED (green) flashes quickly.
❸CONNECT LED (yellow) o.
3. Now the module is reachable at the 192.168.6.6 IP. Manually
configure the network interface. Please read the chapter called
'Configuring the module over the web' in the section called the
Network page.
Page 15 - Manual FA01698-EN - 06/2022- © CAME S.p.A. - Translation of the original instructions
The contents of this manual may be changed, at any time, and without notice.

When restarting, the module exits the preset, static, IP
mode.
Restoring the factory settings
1. Press the P1 button for 10 seconds.
2. Release the P1 button when the module restarts (all the LEDs
will switch o and then switch on again).
3. The module restarts in DHCP mode in default factory mode.
If the module which is being reset to factory default mode is
already registered and configured on a CAMEConnect account,
the module and all devices connected to it must be removed
from the account.
Configuring the module over the web
If you already know the module's IP, or if the module is in the
preset, 192.168.6.6, static, IP mode, you can configure it on a
browser and PC, provided it is connected and configured on the
same network or that is connected directly to the module, that is,
with the preset, static IP.
4. Start your browser and enter the module's IP address.
5. Enter your username and password in the login page . The
factory credentials are:
Username = adminPassword = admin
Once you've entered the access credentials, you can then access
the following pages.
The Network page
This page features information on how to access the module's
network, such as:
• MAC address,
• Static/DHCP, IP assignation mode
• IP, network mas, network gateway.
The various settings, except the MAC address, can be changed to
install the module on your own network.
Any changes will only take eect once the device is
restarted; if the network parameters are wrongly configured,
it may be necessary to restore the default, factory settings.
The Info page
This page features information on the state of the module's
connection to the Cloud, plus information on any associated
RSLV001 modules, that is, serial numbers, radio signal strength,
and firmware version.
N.B.: The information on the quality of the signal and the
firmware version are available only if the module is connected
to CAMEConnect.
The User page
This page is for changing the user password of the user who
accessed the network.
N.B.: The password must have between four and 16 characters.
The System page
This page is divided into three sections.
[System info]
It features the device's keycode and the firmware version
[Maintenance]
The Restart button,restartsthe module; theFactory Reset
Page 16 - Manual FA01698-EN - 06/2022- © CAME S.p.A. - Translation of the original instructions
The contents of this manual may be changed, at any time, and without notice.

buttonrestores the module to its default, factory settings - it's like
pressing the P1 button for 10 seconds.
If the module which is being reset to factory default mode is
already registered and configured on a CAMEConnect account,
the module and all devices connected to it must be removed
from the account.
Firmware Update
This is for updating the RETH001 module's firmware and any
RSLV001 slave devices.
Procedure for updating the RETH001 module's
firmware and that of any RSLV001 associated modules.
Before doing a FW update, check that the RETH001 module
and the RSLV001 modules are properly registered on the
CAMEConnect server. For more information, please read the
CAMEConnect Operators manuals. You can find these in the
Documentation section of the www.cameconnect.net.
1. From http://www.cameconnect.net/came/pages/download.
html the new firmware. Any files for updating the RETH001
module, shall be called, for example: ETH001_1_0_6HE.bin.
Whereas any files for updating the RSLV001 module, shall be
called, for example: RSLV001_1_0_17HE.bin.
2. Accessing the System page In the Firmware Update section,
you can find a link for downloading the "CAME_CtUpload” app.
In this case, the PC needs to be connected to the internet.
3. Once you've installed and launched the CAME_CtUpload app,
in the required field, enter the RETH001 module's IP; open the
File menu -> Open File and select the updating file that you
have previously downloaded.
4. By clicking the Start button, the file will be transferred to the
Firmware Update page.
If the firmware updating file you are transferring is meant to update
the RETH001 module, the update will take place automatically and
all you have to do is restart the module to apply the new firmware
.
Ifthe firmware updating file you are transferring is meant to update
an RSLV001 module, you will need to tell the application the
module's ID. You can find the ID in the RETH001 module's System
page. That module needs to be updated before starting the update
. The module's ID can be found on the Info page .
Once updated, you can choose a new module to update. To apply
the new update, restart the RETH001 device.
http://www.cameconnect.net/came/pages/documentazione_
elenco.html
Page 17 - Manual FA01698-EN - 06/2022- © CAME S.p.A. - Translation of the original instructions
The contents of this manual may be changed, at any time, and without notice.

Troubleshooting
Problem Possible causes Solutions
The module
does not
switch on.
Power supply
missing. Check the connections and
the electric power
The NETWORK
LED stays
o and the
module does
not connect to
the Cloud.
The network
cable is either
disconnected or
damaged.
Check and replace the
network cable.
The CONNECT
LED stays
o and the
module does
not connect to
the Cloud.
No connectivity
towards the
internet
Ports 8884 and
8883 blocked.
Check your network
settings. You many have
to call your network
administrator.
Check your security
settings, that is, the
firewall. You many have
to call your network
administrator.
Page 18 - Manual FA01698-EN - 06/2022- © CAME S.p.A. - Translation of the original instructions
The contents of this manual may be changed, at any time, and without notice.

FRANÇAIS
Instructions générales
• Lire attentivement les instructions avant de commencer
l'installation et d'eectuer les interventions comme indiqué
par le fabricant. • L’installation, la programmation, la mise en
service et l'entretien doivent être eectués par du personnel
qualifié et dans le plein respect des normes en vigueur. • Avant
toute opération de nettoyage ou d'entretien, mettre le dispositif
hors tension. • Ce produit ne devra être destiné qu'à l'utilisation
pour laquelle il a été expressément conçu et toute autre
utilisation est à considérer comme dangereuse. • Came S.p.A.
décline toute responsabilité en cas de dommages provoqués
par des utilisations impropres, incorrectes ou déraisonnables.
Références Normatives
Ce produit est conforme aux directives applicables, en vigueur lors
de sa fabrication.
RED
CAME S.p.A. déclare que le produit décrit dans ce manuel est
conforme à la Directive 2014/53/UE et au document Radio
Equipment Regulations 2017.
Les textes complets des déclarations de conformité UE (CE) et UK
(UKCA) sont disponibles sur www.came.com.
Mise au rebut et élimination
Ne pas jeter l'emballage et le dispositif dans la nature au terme du
cycle de vie de ce dernier, mais les éliminer selon les normes en
vigueur dans le pays où le produit est utilisé. Le symbole et le sigle
du matériau figurent sur les composants recyclables.
LES DONNÉES ET LES INFORMATIONS CONTENUES DANS CE
MANUEL SONT SUSCEPTIBLES DE SUBIR DES MODIFICATIONS
À TOUT MOMENT ET SANS AUCUN PRÉAVIS. LES DIMENSIONS
SONT EXPRIMÉES EN MILLIMÈTRES, SAUF INDICATION
CONTRAIRE.
Description
Module pour la gestion à distance d’un ou de plusieurs
automatismes CAME par le biais de CAMEConnect. Ce dispositif
doit être utilisé comme module maître et gérer un ou plusieurs
modules esclaves (max. 5) y étant associés lesquels, à leur tour,
peuvent gérer un ou plusieurs automatismes.
Description des parties
❶LED POWER (rouge).
❷LED NETWORK (vert).
❸LED CONNECT (jaune).
❹Prise LAN pour la connexion du module à un réseau Ethernet.
❺Connecteur alimentation.
❻BOUTON P1.
Page 19 - Manuel FA01698-FR - 06/2022- © CAME S.p.A. - Traduction des instructions originales
Le contenu de ce manuel est susceptible de subir des modifications à tout moment et sans aucun préavis.

Enfoncé pendant 10 secondes, il permet la réinitialisation du
module aux valeurs d’usine (reset).
Enfoncé pendant 3 secondes, il permet la remise en fonction
du module.
Pour la mise en fonction du module avec IP statique prédéfinie
192.168.6.6, procéder comme suit. Avec module hors
tension, appuyer sur le bouton P1 et le maintenir enfoncé ;
mettre le module sous tension tout en maintenant le bouton
P1 enfoncé pendant 4 secondes environ ; relâcher le bouton
lorsque la led verte (❷LED NETWORK) clignote rapidement.
❼Câble d’alimentation avec connecteur micro-USB.
❽Câble ETH (LAN).
Voyants de signalisation
Légende symboles voyants
Éteint, Allumé,
Clignote toutes les secondes,
Clignote 2 fois par seconde,
Signification des signalisations
❶LED POWER (rouge)
Module hors tension,
Module sous tension et configuré,
Bouton P1 enfoncé.
❷LED NETWORK (verte).
Module non enregistré au réseau,
Module enregistré au réseau,
Acquisition de l’adresse IP en cours,
Mise en fonction du module avec IP statique prédéfinie
192.168.6.6.
❸LED CONNECT (jaune).
Module connecté à Internet et à CAMEConnect,
Module non connecté à Internet et à CAMEConnect,
Module connecté à Internet,
Mise à jour du firmware en cours.
Remarque : à l’allumage ou au réallumage du module, toutes
les leds s’allument en permanence.
❶, ❷ , ❸.
Données techniques
Type RETH001
Alimentation DC (V) 5
Consommation (mA) 200
Puissance signal radio 869,5 MHz (dBm) 14
Portée signal radio 869,5 MHz en champ libre (m) 100
Longueur maximale du câble Ethernet cat. 5 (m) 100
Température de fonctionnement (°C) de 0 à 40
Page 20 - Manuel FA01698-FR - 06/2022- © CAME S.p.A. - Traduction des instructions originales
Le contenu de ce manuel est susceptible de subir des modifications à tout moment et sans aucun préavis.
Other manuals for CONNECT RETH001
1
Table of contents
Languages:
Other CAME Gateway manuals