Trouble Shooting - Causes & Solutions
•The brackets on the van side have not been positioned correctly –see Step 2. Make
sure the bracket is positioned so the rafter hole is directly below fabric
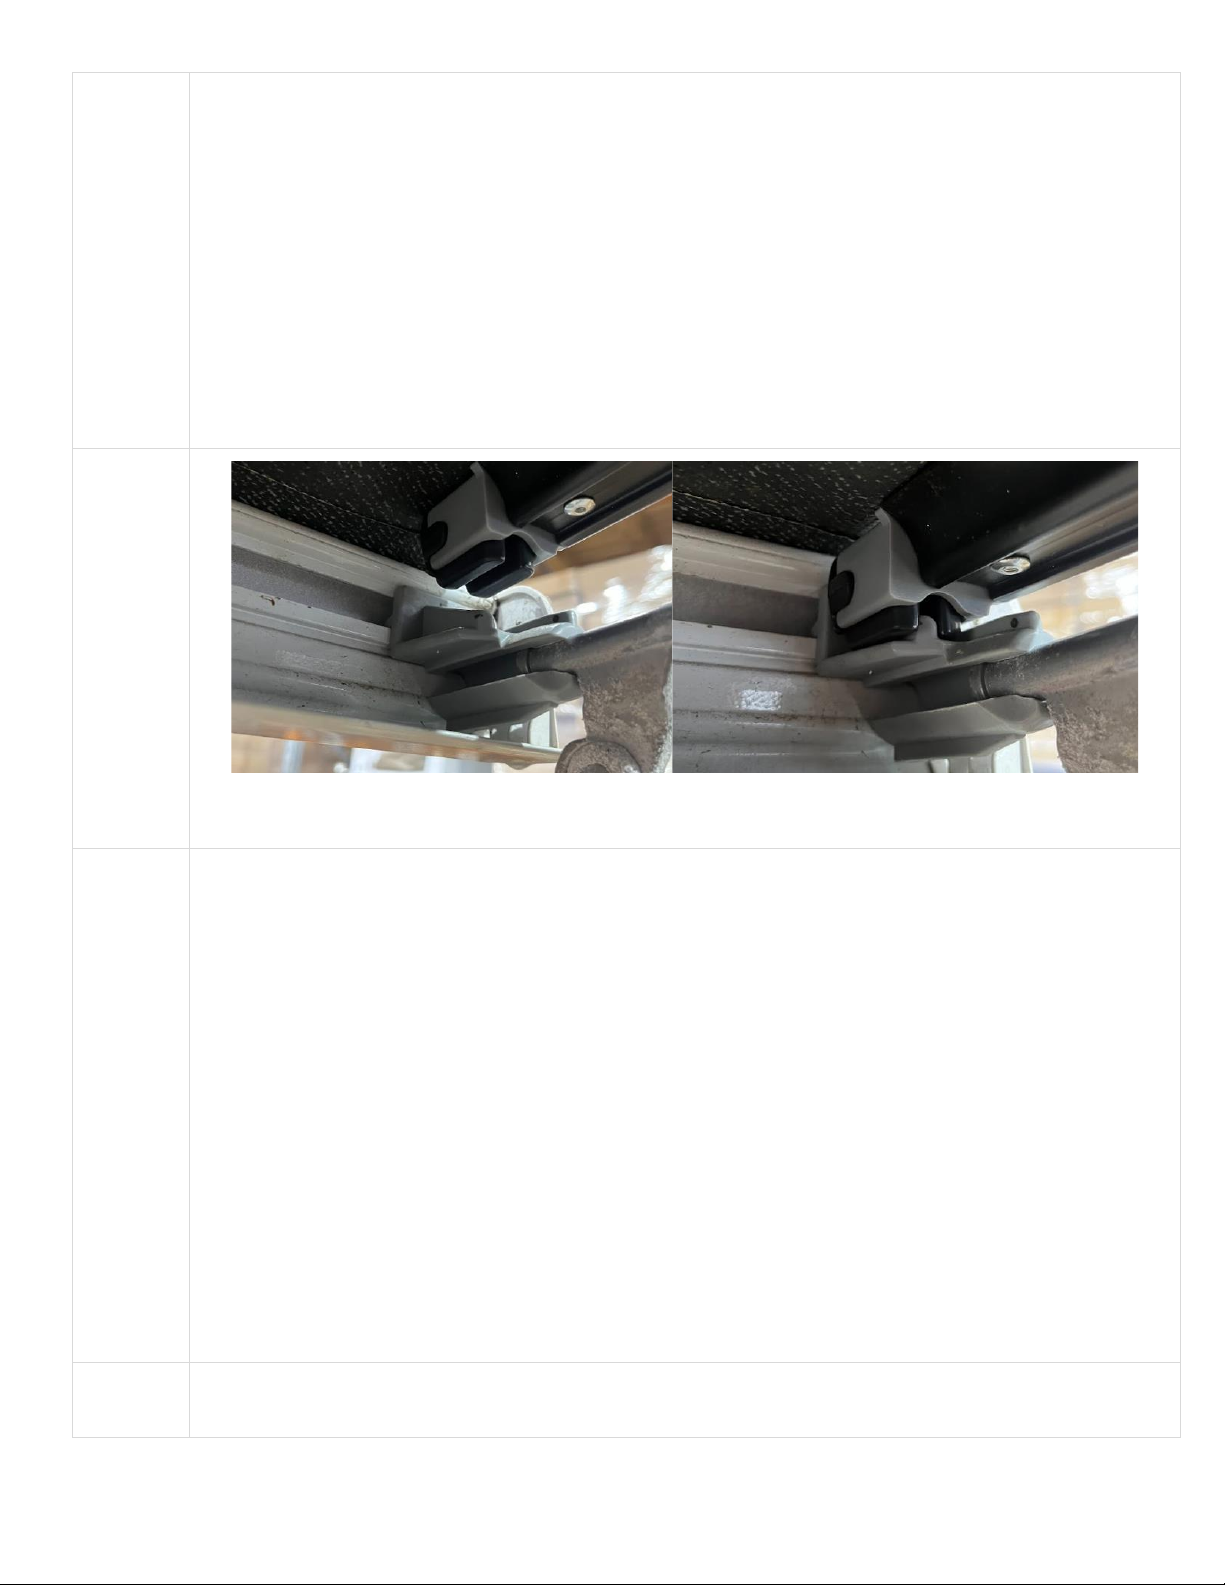
•The rafter insert has been positioned on the outer plastic ridge not the inner plastic
ridge. See Figure 3 for correct attachment location
•The AFK has not been tightened correctly. See notes on cam handles below.
•The awning fabric has not been tightened after the AFK is in position
•The awning fabric is in poor condition. Sometimes fine dust, dew or mold can
accumulate on the awning fabric which can cause reduced friction for the clamp to
grip onto. Cleaning and drying the awning surface will assist resolving this issue.
•In insufficient amount of awning fabric is in the clamp. Ensuring the maximum
amount of fabric is held within the clamp section of the AFK will provide better grip.
Tip: Pull the fabric outwards in the central gap section with one hand while clamping
down one of the middle cam handles with the other.
Does not fit
onto awning
easily
•The plastic brackets usually need to be “snapped” in place past a bottom ridge in the
awning. This sometimes takes considerable force and the use of a large screwdriver
or similar may assist if it can’t be done by hand.
•In rare cases a small amount of plastic may need to be filed off the bottom of the
bracket.
Bracket
does not fit
in correct
position
•Ideally the fabric edge on the awning should be in line with the inside edge of the
hole in the bracket. If the brackets have been installed a little too far away from the
edge of the fabric this will reduce the grip on the fabric.
•In rare cases (reported with some F45 Ti & 3.0m models), there is not enough space
to install the brackets between the shock absorber and end of the awning. In this
case another part is required to fit to the end of the AFK, enabling use without a
bracket. This is referred to as a “Paddle Adapter” (Fiamma Part 98655-900).
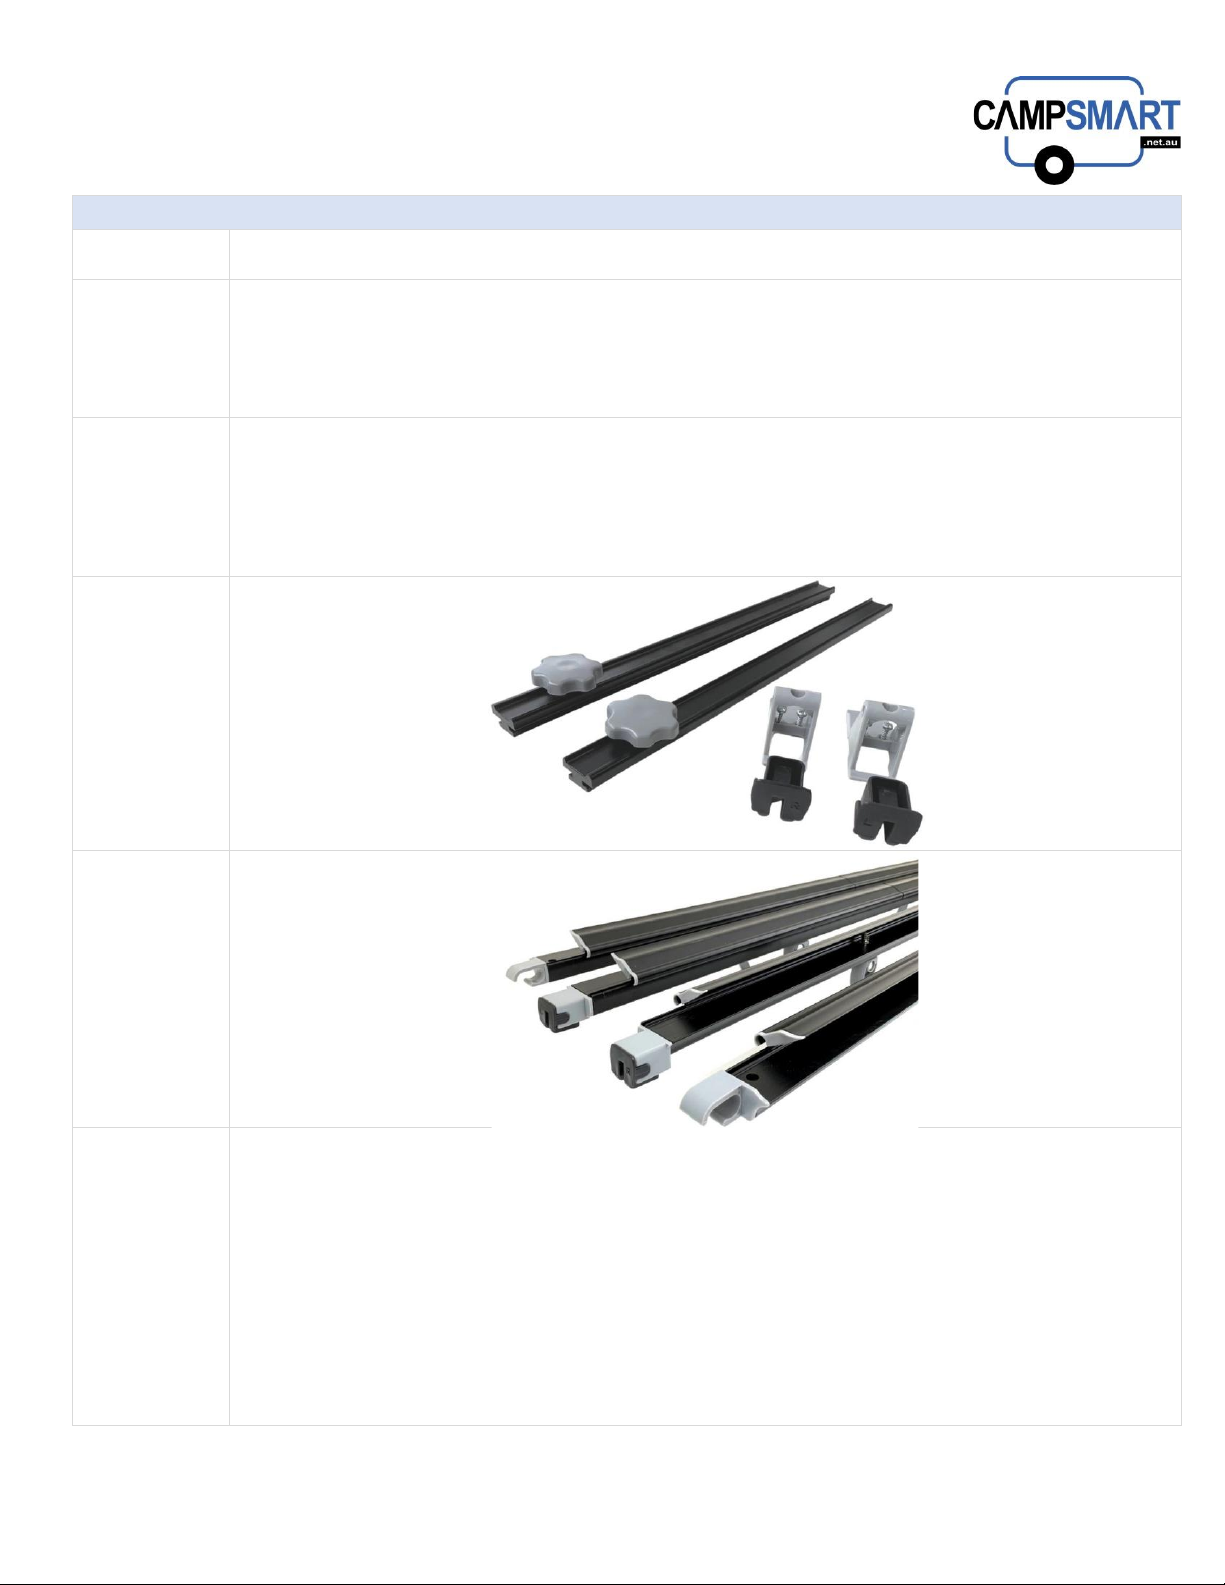
•Insert the black plastic ends for the current Fiamma F45S models. Note some earlier
models don’t use the insert.
•Also check you have positioned the insert on the correct ridge of the awning –see
image on –See image in Figure 3
Awning
Fabric not
tight or
gripped by
AKF
Improving Grip on Fabric by Adjusting Cam Handles
•Cam Handles should be tested & adjusted to be tighter or looser, so the clamping
action is most effective. If too loose, the fabric may easily slip out of the clamp.
•To adjust the tightness, rotate either clockwise or anti-clockwise to loosen or tighten
the clamp in he closed position once set up.
•A little bit of experimenting with this should help obtain the optimal tightness position
& stop instances of the fabric slipping out of the clamp.
•Note the Cam Handles should be closed parallel to the AFK to work properly.
Important Notes:
•When dismantling, the cam handles should be loosened a little to ensure the
mechanism can be easily opened.
•It’s important not to over tighten the Cam Handles as forcing shut or opening when
overtightened can cause the internal mechanism to break.
When installing a rafter in combination with the AFK, ensure the AFK is fitted first. Fitting
the rafters first will cause the fabric in the centre section to be pulled back a little with less
to grip onto.