C&T Solution CT-DBX0x User manual

CT-DBX0x
3.5” Industrial Single Board
Computer with Intel® Atom™
Processor E3800

CT-DBT0X l User’s Manual
Table of Contents
Prefaces …………………………………………………….……………………………………………. 04
Revision …………………………………………………………………………………………..……………….……….. 04
Disclaimer ………………………………………………………..…….…….………………………….……………….. 04
Copyright Notice …………………………………….…………………….…………………………………………… 04
Trademarks Acknowledgment …………..……………………………………………………….................. 04
Environmental Protection Announcement …………………………….………………….…………..….. 04
Safety Precautions ………………………………………….……………………………….…………….……….... 05
Technical Support and Assistance …………………………………….…………….…………….………….. 06
Conventions Used in this Manual ………………………………………………………………….….………. 06
Chapter 1 Product Introductions ………………………………………………………..… 07
1.1 Product Description ……….………………………………..………….………………..………. 08
1.2 Specifications ………………..………………………….....…………….…………..…..………… 09
1.3 Available Models …………………..……………………..…………………………………..…... 10
1.4 Block Diagram ………………………………..…………………………..………..……….………. 11
Chapter 2 Mechanical Specifications ….…………………..………………………..…. 12
2.1 Dimensions ……………………………….…………………………………..…….…..……..….... 13
2.2 Board Layout ……………………………………………………….……….…….………............ 14
2.2.1 Connectors & Jumpers ………………………………………………....……………… 14
2.3 Jumpers Definition ………….………..…............................................................. 15
2.3.1 Serial Port COM1 …………….…………………………………………....……………… 15
2.3.2 VGA Connector ………..…….…………………………………………....……………… 16
2.3.3 USB 3.0 Connector ……..……….……………………………………....……………… 17
2.3.4 USB 2.0 Connector ……..……….……………………………………....……………… 17
2.3.5 HDMI Connector ……..…..……………………………………………....……………… 17
2.3.6 LAN Connector ………..…………..……………………………………....……………… 17
2.4 Internal Connectors ………….……………........................................................... 18
2.4.1 Front Panel Audio Connector (AUDIO) ………….……………....……………… 18
2.4.2 Backlight Control Connector (CN1) …………………………………………..…… 18
2.4.3 COM2-4 Serial Ports (COM2-4) ………………………..……………………..….… 18
2.4.4 LPC Connector (DBG) ……………………………………………………………………. 19
2.4.5 Fan Connector (FAN) …………………………………………………………………….. 19
2.4.6 GPIO Connector: GPIO …….…………………………………………....……………… 19
2.4.7 Power Button Pin Header (JP3) ………….………………………....……………… 19
2.4.8 Reset Button Pin Header (JP4) ……………………………………....……………… 20
2.4.9 Reset Button Pin Header (JP6) ……………………………………....……………… 20
2.4.10 I2C Pin Header (I2C1) ………………………………………………....……………… 20
2.4.11 Multi-LED Pin Header (LED) ………………………………………...……………… 20
2.4.12 LVDS Connector: LVDS ……………………………………………….……………….. 21
2.4.13 microSD Coonector (MICRO_SD) ………………………………………………… 21
2.4.14 Mini-PCIe Slot #1 (PCIE1_MSATA) ……………………………...……….……… 22
2.4.15 Mini-PCIe Slot #2 (MINI_PCIE1) …………………………….…………….…….. 23
2.4.16 ATX Power Connector (POWER_CONN) …………………...………………… 23
2.4.17 PS/2 Keyboard/Mouse Connector (PS2) …………………….……………….. 23
2.4.18 SATA Signal Connectors: SATA1_2 …………………………………………..…… 24
2.4.19 SATA Power Connectors (SATA1/2_PWR) …………………...………….…… 24
2.4.20 USB 2.0 Pin Header (USB_1/2) ……….………………………….……………….. 24
2

CT-DBT0X l User’s Manual
3
2.5 Jumper Settings ………..…….……………............................................................ 25
2.5.1 Backlight Power (JP1) ………….………………………………………..……………… 25
2.5.2 Panel Power (JP2) ……………….………………………………………..……………… 25
2.5.3 Clear CMOS (JP8) ………….…….………………………………………..……………… 25
Chapter 3 Features & Interfaces ………………………………………………………..… 26
3.1 Processor ……………………….………………………………..………….………………..………. 27
3.2 BIOS ……………………………..………………………….....…………….…………..…..………… 27
3.3 System Memory ……….…………..……………………..…………………………………..…... 27
3.4 Graphics ………………………………………..…………………………..………..……….………. 27
3.5 USB ……………………………….………………………………..………….………………..………. 27
3.6 Ethernet ……..………………..………………………….....…………….…………..…..………… 27
3.7 SATA ………………..……….…………..……………………..…………………………………..…... 27
3.8 Audio ………………………………..…………..…………………………..………..……….………. 27
3.9 Expansion ……………………..………………………….....…………….…………..…..………… 28
3.10 General Purpose Input Output ……………………..…………………………………..…... 28
3.10.1 GPIO Configuration ……………………..……….………………………………..…... 28
3.11 Watchdog Timer ………………..…………..…………………………..………..……….………. 29
3.11.1 Board Design ……………..………………..……….………………..……………..…... 29
3.11.2 Psuedo Code ……………..………………..……….……………………..………..…... 29
Chapter 4 Driver Installation ….…………………..………………..……………..…..…. 30
Chapter 5 System BIOS ….…………………………..………………..……………..…..…. 32
5.1 Advanced ……………………………….…………………………………..……….…..……..….... 33
5.1.1 ACPI Settings …………….…………………………………………....…………………… 34
5.1.2 F81866 Super IO Configuration ………..…….………………..…………..……… 34
5.1.3 Hardware Monitor ……..……….……………………………………....……………… 36
5.1.4 Serial Port Console Redirection ……..……….……………....………………..… 36
5.1.5 CPU Configuration ……..……………………………………………....…………..…… 37
5.1.6 SATA Configuration …………..……………………………………....……………….… 38
5.1.7 Miscellaneous Configuration …………….………………………....……………… 38
5.1.8 LPSS & SCC Configuration ………..…….………………..………………………….. 39
5.1.9 Network Stack Configuration ……..……….…………………....………………… 39
5.1.10 CSM Configuration ……..……….………………………….………....……………… 40
5.1.11 SDIO Configuration ……..………………………..…………………....……………… 41
5.1.12 USB Configuration …………..…………………..……………….…....……………… 42
5.1.13 Security Configuration …………..……..…………………………....……………… 43
5.2 Chipset ………….………………………………........................................................... 44
5.2.1 Northbridge Configuration …………..……………………………....……………… 44
5.2.2 Southbridge Configuration …………..……………………………....……………… 47
5.3 Security …….……………………..……………........................................................... 48
5.3.1 Security Boot Menu …………..………..……………………………....……………… 49
5.4 Boot ……………..………………………………........................................................... 50
5.5 Save and Exit …………………………………........................................................... 50
Chapter 6 Address Map ….…………………………..………………..……………..…..…. 51
6.1 I/O Port Address Map ……………………………..…………………..……….…..……..….... 52
6.2 Interrupt Controller (IRQ) Map ……..……………………..……..……….…..……..….... 55
6.3 Memory Map ……………………….………………..…………………..……….…..……..….... 63
CT-DBT0X l User’s Manual
4
Revision
Disclaimer
All specifications and information in this User’s Manual are believed to be accurate and up to date. C&T
Solution Inc. does not guarantee that the contents herein are complete, true, accurate or non-misleading.
The information in this document is subject to change without notice and does not represent a
commitment on the part of C&T Solution Inc.
C&T Solution Inc. disclaims all warranties, express or implied, including, without limitation, those of
merchantability, fitness for a particular purpose with respect to contents of this User’s Manual. Users must
take full responsibility for the application of the product.
Copyright Notice
All rights reserved. No part of this manual may be reproduced or transmitted in any form or by any means,
electronic or mechanical, including photocopying, recording, or information storage and retrieval systems,
without the prior written permission of C&T Solutions Inc. Copyright © 2015 C&T Solutions Inc.
Trademarks Acknowledgment
Intel®, Celeron® and Pentium® are trademarks of Intel Corporation.
Windows® is registered trademark of Microsoft Corporation.
AMI is trademark of American Megatrend Inc.
IBM, XT, AT, PS/2 and Personal System/2 are trademarks of International Business Machines Corporation
All other products and trademarks mentioned in this manual are trademarks of their respective owners.
Environmental Protection Announcement
Do not dispose this electronic device into the trash while discarding. Please recycle to minimize pollution
and ensure environment protection.
Prefaces
Revision
Description
Date
100
Initial release
2015/04/13
110
Correct USB_1/2 connector drawing;
POWER_CONN & COM2
-4 connector descriptions
2015/05/06
120
Modify COM_2/3/4 connector table and drawing
2015/12/08
Preface

CT-DBT0X l User’s Manual
5
Safety Precautions
Before installing and using the equipment, please read the following precautions:
Put this equipment on a reliable surface during installation. Dropping it or letting it fall could
cause damage.
The power outlet shall be installed near the equipment and shall be easily accessible.
Turn off the system power and disconnect the power cord from its source before making any
installation. Be sure both the system and the external devices are turned OFF. Sudden surge
of power could ruin sensitive components. Make sure the equipment is properly grounded.
When the power is connected, never open the equipment. The equipment should be opened
only by qualified service personnel.
Make sure the voltage of the power source is correct before connecting the equipment to the
power outlet.
Disconnect this equipment from the power before cleaning. Use a damp cloth. Do not use
liquid or spray detergents for cleaning.
Avoid the dusty, humidity and temperature extremes.
Do not place heavy objects on the equipment.
If the equipment is not used for long time, disconnect it from the power to avoid being
damaged by transient over-voltage.
The storage temperature shall be above -40°C and below 85°C.
The computer is provided with a battery-powered real-time clock circuit. There is a danger of
explosion if incorrectly replaced. Replace only with the same or equivalent type
recommended by the manufacturer.
If one of the following situation arises, get the equipment checked be service personnel:
•The power cord or plug is damaged.
•Liquid has penetrated into the equipment.
•The equipment has been exposed to moisture.
•The equipment does not work well or it cannot work according the user’s manual.
•The equipment has been dropped and damaged.
•The equipment has obvious signs of breakage.
Preface

CT-DBT0X l User’s Manual
6
Technical Support and Assistance
1. Visit the C&T Solution Inc website at www.candtsolution.com where you can find the latest
information about the product.
2. Contact your distributor, our technical support team or sales representative for technical support if
you need additional assistance. Please have following information ready before you call:
Model name and serial number
Description of your peripheral attachments
Description of your software (operating system, version, application software, etc.)
A complete description of the problem
The exact wording of any error messages
Conventions Used in this Manual
Preface
This indication alerts operators to an operation that, if not strictly observed,
may result in severe injury.
WARNING
This indication alerts operators to an operation that, if not strictly observed,
may result in safety hazards to personnel or damage to equipment.
CAUTION
This indication provides additional information to complete a task easily.
NOTE

Chapter 1
Product Introductions

CT-DBT0X l User’s Manual
8
1.1 Product Description
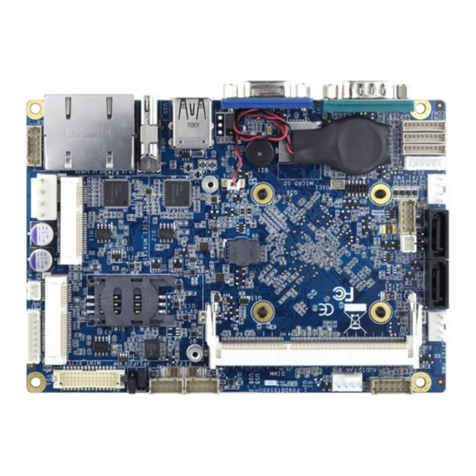
The CT-DBT0x is a single board computer in 3.5” SBC form factor featuring the Intel® Atom™ Processor
E3800 Series in FCBGA1170 package on 22nm process technology in a single chip solution. One 240-
pin SODIMM sockets supports non-ECC/unbuffered DDR3L 1333MHz memory up to 4GB. The Intel®
HD graphics controller integrated within the processor supports three independent displays (VGA,
HDMI, LVDS). The CT-DBT0x supports 2x Gigabit Ethernet, USB 3.0/2.0, COM, GPIO, 2x Mini-PCIe slots,
microSD card SIM card to support a variety of industrial applications.
Chapter 1: Product Introductions

CT-DBT0X l User’s Manual
9
Chapter 1: Product Introductions
1.2 Specifications
CPU
•Intel® Atom™ Processor E3800 Series and Intel®
Celeron® Processor J1900 SoC in FCBGA1170
package
- Atom™ E3845: 4-core, 1.91GHz, TDP 10W
-Atom™ E3827: 2-core, 1.75GHz. TDP 8W
- Atom™ E3815: 1-core, 1.46GHz, TDP 5W
- Celeron® J1900: 4-core, 2.00GHz, TDP 10W
- Celeron® N2807: 4-cores, 1.58GHz, TDP 4.3W
System Memory
•One 204-pin DDR3L SODIMM socket
•1333MHz, non-ECC unbuffered
•Data transfer rates up to 1333MT/s
•Up to 4GB
BIOS
•AMI uEFI BIOS
•8MB SPI flash ROM
Graphics
•Intel® HD Graphics Gen 7 integrated in CPU
•1x VGA, resolution up to 2560x1600@60Hz
•1x HDMI 1.4a interface, up to 1920x1080@60Hz
Ethernet
•Two Intel® I210IT GbE Controllers
•10/100/1000BASE-TX Ethernet
•WOL/PXE support
Audio
•Realtek ALC88
•Line-In, Line-Out and Mic-In
Internal I/O
•2x 7-pin SATA 3Gb/s ports (w/ 2x +12V/+5V/GND
power)
•4x USB 2.0 ports via header (1 from SoC, 3 from
USB 2.0 Hub IC, Genesys GL852GT-OHY12)
•1x RS-232/422/485 port (BIOS selectable, supports
auto-flow)
•3x RS-232 ports via header (COM2-4)
•1x 8-bit GPIO (4-bit input, 4-bit output, +5V level,
GPO default “High”, GPI supports SMI trigger)
•1x PS/2 keyboard and mouse
•1x front panel audio
•1x Reset button header
•1x Power on/off header
•1x wafer connector for external CMOS battery
(included)
•1x header for I2C Serial IO interface from SoC
•1x Clear CMOS header
•1x 4-pin fan connector
•1x 4-pin ATX power connector for +12VDC power
input
External I/O
•+12V DC power input
•1x HDMI port (vertical)
•1x VGA (DB-15)
•2x GbE (RJ-45)
•1x USB 3.0
•1x USB 2.0
•1x RS-232/422/485 COM1 (DB-9,
RS-485 auto low control supported)
Expansion
•2x Mini PCIe slots, full size
- Mini PCIe slot #1: PCIe x1 only or mSATA only
(by BOM option, see 1.3 Available Models)
- Mini PCIe slot #2: PCIe x1 & USB 2.0
(USB 2.0 port from USB Hub IC)
•1x microSD card slot
•1x SIM card slot
Watchdog Timer
•H/W Reset, 1-255 sec./min.
•1 sec. or 1min. Increments
Hardware Monitor
•System voltages
- CPU core power
- CPU I/O power
- DDR power
- VCC3
-Vin
•Temperatures monitoring
•Smart Fan support
Power
•DC +12V input
•ACPI 5.0 compliant
Form Factor
•3.5” SBC, 146mm x 102mm
Operating Temp.
•-20°C to 70°C
Storage Temp.
•-40°C to 85°C
Operating Humidity
•10% to 90% relative humidity, non-condensing
Certifications
•CE
•FCC Class A

CT-DBT0X l User’s Manual
10
1.3 Available Models
Chapter 1: Product Introductions
Model No. Processor Ordering Information Part Number
CT-DBT01
Atom™ E3845
CT
-DBT01-E3845
6
-DBT0101S100-P0
Atom™ E3827
CT
-DBT01-E3827
6
-DBT0102S100-P0
Atom™ E3815
CT
-DBT01-E3815
6
-DBT0103S100-P0
Celeron® J1900
CT
-DBT01-J1900
6
-DBT0104S100-P0
Celeron® N2807
CT
-DBT01-N2807
6
-DBT0105S100-P0
CT-DBT02
Atom™ E3845
CT
-DBT02-E3845
6
-DBT0201S100-P0
Atom™ E3827
CT
-DBT02-E3827
6
-DBT0202S100-P0
Atom™ E3815
CT
-DBT02-E3815
6
-DBT0203S100-P0
Celeron® J1900
CT
-DBT02-J1900
6
-DBT0204S100-P0
Celeron® N2807
CT
-DBT02-N2807
6
-DBT0205S100-P0
Mini PCIe slot #1 Mini PCIe slot #2
CT
-DBT01
PCIe
x1 only
PCIe x1 & USB 2.0
CT
-DBT02
mSATA only
PCIe
x1 & USB 2.0
Mini PCIe Slot BOM Options

CT-DBT0X l User’s Manual
11
1.4 Block Diagram
Chapter 1: Product Introductions

Chapter 2
Mechanical Specifications

CT-DBT0X l User’s Manual
13
2.1 Dimensions
Chapter 2: Jumper & Connectors
Units: mm

CT-DBT0X l User’s Manual
14
2.2 Board Layout
2.2.1 Connectors & Jumpers
Chapter 2: Jumper & Connectors
Connector Description Connector Description
AUDIO
Front Audio connector
I2C1
I2C header
CN1
Backlight Control connector
LED
LED header
COM1
RS
-232/422/485 DB9 connector
LVDS
LVDS connector
COM2
-4
RS
-232 COM2-4 headers
MICRO_SD
microSD card slot
DBG
LPC connector
MINI_PCIE2
Mini PCI Express slot 2
DIMM
240
-pin SODIMM socket
PCIE1_MSATA
Mini PCI Express slot 1
FAN
Fan connector
POWER_CONN
ATX Power connector
GPIO
GPIO header
PS2
PS/2
KB/MS wafer connector
HDMI
HDMI port
RJ45
LAN ports
JP1
Backlight Power Select jumper
SATA1/2
SATA Port 1/2 signal connector
JP2
Panel Power Select jumper
SATA1/2_PWR
SATA Port 1/2 power connector
JP3
Power Button header
SIM1
SIM card slot
JP4
Reset Button header
USB_1/2
USB 2.0 headers
JP6
Battery connector
USB_3
USB 2/0/3.0 ports
JP8
Clear CMOS
VGA
VGA connector

CT-DBT0X l User’s Manual
15
2.3 External Connectors
2.3.1 Serial Port COM1
2.3.1.1 RS-2332 Mode
2.3.1.2 RS-422 Mode
2.3.1.3 RS-485 Mode
Chapter 2: Jumper & Connectors
Pin Signal Pin Signal
1 DCD, Data Carrier Detect 6 DSR, Data Set Ready
2 RXD, Receive Data 7 RTS, Ready To Send
3 TXD, Transmit Data 8 CTS, Clear To Send
4 DTR, Data Terminal Ready
9 RI, Ring Indicator
5 GND, Ground
COM1 VGA USB 2.0 HDMI LAN
Pin Signal Pin Signal
1 TXD-, Transmit Data 6 NA
2 RXD+, Receive Data 7 NA
3 TXD+, Transmit Data 8 NA
4RXD-, Receive Data
9NA
5NA
Pin Signal Pin Signal
1 Data- 6 NA
2 Data+ 7 NA
3NA 8NA
4NA
9NA
5NA

CT-DBT0X l User’s Manual
16
2.3.1.4 COM1 RS-232/422/485 Mode Selection
To set the COM mode, boot the system into BIOS Setup Utility and select
Advanced > F81866 Super IO configuration. You will see the following screen.
Select the COM port you wish to setup and choose from RS-232, RS-422 and RS-485.
If RS-485 is selected, you can enable/disable the RS-485 Auto Flow Function which automatically handles
half-duplex control.
Save the configuration and exit the BIOS Setup Utility ("F4" hotkey).
2.3.2 VGA Connector
15-pin D-sub Female Connector
Chapter 2: Jumper & Connectors
Pin Signal Pin Signal
1 VGA_RED 9 VCC
2 VGA_GRN 10 GND
3 VGA_BLU 11 NC
4NC 12 VGA_DDC_DAT
5 GND 13 VGA_HSYNC
6 GND 14 VGA_VSYNC
7 GND 15 VGA_DCC_CLK
8 GND

CT-DBT0X l User’s Manual
17
2.3.3 USB 3.0 Connector
2.3.4 USB 2.0 Connector
2.3.5 HDMI Connector
2.3.6 LAN Connector
Chapter 2: Jumper & Connectors
Pin Signal Pin Signal
1 USB +5V 5 USB_SSRX-
2 USB_D- 6 USB_SSRX+
3 USB_D+ 7 GND_DRAIN
4 GND 8 USB_SSTX-
9 USB_SSTX+
Pin Signal
1 USB +5V
2 USB_D-
3 USB_D+
4 GND
1 2 3 4
Pin Signal Pin Signal
1 HDMI_TX2_DP_B 2 GND
3 HDMI_TX2_DN_B 4 HDMI_TX1_DP_B
5 GND 6 HDMI_TX1_DN_B
7 HDMI_TX0_DP_B 8 GND
9 HDMI_TX0_DN_B 10 HDMI_CLK_DP_B
11 GND 12 HDMI_CLK_DN_B
13 NC 14 NC
15 HDMI_SCLDDC_B 16 HDMI_SDADDC_B
17 GND 18 +5V
19 1
18 2
Pin Signal Pin Signal
1 MDI0+ 5 MDI2-
2MDI0- 6 MDI1-
3 MDI1+ 7 MDI3+
4 MDI2+ 8 MDI3-
A Active LED (Yellow) B
10 LAN LED (OFF)
100 LAN LED (Green)
1000 LAN LED (Orange)

CT-DBT0X l User’s Manual
18
2.4 Internal Connectors
2.4.1 Front Panel Audio Connector (AUDIO)
Connector Type: 2x6-pin pitch 2.00mm wafer connector
2.4.2 Backlight Control Connector (CN1)
Connector Type: 2x6-pin pitch 2.00mm wafer connector
2.4.3 COM2-4 Serial Ports (COM2-4)
Connector Type: 1x9-pin pitch 1.5mm wafer connector
Chapter 2: Jumper & Connectors
Pin Signal Pin Signal
1 MICIN_L 2 MICIN_R
3 MIC1_JD 4 AGND
5 LOUT_L 6 LOUT_R
7 FRONT_JD 8 AGND
9 LIN_L 10 LIN_R
11 LINE1_JD 12 AGND
Pin Signal Pin Signal
1 Backlight Enable 5 GND
2 Backlight CTRL 6 GND
3 Backlight PWR 7 NC
4 Backlight PWR 8 NC
1 8
Pin Signal
1
DCD, Data Carrier Detect
2
DSR, Data Set Ready
3
RXD, Receive Data
4
RTS, Request To Send
5
TXD, Transmit Data
6
CTS, Clear To Send
7
DTR, Data Terminal Ready
8
RI, Ring Indicator
9
GND
1 9

CT-DBT0X l User’s Manual
19
2.4.4 LPC Connector (DBG)
Connector Type: 2x5 pin pitch 1.27mm box header
2.4.5 Fan Connector (FAN)
Connector Type: 1x4 pin pitch 2.54mm wafer connector
2.4.6 GPIO Connector: GPIO
Connector Type: 2x5-pin pitch 2.0mm wafer connector
2.4.7 Power Button Pin Header (JP3)
Connector Type: 1x2-pin pitch 2.00mm wafer connector
Chapter 2: Jumper & Connectors
Pin Signal Pin Signal
1 GND 2 +3.3V
3 LPC_AD3 4 NC
5 LPC_AD2 6 RESET_DBG
7 LPC_AD1 8 CLOCK_DEBUG
9 LPC_AD0 10 LPC_FRAME
Pin Signal
1 GND
2 +12V Fan Power
3 Fan Sensor
4 Fan PWM
Pin Signal Pin Signal
1 +5V 2 GND
3 GPO0 4 GPI0
5 GPO1 6 GPI1
7 GPO2 8 GPI2
9 GPO3 10 GPI3
Pin Signal
1 PS_ON_BUTTON_N
2 GND

CT-DBT0X l User’s Manual
20
2.4.8 Reset Button Pin Header (JP4)
Connector Type: 1x2-pin pitch 2.00mm wafer connector
2.4.9 Battery Pin Header (JP6)
Connector Type: 1x2-pin pitch 1.25mm wafer connector
2.4.10 I2C Pin Header (I2C1)
Connector Type: 1x3-pin pitch 2.54mm pin header connector
2.4.11 Multi-LED Pin Header (LED)
Connector Type: 2x6-pin pitch 2.00mm wafer connector
Chapter 2: Jumper & Connectors
Pin Signal Pin Signal
1
+5V
2
+5V
3
Power ON/OFF
4
HDD LINK/ACTIVE
5
+3.3V
6
LAN1 Speed 1000
7
LAN1 LINK/ACTIVE
8
LAN1 Speed 100
9
+3.3V
10
LAN2 Speed 1000
11
LAN2 LINK/ACTIVE
12
LAN2 Speed 100
Pin Signal
1 RESET_BUTTON_N
2 GND
Pin Signal
1 GND
2 +3V
Pin Signal
1 CLOCK
2 GND
3 DATA
Table of contents
Other C&T Solution Motherboard manuals

C&T Solution
C&T Solution CT-MSB01 User manual

C&T Solution
C&T Solution G03-NF9G- User manual

C&T Solution
C&T Solution CT-DWL01 User manual

C&T Solution
C&T Solution CT-MHW0X User manual

C&T Solution
C&T Solution CT-MCL01 Series User manual

C&T Solution
C&T Solution CT-AIB01 User manual

C&T Solution
C&T Solution CT-DBT0x User manual

C&T Solution
C&T Solution CT-CCV6X User manual

C&T Solution
C&T Solution CT-PBT01 Series User manual

C&T Solution
C&T Solution CT-XHW0X User manual