manuals.online logo
Brands
  1. Home
  2. •
  3. Brands
  4. •
  5. Canon
  6. •
  7. Digital Camera
  8. •
  9. Canon POWERSHOT SX30IS User manual

Canon POWERSHOT SX30IS User manual

SX30 LS
Camera User Guide
Make sure guide, including the "Safety
Precautions" section before using the camera.
use it in the future.
This chapter explains how to choose images for printing, and pdnt
using a Canon-brand PictBddge compliant pdnter (sold separately)
(p. 41).
Please also refer to the Personal Printing Guide.
Canon-Brand PietBridge Compliant Printers
143
You can easily print the pictures you take by connecting the camera to a
PictBridge compliant printer (sold separately) using the supplied interface
cabte (p, 2),
Turn off the camera and printer.
........................llj_i_.......................................................................Connectthecameratotheprinter.
the included interface cabte (p. 2) firmly
_" into the camera terminal in the direction
Y/
....................... shown.
hsert the interface cable's large plug into
the printer. For connection details, refer to
the user guide provided with the printer.
Turnontheprinter.
Turn onthecamera.
Press the F_ button to turn on the camera.
P_ will appear on the screen,
144
Printing images
::: choosean_,_agetoprint.
Press the 4 _ buttons or turn the ,_:_:dia! to
choose an image,
P,_nt_m_gos.
@ Press the r_ button.
Printing wilU start.
@ Bfyou want to print additiona! images,
repeat Steps 5 and 6 after printing has
completed.
After printing has completed, turn off the
camera and printer, and unplug the
interface cable.
145
You can add images to the print list (DPOF) directly after shooting or during
playback by pressing the _ button.
These selection methods comply with the DPOF (Digital Print Order Format)
standards.
choose animage.
Press the 4 _ buttons or turn the _i:_idial to
choose an image.
PresstheL_button (movieswill be
excluded).
Add images to the print mist.
Press the ,_v buttons to choose the
number of prints, then press the _
buttons or turn the _[i_i_ dial to choose [Add]
and press the @ button.
To cancel adding images, repeat Steps 1
and 2, and press the 4_ buttons or turn
the _:_:_idial to choose [Remove], then
press the @ button.
146
You can choose up to 998 images on a memory card for printing and specify
settings such as the number of copies so that they can be printed together
(p. 150) or processed at a photo developer service= These selection methods
comply with the DPOF (Digital Print Order Format) standards.
P_nt Se'_ngs
You can set the print type, date and fi_e number. These settings apply to all
images chosen for printing.
....:ii:i:i!:¸¸
_iiii¸¸ Choose [Print Settings].
Press the MENU button to choose [Print
Settings] in the ri2htab, then press the @
button=
....: Adj.stthe settings.
Press the ,_v buttons or turn the dial
to choose a menu item, then press the 4
buttons to choose an option.
Pressing the M EN U button accepts the
settings and restores the menu screen.
Standard
index
Both
On
Prints one image per page.
Prints several reduced size images per page.
Prints both standard and index formats.
Prints the shooting date.
On
off Prints the rite number.
147
Choosing Images for Printing (DPOF)
Choosing the Number of Cop_es
Choose [Semeet images & Qty.].
Press the MENUbutton to choose [Select
Images & Qty.] in the ri2htab, then press
the @button=
; Chooseanimage.
Press the 4 _ buttons orturn the _!_ dial to
choose an image, then press the @
button.
You will be able to set the number of print
copies.
If you choose images in [Index],
appears on the screen. Pressing the @
button again will deselect the image and
will disappear.
.... Set the number of prints.
::;'Press the Av buttons or turn the ,_i dial
to set the number of prints (maximum 99).
Repeat Steps 2 and 3 to choose other
images and the number of prints for each.
You cannot set the number of copies for
index prints. You can only choose which
images to print (as shown in Step 2).
Pressing the M EN U button accepts the
settings and restores the menu screen.
148
Select Range
Choosing Images for Printing (DPOF)
Choose [Select Range].
In Step I on p. 148, choose [Select
Range], then press the @ button.
Follow Steps 2 and 3 on p. 130 to choose
images.
Make print settings.
Press the ,_v buttons to choose [Order],
then press the @ button.
Set All images te Print Once
Choose [Select Aim Images].
In Step 1 on p. 148, choose [Select AI!
Images], then press the @ button.
Makeprint settings.
Press the _ _ buttons or turn the _!:_ dial to
choose [OK], then press the @ button.
Clearing All Selections
choose [CmearAHSelections].
, In Step 1 on p. 148, choose [Clear All
Selections], then press the @ button.
149
Print Added Images
All selections will be cJeared.
Pressthe__ buttonsorturnthe,::::dialto
choose [OK], then press the _ button.
You can print images added to the print list by connecting the camera to a
PictBridge compliant printer (pp. 146 = 149).
Number of copies to print Connect the camera to the printer.
FoHow Steps 1 to 4 on p. 144.
Print.
Press the _v buttons to choose [Print
now], then press the @ button.
Printing will starL
Bfyou stop the printer during printing and
start again, it will start from the next print.
150
Custe_izing Camera Settings
You can customize various settings to suit your shooting preferences.
The first part of this chapter explains convenient and _mmonly used
functions.
The latter part explains how to change shooting and playback settings
to suit your purposes.
151
You can customize convenient and commonly used functions from the _' tab
(p. 49).
Choose [Sound Options], then press the
@ button.
Press the Av buttons or turn the dial
to choose an option.
Press the 4 _' buttons to choose an option=
i Piesetsoan s
!cannot be modified)
Preset sounds
2 You can use the included software to
change the sounds (p. 2).
Turning Off Hints &T_ps
When you choose an item in the FUNC.menu (p. 48) or MENU (p. 49), a
description of the function (hints and tips) is displayed. You can turn off this
function.
Choose [Hints & Tips], then press the 4
buttons to choose [Off].
152
Changing Camera Settings
Chang_n 9 the Sta_-up Screen
You can change the start=up screen that appears when you turn on the
camera.
Choose [Start=up Bmage], then press the
@ button.
Press the 4 _ buttons or turn the _ii_i diaJ to
choose an option.
No start-up image
1 Preset images
!cannot be modified)
Preset images
2 You can set recorded images, and use the
included software to change the images.
Registering Recerded mmages as the $tart-up
Screen
When you press the [] button and set the camera to Playback mode, you can
register an image.
Choose [Start=up Bmage], then press the
@ button.
Press the 4 _ buttons or turn the dim! to
choose [2], then press the @ button.
Press the 4 _ buttons or turn the '_ii:_idim! to
choose an image, then press the @
button.
Press the 4 _ buttons or turn the :if:if:dim! to
choose [OK], then press the @ button to
comp}ete registration.
153
Changing Camera Settings
The dedicated operation sounds and start-up images on the included software
can be registered to the camera. Refer to the Software Guide for detaiis.
Changing the FiJe Number Ass_gmTlent
Bmages you shoot are automatically assigned file numbers in the order they
were taken, from 0001 = 9999, and saved to folders of up to 2,000 images.
You can change the file number assignment.
Choose [File Numbering], then press the
_ buttons to choose an option.
Even if you shoot using a new
memory card, the file numbers
Continuous are assigned consecutively until
an image with the number 9999
is taken/saved.
Auto Reset with a new one, or a new folder
is created, rite numbering
begins with 000I again.
154
Changing Camera Settings
Cre_t_ng Folders by Shoot_ng Date iiiiiiiiiiiiiiiiiiiiiiiiiiiiiiiiiiiiiiiiiiiiiiiiiiiiiiiiiiiiiiiiiiiiiiiiiiiiiii%_
Bmages are saved into folders created each month, however, you can also
create folders by shooting date.
Choose [Create Folder], then press the
4t_ buttons to choose [Dally].
Bmages will be saved into folders created
on each shooting date.
Changing the Lens Retract T_e
For safety reasons, the lens retracts about 1 minute after pressing the []
button when in a Shooting mode (p. 28)_ If you want the lens to retract
immediately when you press the [] button, set the retract time to [0 sec.].
Choose [Lens Retract], then press the
4_ buttons to choose [0 sect].
Turning Off the Power Saving Function
You can set the power saving function (p. 52) to [Off]. Setting it to [On] is
recommended to save battery power,
Choose [Power Saving], then press the @
button.
Press the ._v buttons or turn the _i_i dial to
choose [Auto Power Down], then press the
_ buttons to choose [Off].
If you set the power saving function to
[Off], be sure to turn the camera off after
use.
155
Changing Camera Settings
Setting the Screen Shut-Off T_e
You can adjust the time the screen takes to shut off automatically (p. 52). This
also works when [Auto Power Down] is set to [Off].
Choose [Power Saving], then press the @
button.
Press the ._v buttons or turn the _ diaB
to choose [Display Off], then press the 4
buttons to choose a time.
Bnorder to save battery power, you should
choose less than [1 min.].
Using the Werld Clock
When travelling abroad, you can record images with local dates and times
simply by switching the time zone setting, if you pre=register the destination
time zones, you can enjoy the convenience of not having to switch the Date/
Time settings.
....,¸Set the home time zone.
Choose [Time Zone], then press the
button.
When setting this for the first time, check
the information that displays on the screen
the left, then press the _ button.
8t
Press the 4 _' buttons or turn the '_i_i dial to
choose the home time zone.
To set daylight saving time (adds 1 hour),
press the _.v buttons to choose _.
Press the _ button.
156
Changing Camera Settings
Set the woHd time zone.
Press the _ buttons or turn the (_:: dial
to choose [::_World], then press the
button.
Press the _ _ buttons or turn the _:_i;dia! to
choose the destination time zone.
You can also set the daylight saving time
as in Step 1.
Press the _ button.
....choosethewoHdt mezone.
Press the ,_v buttons or turn the ,!::: dia!
to choose ::_, then press the MENU
button.
:_ will appear on the shooting screen
(p. 179).
Changing Distance Units
You can change the distance units that display in the zoom bar (p. 25) and
the MF indicator (p. 89) from m/cm to fVin.
Choose [Distance Units], then press the
4_ buttons to choose [ft/in].
157
Bfyou set the mode dial to P, you can change the settings in the _ tab
(p,49).
The camera focuses on whatever it is aimed at even when the shutter button
is not pressed. However, you can set it so that the camera only focuses when
the shutter button is pressed haFway.
Choose [Continuous AF], then press the
I_ buttons to choose [Off].
Since the camera focuses continuously
On until you press the shutter button
halfway, it allows you to shoot without
missing photo opportunities.
The camera does not focus
Off continuously, thereby conserving
battery power.
Choose [AF-assist Beam], then press the
4 _ buttons to choose [Off].
158
Changing Shooting Function Settings
Changing the FJ_sh Ti_ng
You can change the timing of the flash and shutter,
Choose [Flash Control], then press the @
button.
Press the ,_ buttons or turn the _(!!_:dial
to choose [Shutter Sync.], then press the
_ buttons to choose a setting.
1st- The flash fires right after the shutter
curtain opens.
2nd= The flash fires right before the shutter
curtain closes.
Turning Off the Ned°Eye Reduction Function
The red=eye reduction lamp lights in order to reduce the red=eye effect that
occurs when shooting in dark conditions with the flash. You can turn off this
function.
Choose [Flash Control], then press the @
button.
Press the ,_v buttons or turn the _(!:i:idial
to choose [Red=Eye Lamp], then press the
4_ buttons to choose [Off].
Changing the |mage D_splay T_me Right After
Sheeting
You can change the length of time the images display right after shooting.
Choose [Review], then press the 4
buttons to choose an option.
The image displays uniii you press
Hotd the shutter button halfway.
oil irr,a_eswillnoidispia_':
159
Changing Shooting Function Settings
Changing the Way the mmage D_splays R_ght After
Shoot_ng
You can change the way the image displays right after shooting.
Choose [Review Info], then press the 4
buttons to choose an option.
off 5ispZays{fieirr,a_eoniy:
Detailed Displays detailed information
(p t8t)
The area inside the AF frame is
magnified, aitowing you to check
Focus Check the focus. The procedure is the
same as in "Checking the Focus"
(p. 124).
CUSt:O_Z_ng D_spE_y information
You can change which information is displayed by switching between custom
displays with each press of the DISR button.
Choose [Custom Display], then press the
@ button.
Press the ,_'_'_ _ buttons or turn the 2_!_:
dia! to choose an item, then press the @
button. _ will appear on items that
display.
Press the ,_'_ _ buttons or turn the i_!_::
dialto choose _, k_, _, or _, then
press the @ button, and the DISR button
to change the custom display settings.
Custom display items with Q will not
display when the DISR button is pressed.
Also, (_) cannot be set for the current
custom display while making settings.
Items with _ wil! display.
160
Changing Shooting Function Settings
g(p. I79).
Gray bars will appear on the
top and bottom of the screen,
3:2 Guide This area will not print when
printing on paper with a 3:2
aspect ratio.
Histogram Shooting modes p, Tv, Av,
M.
Ch_t_ _he _-M_ __ iiiiiiiiiiiiiiiiiiiiiiiiiiiiiiiiiiiiiiiiiiiiiiiiiiiiiiiiiiiiiiiiiiiiiiiiiiiiiiiiiiiiiiiiiiiiiiiiiiiiiiii%i_!i_i_I_
Choose [IS Mode], then press the _
buttons to choose an option.
Image stabilization is always on.
You can confirm the effects
directly on the display, which
makes it easier to check the
Continuous composition or focus. When
shooting movies, the camera also
reduces strong camera shake, for
example when walking (Dynamic
mode).
Image stabilization is only active
Shoot Only* at the moment of shooting.
Image stabilization only counters
up and down motion. This option
Panning* is recommended for shooting
objects moving horizontally.
* Sei{ing changes io [Coniinuous] when
shooting movies.
161

Other manuals for POWERSHOT SX30IS

2

This manual suits for next models

1

Other Canon Digital Camera manuals

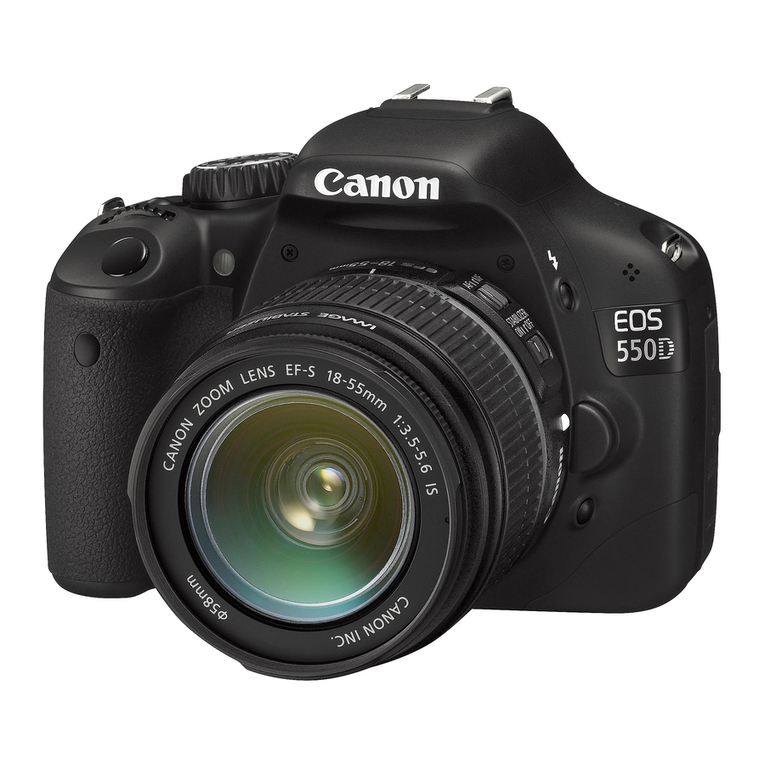
Canon EOS REBEL T6i Technical specifications

Canon

Canon EOS REBEL T6i Technical specifications

Canon Powershot SD890 IS User manual

Canon

Canon Powershot SD890 IS User manual

Canon 3444B001 User manual

Canon

Canon 3444B001 User manual

Canon CR-N500 User manual

Canon

Canon CR-N500 User manual

Canon Digital IXUS I5 User manual

Canon

Canon Digital IXUS I5 User manual

Canon EOS DIGITAL REBEL XTi User manual

Canon

Canon EOS DIGITAL REBEL XTi User manual

Canon Powershot SX40 HS User manual

Canon

Canon Powershot SX40 HS User manual

Canon PowerShot SD30 User Guide Advanced User manual

Canon

Canon PowerShot SD30 User Guide Advanced User manual

Canon PowerShot N Owner's manual

Canon

Canon PowerShot N Owner's manual

Canon IXUS 1100 HS User manual

Canon

Canon IXUS 1100 HS User manual

Canon PowerShot A2500 User manual

Canon

Canon PowerShot A2500 User manual

Canon PowerShot A1200 Quick start guide

Canon

Canon PowerShot A1200 Quick start guide

Canon IXUS 145 User manual

Canon

Canon IXUS 145 User manual

Canon EOS Digital Rebel Quick reference guide

Canon

Canon EOS Digital Rebel Quick reference guide

Canon EOS REBEL T2I User manual

Canon

Canon EOS REBEL T2I User manual

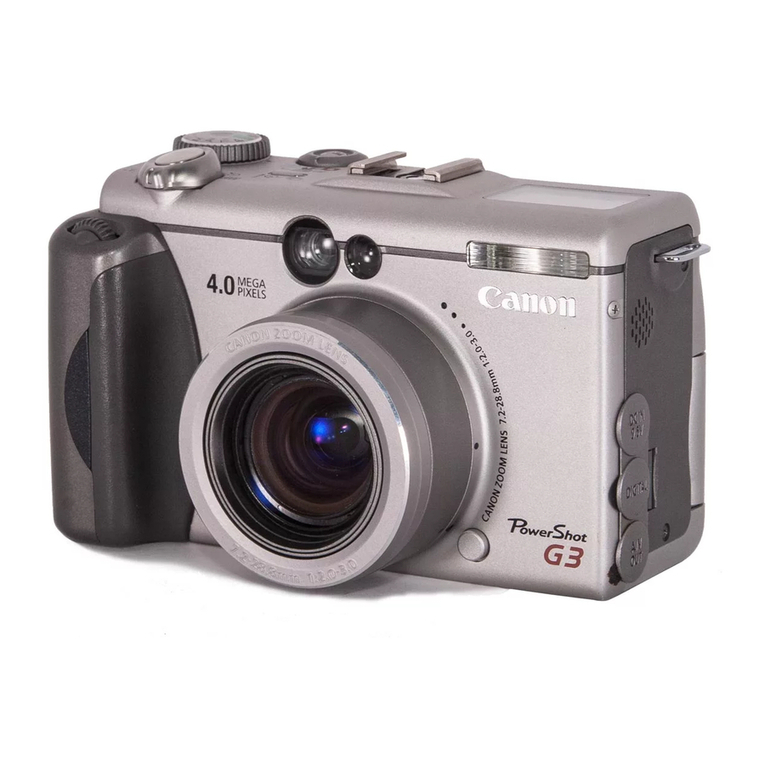
Canon PowerShot G3 User manual

Canon

Canon PowerShot G3 User manual

Canon POWERSHOT A640 User manual

Canon

Canon POWERSHOT A640 User manual

Canon POWERSHOT PRO 1 User manual

Canon

Canon POWERSHOT PRO 1 User manual

Canon EOS-1D C User manual

Canon

Canon EOS-1D C User manual

Canon EOS M5 User manual

Canon

Canon EOS M5 User manual

Canon PowerShot S3 IS Digital Camera User guide

Canon

Canon PowerShot S3 IS Digital Camera User guide

Canon II B Guide

Canon

Canon II B Guide

Canon PowerShot G12 User manual

Canon

Canon PowerShot G12 User manual

Canon EOS D60 User manual

Canon

Canon EOS D60 User manual

Popular Digital Camera manuals by other brands

Samsung S1050 - Digital Camera - Compact user manual

Samsung

Samsung S1050 - Digital Camera - Compact user manual

Guilin Feiyu Technology SUMMON+ user manual

Guilin Feiyu Technology

Guilin Feiyu Technology SUMMON+ user manual

Samsung L100 - Digital Camera - Compact user manual

Samsung

Samsung L100 - Digital Camera - Compact user manual

Kodak Retina automatic III manual

Kodak

Kodak Retina automatic III manual

Uniq UP-600CL-12B user manual

Uniq

Uniq UP-600CL-12B user manual

HuddleCamHD 3X Installation & operation manual

HuddleCamHD

HuddleCamHD 3X Installation & operation manual

ToooAir TC-500 quick start guide

ToooAir

ToooAir TC-500 quick start guide

OVERWATCH XE11 Basic Function Operation

OVERWATCH

OVERWATCH XE11 Basic Function Operation

Nikon D7200 Quick setup guide

Nikon

Nikon D7200 Quick setup guide

SSS Siedle CM 653-0 Product information

SSS Siedle

SSS Siedle CM 653-0 Product information

VEKOOTO N92 Operating	instructions and installation guide

VEKOOTO

VEKOOTO N92 Operating instructions and installation guide

AgfaPhoto DC5200 user manual

AgfaPhoto

AgfaPhoto DC5200 user manual

Olympus Camedia C-2040Zoom Basic Manual

Olympus

Olympus Camedia C-2040Zoom Basic Manual

FujiFilm FINEPIX XP30 Series owner's manual

FujiFilm

FujiFilm FINEPIX XP30 Series owner's manual

DVC DVC-1412 Technical manual

DVC

DVC DVC-1412 Technical manual

Zip SEE855 instruction manual

Zip

Zip SEE855 instruction manual

Sony DSC-W170/R Specifications

Sony

Sony DSC-W170/R Specifications

Panasonic Lumix DC-GH5S Operating instructions for advanced features

Panasonic

Panasonic Lumix DC-GH5S Operating instructions for advanced features

manuals.online logo
manuals.online logoBrands
  • About & Mission
  • Contact us
  • Privacy Policy
  • Terms and Conditions

Copyright 2025 Manuals.Online. All Rights Reserved.