
file:///Volumes/Untitled/Camera%20Info/HFG20/guide%20to%20the%20hfg20.html[4/15/13 1:15:17 PM]
SDXC Memory Cards: You can use SDXC memory cards with this camcorder. When using memory
cards with other devices such as digital recorders, computers and card readers, make sure that
the external device is compatible with SDXC cards.
*When choosing a computer or a laptop make sure that if it has a Card Slot reader that it is SDXC
compatible.
*After repeatedly recording, deleting and editing scenes (fragmented memory), it will take longer
to write data on the memory and recording may stop. Save you recordings and initialize the
camcorder.
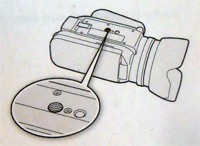
Inserting and Removing a Memory Card:
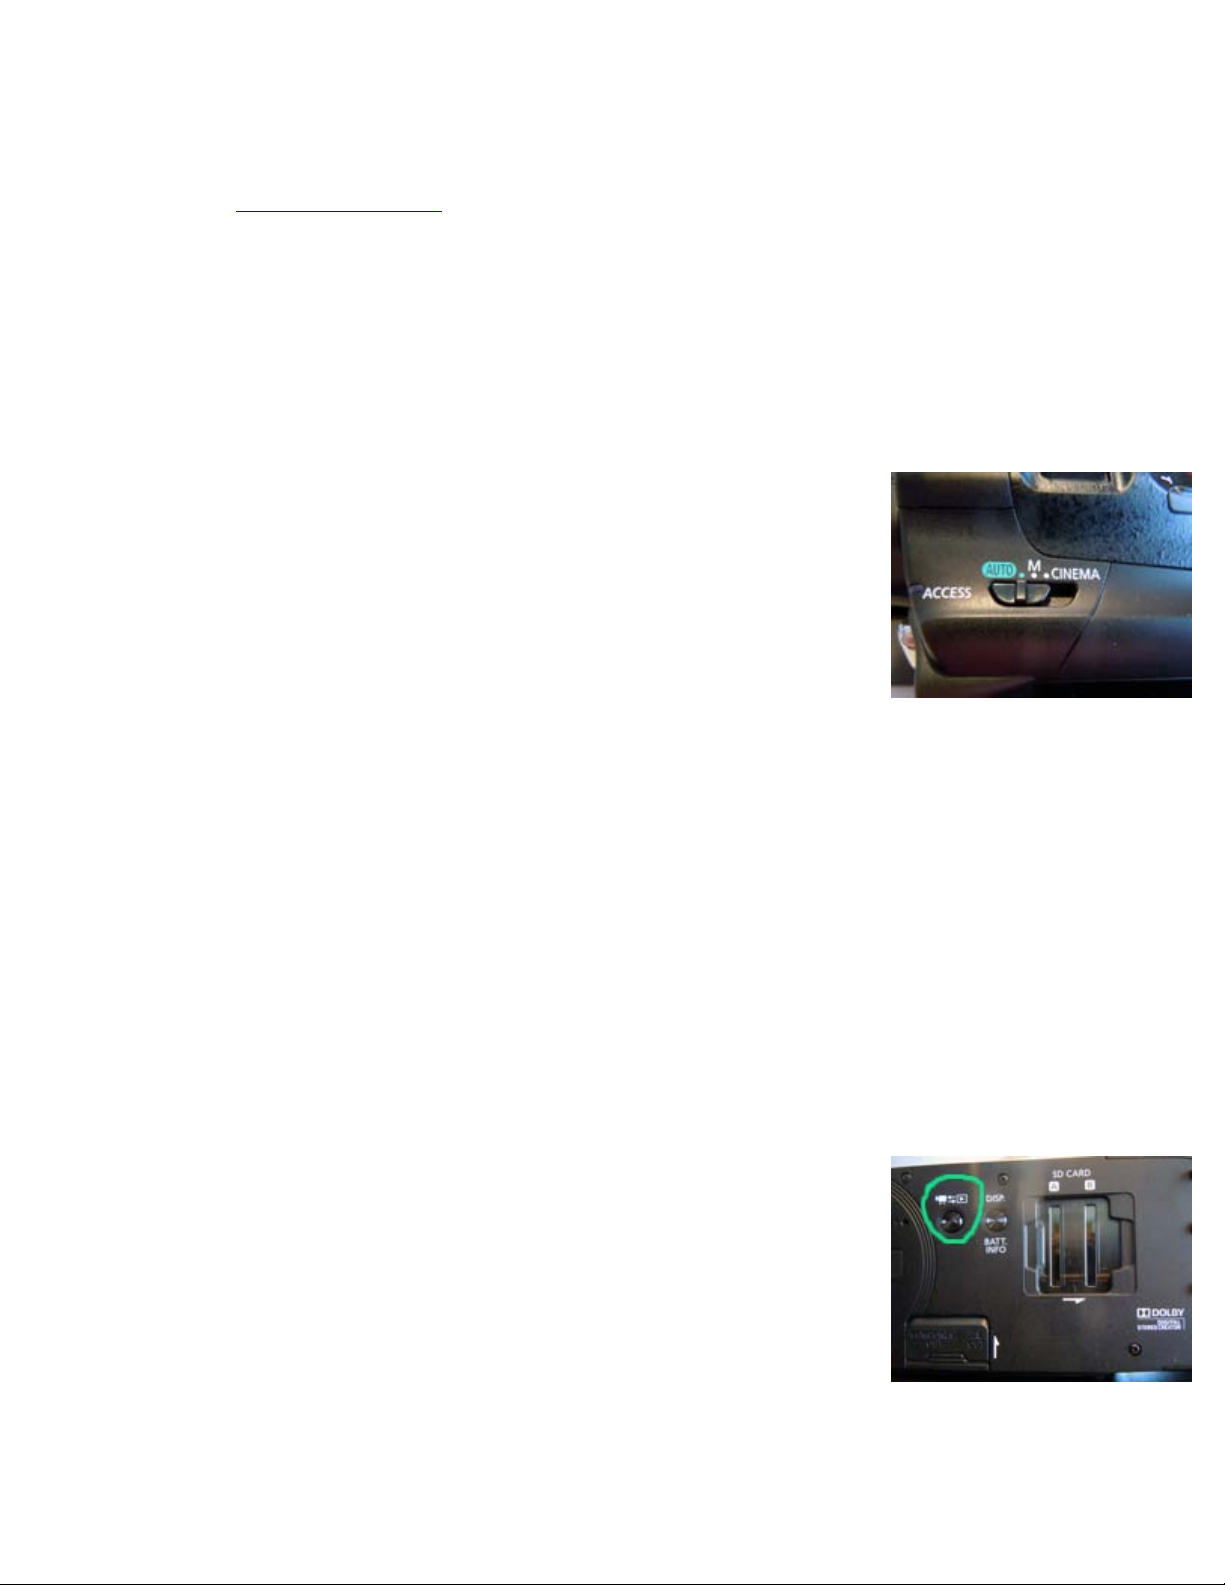
1. Turn off the camcorder.
2. Open the double memory card slot cover.
3. Insert the memory card straight, with the label facing the front of
the camcorder, all the way into one of the memory card slots until it
clicks. You can insert one memory card into each slot.
4. Close the double memory card slot cover. *Do not force the cover
closed if the memory card is not correctly inserted.
To remove the memory card, push the memory card once to release it.
When the memory card springs out, pull it all the way out.
*Remember to always have the camcorder OFF when inserting and
removing SD cards.
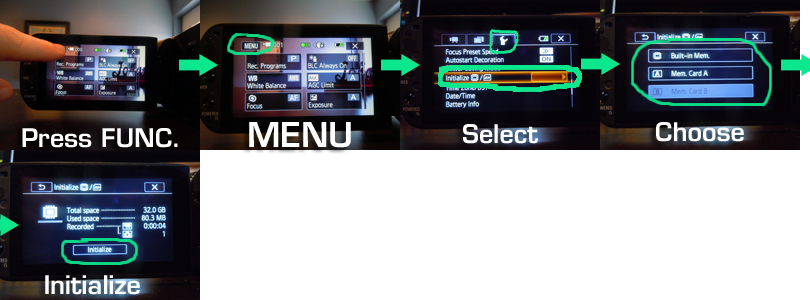
Selecting the Memory for the Recordings:
You can select to record your movies and photos in the built-in memory or on a memory card.
The default memory for recording both is the built-in memory.
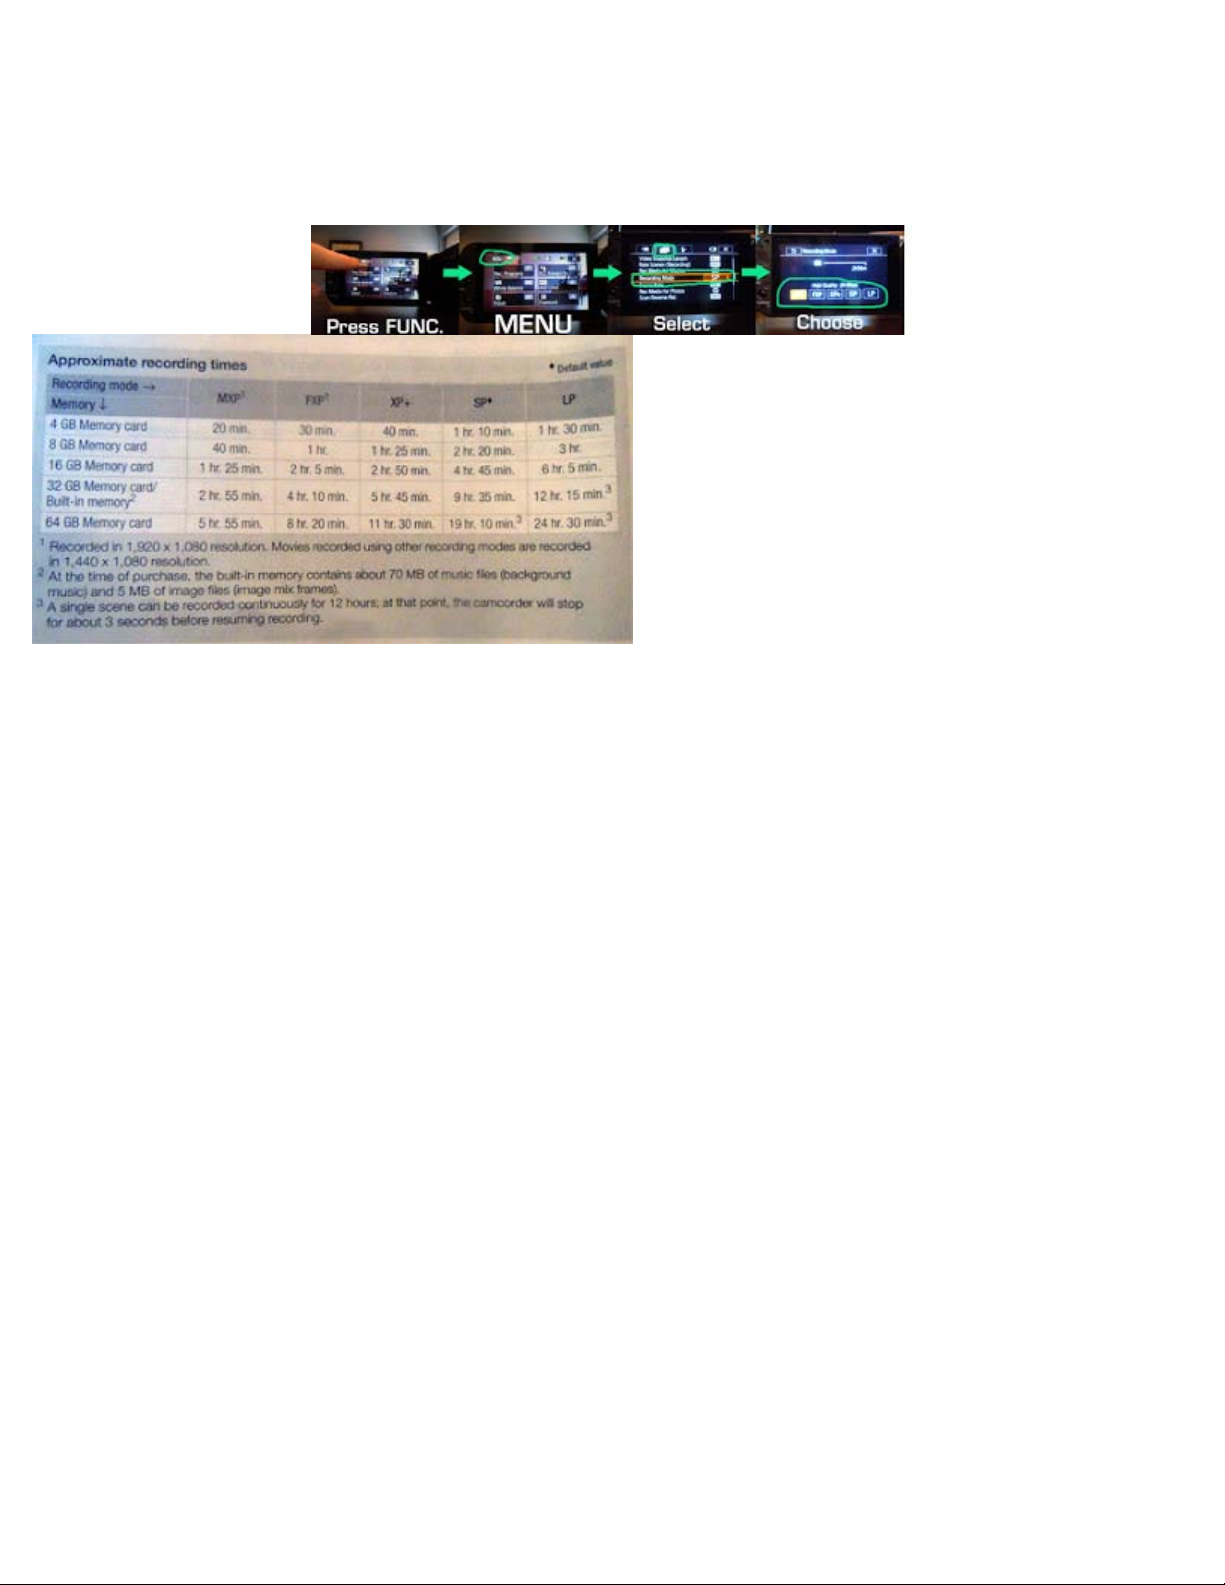
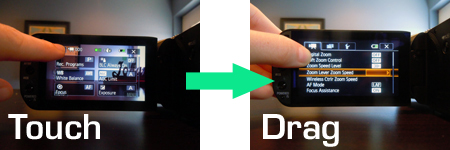
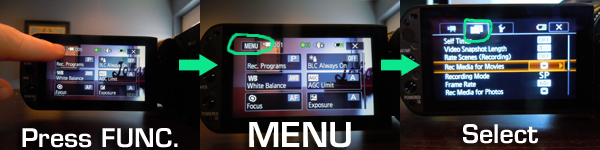
1. Select [FUNC.], [MENU], the film strip category, [Rec Media for Movies] or [Rec Media for Photos]
(depending on the function of the camcorder.
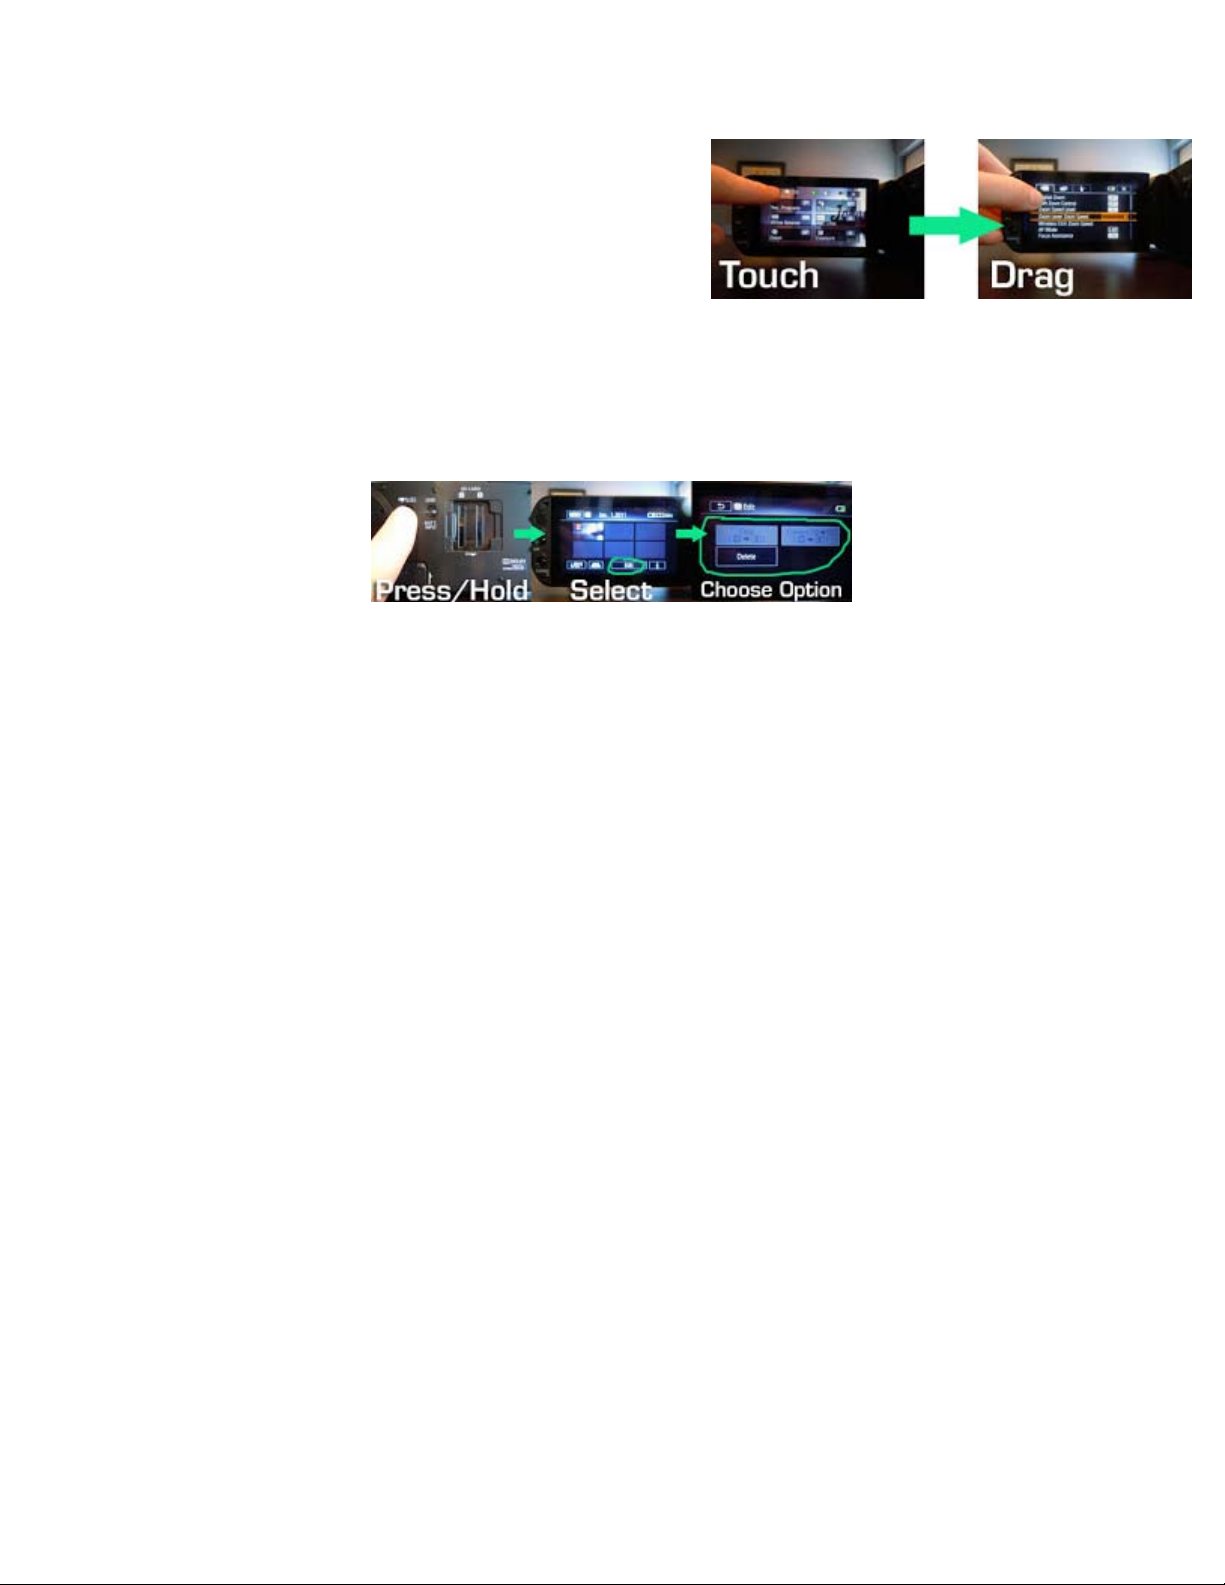
2. Touch the symbol to bring up your options. You will see 3 icons. The first, is the built-in-
memory icon, the second is an A for the 1st card slot, and a [B] for the 2nd card slot.
Depending on what you select your primary recording location to be, more options appear.
To keep recording to the internal memory you select the first icon for the internal memory and
then touch [X]
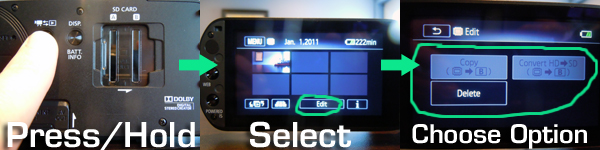
Relay Recording:
You can activate relay recording so if the memory you are using becomes full while recording
movies the recording will continue uninterrupted on a memory card. When recording on memory
card A, you can use memory card B for relay recording. When recording in the built-in memory,
you can choose to use only memory card A for relay recording, or use both memory cards.
*Memory Cards can not contain video recordings if you are going to do the relay recording.
1. Insert a memory card that contains no video recordings into the card slot of the memory card
you want to use for relay recording.
2. To open the Relay Recording Screen you touch [FUNC.] > [MENU] > Film strip icon > [Rec Media


