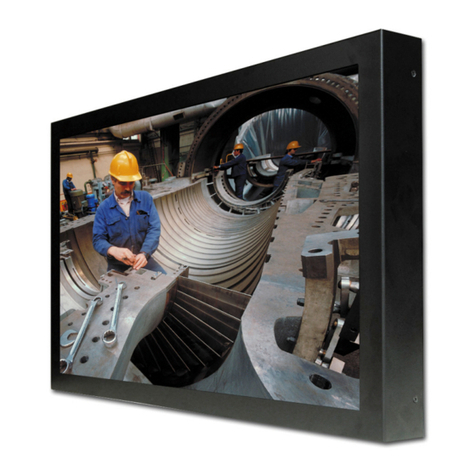
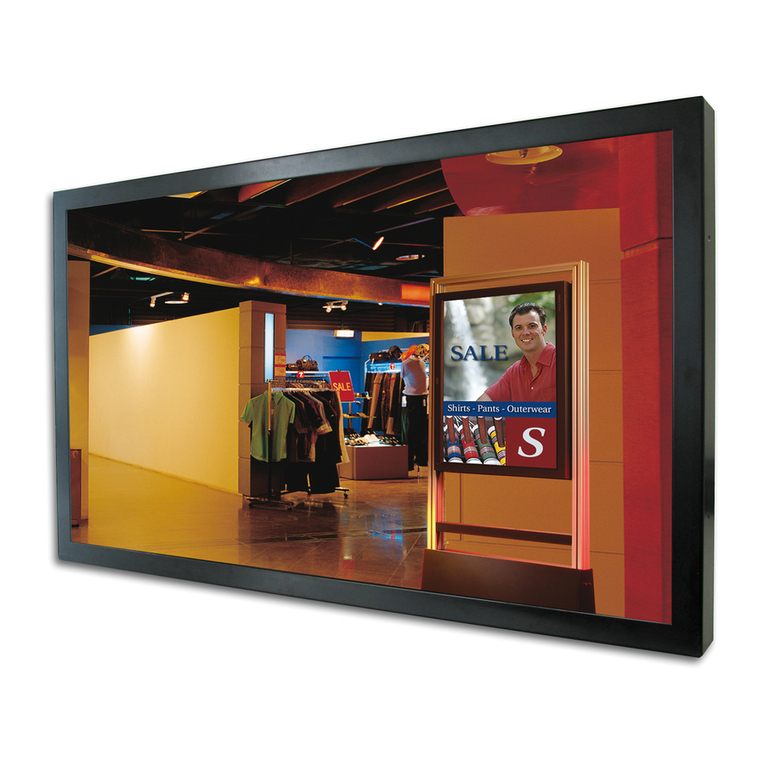
Canvys RTD550AM Series User manual

Display Users Manual
RTD550AM Series
RTD750AM Series
Table of Contents
1.SafetyPrecautions
2.Introduction
3.Set up
4.Controls & Functions
5.Timing Guide
6.Power Management
7.Specifications
8.Cleaning
9.Failure Diagnosis
10.Technical support
1
5
7
11
20
21
22
24
25
26
MAN-00011


FCC Information
Thisequipmenthasbeentestedandfoundtocomplywith
thelimitsforaClass Bdigitaldevice,pursuanttoPart15 of
FCC Rules.Theselimitsaredesignedtoprovidereasonable
protectionagainstradiofrequencyinterferenceinaresiden-
tialinstallation.Thisequipmentgenerates,uses,andcan
radiateradiofrequencyenergy.Ifnotinstalledandusedin
accordancewiththeinstructions,itmaycauseinterferenceto
radiocommunications.However,thereisnoguarantee that
interferencewill notoccurinaparticularinstallation.Ifthis
equipmentdoescauseinterferencetoradioortelevision
reception(thiscanbedeterminedbyturningtheequipment
off andon),theuserisencouragedtotrytocorrectthe
interferencebyoneormoreofthefollowingmeasures:
1
SAFETYPRECAUTIONS
1
• Reorientorrelocatethereceivingantenna.
• Increasetheseparationbetweentheequipment
andreceiver.
• Connecttheequipmentintoanoutletonacircuit
differentfromwhichthereceiverisconnectedto.
• Consultthedealeroranexperiencedradio/
televisiontechnicianforhelp.
FCC Warning:
ToassurecontinuedFCC complianci,theusermustusea
groundedpowersupplycordandtheprovidedshielded
videointerfacecablewithbondedferritecores.Also,any
unauthorizedchangesormodificationstothismonitor
wouldvoidtheuser’sauthoritytooperatethisdevice.
CECertification
ThisdevicecomplieswiththerequirementsoftheMDD
directive93/42/EEC“MedicalDeviceDirective”.
To reduce the risk of electric shock, Do not remove the back cover.
No-user serviceable parts inside, Refer to qualif ed service Personel.
Attention, Consult accompanying documents
Dangerous Voltage, Risk of electric shock

2
SAFETYPRECAUTIONS
1
Warning
-ThisapparatusmustbeearthedbecauseofClass
I
equipment.
-Thisapparatusisnopatientcontactequipment.
-Whenusingat240 VinUnitedStates,supplymustbefrom
center-tapped,240V,singlephasecircuit.
-Pleaseconsultwiththedealerfromwhomyoupurchased
itaboutwastedisposal.
-Thisequipmentshall nottobeusedaroundthepatient
vicinity,whichisthespacewithsurfaceslikelytobe
contactedbythepatientoranattendantwhocantouchthe
patient.
Thisenclosesaspacewithintheroom1.83m(6feet)
beyondtheperimeterofthebedinitsintendedlocation,
andextendingvertically2.29m(7-1/2feet)abovethefloor.
EquipmentClassification
-Typeofprotectionagainstelectricshock:Class
I
equipment.
-Protectionagainstharmfulingress ofwater: Ordinary
Equipment(IPXO)-Noprotection.
-Notsuitableforuseinthepresenceofaflammable
anestheticsoroxygen.
-Modeofoperation:Continuousoperation.
FollowtheinstructionsbelowforsafetyuseofthecolorLCD
display.
*Readthisuser’smanualandproperlyusetheunit.
*Youmustagree thatPixelink isnotliableforanydamage
causedbyanythirdparty’soryourneglegenceoffollowing
theinstructionsofthisuser’smanualandmisuseexcept
thosespecifiedresponsibilitiesforcompensatonaccepted
bylaw.
Symbols
This user's manual contains various symbols to
guide users to properly use the product.
The contents in each box below express the events
that will occur following neglects of signs and
misuse.
Confirm the contents shown here and then read this
manual carefully.
Meaning of symbols
Person could be at risk of severe
injury or death.
Warning
Person or properties could be at risk
of injury or damage.
Caution
expresses DO NOT. expresses MUST DO.
Cautions when setting up
Caution
Do not put the unit on unstable
placees (on a wonky table and
inclined place), which might
cause injuries arising from its
dropping or falling.
Do not place the unit where it is
subject to direct sunlight or near
any heating device.
The cabinet and/or components
may be damaged, which may
cause generation of fever and
ignition.

3
1SAFETYPRECAUTIONS
Cautions when using
Warning
Do not put the unit in such place where
it has bad air circulation, dust, humidity,
oily smoke and steam.
It may lead to f ire.
Do not put any metal materials or
flammable foreign objects into the unit
(from vent holes). It may lead to
electric shock and/or fire
• In case that any object mentioned
above is placed inside, immediately
turn off the power, disconnect the
plug from outlet, and contact shops.
Caution
Scratching or hitting with hard objects may
break the unit.
pushed on its side, or upside down.
These may lead the fever that
the unit generates to pile up
inside the unit, which may
lead to generation of fever and
ignition. Also, falling may
Do not place any container filled with water
or any chemicals near the unit.
In case of containers falling down,
liquid may permeate inside and
insulation failure may occur, which
may lead to electric shock.
• In case of any liquid entering
inside, immediately turn off the
power, disconnect the plug from
outlet, and contact shops.
Do not use the unit turned over on its back.
Caution
Do not put the unit in such place where it
is subject to direct sunlight or near any
heating device.
The cabinet and/or components
may be damaged, which may
cause generation of fever and
ignition.
Do not use the attached AC adapter to
other devices (models with attached AC
adapter).
It may lead to generation of fever and/or
fire. Also, do not use any other AC
adapter to this unit.
During a long-hour use, take a break 10 to 15 minutes every one hour for your eyes.
Otherwise, it may cause eyestrain.
Abnormal circumstances
Warning
In case of any abnormality such as odor,
sound, and overheat taking place,
imediately turn off the power and
disconnect the plug from outlet.
Continuance of using the unit under
such condition may lead to electric
shock and/or fire Immediately turn
off the power, disconnect the plug from outlet,
and contact shops.
In the event of thunder, immediately turn
off the power and disconnect the
plug from outlet.
Lightning strikes may cause
electric shock and/or fire
Warning
In the event of broken panel and leaking liquid crystal, do not inhale,
swallow, or touch the liquid crystal.
It may cause you getting poisoned and/or having a skin irritation. If you
put it in your mouth, immediately gargle with water and go to see a doctor
to get a checkup. In case of taking it on your skin and/or cloth, wipe it off
with alcohol and rinse them.
Maintenance
Warning
Do not remove the cabinet.
There are high-voltage parts inside
that may lead to electric shock.
•Ask shops for adjustments
and inspection.
Do not remodel or repair.
It may lead to fire, electric shock,
or injuries.
Caution
Clean inside the display once a year.
The dust inside the unit may lead to f re.
•Ask shops for adjustments and
inspection.
Disconnect the plug from outlet when not
using the unit for a prolonged period.
Disconnect the plug from outlet
when not using for a prolonged
period for such as trip.


1SAFETYPRECAUTIONS
Notes
•Eveniftheunitisproperlyused,itmayhaveaneffecton
radioand/orTVreceptionupontheconditionofelectric
wave.Ifitisthecase,givecautiontothefollowings.
1)Ensureenoughspacebetweentheunitandradioand/
orTV.
2)Connecttheunitandradioand/orTVtoseparate
outlets.
•ColorLCDdisplaymayhavetinyspotsandunevenness
accordingtothedisplayingconditions,buttheyarenot
anysignoffailure.
•LCDpanelisproducedwithhigh-definitiontechnology,
buttheremaybesomeinperfectdisplayingpixels(lacking,
constantlighting).
•WhenplacingLCDpanelnearwindowsoroutsidefora
longperiod oftime,givecautiontoit;sunlightmaycause
damageonthepanel.
•DonotgiveLCDpanelastrongpuch,scratchit,orplace
anyobjectonit.ItmaycauseLCDpanelfailure.
•Whenusingtheunitinacoldplace,youwill see images
leavetracesoradarkscreen,bititisnotafailure.Itwill
gobacktothenormalstateastemperaturerises.
•Donotdisplaystill picturesforalongperiod oftime,
whichmaycauseafterimages.
•Theminimumstateofthebrightness adjustmentmaymake
imagesdifficulttosee.
•Thequalityofcomputersignalsmayhaveaneffecton
theunit’squality.Werecommendyoutoselectcomputers
withhigh-qualityvideosignaloutput.
•Instantaneousvoltagechange
Thisunitmayhavedefectsuponmomentaryvoltagedrops
ofpowersupplycausedbyincidentssuchaslightning
strikes,Forthecountermeasureforit,werecommendyou
tousedevicessuchasuninterruptivepowersupply.
DisposaloftheUnit
•Donotdisposeoftheunitwithgeneralwastes.
Donotdisposeoftheunittogetherwithgeneralwastes.
•Theunitcontainsmercuryinitsphosphertube.Follow
yourlocalregulationsorrulesupondisposaloftheunit.
4

GeneralInformation
Withincrediblestyle,versatilityandvisualbrilliance,the
LCDmonitormulti-inputflatpanelcanturnthedreamofa
perfectdisplayintoreality.Byincorporatinganalogand
digitalinterfaces,theLCDmonitorprovidestheutmostin
displayperformanceandcompatibilityoftoday’sanalog
videostandards,whileguaranteeingcompatibilityfor
tomorrow’sadvanceddigitalstandards.Thissleek
ergonomicallydesignedTFTdisplayprovidesflexible
four-wayadjustmentsforoptimumdesktop use,alongwith
VESA
®
wall-mountingcapabilitiestoprovideawidearray
ofuseroptions.Furthermore,itsportraitmodeprovides
maximumInternetbrowsingconveniencewith
considerablyless scrollingrequired.
TheLCDmonitormakesanultimateflatpanelsolutionfor
thosewhoprefermoredesktop workingspace,thehighest
videoperformanceandflexibility,duetoitssmaller
footprintandsizecouplingwithcrisp,sharpdisplayimage
quality.
Wetrulybelieveyouwill enjoyusingtheLCDmonitor.
Thankyouformakingourproductyourchoice.
Features
•ThisColorLCDDisplayhasamulti-scanningfunction
•Highbrightness andcontrast
•Superfastresponsetime
•Superwideviewingangles
•VGA,DVIdualinterface
•SupportVideo(NTSCandPAL)signalinput
•16.7millionTrueColor
•Two-wayergonomicadjustment:tiltandpivot(for15”
LCDdisplay)
•Four-wayergonomicadjustment:tilt,height,swiveland
pivot
•VESA
®
standardwall/armmountready
•User-friendlycontroldialandPreVu
TM
On-ScreenDisplay
•DDC2BPlug
&
Play
•Optionalstereospeakers
INTRODUCTION
2
5

INTRODUCTION
2
CheckList
Beforeoperatingthismonitor,pleasemakesurethatall
itemslistedbelowarepresentinyourpackage:
TheLCDmonitor
Thisuser’smanual
Warrantystatement
ACPowercord
AC/DCadapter
D-sub15-pinsignalcable
Touch Screen CD Driver (optional)
OptionalItems
Theseareoptionalitemsandcanbeorderedbycontacting
dealerdirectly.
•
*1
DVIgraphiccardpackageincludingaDVIcable
•VESA
®
standardwall/armmountkits
•PivotDriverandUtilitiesSoftware
•
*2
S-VideoCable
•
*2
CompositeVideoCable
•
*3
AudioCable
Ifanyoftheaboveitemsarefoundmissingorifyouwish
toordertheoptionalitems,pleasecontactyourdealer.
*1
FortheDisplayunitwiththeDVIinputconnector
*2
FortheDisplayunitwiththeS-VideoandRCAinput
connector
*3
FortheDisplayunitwiththeAudiofunction
6

NotoolsarerequiredtosetuptheLCDmonitor.Simply
followtheinstructionsoutlinedinthenextfewpages.
Connectorsforthesignalcables,powerarelocatedon
thebackofthepanelbehindthecoverdoor.Pleaserefer
tothediagramonthispagefortheconnector
configuration.
ConnectSignalCable(VGA
)
AttachtheVGAsignalcableend,whichhastheferritecore
furthestawayfromtheplug,tothemonitorandattachthe
otherendtothegraphicscardadapteronyourcomputer.
Becautiousininsertingthecableproperlyintoboth
connectors.Ifthecabledoesnotseemtofititmaybe
facingthewrongdirection.Turnthecableoverandtryto
matchtheshapeoftheconnectorwiththatofthegraphics
adapter.
ConnectPowerAdapterandCable
ConnecttheroundshapeplugendoftheAC/DCadapter
totheDCPowerinputconnectoroftheLCDmonitor.
ConnectthefemaleendofthepowercabletotheAC
powerinputreceptacleontheAC/DCadapter.Then,plug
themaleendofthepowercableintoanACoutlet.
CAUTION:MakesureyouusetheauxiliaryACadapter.
SETUP
3
*1
ConnectDVICable
IfyouhaveaDVIdigitalgraphicscardadapterandaDVI
cable,connectittotheDVI(IN)connectorofthemonitor.
TheoptionalDVIgraphicsadapterandtheDVIcablecan
beorderedbycontactingdealerdirectly.TheDVI(OUT)
portallowsyoutoconnectasecondLCDmonitororanother
DVI-Dcompatiblemonitortodisplaythesameimageas
thefirstmonitor.Thisdigitalsignaloutputportisfunctional
onlywhenthedigitalDVI(IN)isusedfordisplaysignaling.
*2
ConnectVideosignalCable(forvideodeviceoutput)
ConnectS-videoconnectoroftheLCDmonitorandanS-
VideooutputdevicewiththeattachedS-Videocable.For
compositesignal(NTSC/PAL)input.connecttheRCA
connectorofthemonitorandacompositevideooutput
divecewiththeattachedcompositevideocable.
*3
ConnectAudiosignalCable
ConnectAudioInconnectoroftheLCDmonitorandan
AudioOutdevice(PC.DVD,CD...)withtheattachedstereo
minicable.
CAUTION:Whenyoudisconnectthecord/cables,besure
toholdtheconnectorandnotthecableitself.
7

SETUP
3
8
Connections
A+D
A+V
AUDIO Audio source
AUDIO
S-video source
Audio source
Composite video source
S-video
Y

CableManagement
TheLCDmonitorhasbuilt-incableguidesandcoverto
helpyouorganizeandroutethecablesneatlyonyour
desktop space.Thecablecoverislocatedonthebackof
themonitorstandanditisopenedbygentlypullingitoff
thestand.Underthecover,thecablescanbeheldin
positionbynumerousclips.
Thereareseveralwaystoroutethecablesandyoumay
useanywayyoufindsuitableforyoursituation.However,
theroutingmethod illustratedbythedrawingontherightis
recommendedtogivethebestresultinmostsituationsboth
aestheticallyandfunctionally.Oncethecablesarein
position,gentlysnapthecoverbackontothestand.
Anti-TheftSecurityLockSlot
TheLCDmonitorisequippedwithasecuritylockslot
compatibletoKensington
®
securitylocktype.Thesecurity
cablelockmaybeavailablethruyourdealeroritcanbe
purchasedatmostcomputerperipheralstoresnearyou.
SETUP
3
9
Another Cables

AdjusttheFour-Way(2Way,tiltandpivot,for15”LCD
display)ErgonomicStand
Adjustthefour-way(tilt,height,swivelandpivot)ergonomic
standforyourmaximumviewingcomfort.Tominimizeeye
fatique,wesuggestyouallowaminimumviewingdistance
of18 inches.
CAUTION:InordertoprotecttheLCD,besureto
holdtheedgeofbezelwheneveryouadjustitanddo
nottouchthescreen.
Install thePivot
®
Software(Optional)
InordertousethepivotfunctionoftheLCDmonitor,the
PortraitDisplayPivot
®
software,isnotrequiredforyouto
usethemonitorintraditionallandscapeorientation.Itis
recommendedthatthissoftwareisinstalledonlyifyouare
intendingtousethemonitorinportraitorientation.
Forthelatestlistofcompatiblegraphiccardsandupdates
tothesoftware,visit
www.portrait.com
.
ForanytechnicalsupportissueswiththePivot
®
software,
pleasesendyourquestionviae-mail:
support@portrait.com
.
CAUTION:Beforepivotingtoportraitmode,tiltthe
paneluptothemaximum(20
o
)upwardangleso
thatthecornerofitdoesnottouchthebasewhile
rotating.
SETUP
3
10
4

ControlDial
TheControlDialisamulti-functionaldevicelocatedbehind
theLEDIndicatorontherightsideofthefrontbezel.Ithas
three movements-rotateupward,rotatedownwardand
press inwardasabutton.
1.PowerOn/Off
Press theControlDialtopowertheunitonfromtheoff
stage(theLEDisoff).Toturnthepoweroff,press theControl
Dialandholdforatleast1seconduntil theLEDturnsoff.
2.OSDControl
Whilethemonitorison(greenLEDandimageonthe
screen),pressingontheControlDialactivatestheOSD.
WhiletheOSDmenu isactive,usethethree way
movementsoftheControlDialtoadjustthemonitor.
CONTROLS& FUNCTIONS
4
RotateDownward:MoveDown/Right,Increase
RotateUpward:MoveUp/Left,Decrease
ButtonPress :Execute,Do,Save
LEDIndicator
ThisLEDindicatorturnsgreenwhenthepowerisswitched
ONandthepowercordisproperlyattached.Itturnsamber
whenthemonitorgoesintoapowersavingmode(Active
Off).PleaserefertothePowerManagementsectionofthis
manualformoreinformation.
1
1

CONTROLS&FUNCTIONS
4
OSDDisplay
TheOSDmenu isdisplayedwithicons,adjustmentitems,
andsettingvaluesasshownbelow.
(Thefigurebelowisthemainmenu.)
HowtoOperate
Adjustmentexamplesfromthemainmenu below.
e.g., “Contrast”adjustment
Adjustment1...fromthemainmenu
1.Press ControldialanddisplaytheOSDmunu
12
Color
Picture
Auto
OSD Menu
Misc.
Exit
Contrast
Brightness
Color Temp.
Exit
1024x768 60Hz
70
100
OSD adjustment screen has "main menu" and "submenus."
Main Menu Display
Adjustment item icons
Icons of adjustable items
Cursor display
The menu pressed will be
shown.
Input selection and timing
Display input connector and
input timing currently selected.

CONTROLS&FUNCTIONS
4
2.Rotatethedialtoselect”Color”andpress thedial.
3.Rotatethedialtoselect”Contrast”andpress thedial.
(“Contrast”displaywill appear)
4.Press thedialtomakecontrastadjustments.
5.Rotatethedialtomakecontrastadjustments
Adjustableattherangefrom0to100.
13
Color
Picture
Auto
OSD Menu
Misc.
Exit
Contrast
Brightness
Color Temp.
Exit
1024x768 60Hz
70
100
Color
Picture
Auto
OSD Menu
Misc.
Exit
Contrast
Brightness
Color Temp.
Exit
1024x768 60Hz
70
100
Color
Picture
Auto
OSD Menu
Misc.
Exit
Contrast
Brightness
Color Temp.
Exit
1024x768 60Hz
100
100
Color
Picture
Auto
OSD Menu
Misc.
Exit
Contrast
Brightness
Color Temp.
Exit
1024x768 60Hz
100
100

CONTROLS&FUNCTIONS
4
ColorTemp.
Cool:
Bluishwhitesuitedforgeneraluse.
Neutral:
Whiteclosetonaturallightusedfor
publishingtrade.
Warm:
Reddishwhitemainlysuitedforphoto
modification.
User:Red:
UseradjuststheintensityofRedchannel
attherangefrom0to100.
Green:
UseradjuststheintensityofGreen
channelattherangefrom0to100.
Blue:
UseradjuststheintensityofBlue
channelattherangefrom0to100.
Exit:
ReturntoMainMenu.
Exit
ReturntoMainMenu.
6.Press thedialtofinishadjustments.
Thecursorisplacedon“Exit.”Press Controldialtoreturn
totheOSDmainmenu.
7.Thecursorisplacedon“Exit.”Press Controldialto
returntoclosetheOSDmainmenu.
ChartsofOSDAdjustmentFunctions
Thechartbelowdisplaysthefunctiontree andbrief
explanationsofthefunctions.Color,LCD,andother
adjustmentshavesubmenusundereachtree.
Mainmenu display
Color
Contrast
Adjustthecontrastofthefull screenattherangefrom0to
100.
Brightness
Adjustthebrightness ofthefull screenattherangefrom0
to100.
14

CONTROLS&FUNCTIONS
4
Picture
HPosition
Adjusthorizontalscreenposition.
VPosition
Adjustverticalscreenposition.
Phase
ADC(analogtodigitalconversion)Phaseadjustments.
Clock
Fineadjustmentsonhorizontalpositionofvideosignals.
Exit
ReturntoMainMenu.
Auto
Auto
Automaticscreensize/position/freq./phaseadjustment.
Exit
ReturntoMainMenu.
OSDmenu
Language
English:
DisplayOSDinEnglish.
Francais:
DisplayOSDinFrancais.
Deutsch:
DisplayOSDinDeutsch.
Espanol:
DisplayOSDinEspanol.
Italiano:
DisplayOSDinItaliano.
:
DisplayOSDinJapanese.
OSDH.Pos.
AdjusthorizontalpositionofOSD.
OSDV.Pos.
AdjustverticalpositionofOSD.
Exit
ReturntoMainMenu.
15

CONTROLS&FUNCTIONS
4
Misc
SourceVGA:
SelectD-sub15-pininputsignals.
DVI:
SelectDVI24-pininputsignals.
Recall
Restoresfactorysettings.
Exit
ReturntoMainMenu.
E
X
I
T
Exit
ReturntoMainMenu.
DetailsofAdjustmentItems
Theadjustmentfunctionsaredescribedasfollows.
Color
Contrast(adjustcontrast)
Adjustcontrastofthescreen.Thelargerthevalueis,the
strongerthecontrastis,andviceversa.Adjustableatthe
rangefrom0to100 byacoupleofsteps.
Brightness (adjustbrightness)
Adjustbrightness ofthescreen.Thelargerthevalueis,the
screenis,andviceversa.Adjustableattherangefrom0to
100 byacoupleofsteps.
ColorTemp.
Usercanmaketoneadjustmentsandsettings.
•Cool:
BluishwhiteforgeneraluseandCAD/CAM.
8000Kisafixedvaluebythemanufacturer; User
cannotchangethesettingvalue.
•Neutral
:Whiteclosetonaturallightusedforpublish-
ingtrade.6500Kisafixedvaluebythe
manufacturer; Usercannotchangethesettingvalue.
16

CONTROLS&FUNCTIONS
4
•Warm
:Reddishwhitemainlysuitedforphoto
modification.5400Kisafixedvaluebythe
manufacturer; Usercannotchangethesettingvalue.
•User
:Usercanadjustandsettones.
•Red
:Adjustredandequivalentcolorsattherange
from0to100.Thegreaterthevalueis,thedeeper
thecoloris,andviceversa.
•Green
:Adjustgreenandequivalentcolorsattherange
from0to100.Thegreaterthevalueis,thedeeper
thecoloris,andviceversa.
•Blue
:Adjustblueandequivalentcolorsattherange
from0to100.Thegreaterthevalueis,thedeeper
thecoloris,andviceversa.
•Exit
:ReturntoPictureMenu.
Exit
ReturntoPictureMenu.
Picture
(adjustimages)
H.Position(horizontalpositionadjustment)
Adjustthehorizontalpositionofthedisplay.Whenrotat-
ingControldialclockwise,thedisplaymovestotheleft,and
viceversa.ForthedigitalinputDVI,thisfunctionisnot
available.
V.Position(Verticalpositionadjustment)
Adjusttheverticalpositionofthedisplay.Whenrotating
Controldialclockwise,thedisplaymovesupward,andvice
versa.ForthedigitalinputDVI,thisfunctionisnotavailable.
Phase(phaseadjustment)
Make“Phase”adjustments,ifanyflickers,blurs,or
horizontalstripesonscreen.Adjustableattherangefrom0
to100.ForthedigitalinputDVI,thisfunctionisnotavailable.
17

CONTROLS&FUNCTIONS
4
18
Clock(clockadjustment)
Whenoperating“Autoadjustment”andifanypartially
phasedscreen,makefineadjustmentsonvideosignal
positiontohorizontallysynchronizedsignalsbyrotatingthe
controlknob.Asthevaluegetslarger,thescreenmovesto
theright,andviceversa.Adjustableattherangefrom0to
100.ForthedigitalinputDVI,thisfunctionisnotavailable.
Exit
ReturntoPictureMenu.
Auto
AutoSetup
Automaticallyadjustthesize,position,contrast,andthelike
ofthescreen.
Exit
ReturntoPictureMenu.
OSDMenu
Language
Selectingthiscontroltoselectthelanguageyouwant.
•English:
DisplayOSDinEnglish.
•Francais:
DisplayOSDinFrancais.
•Deutsch:
DisplayOSDinDeutsch.
•Espanol:
DisplayOSDinEspanol.
•Italiano:
DisplayOSDinItaliano.
•:
DisplayOSDinJapanese.
OSDH.Pos.
AdjustthehorizontalpositionofOSD.WhenrotatingControl
dialclockwise,OSDmovestotheright,andviceversa.
OSDV.Pos.
AdjusttheverticalpositionofOSD.WhenrotatingControl
dialclockwise,OSDmovesdownward,andviceversa.
Exit
ReturntoPictureMenu.
This manual suits for next models
1
Table of contents
Other Canvys Monitor manuals

Canvys
Canvys PC55002R User manual

Canvys
Canvys PD-CP32AH Series User manual

Canvys
Canvys LC-VT1503 Series User manual

Canvys
Canvys FP4200-OR User manual

Canvys
Canvys VA series User manual

Canvys
Canvys PD-CP26CM User manual

Canvys
Canvys RAP2123AMII User manual

Canvys
Canvys PD-CP52SS User manual

Canvys
Canvys MD-DFM24-ENDO User manual

Canvys
Canvys VT-24WK User manual