Capri Tools CP21029 User manual

CP21029
VACUUM BRAKE BLEEDER
User’s Manual

1 2
Ref.
A Air Flow Handle ON/OFF
Air Flow Handle Securing Clamp
Air Inlet
Extracting Tank Stopper
Silicone Hose
Universal Brake Nipple Adapter
Quick Connect Fluid Inlet
Integrated Silencer
B
C
D
E
F
G
H
Description
AB
C
D
E
F
Introduction
The Capri Tools Vacuum Brake Bleeder is a lightweight pneumatic brake bleeder
designed to drain most standard and ABS brake systems effortlessly with
no spills and messes. It bleeds and flushes hydraulic brakes and clutches with
vacuum.With built-in auto cut-off feature, the Vacuum Brake Bleeder will stop
the extraction when the reservoir is full. It also features an integrated silencer
for quieter work.
Operating Instructions
NOTICE
An air compressor with 2 CFM is required to work with this tool.
1. Assemble Vacuum Brake Bleeder by
connecting the air compressor hose (not
supplied) to the air inlet and the provided
silicone hose to fluid inlet.
G
H
2. Remove old brake fluid from master
cylinder
(1) Turn on air compressor. (not supplied)
(2) Remove master cylinder reservoir cap
and insert brake bleeder nipple into the
reservoir.
(3) Depress the air flow handle to
evacuate old fluid from the reservoir.
(4) Remove bleeder nipple from the
reservoir once old fluid has been
extracted.
3. Top off master cylinder reservoir to the
maximum level with fresh brake fluid.
Refer to the vehicle’s service manual for
the correct brake fluid type.

3 4
2
3
4. Consult the vehicle’s service manual for
the correct brake bleeding sequence.
Typically, you should start at the brake
that is furthest from the master cylinder
reservoir, usually the passenger side rear
brake. Slide the correct sized box wrench
on the bleeder screw. Push the rubber
bleeder nipple over the bleeder screw.
Operating Instructions (continued)
5. (1) Turn on air compressor. (not supplied)
(2) To apply suction, depress the air flow
handle.
(3) Move the air flow handle securing
clamp over the handle for continuous
suction.
6. To begin bleeding your brakes, loosen the
bleeder screw on the vehicle about a 1/2
turn until brake fluid draws out. Ensure
the master cylinder reservoir does not
run empty as this will introduce air to
the brake system causing your brakes
to operate improperly. Avoid this by
ensuring the master cylinder has fresh
brake uid and is topped off before
beginning bleeding your brakes.
7. Bleed the brake system until fluid runs clear and no bubbles are visible in
the bleeder hose. Close the bleeder screw to stop extraction and remove
the rubber bleeder nipple from the bleeder screw.
8. Repeat steps 3 to 6 going from the passenger side rear to the driver side
rear, passenger side front and finish with the driver side front brake, unless
otherwise specified by the vehicle’s service manual.
9. Once all brakes have been bled, check the master cylinder reservoir fluid
level. Fill to maximum level if needed and replace master cylinder cap.
10. Run the engine and depress the brake pedal to ensure firm braking. If
braking is spongy, air may be in the system and the bleeding process should
be repeated.
Specications
• Air Inlet
• Avg. Air Consumption
• Operating PSI
• Working Temperature
• Max. Capacity
1/4”
2 CFM
40-170 PSI
-3 to 140° F
2 liters (0.52 gallons)
Package Contents
• (1) 40-inch silicone hose with a universal rubber bleed nipple adapter
• (1) 2-liter fluid extractor reservoir
Optional & Sold Separately
• 6.5 ft vacuum brake bleeder extended hose

5 6
Maintenance And Servicing
1. Before each use: Inspect the general condition of the Vacuum Brake
Bleeder. Check for misalignment or binding of moving parts, cracked or
broken parts, damaged hoses, loose connections, and any other condition
that may affect its safe operation. If a problem occurs, have the problem
corrected before further use. Do not use damaged equipment.
2. When cleaning: Do not clean the Vacuum Bleeder with cleaners or other
solvents not intended for use with plastic components. Use a clean cloth
and, if necessary, a mild detergent. Do not immerse the Vacuum Brake
Bleeder in any liquid.
3. When storing: Do not store fluid in the tank. Remove the extracting tank
stopper and drain fluid from the tank. Dispose of excess fluid properly,
according to federal, state, and local guidelines. Store the Vacuum Brake
Bleeder in a clean, dry location out of reach of children.
Troubleshooting
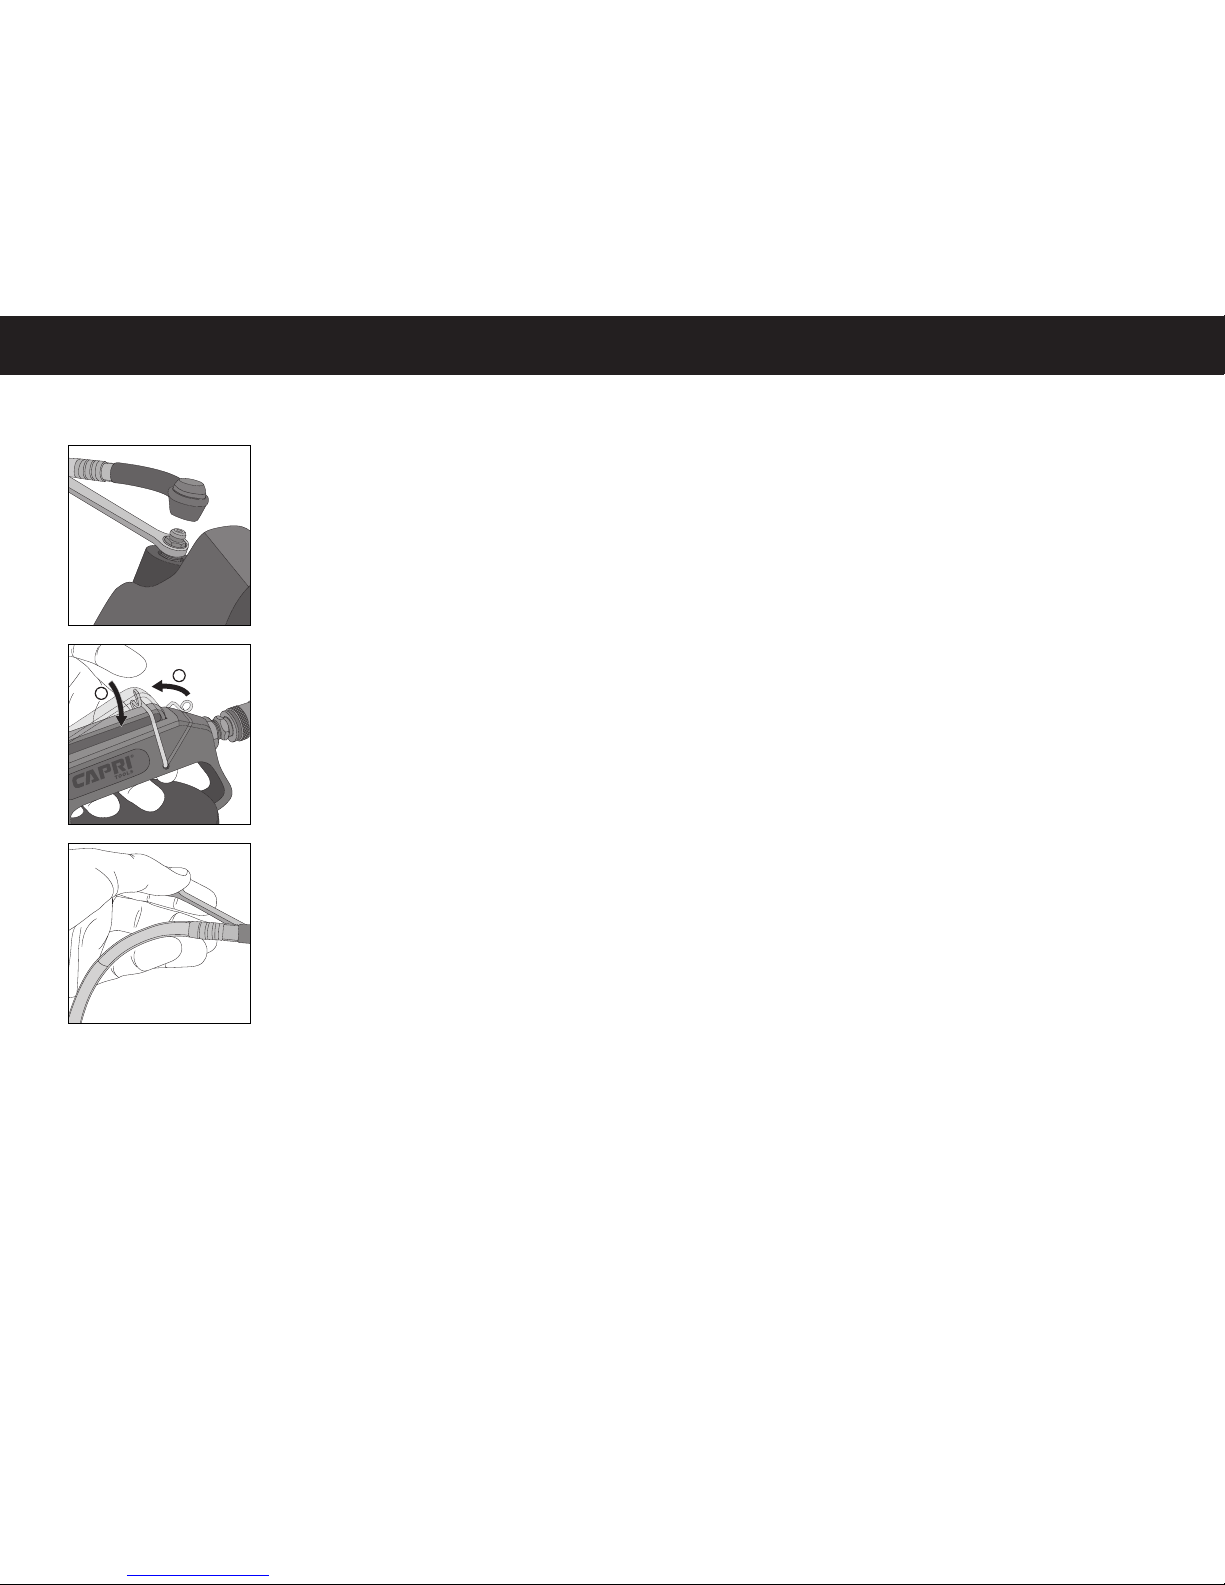
The Vacuum Brake Bleeder is not extracting uid
(1) Close brake bleeder screw.
(2) Apply brakes and release a few times.
(3) Ensure air compresser capable of at least 2 CFM is connected, turned on
and brake bleeder nipple is attached to brake bleeder screw.
(4) Depress air flow handle and lock into place with securing clamp.
(5) Open bleeder screwer with wrench to extract fluid.
Where do I nd the correct brake uid type?
Refer to the vehicle’s service manual for the correct brake fluid type. It may
also be printed on the master cylinder reservoir cap.
Do I need to remove wheels from the vehicle?
If you have access and enough clearance open to the bleeder nipple through
the wheel or under the vehicle, removing the wheel may not be required.
Can I separate the lid from the tank?
The lid should not be removed from the tank body of the vacuum brake
bleeder. If it is removed, please make sure it is reattached to the tank and tightly
sealed before operating.
Warranty
This Capri Tools® product includes a limited one year
warranty against defects from workmanship and materials.This
applies to the original purchaser only, to products purchased
and used in North America, and does not cover abuse, misuse
or regular wear and tear. For additional information, contact us
at: (888) 723-0550 or email us at: support@capritools.com
Disclaimer
Capri Tools is not responsible for any injury or damage incurred to any person
or object related to the use or misuse of the Capri Tools Vacuum Brake Bleeder.
Safety Warnings
• Brake fluid is flammable. Keep away from sources of ignition, especially hot
surfaces like exhaust pipes or manifold.
• Wear eye protection at all times. Brake fluid may cause eye or skin irritation.
Do not let brake fluid get into eyes, skin or clothing. If brake fluid gets into
eyes, wash with water for 15 minutes and seek medical attention.
• Keep out of reach of children.
• Dispose used brake fluid responsibly.

CONTACT US
If you experience problems with this product,
contact our customer service for product support
and assistance.We are here to help.
1788 W 2nd Street, Pomona, CA 91766
(888) 723-0550
Find us Online:
Table of contents
Popular Tools manuals by other brands

Farm King
Farm King 1370 Assembly manual

Bosch
Bosch BRUTE 11304 parts list

SCHUNK
SCHUNK TENDO SK 50 Assembly and operating manual

Current Tools
Current Tools 66 Cable Puller Operating, Maintenance, Safety and Parts Manual

Yuasa
Yuasa Yu-Fit user guide

Milescraft
Milescraft CircleGuideKit 1219 instruction manual