Caravaggi CIPPO 25 Instruction Manual

USER & SAFETY MANUAL
CHIPPER
CIPPO 25
READ CAREFULLY THIS BOOKLET BEFORE
OPERATING WITH THE MACHINE .

1. INTRODUCTION
PREAMBLE
Thank you for buying a CARAVAGGI CHIPPER .
Caravaggi have been manufacturing shredding and
compost equipment for many years and are now able to
offer a full range .
CARAVAGGI CHIPPERS are designed to last a long
time and run very safely provided that the instructions
herein are carried out to the letter .
You are advised to read this booklet carefully so that the
machine will not get damaged or the user injured due to
misuse.
Make sure you are fully acquainted with how the
CHIPPER works before using it .
INTRODUCTION
The CARAVAGGI CHIPPERS is a new-age chipping
machine that is highly efficient and easy to use . If it is
used and maintained correctly , it will work reliably for a
very long time .
GENERAL
Please read this booklet carefully to acquaint yourself
fully with the safety regulations and how to run , adjust
and use the machine .
IMPORTANT NOTE
Caravaggi cannot be held liable if the instructions
herein are not followed to the letter .
If you have the slightest doubt about anything ,
please do not hesitate to contact the importer for
advice on how to proceed.

2. DIMENSIONS , WEIGHT & TRANSFERS POINTS
Diesel model Tractor model
LENGTH mm 4000 LENGTH mm 3900
WIDTH mm 1590 WIDTH mm 1250
HEIGHT mm 2400 HEIGHT mm 2400
WEIGHT Kg. 1345 WEIGHT Kg. 780
LWA MAX 107 dB LWA MAX /
3
2
4
A
D
17
E
BC
6
5
1 HOPPER 5 ROAD FRAME
2 EXHAUST FAN 6 TRACTOR P.T.O.
3 DIESEL ENGINE 7 3rd POINT FRAME
4 WHEELS

3. TRANSFERS AND SYMBOLS
A C
D
B
E

4. SAFETY REGULATIONS
Misuse or improper maintenance is likely to cause damage or
injury . To prevent accidents , follow the instructions below very
carefully .
GENERAL REGULATIONS
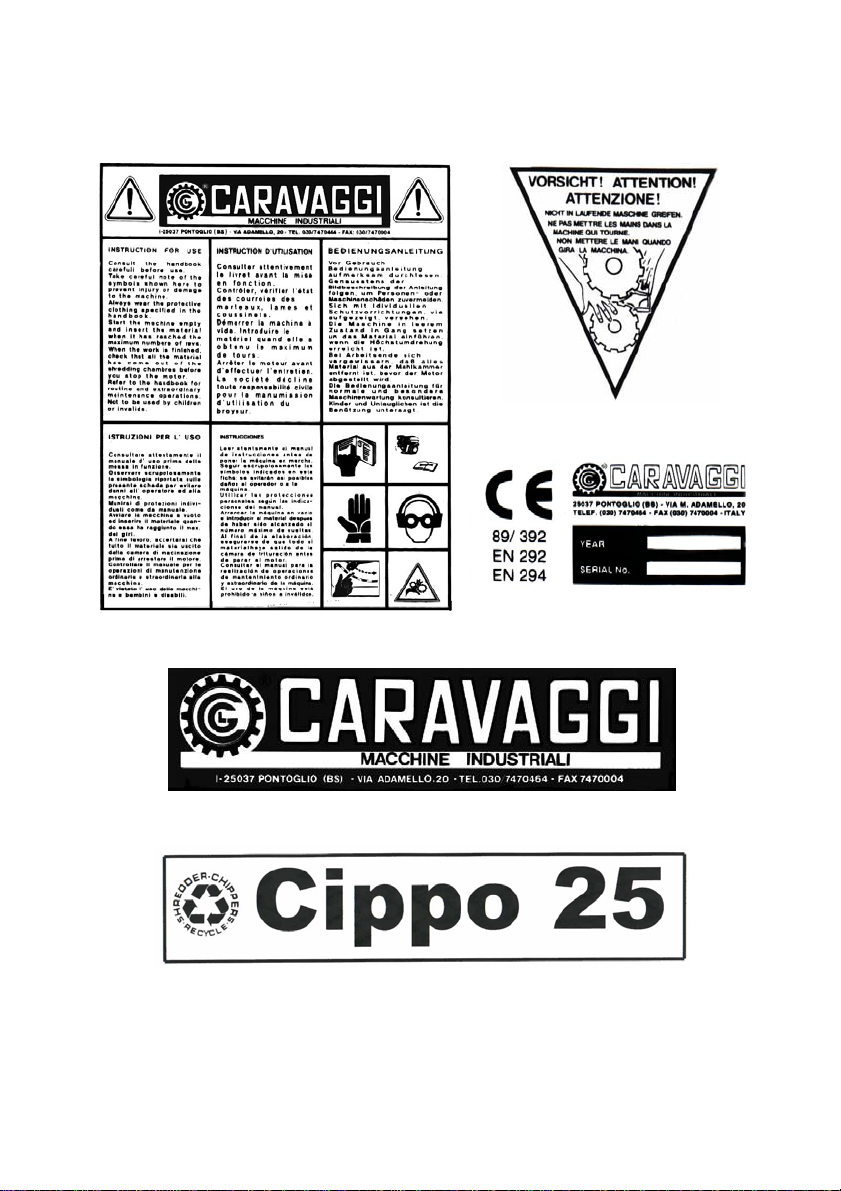
1. Read this booklet carefully before using the chipper . If you
mislay it apply for another copy from : CARAVAGGI , Via M.
Adamello , 20 - I - 25037 Pontoglio - BS .
2. DO NOT ALLOW children or anyone else who is not authorized
or acquainted with the instructions to use the machine .
3. The user is responsible for any damage or injury caused within
the machine’s RANGE OF ACTION . KEEP CHILDREN ,
ANIMALS AND UNAUTHORIZED PERSONS WELL AWAY FROM
THE WORKING AREA.
4. Use the machine for shredding organic and vegetal material only .
5. Always wear headgear , gloves and goggles . Wear long trousers
and sturdy shoes . Never use the chipper in bare feet or wearing
sandals , sneakers or any other clothing which is likely to be
caught up in the moving parts .
6. The fuel is highly flammable and volatile , which means there is
the risk of explosion . Remember the following :
a ) Use a good tank .
b ) DO NOT FILL the tank when the motor is hot or running .
c ) DO NOT SMOKE when handling fuel .
d ) Always fill the tank in the open air using a funnel .
e ) Wipe away any spilt fuel .
7. Make sure all the guards are mounted .
8. NEVER remove the safety guards , which are designed for your
personal safety . If they get damaged , replace them before using
the chipper again .
9. Keep your face , hands and feet well away from the loading and
shredding device when it is running . Always keep to the safety
distance .
10. NEVER leave the chipper unattended with the motor running
or connected to the tractor .
11. Before carrying out any maintenance operations , turn off the
motor and wait for all the moving parts to stop . In the
explosion engine version , turn the engine off and remove the
spark plug . In the P.T.O tractor model turn off and remove
the cardan shaft .

12. Do not touch the motor / engine when it is running or for some
time after it has been turned off , otherwise you are likely to GET
BURNT.
13. For perfect shredding , always check the outcoming product.
14. Check regularly that all the screws , nuts and bolts are tightened
properly.
15. DO NOT alter the rpm of the motor . If it needs to be adjusted ,
have it checked by an authorized dealer .
16. Keep the chipper free from leaves , oil or other materials to
prevent the risk of fire . Clean any oil off the motor using a
water jetter .
17. This chipper has been built to comply with all the latest safety
standards . To keep it in safe running order , always use original
parts and spares .
18. Only perform the routine maintenance work specified herein .
Contact a Caravaggi dealer for major repairs or other
maintenance .
19. Before starting up , make sure there are no foreign bodies in the
shredding chamber to prevent start up and rotation .
20. For chippers with built - in motors , always check the motor runs
properly and follow the Manufacturer’s recommendations .
21. Warm up the machine briefly and then run it at top speed .
22. Insert the material in the hopper slowly ( do not force it ) . Do
not attempt to insert material with dimension larger of 25 cm .
IMPORTANT
23. In the case of breakdown or sudden accident , first reduce
the number of rpm and then stop the motor if is necessary .

5 . SETTING TO WORK
5.1 DIESEL VERSION
5.1.1 Place the chipping machine on a flat firm surface. With the road
trailer version, apply the parking brake.
5.1.2 Check that the engine is filled with oil and fuel.
5.1.3 Check that the emergency button on the hopper is not pressed
(released).
5.1.4 Check that the engine cover is closed and the locking knobs
properly tightened.
5.1.5 Make sure the clutch is disengaged (lever turned towards the
hopper).
5.1.6 Place the hopper extension in the work position and lock it with the
knobs.
5.1.7 Fit on the discharge pipe and move it into the safest working
position for the operator (out of range of the operator’s position).
5.1.8 Insert the keys in the ignition, switch on the engine and run at
minimum revs.
5.1.9 Engage the clutch, move the lever to the right (direction of the
steering gear).
5.1.10 Run the chipping machine empty for about one minute, then
increase the revs to maximum (move the accelerator lever to the
left) and start operation.
Ignition
Electronic no-
stress device
Accelerator
lever
Clutch lever

5.2 TRACTOR VERSION
5.2.1 Place the chipping machine on a flat firm surface
5.2.2 Connect the chipping machine to the hoist and the 3rd point of the
tractor.
5.2.3 Connect the cardan shaft to the tractor power takeoff with the
engine switched off and with the power takeoff disengaged (use the
type of cardan shaft recommended by the manufacturer).
5.2.4 Insert the plug of the chipping machine in the tractor socket.
5.2.5 Check that the emergency button on the hopper is not pressed
(released).
5.2.6 Place the hopper extension in the working position and turn the
knobs to lock it.
5.2.7 Fit on the discharge pipe and move it into the safest working
position for the operator (out of range of the operator’s position).
5.2.8 Switch on the tractor engine and activate the power takeoff.
5.2.9 Run the chipping machine for about a minute with the rotation speed
as marked on the plate near the power takeoff, and then start
operation.
Power
takeoff
IMPORTANT
If the cardan shaft was not supplied together with the chipping
machine, make sure it is of a suitable type and check that the guards
are not damaged and positioned properly.

6. OPERATING INSTRUCTIONS
Position A Position B
6.1.1 Move the lever to position A to operate the feed roller.
6.1.2 Feed prunings and branches up to 25 cm in diameter into the feed
hopper. Accompany them in and let them drop.
6.1.3 Set the delivery mouthpiece in the safest position to prevent injury.
6.1.4 If the motor loses revs or power due to blockage, proceed as
follows:
- Stop feeding in material.
- Immediately move the feed roller lever to position B
(reverse).
1. Wait until the machine has freed itself of material and the motor
speed has increased to the correct number of revs.
6.1.5 What to do when you have finished the work:
2. - Check that there is no more material in the shredding chamber.
3. - Switch off the motor.
Disconnect the power takeoff and remove the cardan shaft (tractor
version).

6.2 HOW TO OPERATE THE ELECTRONIC NO-STRESS DEVICE
(GEFRAN)
6.2.1 Introduction
This electronic device stops the feed roller when the number of revs of the
chipping discs drops below a set value. When the number of revs rises
above the minimum limit, the feed roller starts up again and the work can
be resumed.
Standard factory-set values:
Model Rotor disc rpm Set limit Interval
Cippo 25 T 1234 1200 50
Cippo 25 D 1400 1200 50
6.2.2 Operation
When the motor or engine is running at the maximum revs, display A
shows the current number of revs. During shredding, the number of revs of
the chipping disc varies with the load.
If the revs drop below the minimum limit (difference between the restart
limit and the interval), the no-stress device stops the feed roller. When the
chipping disc reaches the restart limit (1200 revs), the feed rollers start up
as well and the work can be resumed.
6.2.3 How to set new values
If the no-stress device keeps stopping the chipping disc, thus continuously
interrupting the work, the restart limit and the interval can be modified.
With the motor running (all the power takeoff inserted) and the no-stress
device on, press the modification keys to modify the restart limit, increasing
or decreasing the value shown on display B.
To change the interval, press Ffor about one second. This will show the
set value on display B. Use the function modification keys to increase or
decrease the value.
Example :
Restart limit 1200 New restart limit 1150
Interval 50
⇒New interval 100

6.3 Programming the HENGSTLER TICO 732
HENGSTLER
tico 732
F1 F2 PSC PRG
5E 31
246 R
Setting the minimum threshold
• Press buttons ”E” and ”1” together
• Enter the required value. For example to enter 1650,
press button 4 for ”1”, button 3 for ”6”, button 2 for ”5”
and button 1 for ”0”.
• Press ”E” again to confirm.
Setting the maximum threshold
• Press buttons ”E” and ”2” together
• Enter the required value. For example to enter 1750,
press button 4 for ”1”, button 3 for ”7”, button 2 for ”5”
and button 1 for ”0”.
• Press ”E” again to confirm.

HENGSTLER
35E
R
64
tico 732
F1 F2 PSC
1
2
PRG
F
556Gefran
Electronic
No-stress
Display A
Number of chipping
disc revs.
Display B
Restart limit
Function
key F
I / O switch
Function
key E
Modification
keys Display
number of
chipping
disc revs.

7. MAINTENANCE
Always service the machine with the motor off and follow
the safety rules. In the tractor version, remove the cardan
shaft. In the diesel engine version, remove the sparkplug.
7.1 REPLACING THE CHIPPING BLADE
• Remove the five screws securing the housing to the
chassis.
• Release the safety catch.
• Open the chipper housing.
Safety catch
Fixing screw

• Remove the three screws in the blade assembly and
remove it.
• Replace the blade.
• Insert and tighten the three screws.
Adjusting the blade:
• Tighten the two blade adjusting screws equally to ensure
uniform wear and longer life.
Blade assembly
fixing screws
Adjusting screw
IMPORTANT
After replacing the blade, return the adjusting screws to
their original position (see photo) to prevent damage to
the blade.

7.2 REPLACING THE COUNTER-BLADE
• Unscrew and remove the five screws.
• Replace the counter-blade.
• Insert ant tighten the screws. It is also advisable to replace
the self-locking nuts.
Counter-blade fixing screws
Counter-blade

8. TROUBLE - SHOOTING
PROBLEM CHECK
1
CHIPPER DOES NOT TO START
B + C
2
TROUBLE STARTING UP OR POWER LOSS
C + D
3
CHIPPER MOTOR RUNS UNEVELY OR
SLOWS DOWN
A + B + C + D
4
EXCESSIVE VIBRATION
A
5
REDUCED OUTPUT
A
6
MATERIAL REJECTED BY HOPPER
A + B + E
REASONS AND WHAT TO DO
A
CHECK THE CHIPPER BLADE FOR WEAR .
B
CHECK THERE IS NO MATERIAL IN THE SHREDDING
CHAMBER .
C
CHECK ENGINE OR TRACTOR ( See the relevant booklet ) .
D
QUALITY OF SHREDDING MATERIAL .
E
CHECK FEED ROLLER ROTATION .

9. MAINTENANCE SCHEDULE
START OF
EACH
SEASON
START OF
EACH
OPERATION
END OF
EACH
SEASON
1 - CHECK MOTOR
See
booklet
See
booklet
See
booklet
2 - CHECK MACHINE P.T.O.
•
•
3 - CHECK SCREWS,
GUARDS, HOPPERS, ETC.
•
4 - CHECK BLADE WEAR
•
•
5 - CHECK WEAR AND
TENSION BELT
•
•
6 - CLEAN THE MACHINE
•
7 - CHECK TRANSFERS OF
THE MACHINE
•
•

10 . DECLARATION OF CONFORMITY
The company Caravaggi, hereby declares under its own
responsability, that the machine CARAVAGGI type CIPPO 25
Diesel and P.T.O. model, complies with the Basic Safety and
Health Requirements prescribed in EC Directive 89/336 and
89/392, 94/626 and subsequent modifications thereto 89/686,
91/368, 93/44 and 93/68.
EN 292
EN 294
The Manufacturer
( CARAVAGGI GIANLORENZO )
Pontoglio , 01 / JAN / 1995

GENERAL WARRANTY
WARRANTY
1. The Manufacturer hereby guarantees its CHIPPERS against breakage
caused by faulty materials or workmanship .
2. This warranty is valid for the first owner only for Twelve ( 12 ) months as
from the date of purchase and / or delivery .
3. The Manufacturer is entitled to inspect the chipper and any components
for which a claim has been made under the guarantee , in order to
determine the validity of the claim .
4. This warranty covers replacements free of charge only of components
found to be defective due to faulty materials or workmanship under the
guarantee period.
5. This warranty does not cover reimbursement for labour , consumables or
transport charges for repairs under guarantee .
THIS WARRANTY DOES NOT APPLY IN THE FOLLOWING CASES
4. The Manufacturer may in no way held liable for general damage ,
including damage or injury , loss due to halts in production , loss of
earnings , leasing costs or any moral or commercial damage .
5. All claims concerning motors or engines mounted on chipper will be
handled by the relevant Manufacturers’ after - sales service .
6. This warranty does not cover damage caused by misuse , abuse ,
insufficient maintenance , accident or damage caused during transport.
7. Parts which are subject to war , such as hammers , blades , anvil blades ,
etc . are not covered under this guarantee .
8. All expenses for setting the machine to work will be charged to the
distributor or dealer .
9. This warranty is not valid if the repairs , maintenance or modifications are
performed by an unauthorised persons or dealers .
10.The owner is responsible for routine maintenance and settings , which are
thus excluded herefrom .
11.The use or fitting or components and accessories that are not original
will immediately invalidate this warranty .
PROCEDURE FOR MAKING CLAIMS UNDER THIS WARRANTY
If the chipper is found to be defective due to faults material or workmanship
, you are required to send the Manufacturer a written claim and proceed as
follows :
1. The machine must be returned to the Seller or the authorised
CARAVAGGI importer .
2. You are required to present the guarantee duly filled in or the bill , if this
is not avaiable .
3. The claim will be completed by the Dealer , who will forward it to the
Manufacturer .
4. The Manufacturer alone reserves the right to determine whether to accept
the claim or otherwise .
Any disputes will be put before the Court of Brescia , Italy .

Cippo 25 - TABLE 1 – Basic Machine
Pos. Description Qty Part No.
1 Control spring 2 CP25010001
2 Roller control lever 1 CP25010002
3 Galvanised plate 2 CP25010003
4 M 10x40 knob 2 CP25010004
5 Chain 2 CP25010005
6 M 10x60 knob 1 CP25010006
7 Spacer φ18x30 2 CP25010007
8 Adjusting plate 2 CP25010008
9 M 10 Fork 2 CP25010009
10 Control cable 1 CP25010010
11 Angle protection rubber 1 CP25010011
12 Transmission bar 1 CP25010012
13 Protection rubber 1 CP25010013
14 Hopper 1 CP25010014
15 Roller guard 1 CP25010015
16 Floating roller 1 CP25010016
17 Pin hopper hinge 1 CP25010017
18 Support UCFC 206 1 CP25010018
19 Fixed roller 1 CP25010019
20 Chipping box 1 CP25010020
21
22 Outlet pipe hinge unit 1 CP25010022
22a Top flange 1 CP25010022a
22b Bottom flange with hook 1 CP25010022b
22c Handle 25x8 1 CP25010022c
22d Hex. screw M 12x180 1 CP25010022d
22e Spring handle 1 CP25010022e
22f Bottom flange 1 CP25010022f
23 Elbow 1 CP25010023
24 M8 MA knob or wing nut 1 CP25010024
25 Cover adjusting bar 1 CP25010025
26 Cover 1 CP25010026
27 Chipping box pin 1 CP25010027
28 Hydraulic motor support 1 CP25010028
29 Cast iron block spring 2 CP25010029
30 Cast iron block pin 2 CP25010030
31 Hopper extension 1 CP25010031
32 Bearing 6010 2 CP25010032
33 Bearing HK 3050 2 CP25010033
Table of contents
Other Caravaggi Chipper manuals
Popular Chipper manuals by other brands

Jensen
Jensen A521 Di operating instructions

Giant-Vac
Giant-Vac TLBC29202BVG Assembly instructions operator's manual parts list

chiptuning-direct
chiptuning-direct Pumpe-duse installation guide

Timberwolf
Timberwolf TW150FTR manual

Linddana
Linddana TP Series User instructions

DR
DR 18 HP Safety & Operating Instructions