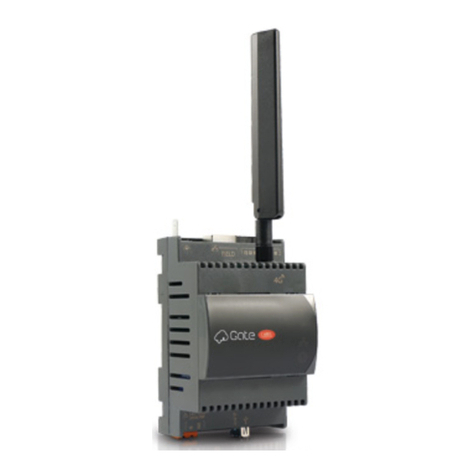
Carel mboss 0500152IE Manual

A
C
D
E
B
70 60
110
45
DO1
DO2
Vdc
DI1
GND
I/O
G
G0
2
LAN FIELD
SD
24V~/24V
20VA/9W
13
14
8
9
11
15
16
10
17
12
3 5
26
4
"μboss" +0500152IE - rel. 1.4 - 06.07.2023
μboss: Istruzioni di montaggio / Assembly procedure
ATTENZIONE
Quest’apparecchiatura deve essere installata esclusivamente da personale
di servizio con adeguato addestramento tecnico ed esperienza per essere
consapevole dei pericoli a cui può essere esposto in caso di congurazione
erronea (installatori abilitati).
NOTE GENERALI
Prima di passare a qualsiasi operazione si raccomanda di controllare che nella scatola
di µboss siano presenti:
1. il dispositivo stesso;
2. nelle versioni wireless una antenna (tipoWi-Fi o 2G/4G); Per i modelli con due radio ci
devono essere due antenne;
3. documentazione tecnica;
4. kit morsetti estraibili e due resistori da 120 per terminazione di linea seriale.
Evitare il montaggio del prodotto in ambienti che presentino le seguenti
caratteristiche:
• umidità relativa maggiore di quanto indicato nelle speciche tecniche;
• forti vibrazioni o urti;
• esposizione ad atmosfere aggressive ed inquinanti (es.: gas solforici e ammoniacali,
nebbie saline, fumi) con conseguente corrosione e/o ossidazione;
• elevate interferenze magnetiche e/o radiofrequenze (evitare quindi l’installazione
delle macchine vicino ad antenne trasmittenti);
• esposizione all’irraggiamento solare diretto e agli agenti atmosferici in genere;
• ampie e rapide uttuazioni della temperatura ambiente;
• ambienti ove sono presenti esplosivi o miscele di gas inammabili.
Avvertenze per l’installazione per i modelli con radio
• Prima di installare il prodotto vericare che la zona sia coperta adeguatamente dal
segnale 2G/3G/4G, se il modello da utilizzare prevede tale connettività radio;
• posizionare l’antenna al di fuori di carpenterie metalliche.
CARATTERISTICHE TECNICHE
Alimentazione tra G e G0: 24 Vac +10%/-15% 50/60 Hz , 24 Vdc, ±5%
Potenza ingresso Max 9W
Cond. di Funzionamento -40T60 °C, 90% U.R. non-condensante.
Cond. di Stoccaggio -40T70 °C, 90% U.R. non-condensante
2 uscite digitali Open-collector, per ogni uscita max carico 20mA
1 ingresso contatto pulito: max 24Vdc, max 5mA
Porte seriali 1 RS485 Master optoisolata - 1 RS485 Master non optois.
Batteria interna Batteria Lithium bottone, BR/CR2032, 3 Vdc, NON ricaricabile.
Requisiti di certificazione:
RED:
- WIFI
- 2G/3G/4G
EN 301 489-1
EN 301 489-17 Ver. 3.1.1; EN 300 328 Ver. 2.1.1
EN 301 489-52 Ver. 1.1.0; EN 301 511 Ver. 12.5.1;
EN 301 908-1 Ver. 11.1.1
FCC:
- WIFI+2G/3G/4G
FCC Part 15 Subpart B, ICES003
FCC Part 15.31 (k); ANSI C95.1. MPE; RSS-102. MPE
Safety: 60950; 62368
ANATEL Questa apparecchiatura non ha diritto alla protezione da
interferenze dannose e non deve causare interferenze in
sistemi debitamente autorizzati
Dimensioni modulo 4 DIN = 70x110x60 mm
Grado di inquinamento 2 secondo EN60950-1 / EN62368-1
Grado di protezione IP10
Materiale del contenitore tecnopolimero
Non aprire il dispositivo quando alimentato.
Alimentazione
• L’alimentazione del prodotto si deve eettuare unicamente tra G e G0;
• lunghezza massima=5 m;
• se alimentato in alternata utilizzare un trasformatore dedicato di sicurezza di classe 2
da 24Vac, 20...30VA, protetto contro il cortocircuito e il sovraccarico, senza collegare
il secondario a terra;
• se alimentato in continua usare l’alimentatore PGTA00TRX0, 100/230Vac-24Vdc (10W
±2% 1 modulo DIN, Temperatura minima = -25°C). Collegare il polo positivo a G e
il negativo a G0.
Ingressi e uscite digitali
• Uscite digitali open-collector pre-congurate in modalità “safe-mode”: per noticare
una condizione di allarme l'uscita viene de-energizzata. Collegare solo il modulo relè
esterno BMESTRLA00 con cavi di lunghezza inferiore a 1m;
• ingresso digitale contatto pulito, distanza inferiore ai 10m.
ATTENZIONE: utilizzare cavi separati per ingresso digitale, comandi relè,
connessioni seriali e alimentazione.
LINEE DI COMUNICAZIONE
Linee di comunicazione RS485
La lunghezza massima non deve superare i 1000m, tramite cavo schermato AWG24
per linee max 100m, AWG22 per linee max 500m AWG20 per linee max 1000m, con
connessione dello schermo a terra e non a GND.
Le resistenze di terminazione 120 , 1/4W sul primo e sull’ultimo dispositivo della
rete vanno messe se la lunghezza della stessa supera i 100 m. Resistenze incluse nel
prodotto da collegare tra i morsetti seriale + e -
• rispettare la polarità (-,+,GND);
• non realizzare biforcazioni della linea o collegamenti a stella;
• evitare di posizionare la linea in prossimità delle linee di potenza;
Per migliorare l’immunità del controllo ai disturbi elettromagnetici, il cavo di
collegamento delle seriali deve essere a coppie ritorte (twisted pair), schermato,
bipolare o tripolare in dipendenza dall’isolamento della seriale.
Vale la seguente regola:
• se la porta seriale è optoisolata (funzionalmente) rispetto all’alimentazione, occorre
un terzo lo di collegamento nel cavo seriale per dare un riferimento comune ai
controlli.
• se la porta seriale non è optoisolata e il riferimento comune è già presente, il terzo
lo non è usato.
Linee Ethernet RJ45
Utilizzare cavo schermato 100 m Cat.5e SFTP. Per collegare lo schermo
del cavo ethernet a terra funzionale, utilizzare un Faston femmina da
6,3mm come indicato in gura.
Il prodotto è di classe II, ma è presente il faston per la messa a terra funzionale della
schermatura del cavo Ethernet. Il collegamento potrebbe essere verso una terra di
protezione o, eventualmente una terra funzionale separata da tensioni pericolose
fornite da altre alimentazioni esterne.
INSTALLAZIONE
Per tutelare la sicurezza degli operatori e la salvaguardia del dispositivo, prima di
eettuare qualsiasi intervento togliere l’alimentazione. Il prodotto va installato
all’interno di un quadro elettrico, che se di materiale plastico deve avere grado di
inammabilità 5VA.
Collegare solo le antenne indoor presenti nella confezione.
WARNING
This appliance must only be installed by service personnel with suitable
technical training and experience and who are aware of the dangers they may
be exposed to in the event of incorrect conguration (qualied installers).
GENERAL NOTE
Before performing any operations, check that the µboss contains:
1. the device itself;
2. forwirelessversion:anantenna(Wi-Fior 2G/4G type). Formodels with tworadiosthere
must be two antennas.
3. technical documents;
4. terminals kit and two resistors 120 for the end of the serial line.
Do not install products in environments with the following characteristics:
• relative humidity greater than the value specied in the technical specications;
• strong vibrations or knocks;
• exposure to aggressive and polluting atmospheres (e.g.: sulphur and ammonia
fumes, saline mist, smoke) so as to avoid corrosion and/or oxidation;
• strong magnetic and/or radio frequency interference (therefore avoid installing the
units near transmitting antennae);
• exposure to direct sunlight and to the elements in general;
• large and rapid uctuations in the room temperature;
• environments where explosives or mixes of ammable gases are present.
Installation warnings for Radio models
• Before installing the product make sure the area is suciently covered by a 2G/3G/4G
signal, if the model to be used includes radio connectivity;
• locate the antenna outside metal hardware.
TECHNICAL SPECIFICATIONS
Power supply from G to G0: 24 Vac +10%/-15% 50/60 Hz, 24 Vdc, ±5%
Input power 9W Max
Operating conditions -40T60 °C, 90% U.R. non-condensing
Storage conditions -40T70 °C, 90% U.R. non-condensing
2 digital outputs Open-collector, on each output 20mA max. load
1 input free contact: 24Vdc max, 5mA max
Serial Ports 1 RS485 Master optoisolated- 1 RS485 Master non optoisolated
Battery (internal) Lithium “button” type, BR/CR2032, 3 Vdc, NON rechargeable
Certication requirements
RED:
- WIFI
- 2G/3G/4G
EN 301 489-1
EN 301 489-17 Ver. 3.1.1; EN 300 328 Ver. 2.1.1
EN 301 489-52 Ver. 1.1.0; EN 301 511 Ver. 12.5.1;
EN 301 908-1 Ver. 11.1.1
FCC:
- WIFI+2G/3G/4G
FCC Part 15 Subpart B, ICES003
FCC Part 15.31 (k); ANSI C95.1. MPE; RSS-102. MPE
Safety: 60950; 62368
ANATEL This equipment is not entitled to protection against harmful
interference and may not cause interference in duly authorized
systems.
Dimensions 4 DIN module = 70x110x60 mm
Pollution degree 2 according to EN60950-1 / EN62368-1
Index of protection IP10
Case material tecnopolymer
Do not open the device when powered.
Power supply
• Power supply to the product must only be connected between G and G0
• Maximum length =5 m.
• If AC powered, use a dedicated safety transformer rated in Class 2 24Vac, 20...30VA,
protected against short-circuits and overload, without secondary must be
earthed connected.
• If direct current powered use PGTA00TRX0 power supply, 100/230Vac-24Vdc (10W
±2% 1 DIN-module, Minimum Temperature = -25°C). Connect the positive pole to
G and negative pole to G0.
Digital inputs and digital outputs
• Open-collector pre-congured digital input “safe-mode”: to notify an alarm
condition the output is de-energized. Connect only the BMESTRLA00 external relay
module with cables lenght less 1m;
• free contact digital input, distance less 10m.
CAUTION: use separate cables for serial connections and power supply.
COMMUNICATION LINES
RS485 communication lines
The maximum length must not be over 1000m, via AWG24 shielded cable for lines max
100m, AWG22 for lines max 500m, AWG20 for lines max 1000m lenght, with screen
connection to earth and not to GND. The 120Ω terminal resistors, 1/4W into the rst
and the last devices of the network, must be connected even if the lenght exceeds 100
meters. The resistors, included in the product, are to be connected between the serial
+ and - terminals:
• observe the polarity (+.-,GND);
• do not make branches in the line or star connections;
• avoid laying the line near power cables.
To improve immunity of the controller to electromagnetic disturbance, the serial
connection cable must be twisted pair shielded, twisted two- or three-wire depending
on the insulation of the serial connection.
The following rule applies:
• if the serial port is insulated (functionally) from the power supply, a third wire is
required in the serial cable to act as a common reference for the controllers;
• if the serial port is not optically-isolated and the common reference is already
present, the third wire is not needed.
RJ45 Ethernet Linee
Use shielded cables 100 m Cat.5e SFTP. To connect earth the screen
ethernet cable (functional connection), use a female Faston 6,3mm, as
indicated inthe gure.
The product is class II classied, but there is a faston for the earth connection (functional)
shiel cable. The connection could be directed to earth (protection) or, earth (functional)
separated by dangerous voltages from to other external power supplies.
MOUNTING
To safeguard operators and the boards, disconnect power before performing any
operations. The product must be installed inside an electrical panel if it is made of
plastic material use one with ammability rating of 5VA.
Connect only the indoor antennas in the package.
DESCRIZIONE CONNETTORI /
CONNECTOR’S DESCRIPTION
Legenda /
Key
:
Descrizione
Description
1
Connettore per l’alimentazione [G(+), G0(-)] 24Vac/Vdc
Power supply connector [G(+), G0(-)] 24Vac/Vdc
2
LED power-on (verde) /
LED power-on (green)
3
uSD-card reader per funzioni di backup/recovery
uSD-card reader for backup/recovery function
4
Led segnalazione Ethernet /
Ethernet signal Led
5
Pulsante Reset e abilitazione IP temporaneo /
Reset button and Enable temporary IP
6
Porta USB standard HOST, connettore tipo A, per upgrading FW e log files
downloading /
Porta USB standard HOST, connettore tipo A, per upgrading FW
e log files downloading
7
Comando relay esterni e ingresso digitale a contatto pulito
external relay command and free contact digital input
8
Seriale RS485 Optoisolata /
RS485 serial opto-isolated;
9
Seriale RS485 Non Optoisolata /
RS485 serial not opto-isolated;
10
Ethernet FIELD /
FIELD Ethernet
;
11
Ethernet LAN /
LAN Ethernet
;
12
Faston collegamento a terra calza ethernet /
Faston for shield ethernet port earth
connection
13
Connettore per antenna 2G/3G/4G /
2G/3G/4G Antenna connector
(*)
14
Connettore per antenna Wi-Fi /
Wi-Fi Antenna connector
(*)
15
Sinottico LED /
LED synoptic
16
Connettore SIM (*) /
SIM connector (*)
(*)
per i modelli che lo prevedono /
depending on the model
SIGNIFICATO DEI LEDS /
LEDS MEANINGS
Descrizione
Description
A
Modulo radio attivo /
Radio module actived
B
Stato I/O /
I/O Status
VERDE: ingresso digitale chiuso /
GREEN: closed digital input
SPENTO: ingresso digitale aperto /
OFF: opened digital input
C
ROSSO lampeggiante: Sistema in allarme / RED flashing:
Alarm system
GIALLO: Sistema non inizializzato (manca il primo avvio) /
YELLOW: System not initialized
(rst boot missing)
D
Sistema acceso /
System ON
E
Intensità segnale Radio 2G/3G/4G /
Radio signal strength 2G/3G/4G
Primo LED giallo lampeggiante: relè 1 energizzato /
First yellow LED ashing: relay 1
energized
Secondo LED giallo lampeggiante: relè 2 energizzato /
Second yellow LED ashing: relay
2 energized
DIMENSIONI /
DIMENSIONS
Montaggio DIN: agganciabile su guida DIN secondo DIN 43880 CEI EN 50022
DIN mounting: tted on DIN rail in accordance with DIN 43880 and IEC EN 50022;
Remarque: la feuille d'instruction est disponible en Français et téléchargeable
sur le site www.carel.com (https://www.carel.com/product/boss).
NB: Die Anleitungsblatt liegt in deutscher Sprache vor und kann auf der Website
heruntergeladen werden www.carel.com (https://www.carel.com/product/boss).
Not: Talimat sayfası Türkçe olarak mevcuttur ve web sitesinden indirilebilir
www.carel.com (https://www.carel.com/product/boss).
Nota: la hoja de instrucciones está disponible en Español y se puede descargar
del sitio web www.carel.com (https://www.carel.com/product/boss).
Observação: a folha de instruções está disponível em espanhol e pode ser
baixada no site www.carel.com (https://www.carel.com/product/boss).
Примечание: инструкция доступна на русском языке, ее можно
скачать с сайта www.carel.com (https://www.carel.com/product/boss).
注:注:说明书有
中文版,可从
网站下载 www.
carel.com (https://
www.carel.com/
product/boss).

CAREL INDUSTRIES HQs
Via dell’Industria, 11 – 35020 Brugine – Padova (Italy)
Tel. (+39) 0499716611 – Fax (+39) 0499716600 – e-mail: carel@carel.com – www.carel.com
CAUTION
This equipment has been tested and found to comply with the limits for a Class B digital
device, pursuant to Part 15 of the FCC Rules. These limits are designed to provide reasonable
protection against harmful interference in a residential installation.
This equipment generates, uses and can radiate radio frequency energy and, if not installed
and used in accordance with the instructions, may cause harmful interference to radio
communications. However, there is no guarantee that interference will not occur in a
particular installation.
If this equipment does cause harmful interference to radio or television reception, which
can be determined by turning the equipment o and on, the user is encouraged to try to
correct the interference by one of the following measures:
• reorient or relocate the receiving antenna;
• increase the separation between the equipment and receiver.;
• connect the equipment into an outlet on a circuit dierent from that to which the
receiver is connected;
• consult the dealer or an experienced radio/TV technician for help.
FCC Caution: Any changes or modications not expressly approved by the party responsible
for compliance could void the user's authority to operate this equipment.
This device complies with Part 15 of the FCC Rules. Operation is subject to the following
two conditions:
(1) this device may not cause harmful interference, and
(2) this device must accept any interference received, including interference that may
cause undesired operation.
FCC RF Radiation Exposure Statement:
1. This Transmitter must not be co-located or operating in conjunction with any other
antenna or transmitter.
2. This equipment complies with FCC RF radiation exposure limits set forth for an
uncontrolled environment. This equipment should be installed and operated with a
minimum distance of 20 centimeters between the radiator and your body.
CAUTION
1. “CAUTION” Risk of explosion if the battery is replaced by an incorrect type or short
circuit;
2. Never open the equipment. For safety reasons, the equipment should be opened only
by qualied skilled person; only front cover can be removed to insert SIM;
3. can only be safely used lower than 2000 meters altitude
DO1
DO2
Vdc
DI1
GND
I/O
G
G0
2
LAN FIELD
SD
24V~/24V
20VA/9W
LN
230 Vac
BMESTRLA00 (relays module)
24 Vac
digital input
GND +–
coppia intrecciata
interfaced couple
shield
shield
collegare a terra funzionale /
connect to functional earth
DO1
DO2
Vdc
DI1
GND
I/O
G
G0
2
LAN FIELD
SD
24V~/24V
20VA/9W
+–
24 Vdc
BMESTRLA00 (relays module)
digital input
shield
shield
GND +–
coppia intrecciata
interfaced couple
collegare a terra funzionale /
connect to functional earth
AVVERTENZE GENERALI /
MAIN WARNINGS
REGOLE PER LO SMALTIMENTO / GUIDELINES FOR DISPOSAL
• L’apparecchiatura (o il prodotto) deve essere oggetto di raccolta separata in conformità alle
vigenti normative locali in materia di smaltimento.
• Non smaltire il prodotto come riuto solido urbano ma smaltirlo negli appositi centri di raccolta.
• Il prodotto contiene una batteria ed è quindi necessario rimuoverla separandola dal resto del
prodotto seguendo le istruzioni riportate di seguito prima di procedere al suo smaltimento.
• Un uso improprio o uno smaltimento non corretto potrebbe avere eetti negativi sulla
salute umana e sull’ambiente.
• In caso di smaltimento abusivo dei riuti elettrici ed elettronici sono previste sanzioni
stabilite dalle vigenti normative locali in materia di smaltimento.
•
The appliance (or the product) must be disposed of separately in accordance with the local
waste disposal legislation in force.
•
Do not dispose of the product as municipal waste; it must be disposed of through
specialist waste disposal centres.
•
The product contains a battery that must be removed and separated from the rest of the
product according to the instructions provided, before disposing of the product.
•
Improper use or incorrect disposal of the product may negative eects on human health
and on the environment.
•
In the event of illegal disposal of electrical and electronic waste, the penalties are specied
by local waste disposal legislation.
AVVERTENZE IMPORTANTI /
IMPORTANT WARNINGS
Il prodotto CAREL è un prodotto avanzato, il cui funzionamento è specicato
nella documentazione tecnica fornita col prodotto o scaricabile, anche anteriormente
all’acquisto, dal sito internet www.carel.com. Il cliente (costruttore, progettista o installatore
dell’equipaggiamento nale) si assume ogni responsabilità e rischio in relazione alla fase
di congurazione del prodotto per il raggiungimento dei risultati previsti in relazione
all’installazione e/o equipaggiamento nale specico. La mancanza di tale fase di studio, la
quale è richiesta/indicata nel manuale d’uso, può generare malfunzionamenti nei prodotti
nali di cui CAREL non potrà essere ritenuta responsabile. Il cliente nale deve usare il
prodotto solo nelle modalità descritte nella documentazione relativa al prodotto stesso. La
responsabilità di CAREL in relazione al proprio prodotto è regolata dalle condizioni generali di
contratto CAREL editate nel sito www.carel.com e/o da specici accordi con i clienti.
The CAREL product is a state-of-the-art product, whose operation is specied in the technical
documentation supplied with the product or can be downloaded, even prior to purchase, from the
website www.carel.com. - The client (builder, developer or installer of the nal equipment) assumes
every responsibility and risk relating to the phase of conguration the product in order to reach
the expected results in relation to the specic nal installation and/or equipment. The lack of such
phase of study, which is requested/indicated in the user manual, can cause the nal product to
malfunction of which CAREL can not be held responsible. The nal client must use the product only
in the manner described in the documentation related to the product itself. The liability of CAREL
in relation to its own product is regulated by CAREL’s general contract conditions edited on the
website www.carel.com and/or by specic agreements with clients.
Se c’è la necessità di installare il prodotto in un quadro metallico
è opportuno remotare le antenne. Il quadro elettrico metallico
deve essere connesso a terra. A tale scopo utilizzare la prolunga
BMBSTEWA00 (Wi-Fi) e/o BMBSTEGA00 (2G/3G/4G). La lunghezza
massima della prolunga è di 3 m sia per il Wi-Fi sia per 2G/3G/4G.
Non esporre l’antenna agli agenti atmosferici (pioggia, HV,
fulmini, ecc. ) senza adeguata protezione.
Attenz.: non invertire le antenne Wi-Fi con 2G/3G/4G.
Nel caso di modelli con entrambi i moduli Wi-Fi e 4G è necessario
remotare l’antenna 4G per non avere interferenza con il Wi-Fi
(vedi gura).
Wi-Fi Antenna
Mobile Antenna
Shielded
cable
2/3m
Se si remotano entrambe le antenne fuori del quadro, devono essere poste ad una distanza
di almeno 30 cm tra loro.
In ogni caso la/le antenne devono essere installate ad una distanza di almeno 20cm
dal corpo umano.
Una tensione di alimentazione elettrica diversa da quella prescritta può danneggiare
seriamente il sistema.
Utilizzare capicorda adatti per i morsetti in uso. Allentare ogni vite ed inserirvi i
capicorda, quindi serrare le viti. Ad operazione ultimata tirare leggermente i cavi per
vericarne il corretto serraggio. Non collegare il dispositivo a linee esterne al building.
INSERIMENTO E SOSTITUZIONE DELLA SIM:
scollegare l’alimentazione e togliere il
coperchietto premendo lateralmente
con le dita. Assumere prevenzione
contro le scariche elettrostatiche.
press
press
PROCEDURA DI PRIMO ACCESSO
La prima volta che si accede a µboss è necessario completare la procedura di primo accesso
per congurare l’accessibilità al dispositivo. La procedura può essere eettuata in 2 modi:
• se µboss è collegato ad una rete locale, tramite un PC in rete che possa accedere a µboss;
• tramite la connessione Wi-Fi integrata (solo nei modelli con Wi-Fi).
ACCESSO TRAMITE RETE LOCALE DA UN ALTRO PC
Assicurarsi che µboss sia collegato ad una rete locale e che sia accessibile da un PC
collegato alla stessa rete. Accendere µboss, attendere qualche istante, quindi aprire
un browser nel PC e collegarsi all’indirizzo: https://uboss-nnnn. Le ultime 4 cifre sono
riportate sull’adesivo sul lato del dispositivo. Quindi seguire la procedura guidata di
primo accesso.
ACCESSO TRAMITE WIFI INTEGRATA
Accendere µboss, attendere qualche istante, quindi eettuare una ricerca delle reti
Wi-Fi disponibili da tablet, telefono o PC. Selezionare la rete mboss-nnnn, le ultime 4
cifre sono riportate sull’adesivo sul lato del dispositivo. La prima volta che si accede
alla rete Wi-Fi non sarà necessario inserire alcuna password. Dopo aver eettuato la
connessione alla rete Wi-Fi, avviare il browser e collegare all’indirizzo: https://uboss-
nnnn o https://192.168.42.1 e seguire la procedura guidata di primo accesso.
ASSEGNAZIONE IP TEMPORANEO
Per assegnare un IP sso temporaneo alla porta LAN di µboss in modo da potervi accedere
in caso di non conoscenza dell'IP di quest'ultimo, procedere come indicato di seguito:
• tenere premuto per più di 2s il "Pulsante abilitazione IP temporaneo" (5);
• il LED allarme comincerà a lampeggiare in verde;
• da questo momento in poi il µboss è raggiungibile all'IP 172.16.0.33/16 per circa
un'ora, allo scadere della quale l’IP temporaneo verrà disabilitato automaticamente.
Nota: l'IP temporaneo non è visibile nella congurazione di rete del µboss.
FACTORY RESET RIPRISTINO VALORI DI FABBRICA
Nel caso vi sia la necessità di riportare il µboss alle condizioni di prima accensione
(cancellazione della congurazione, dei dati storici e degli eventuali aggiornamenti
installati), procedere come indicato di seguito:
• Tenere premuto il tasto “2nd IP” (4) e alimentare il boss-micro supervisore.
• Il simbolo "Sistema acceso" inizierà a lampeggiare con frequenza di circa 1
lampeggio al secondo (LENTO).
• Quando il simbolo "Sistema acceso" (D) inizia a lampeggiare VELOCE rilasciare il bottone.
• Ora il lampeggio tornerà LENTO.
• Dopo circa 5 secondi il lampeggio ritornerà ancora VELOCE, a questo punto premere
di nuovo il pulsante "2nd IP", no a quando non si spegneranno tutti i led.
• Attendere i riavvi automatici che farà boss-micro (NON togliere tensione prima del
termine del completo riavvio).
FUNZIONE WPS PER MODELLI WIFI
Per accoppiare attraverso la funzionalità WPS il proprio dispositivo alla rete Wi-Fi di µboss,
procedere come indicato di seguito:
• tenere premuto per circa 10s il "Pulsante abilitazione IP temporaneo" (5);
• il LED "potenza segnale radio minimo" (E) si accenderà in verde;
• stimolare ora la funzionalità WPS nel proprio dispositivo per connettersi alla rete Wi-Fi
di µboss.
Nota: la funzionalità WPS rimane attiva (in attesa di accoppiamento) per circa 2 min.
If necessary to install the product in a metal electrical panel, it
is recommended to remote the antennas. The metallic electrical
panel must be earthed. Use the extension BMBSTEWA00 (Wi-
Fi) and/or BMBSTEGA00 (2G/3G/4G). The extention maximum
length is 3 m, for Wi-Fi and 2G/3G/4G.
Not exposure the antenna to the atmospheric agent (rain, UV
lightning, etc.) without a proper protection.
Attention.: do not invert the antennas Wi-Fi with 2G/3G/4G.
If using models with both Wi-Fi and 4G modules, it is necessary
to remotely control the 4G antenna to avoid interference with
Wi-Fi (see gure).
Wi-Fi Antenna
Mobile Antenna
Shielded
cable
2/3m
If both antennas are located outside the panel, they must be placed at a distance of at
least 30 cm between them.
Anyway antennas must be installed at minimum distance of 20cm from the human body.
A power supply voltage other than that specied will seriously damage the system.
Use cable ends suitable for the corresponding terminals. Loosen each screw and insert
the cable ends, then tighten the screws. When the operation is completed, slightly tug
the cables to check they are suciently tight. Do not connect the device to external
line of building.
INSERTING AND REPLACING SIM CARD:
disconnect the power supply and
remove the cover by pressing on the
side with ngers.
Take precaution of electrostatic
discharge.
press
press
FIRST COMMISSIONING PROCEDURE
The rst time you power up your µboss, you need to setup its access properties. You can
choose to do that in one of two ways:
• in case µboss is plugged in a LAN network, you can access it through another PC
in the LAN;
• using the integrated Wi-Fi connection;
ACCESS THROUGH ANOTHER PC IN THE SAME LAN
Check the µboss will be connected to a LAN and it is accessible from a PC connected
to the same network. Power up µboss, wait a few seconds, then access its first setup
procedure by opening a browser on your PC and connecting to the URL: https://uboss-
nnnn. The last 4 digits are printed on the sticker on the side of device. Now, follow th
rst commissioning procedure.
ACCESS THROUGH INTEGRATED WIFI
Power up µboss, wait a few seconds, and enable Wi-Fi on your PC or mobile device.
From the list of available devices, choose the mboss-nnnn network; the last 4 digits of
the name are printed on the sticker on the side of device. The first time you access that
Wi-Fi network, no password is required. Once connected to the Wi-Fi, open a browser
on your PC or device, type the URL https://uboss-nnnn or https://192.168.42.1 and follow
the online procedure.
TEMPORARY IP ASSIGNMENT
To assign a temporary IP address to the µboss LAN port for access when the actual IP is
not known, proceed as follows:
• press and hold the “Enable temporary IP button”(5) for 2 seconds;
• the alarm LED will start ashing green;
• µboss can now be accessed at IP address 172.16.0.33/16 for around one hour, after
which the temporary IP will be automatically disabled.
NB: the temporary IP address is not visible in the boss mini network conguration.
FACTORY RESET FACTORY DATA RESET
If it is necessary to reset the µboss to the default settings (initial start-up, deleting the
conguration, historical data and any updates installed), proceed as follows:
• Hold the “2nd IP” button (4) pressed and power up the boss-micro supervisor.
• The “System on”symbol will start ashing at a frequency of about 1 ash per second
(SLOW).
• Release the button when the '”System on”symbol (D) starts ashing FAST.
• It will start ashing SLOW again.
• After about 5 seconds it will start ashing FAST again. Press the “2nd IP” button again
until all LEDs go out.
• Wait for boss-micro to reboot automatically (DO NOT disconnect power before the
end of the reboot).
WPS FUNCTION FOR WIFI MODELS
To pair your device to the µboss Wi-Fi network via the WPS, proceed as follows:
• keep the “Enable temporary IP button”(5) pressed for about 10s;
• the "minimum radio signal strength" LED (E) will turn green;
• stimulate the WPS functionality in your device to connect to the µboss Wi-Fi network.
Note: the WPS function remains active (waiting for pairing) for approx. 2 minutes.
SUPPORTO
SUPPORT
In caso di malfunzionamenti del
dispositivo contattare personale di
supporto CAREL. Per ogni dubbio o
segnalazione rivolgersi a sw.support@
carel.com
in case of device malfunctions contact
CAREL support personnel. For any
questions or concerns, please contact
Alimentazione a 24Vac /
24Vac Power supply
Alimentazione a 24Vdc /
24Vdc Power supply
SCHEMA DI COLLEGAMENTO /
CONNECTIONS DRAWING
"μboss" +0500152IE - rel. 1.4 - 06.07.2023
NOTA
Con la presente, Carel Industries SpA dichiara che
l'apparecchiatura radio tipo boss-micro è conforme
alla Direttiva 2014/53/UE. Il testo completo della
dichiarazione di conformità UE è disponibile:
NOTE
Hereby, Carel Industries SpA declares that the
radio equipment type boss-micro is in compliance
with Directive 2014/53/EU. The full text of the EU
declaration of conformity is available at
Other Carel Network Hardware manuals