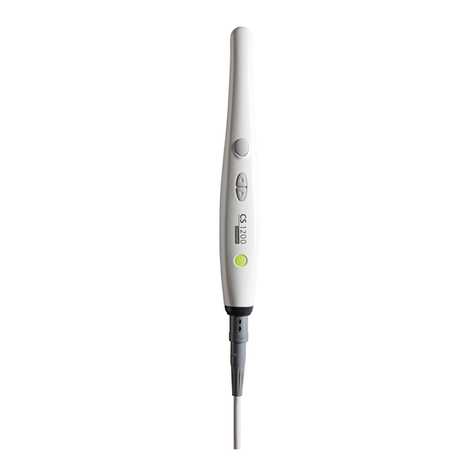
CS 3500 Overview
1. Disposable Tip: The tip can be installed facing upward
or downward. Tips come in two sizes; use the smaller
tip for children or smaller patients.
2. Acquisition Buttons: Press to scan and acquire a 3D
image.
• The CS 3500 is in auto acquisition mode by default.
When the CS 3500 is stable and the image is clear,
the acquisition begins.
• To make a manual acquisition, press the button
once to acquire a single view. To keep the CS 3500
in manual acquisition mode, deselect auto capture
in the Preferences window.
3. Mode Indicators
• Lower jaw scan mode
• Upper jaw scan mode
• Buccal bite registration mode
4. Mode Button: Press the button to switch between
different modes.
5. Power Button: Press 1 second to power ON. Press 3
seconds to power OFF.
Power indicator LED:
• Green indicates the CS 3500 is active.
• Orange indicates the CS 3500 is in sleep mode,
holder mode, standby mode, or other inactive
mode.
• No light indicates the power is OFF.
6. USB Connection Indicator:
• Blue indicates the connection is established.
• No light indicates the connection is disconnected.
7. USB Cable: One end of the cable is hard-wired to the
bottom of the CS 3500, and the other end is inserted
in the computer’s USB port.
8. Power Adapter: One end of the adapter is inserted in
the jack on the USB plug, and the other end is inserted
in the power outlet.
CS 3500 Acquisition Interface Overview
1. Title bar:
• Displays the patient’s name.
• Minimizes the Acquisition interface.
• Maximizes or restores down the Acquisition
interface.
• Closes the Acquisition interface.
2. CS 3500 Status Bar: Indicates the current status of the
CS 3500.
3. Video Preview Screen: Displays live video of the scan
of the patient’s teeth, as well as the alignment guide,
when enabled.
4. Tutorial Animation: Gives a visual indication to guide
you through the image acquisition.
5. Progress Bar: Indicates the status of the image
acquisition process.
6. 3D Model Display Screen: Displays the 3D model
created from the scan.
7. Image Toolbar: Enables you to work with the 3D
model.
8. Settings Toolbar: Enables you to set preferences and
access system information and online help.
9. Acquisition Feedback Indicator: Indicates the
acquisition is successful or the reason for the
acquisition failure.
10. Acquisition Mode Toolbar: Enables you to select the
acquisition mode.
Accessing the Acquisition Interface
To access the CS 3500 Acquisition interface from the
Dental Imaging Software, follow these steps:
1. On your desktop, double-click to open the imaging
software.
2. Find or create the patient record.
3. Double-click the patient record to access the imaging
window.
4. In the imaging window, click to open the CS 3500
Acquisition interface.
5. Select your preference settings.
Selecting the Preference Settings
On the Acquisition interface, click to set the CS 3500
and software options.
Use to:
• Select an interface and a help language
• Select a CAD format
• Select a mesh format
• Enable/disable Export DICOM
Use to:
• Enable/disable auto capture and adjust auto capture
sensitivity
• Enable/disable the guide system
• Select the default acquisition mode
Use to create a log le for faster service response
©Carestream Health, Inc., 2013.
Carestream Dental
A Division of Carestream Health, Inc.
150 Verona St.
Rochester, NY 14608
USA
For more information, visit: www.carestreamdental.com
To give documentation feedback, visit:
www.carestreamdental.com/documentationfeedback
9H4855 Ed01 2013-07
11. Press the power button
one second to power on
the CS 3500. Ensure the
power indicator turns
orange.
12. Wait until the USB
connection indicator
turns blue.
Note: The power indicator turns green when the
acquisition interface is open and the CS 3500 is
ready to acquire.
