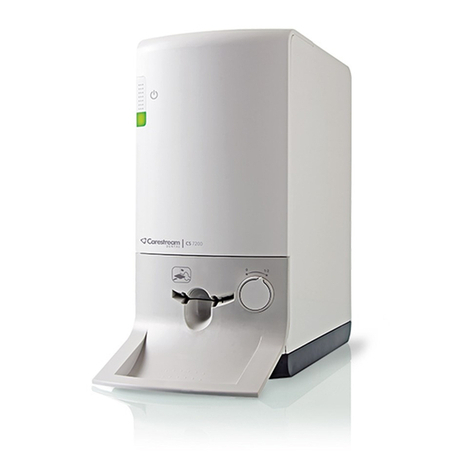
Carestream CS 7600 User manual

CS 7600
User Guide

Notice
CARESTREAM Dental Systems are designed to meet international safety and performance standards. Personnel
operating the unit must have a thorough understanding of the proper operation of the system. This guide has been
prepared to aid dental professionals to understand and operate the system. Do not operate the system before reading this
guide and gaining a clear understanding of the operation of the system. If any part of this guide is not clear, please
contact your Carestream Dental LLC representative for clarification.
The CS 7600 is intended for digital dental radiography using an imaging plate (storage phosphor screen) for
radiographic diagnostic intraoral images.
The CS 7600 in addition, optionally provides the Scan & Go technology to enable dental practitioners prior to
acquisition to record the dental imaging plates with exam acquisition data.
No part of this guide may be reproduced without the express permission of Carestream Dental LLC.
U.S. Federal law restricts this device to sale by or on the order of a dentist or physician.
This document is originally written in English.
Guide Name: CS 7600 User Guide
Part Number: 8J4071
Revision Number: 07
Print Date: 2019-03
In this guide, all trademarks and registered trademarks are the property of their respective holders.
The brand names and logos reproduced in this guide are copyright.
CS 7600 complies with Directive 93/42/CEE relating to medical equipment.
Manufacturer
Authorized Representative in the European Community
Trophy
4, Rue F. Pelloutier
Croissy-Beaubourg
77435 Marne-la-Vallée, Cedex 2
France
WARNING: Read the “Safety, Regulatory and the Technical
Specifications User Guide” and make sure you observe all the
Warnings and Cautions before using the CS 7600.
0086
EC REP

CS 7600_User Guide (8J4071)_Ed07 iii
Contents
Chapter 1
Conventions in this
Guide
Conventions in this Guide . . . . . . . . . . . . . . . . . . . . . . . . . . . . . . . . 1
Chapter 2
CS 7600 System
Overview
Introduction . . . . . . . . . . . . . . . . . . . . . . . . . . . . . . . . . . . . . . . . . . . . 3
CS 7600 Components Overview . . . . . . . . . . . . . . . . . . . . . . . . . . . 4
Scanner Overview . . . . . . . . . . . . . . . . . . . . . . . . . . . . . . . . . . . 4
Smart Imaging Plates Overview. . . . . . . . . . . . . . . . . . . . . . . . 6
Hygienic Sheaths . . . . . . . . . . . . . . . . . . . . . . . . . . . . . . . . . . . . 7
Scan & Go Overview . . . . . . . . . . . . . . . . . . . . . . . . . . . . . . . . 9
Scan & Go Generation 1 (Models Released before June 2012)
9
Scan & Go Generation 2 (Models Released from June 2012)
10
Connecting the Scan & Go Device . . . . . . . . . . . . 11
Scanner Shelf . . . . . . . . . . . . . . . . . . . . . . . . . . . . . . . . . . . . . . 11
Chapter 3
Software Overview
Computer System Requirements . . . . . . . . . . . . . . . . . . . . . . . . . . 13
General Software Overview . . . . . . . . . . . . . . . . . . . . . . . . . . . . . . 13
Single Image Acquisition Interface Overview . . . . . . . . . . . . . . .13
Full Mouth Series (FMS) Acquisition Interface Overview . . . . 14
Dental Imaging Software Main Toolbar . . . . . . . . . . . . . . . . 17
CS 7600 Configuration Window . . . . . . . . . . . . . . . . . . . . . . . . . . 18
Chapter 4
Scanner Interface
Overview
Computer System Requirements . . . . . . . . . . . . . . . . . . . . . . . . . . 19
CS 7600 Scanner Interface Overview . . . . . . . . . . . . . . . . . . . . . 19
Scanner Interface Icons . . . . . . . . . . . . . . . . . . . . . . . . . . . . . . 20
Working with the Scanner . . . . . . . . . . . . . . . . . . . . . . . . . . . . . . . 22
Turning on the Scanner . . . . . . . . . . . . . . . . . . . . . . . . . . . . . 22
Image Acquisition. . . . . . . . . . . . . . . . . . . . . . . . . . . . . . . . . . . 22
Scanner Info . . . . . . . . . . . . . . . . . . . . . . . . . . . . . . . . . . . . . . . 23
Erasing the Imaging Plates. . . . . . . . . . . . . . . . . . . . . . . . . . . 24
Chapter 5
CS 7600 Image
Acquisition Interface
CS 7600 Imaging Software Overview . . . . . . . . . . . . . . . . . . . . . 25
CS 7600 Image Acquisition Interface Overview . . . . . . . . . . . . .25
Full Mouth Series Image Acquisition Interface . . . . . . . . . . 26
Chapter 6
Acquiring Images
without Scan & Go
Introduction . . . . . . . . . . . . . . . . . . . . . . . . . . . . . . . . . . . . . . . . . . . 33
Acquiring Single Image . . . . . . . . . . . . . . . . . . . . . . . . . . . . . . . . . 34
Starting the Imaging Software . . . . . . . . . . . . . . . . . . . . . . . . 34

iv
Preparing the Imaging Plates . . . . . . . . . . . . . . . . . . . . . . . . .35
Inserting the Imaging Plate. . . . . . . . . . . . . . . . . . . . . . . . . . .35
Performing the X-rays . . . . . . . . . . . . . . . . . . . . . . . . . . . . . . .36
Scanning the Imaging Plates . . . . . . . . . . . . . . . . . . . . . . . . .37
Acquiring Multiple Images. . . . . . . . . . . . . . . . . . . . . . . . . . . . . . .40
Preparing Acquisition of FMS Images . . . . . . . . . . . . . . . . .40
Chapter 7
Acquiring Images
Using Scan & Go
Introduction. . . . . . . . . . . . . . . . . . . . . . . . . . . . . . . . . . . . . . . . . . . .43
Acquiring Single Image Using Scan & Go. . . . . . . . . . . . . . . . .44
Starting the Imaging Software . . . . . . . . . . . . . . . . . . . . . . . .44
Preparing the Imaging Plates . . . . . . . . . . . . . . . . . . . . . . . . .44
Tagging the Imaging Plate with the Scan & Go . . . . . 44
Performing the X-rays . . . . . . . . . . . . . . . . . . . . . . . . . . . . . . .45
Scanning the Imaging Plates . . . . . . . . . . . . . . . . . . . . . . . . .45
Retrieving a Fallen Imaging Plate . . . . . . . . . . . . . . . . . . . . .45
Acquisition Related Procedures . . . . . . . . . . . . . . . . . . . . . . . . . . .45
Acquiring Multiple Images (FMS) Using Scan & Go. . . . . . . .46
Acquiring Images. . . . . . . . . . . . . . . . . . . . . . . . . . . . . . . . . . . . . . .46
Starting the Imaging Software . . . . . . . . . . . . . . . . . . . . . . . .46
Opening the Image Acquisition Interface. . . . . . . . . 46
Preparing the Imaging Plates . . . . . . . . . . . . . . . . . . . . . . . . .46
Tagging the Imaging Plate with the Scan & Go . . . . . 46
Performing the X-rays . . . . . . . . . . . . . . . . . . . . . . . . . . . . . . .46
Scanning the Imaging Plates . . . . . . . . . . . . . . . . . . . . . . . . .46
Acquisition Related Procedures . . . . . . . . . . . . . . . . . . . . . . . . . . .46
Chapter 8
Acquisition Related
Procedures
Processing the Images. . . . . . . . . . . . . . . . . . . . . . . . . . . . . . . . . . .47
Re-tagging Imaging Plates . . . . . . . . . . . . . . . . . . . . . . . . . . . . . . .48
Storing the Images . . . . . . . . . . . . . . . . . . . . . . . . . . . . . . . . . . . . .48
Clearing Scanner Memory . . . . . . . . . . . . . . . . . . . . . . . . . . . . . . .48
Erasing the Imaging Plates . . . . . . . . . . . . . . . . . . . . . . . . . . . . . .49
Chapter 9
Scanner Settings
General . . . . . . . . . . . . . . . . . . . . . . . . . . . . . . . . . . . . . . . . . . . . . . .51
Scanner Settings . . . . . . . . . . . . . . . . . . . . . . . . . . . . . . . . . . . .51
Brightness Control . . . . . . . . . . . . . . . . . . . . 52
IP Setup . . . . . . . . . . . . . . . . . . . . . . . . . . 52
Viewer . . . . . . . . . . . . . . . . . . . . . . . . . . 54
Working with Settings . . . . . . . . . . . . . . . . . . . . . . . . . . . . . . .55
General Settings Tab . . . . . . . . . . . . . . . . . . . . . . . . . . . . . . . .55
Working with the General Settings Tab . . . . . . . . . . . . . . . .57
Scan & Go Tab . . . . . . . . . . . . . . . . . . . . . . . . . . . . . . . . . . . .61
Scanners Connections Tab . . . . . . . . . . . . . . . . . . . . . . . . . . . .62
Working with the Scanners Connections Tab. . . . . . . . . . . .63
About Peer to Peer Connection . . . . . . . . . . . . . . 63
Creating a Peer to Peer Connection. . . . . . . . . . . . 64
CS 7600_User Guide (8J4071)_Ed07 v
Disconnecting a Peer to Peer Connection . . . . . . . . . 65
Clearing Scanner Memory . . . . . . . . . . . . . . . . . . . . . . . . . . . 66
Chapter 10
Maintenance
Imaging Plate Care . . . . . . . . . . . . . . . . . . . . . . . . . . . . . . . . . . . . .69
Handling and Storage of Imaging Plates . . . . . . . . . . . . . . . 69
Cleaning the Imaging Plate . . . . . . . . . . . . . . . . . . . . . . . . . . 70
Cleaning Materials . . . . . . . . . . . . . . . . . . . . . 70
Cleaning Method. . . . . . . . . . . . . . . . . . . . . . 70
Disinfecting the Hygienic Sheath and the Imaging Plates . 71
Frequency of Disinfection . . . . . . . . . . . . . . . . .71
Disinfection Solutions . . . . . . . . . . . . . . . . . . . 71
Disinfection Method . . . . . . . . . . . . . . . . . . . . 71
Disposing of the Imaging Plate . . . . . . . . . . . . . . . . . . . . . . . 71
Scanner Care . . . . . . . . . . . . . . . . . . . . . . . . . . . . . . . . . . . . . . . . . .72
Cleaning the Scanner Body . . . . . . . . . . . . . . . . . . . . . . . . . . 72
Cleaning the Detachable Insertion Panels. . . . . . . . . . . . . . . 72
Cleaning the Scanner Rollers . . . . . . . . . . . . . . . . . . . . . . . . . 75
Scan & Go Device Care . . . . . . . . . . . . . . . . . . . . . . . . . . . . . . . . 78
Cleaning the Scan & Go . . . . . . . . . . . . . . . . . . . . . . . . . . . . 78
Replacing the Battery (Scan & Go Generation 1) . . . . . . . 78
Chapter 11
Troubleshooting
Quick Troubleshooting . . . . . . . . . . . . . . . . . . . . . . . . . . . . . . . . . . 81
Retrieving a Fallen Imaging Plate. . . . . . . . . . . . . . . . . . . . . 84
Appendix:CS 7600 Consumables & Accessories . . . . . . . . . . . . . . . . . . . . . 89
Scanner Manager. . . . . . . . . . . . . . . . . . . . . . . . . . . . . . . . . . . . . . . 90
Accessing the Scanner Manager . . . . . . . . . . . . . . . . . . . . . . 90
Scanner Info . . . . . . . . . . . . . . . . . . . . . . . . . . . . . . . . . . . . . . . 91
Scanner Setup. . . . . . . . . . . . . . . . . . . . . . . . . . . . . . . . . . . . . . 92
Update Scanner . . . . . . . . . . . . . . . . . . . . . . . . . . . . . . . . . . . . 93
Updating the Scanner using the USB Storage Device . . . . 93
Updating the Scanner using the Scanner Manager Tool . . 94
Collect Info. . . . . . . . . . . . . . . . . . . . . . . . . . . . . . . . . . . . . . . . 95
Diagnose Connection . . . . . . . . . . . . . . . . . . . . . . . . . . . . . . . . 96

vi

CS 7600_User Guide (8J4071)_Ed07 1
1Conventions in this Guide
Conventions in this Guide
The following special messages emphasize information or indicate potential risk to personnel or equipment:
WARNING: Warns you to avoid injury to yourself or others by following
the safety instructions precisely.
CAUTION: Alerts you to a condition that might cause serious damage.
Important: Alerts you to a condition that might cause problems.
Note: Emphasizes important information.
Tip: Provides extra information and hints.

2 Chapter 1 Conventions in this Guide

CS 7600_User Guide (8J4071)_Ed07 3
2CS 7600 System Overview
Introduction
CS 7600 is a scanner system for intraoral X-ray exposed imaging plates.
The CS 7600 is intended for digital dental radiography using an imaging plate (storage phosphor plate) for
radiographic diagnostic intraoral images. The CS 7600 system is used to scan and review intraoral dental
X-ray images. When scanning the X-ray exposed imaging plate a digital image is previewed on the
scanner’s LCD and saved to the scanner’s internal memory. After scanning, the scanner erases the imaging
plate and ejects it. The imaging plate is ready for re-use.
The exam acquisition’s scanned image is sent over the network to the workstation’s image Acquisition
interface. Using the image Acquisition interface the image is processed and reviewed.
The image Acquisition interface sends the images to the CS Imaging Software, which archives the acquired
images.
The scanner connects directly to the network, or is connected peer-to-peer to the workstation.
The scanner can be optionally placed on a desk/counter top or mounted on a wall, using a special shelf
(adapter).
The system is composed of the following elements:
CS 7600 scanning device (page 4)
Smart imaging plates (page 6)
Scan & Go device (optional, page 9)
Note: The CS 7600 is intended for dental professionals. You are required to
have training to use the CS 7600.
Note: The scanner is supplied with a separate viewing and archiving software
package: CS Imaging Software, approved by Carestream Dental.
Note: The CS 7600 User Guide is also provided as a PDF file on the supplied
CD-ROM.

This device complies with part 15 of the FCC Rules and contains licence-exempt transmitter(s)/
receiver(s) that comply with Innovation, Science and Economic Development Canada's licence-
exempt RSS(s). Operation is subject to the following two conditions: (1) This device may not
cause interference. (2) This device must accept any interference, including interference that may
cause undesired operation of the device.
L'émetteur/récepteur exempt de licence contenu dans le présent appareil est conforme aux CNR
d'Innovation, Sciences et Développement économique Canada applicables aux appareils radio
exempts de licence. L'exploitation est autorisée aux deux conditions suivantes:
1) L'appareil ne doit pas produire de brouillage;
2) L'appareil doit accepter tout brouillage radioélectrique subi, même si le brouillage est
susceptible d’en compromettre le fonctionnement.
Caution: Changes or modifications to this unit not expressly approved by the party responsible for
compliance could void the user's authority to operate the equipment.
CS 7600_User Guide (8J4071)_Ed07 4

5 Chapter 2 CS 7600 System Overview
CS 7600 Components Overview
Scanner Overview
The CS 7600 scanner performs the functions necessary for scanning and acquiring images from the imaging
plates.
Figure 1 CS 7600 Front View
13.5" QVGA color LCD (320 X 240 pixels, landscape matrix)
2Function buttons for scanner use and menu navigation
3On/Off button + LED power indicator
On/Off button functions:
Turn scanner On: press for 1 second
Turn scanner Off (close application and files and then turn off): press for 2 seconds
4Base
5Intraoral imaging plates tray
6Detachable insertion panel. The CS 7600 makes use of three insertion panel sizes according to the
inserted imaging plates size (0, 0–3, or 4).
7Front cover
8Back covers
2
7
8
3
6
1
4
5

CS 7600_User Guide (8J4071)_Ed07 6
Figure 2 CS 7600 Rear View
Figure 3 Cables Compartment in Detail
1Service door
2Base
3Cables compartment for power supply connection and interface ports (RJ-45 Ethernet port)
4Back cover
1
4
3
2
1
3
2
4
1Power supply inlet
2
RJ-45 Ethernet port (Ethernet activity
LEDs: yellow indicates speed, green
indicates that the ethernet is
connected)
3Service ONLY ports
4Compartment cover

7 Chapter 2 CS 7600 System Overview
Smart Imaging Plates Overview
The CS 7600 works with five imaging plate sizes: 0 to 4. The scanned image file size depends on the
imaging plate size and the scanning resolution set by the user.
The smart function of the imaging plates is utilized when using the Scan & Go device.
Table 1 Intraoral Imaging Plate Sizes
Size Illustration Application
0Periapical exam (Pediatric dentistry)
1Bitewing exam (Pediatric dentistry)
2Periapical exam (Adult)
3Bitewing exam (Adult)
4Occlusal exam

CS 7600_User Guide (8J4071)_Ed07 8
The imaging plate has two sides: the active side for capturing the X-ray image and the inactive side. The
active side of the imaging plate includes an orientation mark ‘c’ to facilitate accurate positioning within the
patient’s mouth. The inactive side has a printed dot that corresponds to the location of the orientation mark
on the active side. This dot is visible through the transparent hygienic sheath and is also helpful for
positioning the imaging plate correctly in the patient’s mouth.
Hygienic Sheaths
For each imaging plate size there is a corresponding one-time use, disposable, hygienic sheath for
preventing cross contamination. The transparent side allows you to see the orientation mark for positioning
the imaging plate correctly in the patient’s mouth while the opaque side protects the active side of the
inserted imaging plate from light damaging effects. The foam strip is a stopper which prevents inserting the
hygienic sheath by mistake into the scanner (as long as the insertion direction is correct).
Inactive side
Active side
Orientation dot
Important: Use only Carestream Dental imaging plates and hygienic
sheaths!

9 Chapter 2 CS 7600 System Overview
Figure 4 Hygienic Sheath (front view)
1Adhesive strip (for sealing the hygienic sheath)
2Foam stopper
3Sheath, transparent on one side and with a light protection barrier on the other side
3
1
2

CS 7600_User Guide (8J4071)_Ed07 10
Scan & Go Overview
Scan & Go is an optional device that enables you to link the imaging plate to a specific exam acquisition (for
example, patient) prior to acquisition.When the plate is inserted into the scanner, the information which was
tagged onto the plate is retrieved by the scanner and the imaging plate is scanned automatically according to
this information (resolution, target workstation, etc). Scanned images are then routed automatically to the
correct workstation, associated to the correct exam acquisition and placed in the correct frame in the CS
7600 image Acquisition interface.
Scan & Go Generation 1 (Models Released before June 2012)
Scan & Go Generation 1 (models released before June 2012) have a rechargeable battery, accessible from
the panel at the back of the device.
Figure 5 Scan & Go device, Generation 1 (before June 2012)
1USB 2.0 port
2On/Off button
3On/Off/Recording LED status indicator (blue)
Turning On/Off, 3 short flashes
Standby (intermittent flashing)
Recording data to the imaging plate (successive short flashes)
4Battery LED status indicator (amber):
Charging (static light)
Low battery (successive short flashes)
(light Off) battery charged
5Recording surface for imaging plate
6Mounting adapter
5
1
4
3
2
6

11 Chapter 2 CS 7600 System Overview
Scan & Go Generation 2 (Models Released from June 2012)
A second generation of Scan & Go device is available from June 2012. The following improvements have
been made to the second generation Scan & Go device:
Faster scanning - Approximately 1/4 sec instead of 1 sec
No battery - Therefore no need for charging
No on off switch - Turns on automatically when the USB is connected
Figure 6 Scan & Go device, Generation 2 (after June 2012)
1USB 2.0 port
2On/Off/Recording LED status indicator (blue)
Power Up: One Flash & Beep (Internal FW)
Beacon: Flashes blue every few seconds when the image Acquisition interface is open
(Not during Tagging)
Tagging OK: One flash (long) & 1 bleep (long)
Tagging Fail: One Red flash (long) & 1 bleep (long)
3Connected to USB: LED status indicator (green)
4Recording surface for imaging plate
2
4
3
1

CS 7600_User Guide (8J4071)_Ed07 12
Connecting the Scan & Go Device
To connect the Scan & Go:
Connect the USB cable to the computer and to the USB port on the Scan & Go device.
Scan and Go Generation 1, the right LED illumines amber, the left LED flashes blue to indicate that
it is ready for use.
Scan and Go Generation 2, the right LED flashes green three times, the left LED illumines green
continuously and the device bleeps three times to indicate that it is ready for use.
Scanner Shelf
The CS 7600 can be optionally mounted on the wall using a shelf bracket.
The CS 7600 is attached to the shelf by a single central tightening nut.
For more information on Scanner Shelf Installation, see document HT014_20111006_EN
Scanner Shelf Scanner on Shelf

13 Chapter 2 CS 7600 System Overview

CS 7600_User Guide (8J4071)_Ed07 14
3Software Overview
Computer System Requirements
General Software Overview
The CS 7600 intraoral imaging system operates with the following software:
CS Imaging Software
Single Image Acquisition Interface. See “Single Image Acquisition Interface Overview” on
page 13.
Full Mouth Series (FMS) Acquisition Interface. See “Full Mouth Series (FMS) Acquisition
Interface Overview” on page 14.
CS 7600 Image Acquisition Software
Full Mouth Series (FMS) Acquisition Interface. See “Full Mouth Series Image Acquisition
Interface” on page 28.
Single Image Acquisition Interface Overview
You can acquire individual images using the CS Imaging Software.
Figure 1 CS Imaging with Active CS 7600 Scanner Connected
Important: It is MANDATORY to check that the computer system
configuration is compatible with the computer minimum system
requirements specified in the Safety, Regulatory & Technical
Specifications User Guide. If necessary, update your computer system
configuration.
Other manuals for CS 7600
1
Table of contents
Other Carestream Dental Equipment manuals

Carestream
Carestream CS 8100 3D User manual

Carestream
Carestream CS 8100SC series User manual

Carestream
Carestream cs 3500 User manual

Carestream
Carestream CS 8100 User manual

Carestream
Carestream CS 1200 Manual

Carestream
Carestream CS 1500 Owner's manual

Carestream
Carestream CS 7200 Manual

Carestream
Carestream CS 1200 User manual
Popular Dental Equipment manuals by other brands

Aseptico
Aseptico ADU-17A Operation and maintenance instruction manual

DENTSPLY
DENTSPLY PROMARK Quick reference guide

Dentsply Sirona
Dentsply Sirona Heliodent Plus Service manual

Dentsply Sirona
Dentsply Sirona Propex IQ Directions for use

Cattani
Cattani TURBO-SMART Operator's handbook

NSK
NSK Surgic Pro Series Operation manual