Carex Day-Light Classic User manual

Read all instructions before using the Day-Light
Safety Precautions
1. As with any electrical device, do not use the Day-Light in
or near water.
2. Do not overuse the Day-Light. Recommended usage is
20-30 minutes each morning. Overuse may cause irritabil-
ity, excessive energy, or difficulty falling asleep at bed-
time.
3. It is not necessary to stare into the light. Feel free to
read, work, eat or talk on the phone during your light
therapy session. See page 7 for correct
positioning.
5. During the first few uses, your
Day-Light may give off an odor; this is harmless. This will
not affect the use of your Day-Light and will quickly dis-
appear.
6. Do not leave your Day-Light on for more than 60 minutes
in Therapy mode. Always use in a well ventilated area
away from other heat sources and ensure that the air
vents are not blocked when the product is in use.
Disclaimer
The Day-Light is an innovative light
supply system and is not a listed medical
device in the USA.
Day-Light Classic
User Guide
SAVE THESE INSTRUCTIONS
The Day-Light is intended for household use only.

Thank you for purchasing the Day-Light Classic!
This bright light system was designed with the
highest quality and safety standards.
For instructions on correct assembly and use of your
Day-Light, please read this manual in its entirety. For
more information on light therapy and the entire
Day-Light product line, visit our Web site at:
www.carex.com
Day-Light Benefits
The Day-Light brings the light of a springtime
morning into your home or office. Using your Day-
Light on a regular basis during the fall, winter and
spring months will not only keep your moods and
energy level up, but it will also pleasantly brighten
your home or office.
Whether used as a task light, reading lamp, or
placed on the shelf for enjoyable ambient light, your
Day-Light can be put to good use for much more
than your regular 20-30 minute light therapy session
each morning.
Day-Light Features
Your Day-Light is designed with versatility and
convenience in mind.
Day-Light User Guide
2
Lightweight and compact,
the Day-Light fits conven-
iently into your carry-on
luggage.
Using the built-in stand,
the Day-Light adapts for
suitable use on a table,
desk or shelf.
Specifications
UL & C-UL Listed
Enclosure Size: 13.25" x 16" x 3"
(33.7 cm x 40.6 cm x 7.6 cm)
Height with Legs: Max: 28" / 71.1 cm
Mid: 26.5" / 67 cm
Min. 25" / 63.5 cm
Weight: 6.5 lb / 3.0 kg
Boxed Weight: 8.3 lb / 3.8 kg
Electronic Ballasts: Instant start, no flicker
Lens Material: High-impact polycarbonate
Diffusing Filter: 99.3% UV filter
Two Light Intensities:
a) 3 light setting 10,000 LUX at 12"
b) 2 light setting 7,000 LUX at 12"
Light Tubes: 3 x 36 watt compact fluorescent
4000 Kelvin color temperature
Warranty: Five-year limited warranty
Using the removable legs
as shown, you can adjust
the light to the optimal
height and angle for your
light therapy session.
Choose the three-light
setting for light therapy,
and the two-light setting
when you prefer lower
intensity ambient light.

1. Check package contents to ensure that all parts are
enclosed and in good condition (see pictures below).
2. Test light tubes to ensure that all three are in
working order.
Check Package Contents
Your Day-Light comes with the following components:
The light case, which includes three pre-installed
light tubes and a built-in stand on the back;
Two height-adjustable legs (see photo). Note the
placement of the Height Adjustment Button;
Users Guide and your Warranty Registration Card.
Please check to see that all parts are included in your
package. Send in your Warranty Card today to ensure
you are registered. Contact your dealer if any product
parts are missing or damaged.
Test Light Tubes
Your Day-Light comes equipped with three 36 watt
compact fluorescent light tubes and can be used in a
two-or three-light setting. Test to see that the switch
and light tubes are working properly with these steps:
Plug in the light case.
Push the switch to the solid yellow dot for the three-
light setting. The lamp should illuminate.
Push the switch to the yellow “O” for the two-light
setting. The lamp should illuminate at a lower
intensity.
If all three tubes do not light up, the non-functioning
light may be loose or damaged.
www.day-lights.com
In this event, you will need to remove and reinstall the
nonfunctioning light tube to determine the problem, as
described in the section
Removing and Installing
Day-Light Tubes
below.
Removing & Installing Day-Light Tubes
1. Unplug the Day-Light (remove both detachable legs
if already assembled).
2. Gently lay the lamp with lens down on a flat surface.
3. Remove the nine screws on the back of the unit
using a #2 Philips
screwdriver.
4. Turn the lamp onto its
back. Remove the lens.
5. Check to see if a light
tube is loose. If loose,
remove and re-install.
6. Remove the elastic
around the metal clips.
7. Remove and discard the
rubber shipping insert at
the socket end of the
light tube.
8. To remove the light
tube, depress the white
clip in the middle of the
light housing unit (see
photo). With your other
hand, grasp the tube
near the plastic base
and gently wiggle it
until it rises above the
white clip.
9. Twist the light tube until
one side of the base
comes out of the socket.
10. The other side should
slide out with minimal
effort.
11. Now slide out or
disengage the light tube
from the retainer clip at
the other end.
Lens
Switch
Power Cord
Light Case Removable Legs
Height
Adjustment
Buttons
Knobs
3
Before Using Your Day-Light

Day-Light User Guide
4
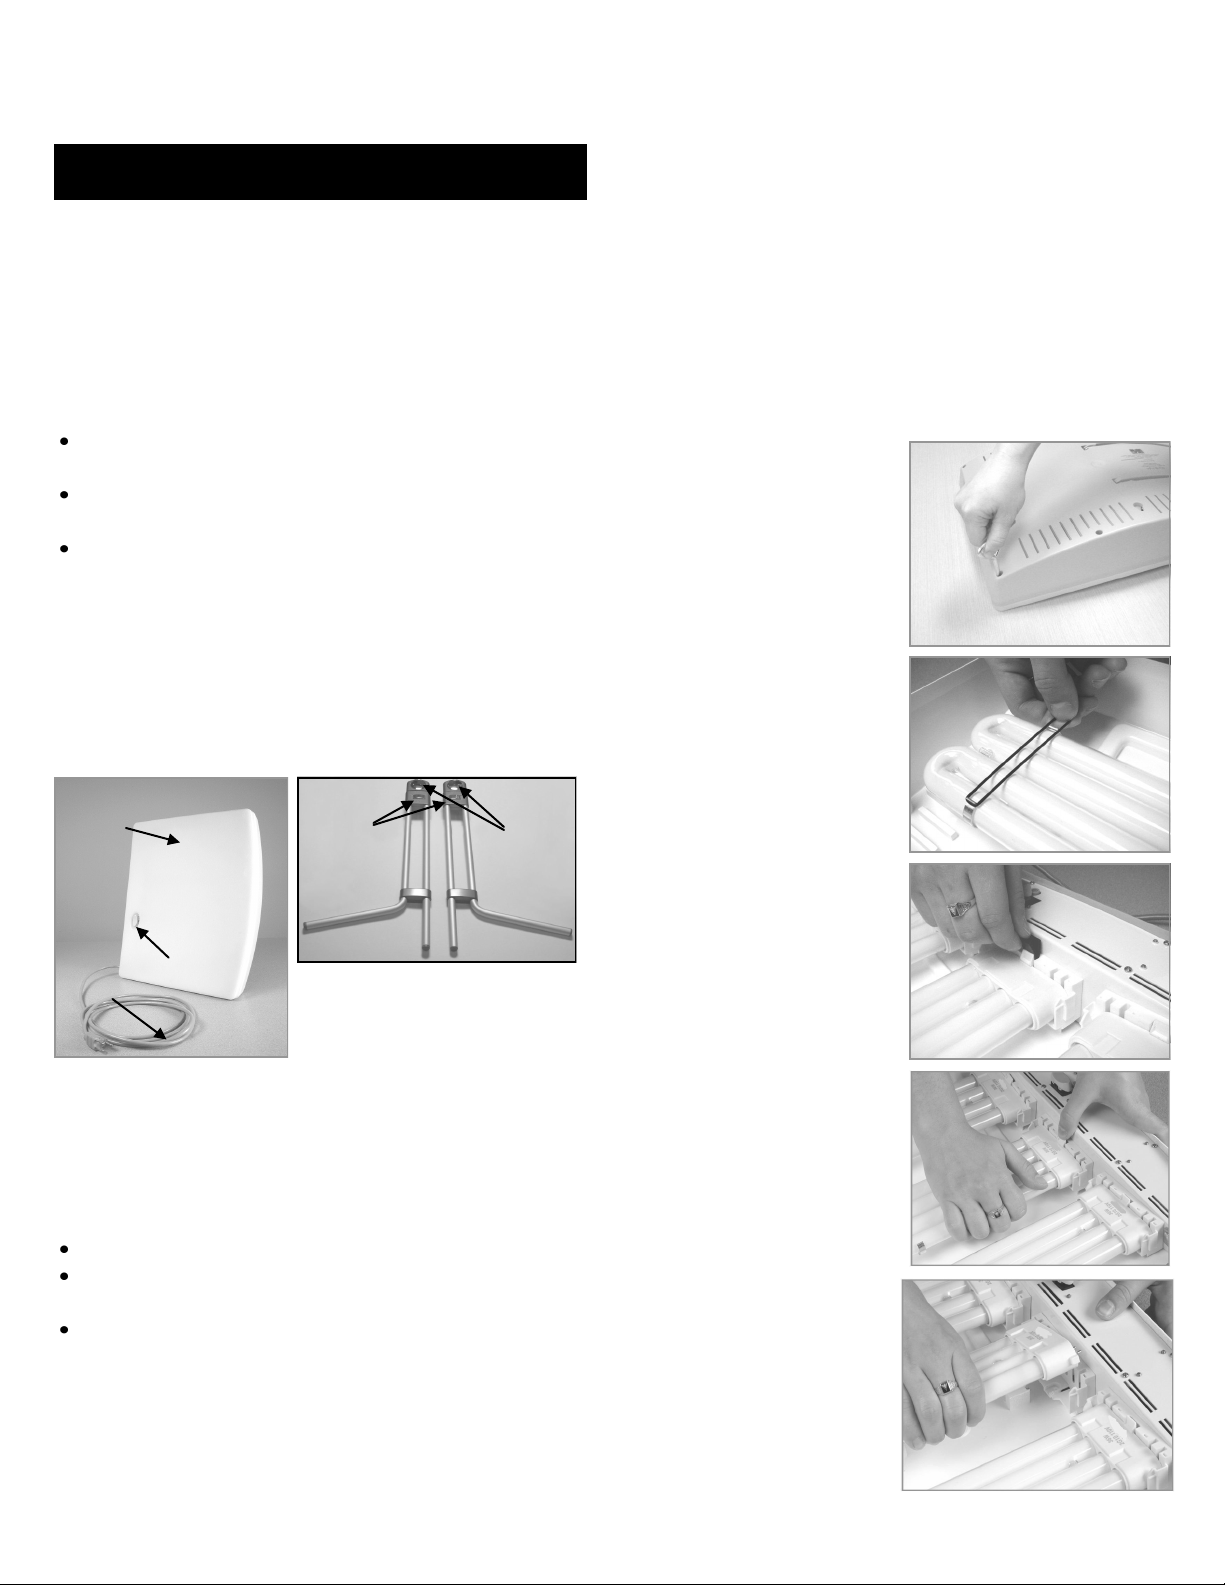
To Install a Light Tube
1. To re-install the light
tube, hold the tube
horizontally and slide
the top end into the
retainer clip.
2. Next, gently slide the
prongs into the light
socket. When it is
fully in place you will
hear a ‘click’.
3. Reinstall the elastic over the metal clips.
NOTE: Elastics are installed for shipping safety, and
are not otherwise necessary. If one of the elastics
should break, you can safely discard it without
affecting use of the Day-Light.
4. Once the light tubes are installed correctly, plug the
Day-Light in and check that the lights illuminate in
each switch position. If working, unplug and
continue to the next step. (If not, try again before
determining that there is a problem with the light.)
5. Make sure that the cord is threaded through the
notch provided. Replace the plastic lens. It should
clip easily back into place.
6. While grasping the entire width of the Day-Light,
turn it over so that it is face down on the table.
Reinstall the nine screws. Do not over tighten as this
could result in stripping the screws.
NOTE: Ensure that the light tubes lock into place or they
could disconnect from the socket.
Adjusting the Light Intensity Settings
The Day-Light operates with three 36 watt compact
fluorescent light tubes. There are two light intensity
settings on your new Day-Light –a high intensity and low
intensity setting. High intensity is the recommended
dosage for light therapy sessions, while low intensity
may be preferred for use as a task light.
High Intensity - Light Therapy
At this setting, the Day-Light emits 10,000 LUX light
intensity when sitting a distance of 12" from the light.
This light level is the recommended dosage for 20-30
minute daily light therapy sessions. Push the switch to
the side with the solid yellow dot. All three light tubes
will be on at this setting. Do not use your Day-Light for
more than 60 minutes in Therapy mode.
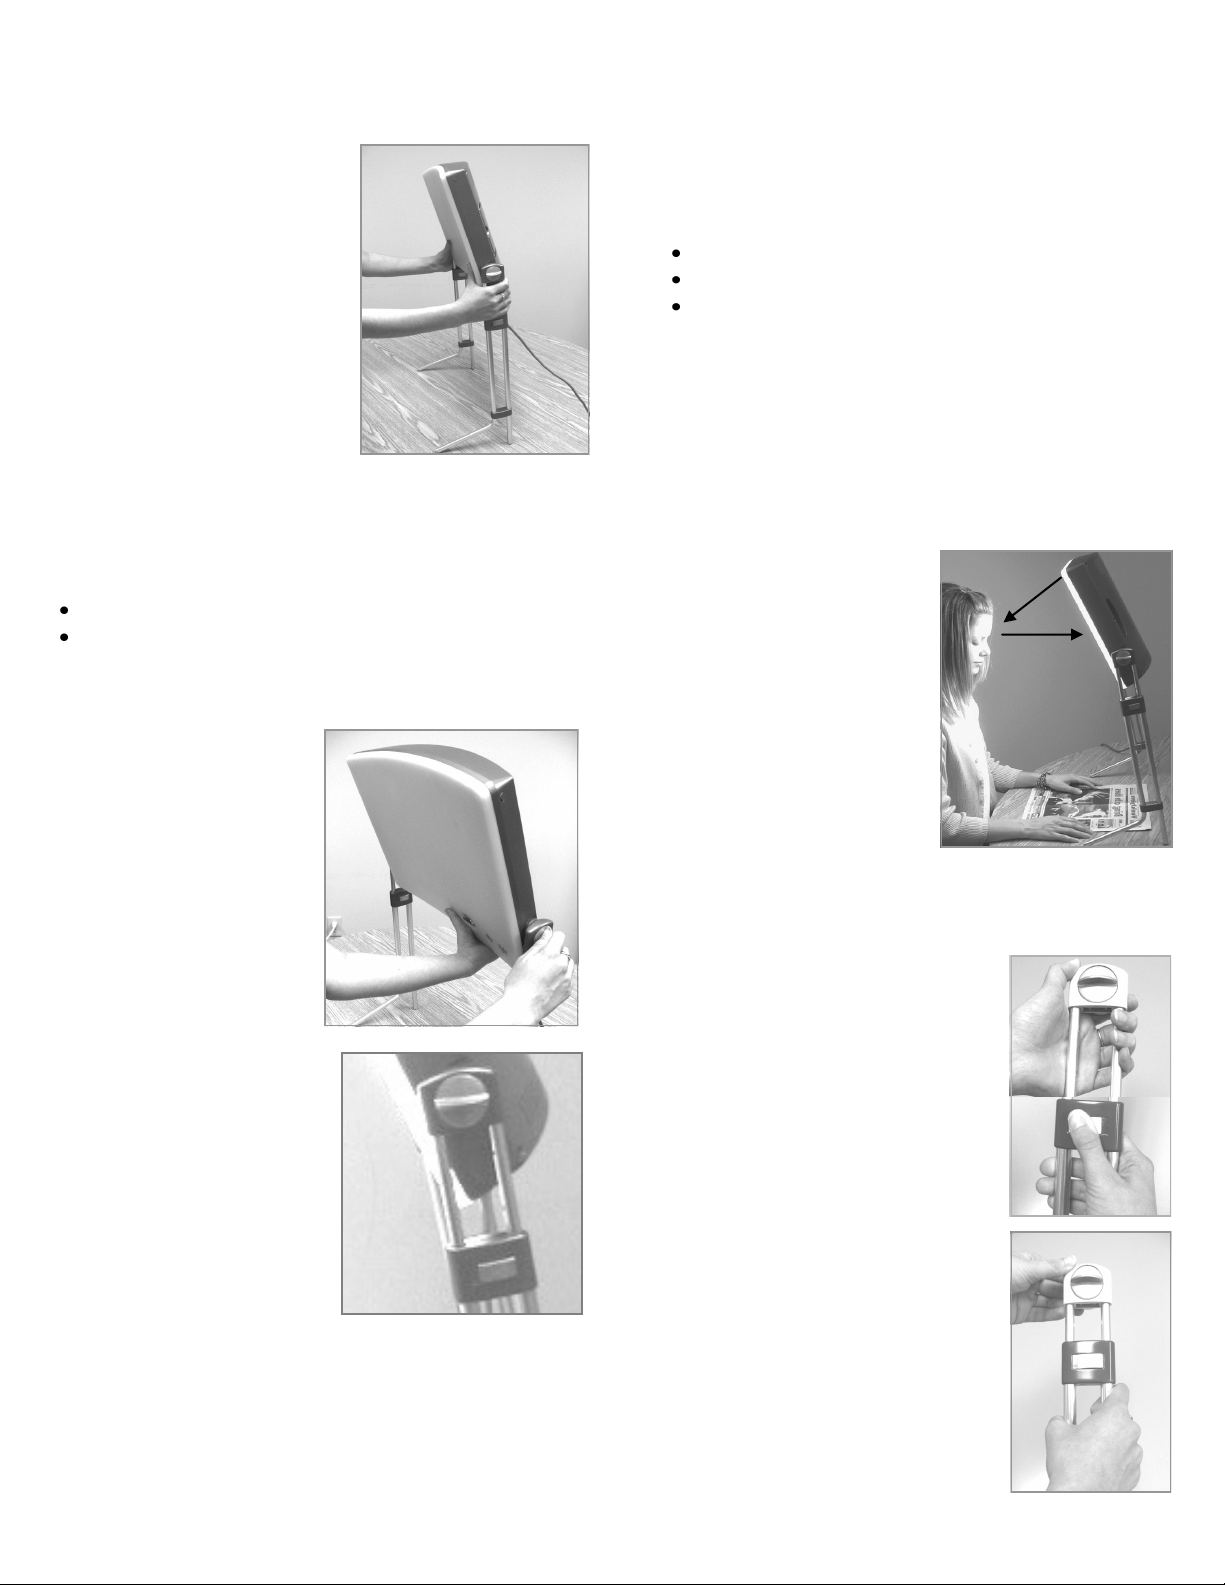
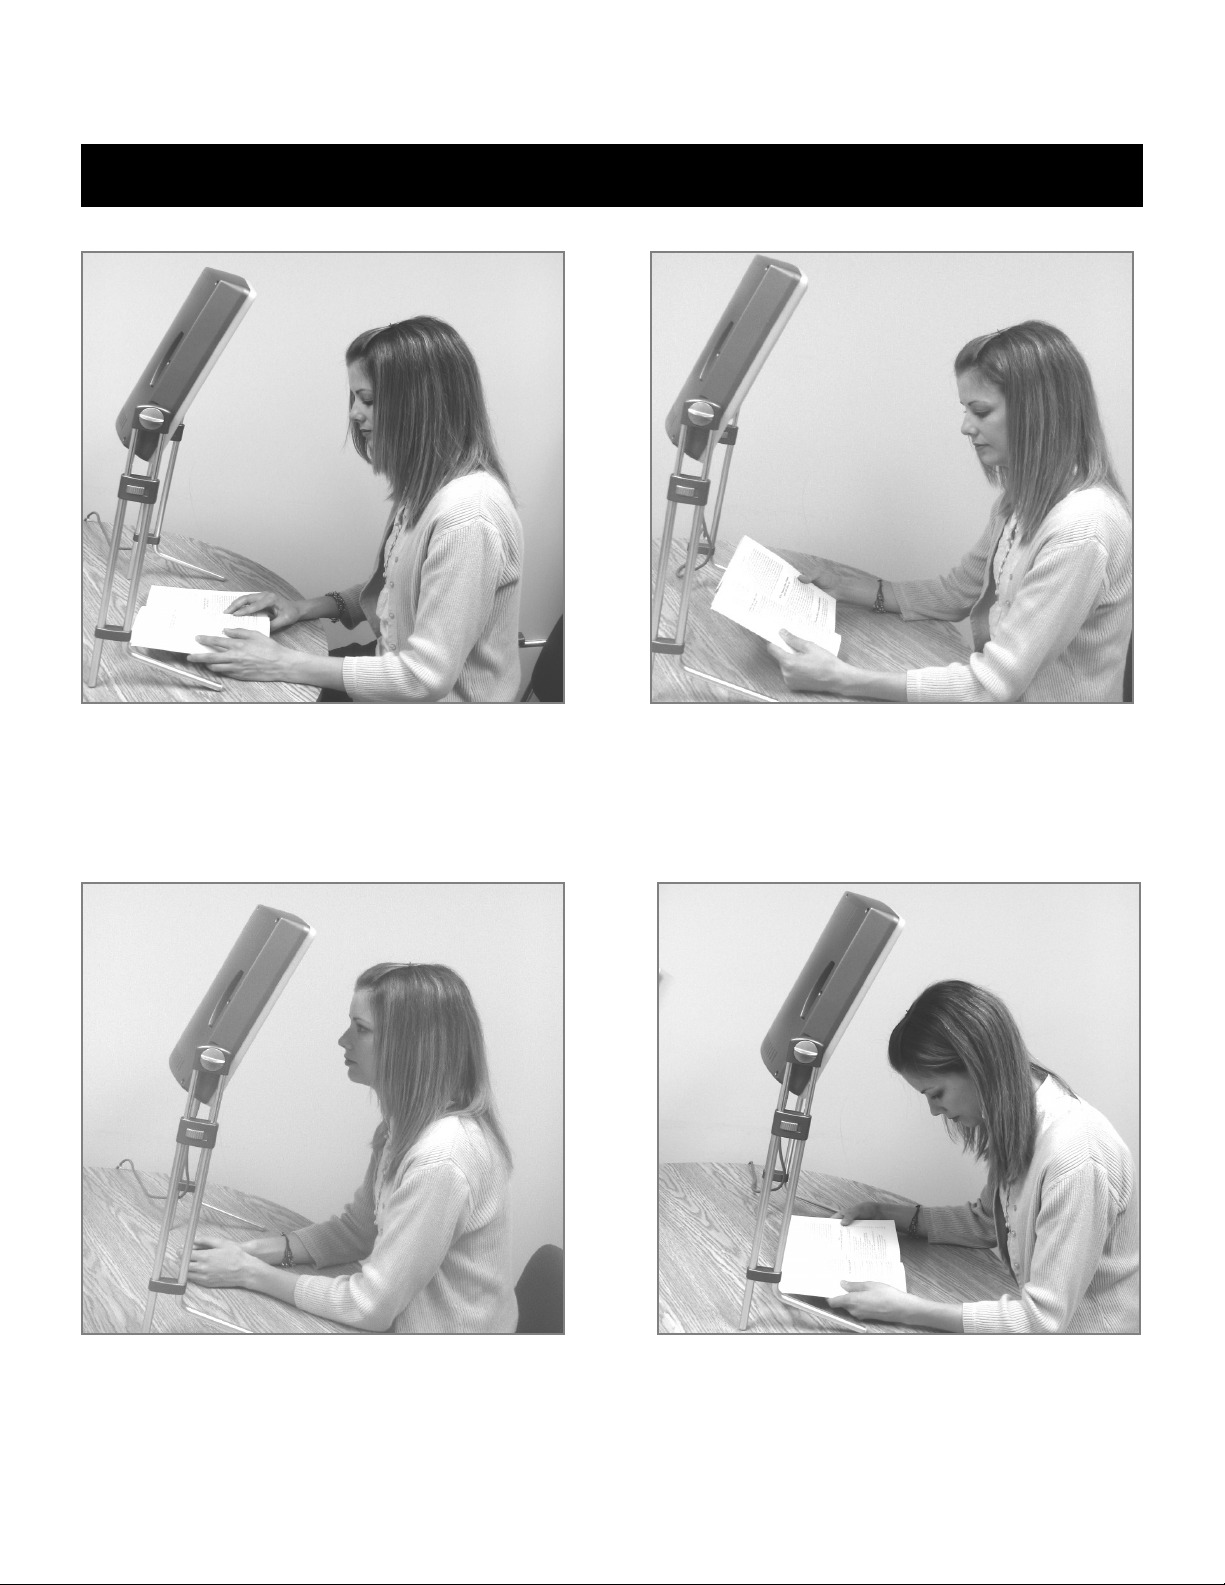
Low Intensity –Task/Ambient Lighting
You may prefer the lower intensity setting when using
your Day-Light for work or ambient lighting –it’s your
choice. However, the lower setting emits a light intensity
of 7,000 LUX when sitting 12" from the light. As this is still
quite bright, we recommend that you either move your
Day-Light further away, or angle the light down over your
work area when using it for non-light therapy uses.
For the lower light intensity setting, push the switch to
the side with the yellow “O”. You should see only two of
the light tubes illuminate.
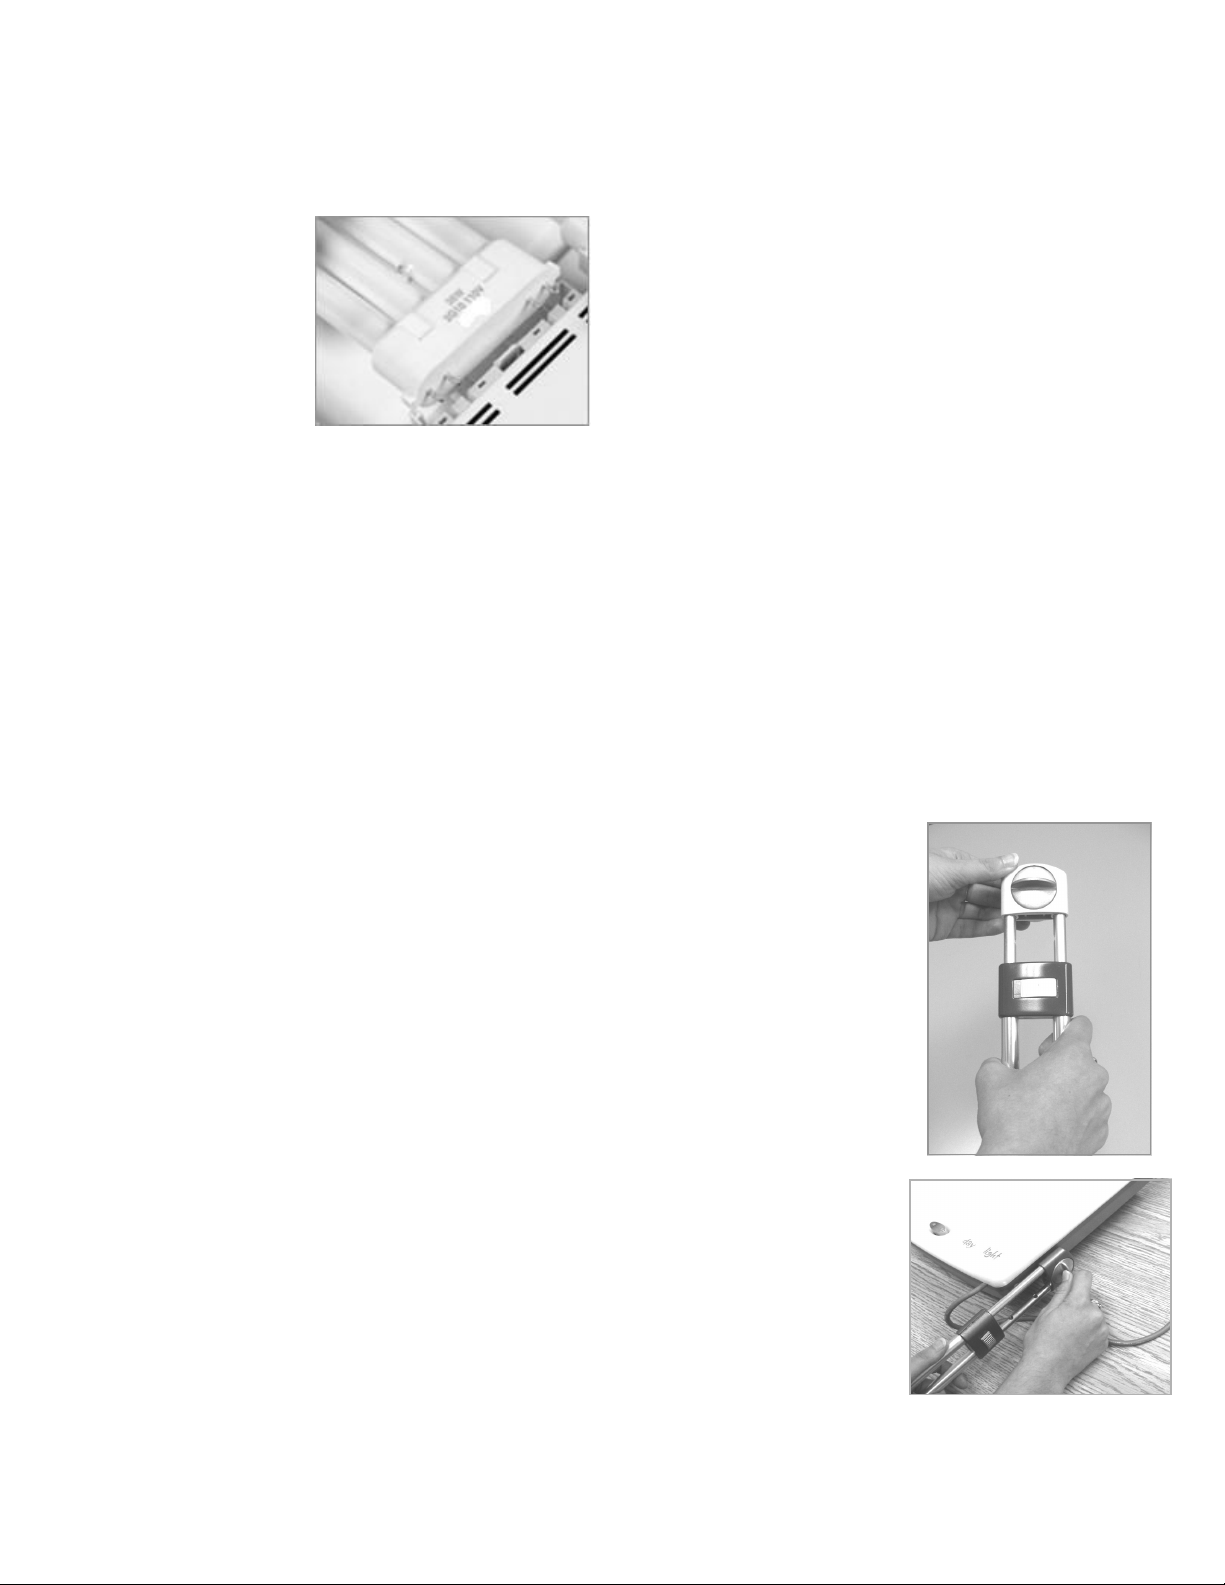
Attaching the Height Adjustable Legs
Use your Day-Light with the
height adjustable legs and
high intensity, three-light
setting for optimal use in light
therapy sessions.
You will need to attach the
legs before use.
To attach the legs, lay the
Day-Light on a flat surface -
front facing up. Take the
right leg (the one that has
the knob on the right when
the curved part of the leg is
sticking up).
Insert the threaded screw
into the hole and turn
clockwise until snug.
Repeat assembly for the
left leg.

To Adjust the Height of the Light
There are three leg heights available on your Day-Light:
Maximum height - 28" / 71 cm
Mid-height - 26.5" / 67 cm
Minimum height - 25" / 63.5 cm
You will want to choose the height that works best for
you: the height at which your eyes are approximately in
the center of the light when tilted at the
15° angle as
illustrated.
If you set the light up using the bottom hole, you are at
the maximum height of 28 inches (71 cm).
To determine
your best height, simply ask a
friend or family member to
observe you sitting in front of
the light and calculate your best
setting from there. The second
hole lowers the light by 1.5
inches, and the third hole
another 1.5 inches.
When you have determined
which height is best for you,
remove the legs and adjust
them accordingly.
To do this, simply push the Height Adjustment Button
forward on both legs (as shown) so that
the top part of the leg slides freely up
and down. You must release the button
before it will lodge properly in one of
the holes. You will hear a “click” when
the setting is secure.
IMPORTANT: Never use the legs unless
they are properly seated into one of
these three height setting holes. This
could result in your Day-Light tipping
and breaking.
IMPORTANT: Ensure the legs
are tightly fastened to the light
case. The legs must also be
parallel in order for the Day-
Light to stand safely on a
tabletop surface.
Now stand your Day-Light up,
grasping the bottom of the
case around the legs.
Adjusting Light Angle and Height
For optimum light therapy usage, you will now need to
adjust your Day-Light so that:
The light shines down at an angle of about 15°;
Your eyes are approximately in the center of the light.
To Adjust the Angle of the Light
To set the angle of the light
at approximately
15°,
carefully loosen the two leg
knobs and tilt the light
slightly forward, so that the
bottom front corner of the
light is just past the front
part of the leg, as shown.
Light therapy experts
recommend this angle of
light.
When in position, retighten
the knobs on the legs of the
Day-Light. When not using
your Day-Light for light
therapy, you can easily
convert it to a task lamp by
placing the light over or near
your work space.
www.day-lights.com
5

Adjusting Sessions
After a week of use you should be able to determine
what usage schedule is best for you. Some people find
an additional 15 to 30 minute session later in the
afternoon or early evening to be helpful, particularly if
they experience a slump in energy late in the day.
Daily Use
If you miss sessions or discontinue use of the Day-Light,
your body will return to its usual wintertime doldrums.
Benefits should reappear a few days after resuming use.
Using Day-Lights for other Conditions
Increasing evidence points to the efficacy of using bright
light therapy lamps for jet lag, shift work adjustment,
improved sleep patterns and low energy.
Using the Built-in Stand
Simply remove the legs from your Day-Light, pull out the
built-in stand and set it on any stable surface that is con-
venient. This option is best for ambient lighting.
Using Your Day-Light for Light Therapy
It is best to use your Day-Light with the legs for light
therapy. As described previously, tilt the light at a
15°
angle and adjust the legs so that your eyes are
approximately in the center of the light.
This is the
position recommended by light therapy experts.
Begin with a 30 minute session early in the morning if
possible. Read, eat breakfast, talk on the phone, etc.
There is no need to look directly into the light.
NOTE: While you should face the Day-Light and have your
eyes open during your light therapy session, it is neither
necessary nor recommended to look directly into the light.
Timing and Duration of Session
For best results use your Day-Light shortly after waking,
preferably before 9 a.m. A 20-30 minute session is usually
sufficient. Begin with a 30 minute session and adjust
according to your needs –whether shorter or longer
sessions are required to alleviate your symptoms.
Symptoms of Overuse
Although there are rarely any negative side effects of
using light therapy, it is possible to use the Day-Light too
much. If you experience increased irritability, excessive
energy, and/or any discomfort consistently during or after
use, decrease the length of your sessions, or move the
light several inches further away from you.
Adjusting to Light Intensity
Some individuals prefer to get used to the brightness of
the light before their therapy session. This can be
achieved by turning the system on a short time before
sitting directly in front of it, allowing your eyes to adjust
more comfortably. You might also wish to wake up using
the Day-Light by putting it on a lighting timer. These are
available at your local electrical supply store.
NOTE: After switching THE Day-Light on, it takes about
three minutes before the light tubes reach full intensity.
Day-Light User Guide
6
Important Information
Consult your doctor before starting any
bright light therapy regimen.

7
Correct and Incorrect Positioning for Light Therapy Usage
Correct Position
The light angle should be set around 15º, and legs
adjusted so that your eyes are approximately in the
center of the light. Sit 12" from the light. You can
comfortably read or have breakfast at this distance.
Incorrect Position: Sitting Too Far Away
Sitting too far (over 12") from the light effectively
decreases the dosage of the light you are receiving.
This will “work”, but will require longer sessions. The
recommended dosage is 10,000 LUX.
Incorrect Position: Sitting Too Close
The recommended light dosage is 10,000 LUX which
is achieved by sitting 12" from the Day-Light. It is
not necessary, or recommended to sit any closer to
the light or to stare directly into the light.
Incorrect Position: Head Down Too Far
Although it is fine to read while using the Day-Light,
the light must be able to reach your eyes. With the
head in this position, light cannot reach the eyes.

Replacement of Day-Light Tubes
The Day-Light Classic functions with three compact fluorescent light tubes. As fluorescent
light tubes deteriorate over time they emit lower light intensity levels.
Light tubes are rated for 8,000 hours of use but we recommend replacing the tubes after
two (2) years of daily, seasonal usage –regardless of whether they have burnt out. This
will ensure continued 10,000 LUX intensity for your light therapy sessions.
Day-Light Classic
User Guide
Warranty Returns
If your Day-Light fails to function as warranted, contact the original place of purchase for
assistance. You will be required to provide date and proof of purchase.
We encourage all of our dealers to provide warranty service for Day-Light consumers so
that you do not experience delays in receiving a replacement unit.
Dealers
No returns will be accepted without a Return Authorization Number. Please call 1-800-526-
8051 for your Return Authorization Number.
We recommend that you use the original packing material and box for all Warranty returns.
These items were designed to withstand the shipping process. If the Day-Light incurs any
damage due to improper packaging, the cost for repair will be charged back to you.
www.carex.com
© 2013
Table of contents
Other Carex Medical Equipment manuals