C. Fitting Electrode Cables
1. Note the position of the lid on the unit. This shows the correct polarity and the correct orientation
of the cables, black is negative and red positive.
2. Remove the lid from the unit. Note if the lid is not removed, fitting the cables may result in un-
tightening of the gold plug and damage to the electrode.
3. Screw the cables into the tapped holes as fully as possible so that there is no gap between the lid
and the leading edge of the cable fitting.
4. Refit the lid.
D. Preparation and Gel running
The following protocol is a guideline only.
Please follow the manufacturers recommend instructions with the types of Cellulose Acetate strip and
samples being used.
1. Position the wick carrying bars in the tank such that the distance between them is just longer then
the strip to be used when applied lengthways.
2. Cut to the appropriate size and position the electrode wicks in the tank so that they overhang the
wick carrying bars with the base sitting in the buffer tanks, see diagram below. Filter paper or
paper towels can be used as the wicks.
3. Equilibrate the strip in buffer with agitation for 10 –15 minutes. Commonly used buffers are, e.g.,
Tris Hippurate 0.05 M, pH 8.8 or Barbital Tris 0.05 M.
4. Fill the tank with 180 ml of buffer per chamber side, 360 ml in total.
5. Holding the strip by the edges only in gloved hands, blot the strip in between two pieces of filter
paper.
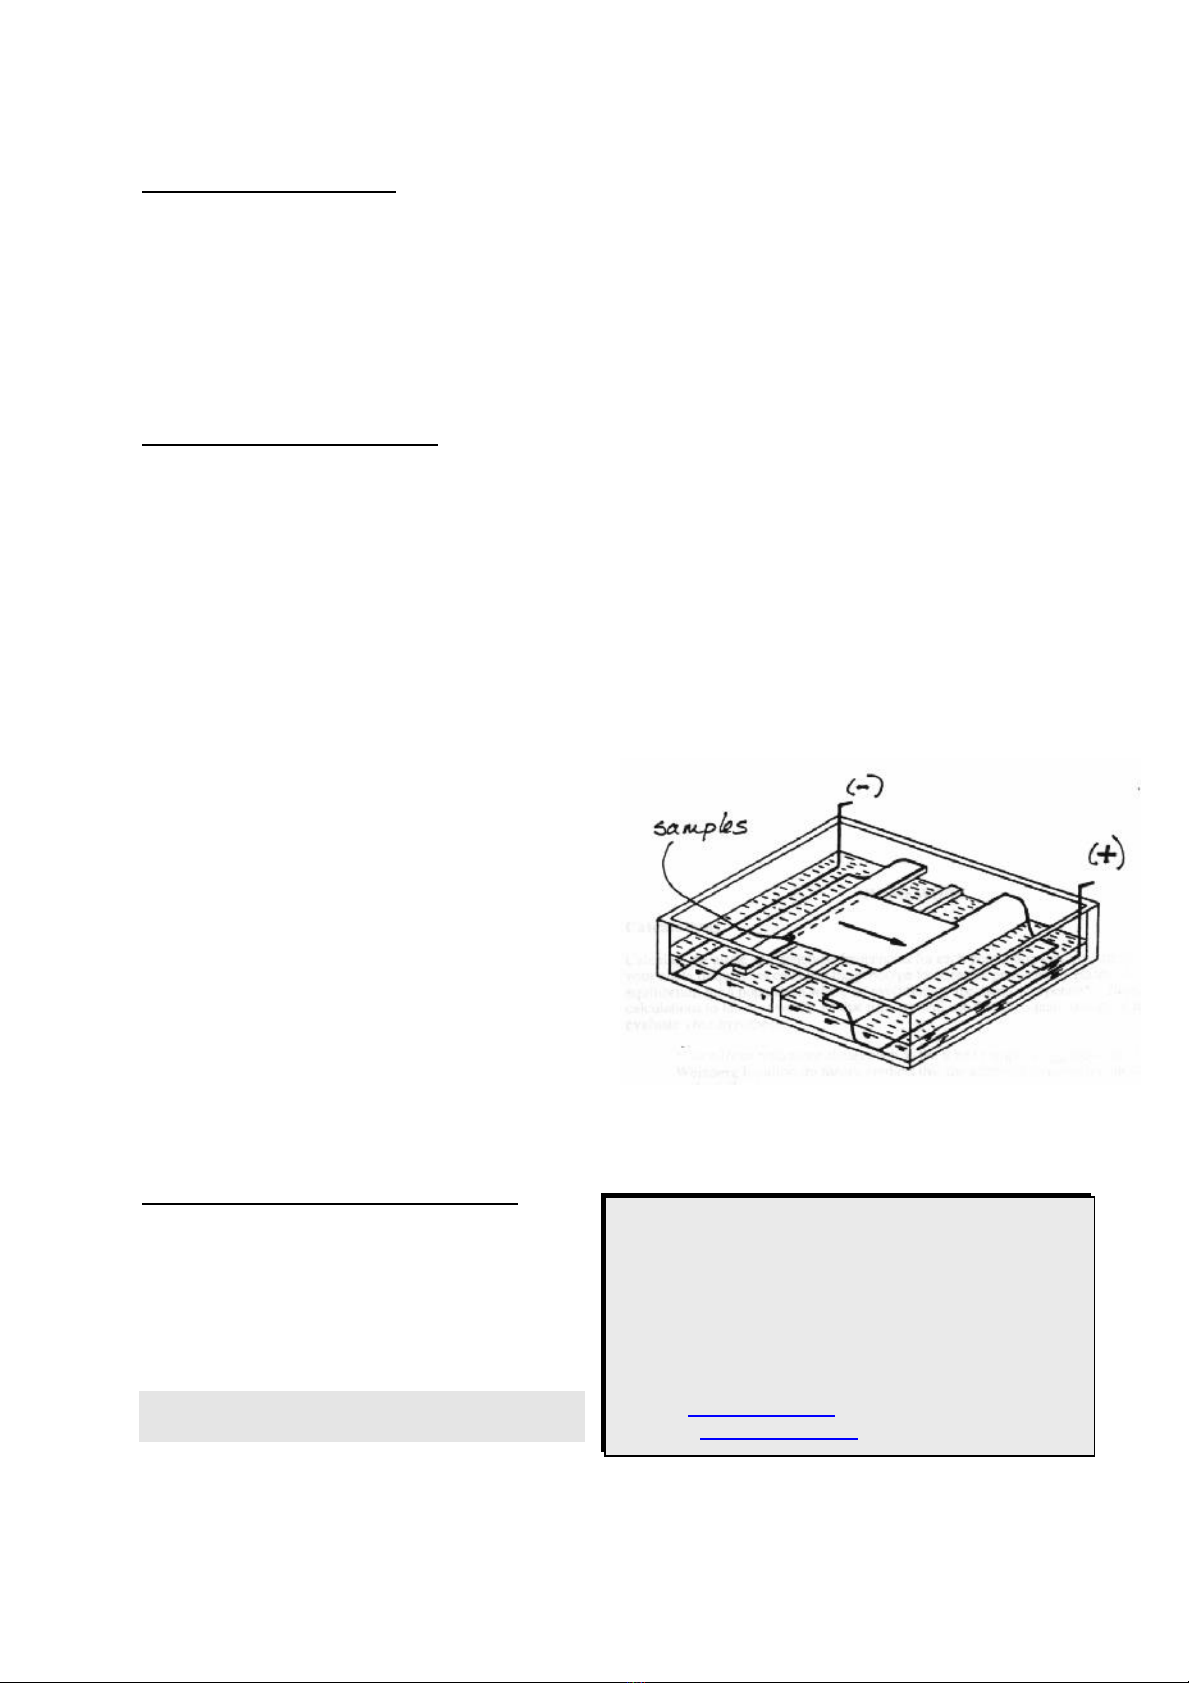
6. Place the strip on top of the wicks and between
the bars with the sample end at the negative
electrode. Make sure there is good contact by
pushing down on the ends of the strip. Glass
slides can be placed over each end to further
ensure a good contact.
7. Apply the samples at the negative end of the
cellulose acetate plate. Usually a small amount
of dye can also be loaded to indicate sample
migration distance. The samples should be kept
as cold as possible before application to prevent
denaturation.
8. Place the safety lid onto the tank and connect
the leads to a power supply.
9. Electrophorese at 200 volts for 15 –30 minutes.
10. Once electrophoresis is complete, the strip can be stained.
E. Staining in Ponceau S (Art. No. 5938)
1. Immerse the strips in about 50 ml of Ponceau
S staining solution for 5 to 10 min.
Amidoblack, Art. No. 9590, may be used if
preferred) with agitation.
2. Remove Ponceau S and destain with 3 baths
of 5 % Acetic Acid (3 min. each).
Elektrophoresis Unit ROTIPHORESE®
PROfessional Acetate 3099.1