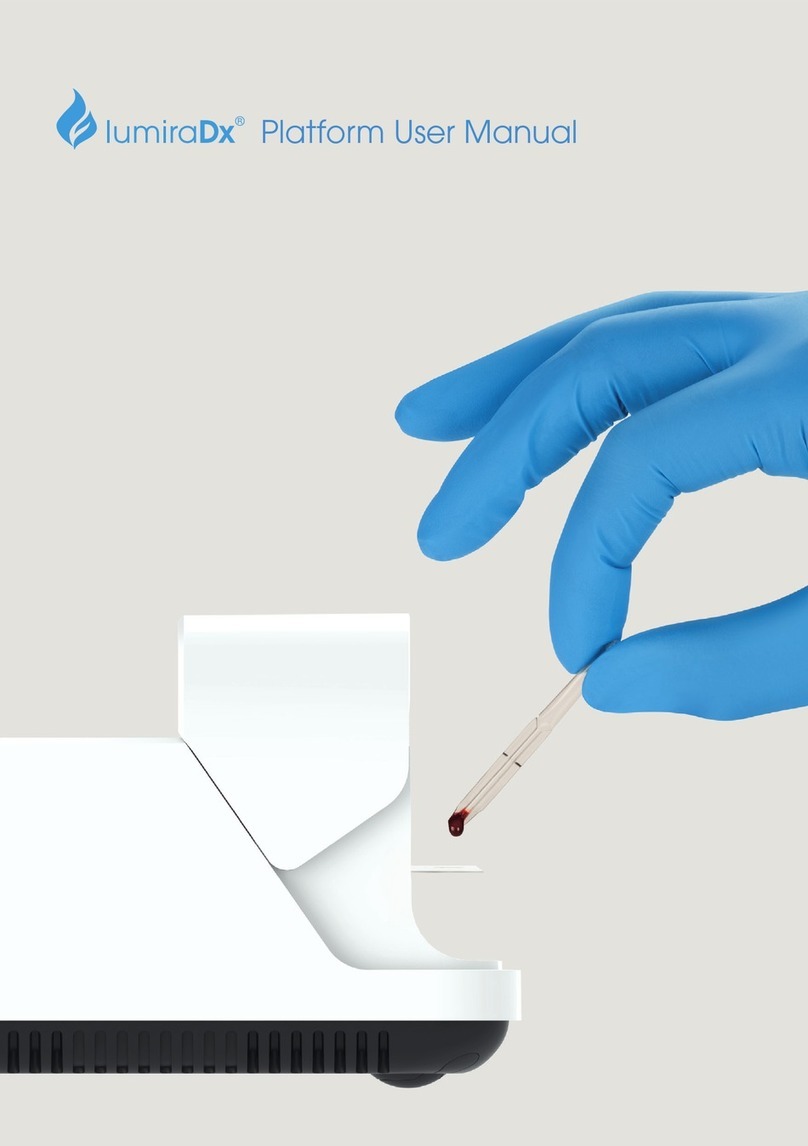
LumiraDx Platform User manual

Platform User Manual


Contents
2
Contents
Symbols 5
Instrument Icons and Buttons 6
Abbreviations 7
Important Safety Information 8
Overview of the LumiraDx Platform 10
About this Platform User Manual 11
1 Introduction 12
1.1 Intended Use 12
1.2 Important Information 12
1.3 Summary of the Test Procedure 12
1.4 Principles of Operation 13
1.5 Storage and Operating Conditions 14
1.6 Warnings 15
1.7 Precautions 17
1.8 Help and Support 18
2 Getting Started 19
2.1 Unpacking 19
2.2 Powering the Instrument On and Off 19
2.3 Instrument Self-Check 19
2.4 User ID 20
2.5 Operating Mode and First Time Setup 20
2.6 The LumiraDx Instrument 21
2.7 Power Supply 22
2.8 LumiraDx Lot Calibration File Installation 23
2.9 Extended Functionality and Operating Modes 24
3 Preparation for Testing 25
3.1 Handling Test Strips 25
3.2 Inserting and Removing Test Strips 25
3.3 Sample Collection and Application 27
3.4 Applying a Sample to the Test Strip 27
3.5 Quality Control Solution Application 28
4 Instrument Operation 29
4.1 Home Screen 29
4.2 Settings Menu 30
4.3 Standalone Instrument First Time Setup 32
4.4 Connected Instrument First Time Setup 34
4.5 Display and Sound Preferences 36
4.6 Test Management 37

4.7 Performing a Patient Test 42
4.8 Quality Control 53
4.9 Performing a Quality Control Test 55
4.10 Result History 65
4.11 Onboard Quality Control 68
5 Cleaning and Disinfecting 70
5.1 Cleaning Procedure 72
5.2 Disinfecting Procedure 72
6 Soware Updates 74
6.1 Check Software Version 74
6.2 Performing a Software Update 76
7 Troubleshooting 78
8 Maintenance and Disposal 82
9 Instrument Specifications 83
10 Ancillary Devices 84
10.1 LumiraDx Barcode Scanner 84
10.2 LumiraDx Printer 89
10.3 LumiraDx Connect Hub 93
10.4 LumiraDx Connect App 93
10.5 LumiraDx Platform Instrument Base 94
11 Customer Services 95
11.1 Warranty 95
12 References 96
13 Compliance 97
13.1 Environmental Practices 97
13.2 Compliance 97
3

Platform User Manual
• Please note: Instructions are combined with example screenshots. Some
screens may look different on the Instrument depending on the test or
mode of operation. All screens, test names and results displayed in this
Platform User Manual are intended only as examples.
• Refer to lumiradx.com/instrument for the most recent version of the
Platform User Manual.
• For In Vitro Diagnostic Use
4

On the packaging and on the identification plate of the Instrument you may
encounter the following symbols, shown here with their meaning:
Symbols
Temperature limitation
Manufacturer
In vitro diagnostic medical device
This product contains electrical and electronic components that
may contain materials which, if disposed with general waste,
could be damaging to the environment.Residents of the European
Union must follow specific disposal or recycling instructions for this
product. Residents outside the European Union must dispose or
recycle this product in accordance with local laws or regulations
that apply
Catalogue Number
Serial Number
“CE Mark“.The product is in compliance with all relevant
European Directives and Regulations. Refer to Declaration of
Conformity for full details
Caution - Consult Instructions for Use. Refer to safety-related
warnings and precaution notes in the Instructions for Use
accompanying this product, e.g. Platform User Manual, Test Strip
Product Insert or Quality Control Product Insert
Indicates that the Instrument can be potentially infectious due to
the samples or reagents used
Direct current - Indicates that the Instrument is suitable for direct
current only and to identify relevant terminals
Universal Serial Bus (USB) Port
Near Field Connectivity (NFC) – Indicates the presence of the
Radio Frequency (RFID) reader
Identifies the power button to power on or power off the Instrument
Consult Instructions for Use
Authorized representative in the European Community
Importer
Unique Device Identifier
5

The icons and buttons that appear on the touch-screen during normal operation
of the LumiraDx Instrument are shown here, along with their respective meanings.
Instrument Icons and Buttons
Indicates the patient’s biological sample
Return to the home screen
Info button - used to reveal additional information, such as test
or patient information
Indicates which fields barcode scanning is available as a means of
data input.When pressed as a button, displays barcode scanning
instructions
Indicates when the Instrument is connected to Connect Manager
Indicates that the Instrument has an active connection to an
Electronic Health Record (EHR).
Indicates that the Instrument connection to an Electronic Health
Record (EHR) is not active
Notification - Highlights an area which requires attention
Caution - Highlights an error or precautionary statement which
requires attention. Refer to safety-related warnings and precaution
notes in the Instructions for Use accompanying this product,
e.g.Platform User Manual,Test Strip Product Insert or Quality Control
Product Insert
Indicates the status of the battery
Displayed when the battery is in a charging state
Icon which acts as a button - clears the text input field of all data
Indicates the high end of the touch-screen brightness slider
Indicates the low end of the touch-screen brightness slider
Volume (high)
Volume (low)
Indicates a text field which can perform a search function
Indicates confirmation of a completed action
6

Abbreviations
CDC Centers for Disease Control and Prevention
EHR Electronic Health Record
HCP Health Care Professional
ID Identification
QC Quality Control
RFID Radio-Frequency Identification
UK United Kingdom
USB Universal Serial Bus
WHO World Health Organization
HIS Hospital Information System
LIS Laboratory Information System
DOB Date of Birth
RF Radio Frequency
RH Relative Humidity
7

Important Safety Information
Healthcare professionals need to adhere to standard precautions when using the
LumiraDx Platform1,2,3.All parts of the LumiraDx Instrument and LumiraDx Test Strips
should be considered potentially infectious after use and are capable of transmitting
pathogens between patients and healthcare professionals4.
The Instrument should be disinfected at least once per day when in use or if
contamination is suspected, unless recommended otherwise for specific tests4.
TheInstrument may only be used for testing multiple patients when standard precautions
and the manufacturer’s disinfection procedures are followed. Full cleaning and
disinfecting procedures are described in the “Cleaning and Disinfecting” chapter in this
Platform User Manual.
The LumiraDx Instrument contains a neodymium magnet.
Although the risk of interference with implanted devices such as pacemakers
is minimal, we recommend that patients with an implanted device should
maintain a distance of at least 15 cm between the LumiraDx Instrument
andtheir heart device.
This User Manual and its content is copyright of LumiraDx Group Limited, 2023.
© All rights reserved, worldwide. Content should be used for use of the LumiraDx
Products only and in line with instructions provided.You may not, except with our express
written permission, distribute or commercially exploit the content. Nor may you transmit
it or store it in any other form of electronic retrieval system other than for the purpose
ofuse of the LumiraDx Instrument or LumiraDx Test Strips.
LumiraDx and Flame logo are protected trademarks of LumiraDx International LTD.
Full details of these and other registrations of LumiraDx can be found at lumiradx.com/IP.
All other trademarks are the property of their respective owners.
8
A clean pair of gloves should be worn before testing each patient.
Wash hands thoroughly with soap and water before putting on a new pair
of gloves and performing the next patient test.
Dispose of all Test Strips used for patient or Quality Control testing safely
inaccordance with local regulations and procedures.
The LumiraDx Instrument contains 2 USB ports that are for use with approved
& supported USB devices only. DO NOT connect any unsupported devices into
the USB ports.


Overview of the LumiraDx Platform
10
The LumiraDx Platform is a point of care system which is used for in vitro diagnostic tests.
It comprises a portable LumiraDx Instrument and a LumiraDx Test Strip for the required
test.This allows healthcare professionals to perform tests using small sample volumes
and to view results quickly on the Instrument touch-screen. Information about test
duration and test performance can be found in the LumiraDx Test Strip Product Inserts.
The LumiraDx Instrument is intended to be for multi patient use.
The LumiraDx Instrument can be used in Standalone mode, providing test results on the
touch-screen. Single or multiple Instruments can be connected to the LumiraDx Connect
Manager for extended functionality and configuration. LumiraDx EHR Connect can
enable the transfer of patient test results to the Electronic Health Record (EHR).
Contained within this packaging
The LumiraDx Platform comprises:
Available separately
• LumiraDx Test Strips
• LumiraDx Quality Controls
• LumiraDx Barcode Scanner
• LumiraDx Desktop stand for Barcode
Scanner
• LumiraDx Printer
• LumiraDx Instrument Carry Case
• Disinfectant Material – please refer to
LumiraDx website for recommended
disinfectant materials
LumiraDx Connect diagnostic connectivity solution:
• LumiraDx Connect Manager
• LumiraDx Connect App (for iOS and Android)
• LumiraDx Connect Hub
• LumiraDx EHR Connect
The mode of operation and selection of Platform components is dependent on the
following requirements of the organization:
• Types of tests to be performed
• Number of testing sites and users
• System administration, integration, and data transfer to the EHR
• LumiraDx Instrument

Read this LumiraDx Platform User Manual and the LumiraDx Test Strip Product
Inserts carefully and completely before testing for the first time.
This Platform User Manual provides the information required to operate and care
for the LumiraDx Instrument.
If error messages appear on the Instrument touch-screen, follow the instructions
displayed or refer to the “Troubleshooting” chapter. For questions not answered in
the LumiraDx Platform User Manual or Product Inserts, please contact Customer
Services. Refer to the “Customer Services” chapter of this Platform User Manual
for contact information.
Please note: Instructions are combined with example screenshots. Some screens
may look different on the Instrument depending on the test or mode of operation.
All screens, test names and results displayed in this Platform User Manual are
intended only as examples.
This Platform User Manual highlights cautions and important information:
About this Platform User Manual
11
This symbol indicates a caution.Refer to safety-related warnings and precaution
notes in the Instructions for Use accompanying this product,e.g. Platform User
Manual,Test Strip Product Insert or Quality Control Product Insert

12 - Introduction
1 Introduction
1.1 Intended Use
The LumiraDx Instrument (hereafter referred to as Instrument) is intended for use
with the LumiraDx family of Test Strips (hereafter referred to as Test Strips) for the
in vitro measurement of various analytes in a range of biological samples by
trained healthcare professionals.
1.2 Important Information
Read this LumiraDx Platform User Manual and the LumiraDx Test Strip Product
Inserts carefully and completely before testing. Pay attention to the “Important
Safety Information” at the start of this Platform User Manual before operating the
Instrument.
1.3 Summary of the Test Procedure
To perform a patient test, the user is required to insert a Test Strip, apply a small
sample volume of one drop, and close the Instrument door. Patient ID can be
entered using the touch-screen keyboard or LumiraDx Barcode Scanner.
When the test process is complete, the result is displayed on the touch-screen
and the user can optionally add a comment. Upon completion of the test, the
Instrument stores the test result.
The Instrument provides visual and audible prompts throughout the test process.

Introduction - 13
1.4 Principles of Operation
The Instrument automatically processes the Test Strip including sample movement,
reagent mixing, thermal control and fluorescent reading of the reaction product
and provides a calibrated, quantitative or qualitative result. Each Lot of Test
Strips requires a LumiraDx Lot Calibration File, which provides the Instrument with
the information required to process the test.The Lot Calibration File is installed
by placing the RFID tag in the Test Strip Carton against the RFID reader in the
Instrument.
1.4.1 Quality Assurance
The LumiraDx Instrument ensures the quality of test results obtained through the
following features:
• Automated checks of the correct functioning of the Instrument at power on
and during operation.
• This includes electrical component operation, heater operation,
battery charge state, mechanical actuators and sensors and optical
system performance.
• Monitoring of Test Strip performance and controls during test runtime.
• Onboard Quality Control (OBC) assay for some tests (see Product Insert).
• Ability to perform Quality Control Tests using LumiraDx Quality Controls to
meet regulatory compliance requirements.

14 - Introduction
1.5 Storage and Operating Conditions
1.5.1 LumiraDx Test Strips
For specific information on Test Strip storage and operating conditions,
refer to the relevant LumiraDx Test Strip Product Inserts.
1.5.2 LumiraDx Instrument
The Instrument is portable and can be used across a range of settings, such as
care homes, primary care clinics, hospital wards and departments, pharmacy
and laboratories.The Instrument is not intended for hand-held operation.
The Instrument can be stored or transported at a temperature between -10°C
and 50°C (14°F and 122°F).
To power on and access the Instrument result history, operate the LumiraDx
Instrument at a temperature between 15°C and 30°C (59°F and 86°F), and at
a relative humidity (RH) between 10 % and 90 % (non-condensing). Specific
test operating conditions may be more restrictive. Allow time for the Instrument
to acclimatize to operating temperatures if it has been stored in a cold
environment.
Always place the Instrument on a level, stable surface when powering up or
performing a test.Testing should be performed in a location where the air vents
located in the back of the Instrument will not be blocked, i.e. on a table top
away from soft surfaces.The Instrument will display an error message if these
operating conditions are not met.
Avoid placing the Instrument in direct sunlight.This may interfere with proper
functioning of the Instrument.
Refer to the “Instrument Specifications” chapter of this Platform User Manual
for additional information on operating conditions and complete Instrument
specifications.

Introduction - 15
1.6 Warnings
Inserting Test Strips
• Do NOT touch Test Strip Sample Application Area.
• Do NOT insert Test Strip when Instrument is powered off.
• Do NOT bend or fold the Test Strip.
• Do NOT touch Test Strip contacts.
• Do NOT apply sample until prompted.
Performing a patient test
• Wear a clean pair of gloves before performing a patient test.
• Place the Instrument on a level, stable surface before performing a test.
• Apply sample AFTER inserting the Test Strip and the Instrument prompt.
• Do NOT apply more than one drop of sample.
• Close the Instrument door after applying the sample and the Instrument
prompt.
• Do NOT touch the Test Strip until the test has finished and the result is
displayed.
• Do NOT open the door or move the Instrument during the test or an error
will result and the test result will not be saved.
• Dispose of all Test Strips used for patient testing safely in accordance with
local regulations and procedures.
• Follow the test operating conditions in the LumiraDx Test Strip Product
Insert.
• Follow the information on correct handling of Test Strips in the LumiraDx
Test Strip Product Insert.

16 - Introduction
Performing a Quality Control test
• Place the Instrument on a level, stable surface before starting a test.
• Use only LumiraDx Quality Controls.
• Apply Quality Control solution AFTER inserting the Test Strip and the
Instrument prompt.
• Do NOT apply more than one drop of Quality Control solution.
• Close the Instrument door after applying the Quality Control solution and
the Instrument prompt.
• Do NOT touch the Test Strip until the test has finished and the result
isdisplayed.
• Do NOT open the door or move the Instrument during the test or an error
will result and the test result will not be saved.
• Dispose of all Test Strips used for Quality Control testing safely in
accordance with local regulations and procedures.
• Follow the test operating conditions in the LumiraDx Test Strip Product
Insert.
• Follow the information on correct handling of Test Strips in the LumiraDx
Test Strip Product Insert.
Cleaning and disinfecting
• Always wear gloves whilst cleaning and disinfecting the Instrument.
• Always use LumiraDx recommended materials to disinfect the Instrument.
Details of LumiraDx recommended materials can be found at lumiradx.com.
• CAUTION: Excessive liquid may damage the Instrument. It is important
for the protection of the Instrument that exposure to excess moisture is
prevented.All disinfection cloths and/or wipes should only be slightly damp,
with any excess liquid being manually removed from the cloth or wipe
before use.
• CAUTION: Liquid should not be placed in or near the vents on the bottom
or back of the Instrument.
• CAUTION: Alcohol wipes alone are not sufficient to disinfect the
Instrument for blood-based samples, due to the potential presence
ofbloodborne pathogens.
• Do NOT spray or pour solution directly onto the Instrument.
• Following cleaning and disinfection, and before performing a patient
test, change gloves and wash hands.

Introduction - 17
1.7 Precautions
Only operate the LumiraDx Instrument for its intended purpose and in
accordance with this Platform User Manual and warnings. If the Instrument is
used in a manner not specified in the Platform User Manual, protection provided
by the equipment will be impaired.The LumiraDx Instrument (including power
supply unit) is designed to operate within the manufacturer specifications.
Do not exceed the manufacturer specifications when in use.
Avoidance of electrical shock, re and explosions
• Use only the power supply unit that is provided with the Instrument.
Use the appropriate power blade for the region.The correct power
supply unit and adapter is required to maintain the safety and
electromagnetic compatibility of the system.
• Always operate this Instrument on a clean, level and stable surface.
Do not drop the Instrument. Ensure that air flow to the ventilation
openings located on the back of the Instrument are not restricted.
• Risk of electrical shock. Do not operate the Instrument or the power
supply unit if it has been opened, damaged or exposed to moisture,
condensation or rain.
• Overheating can cause the battery pack to catch fire or explode.
Instrument disposal
• Do NOT attempt to replace or reinstate the battery.

18 - Introduction
Electromagnetic compatibility
• This Instrument has been designed and tested to CISPR 11 Class A.
In a domestic environment it may cause radio interference, in which
case, you may need to take measures to mitigate the interference.
Electromagnetic interference
• Do not use the Instrument near strong electromagnetic fields, which
could interfere with the proper operation of the Instrument.
1.8 Help and Support
Information about using the LumiraDx Instrument can be found in this Platform
User Manual. Information about the Test Strips and test performance can be
found in the LumiraDx Test Strip Product Inserts and Quality Control Product
Inserts. Information about LumiraDx Connect Manager and LumiraDx EHR
Connect can be found in the LumiraDx Connect User Manual.
The documents can also be found at lumiradx.com/instrument.
If error messages appear on the screen, refer to the “Troubleshooting” chapter
in this Platform User Manual. For questions not answered in the LumiraDx User
Manuals or Product Inserts, please contact Customer Services. Refer to the
“Customer Services” chapter of this Platform User Manual for contact information.
Safe disposal
• Follow proper infection control guidelines for handling all specimens and
related items. Properly dispose of all contaminated waste according to
local regulations.
• The LumiraDx Instrument and its components must be treated as
potentially biohazardous waste. Decontamination (i.e. a combination of
processes including cleaning, disinfection and/or sterilization) is required
before reuse, recycling, or disposal.
• Dispose of the system or its components according to the appropriate
local regulations.

Getting Started - 19
2.1 Unpacking
The LumiraDx Instrument package includes the following contents:
1. LumiraDx Instrument
2. LumiraDx Power Supply Unit
3. Platform User Manual
4. Platform Quick Reference Guide (including passwords for Standalone
operation)
Inspect the Instrument and packaging for damage before use. Report any
damage to Customer Services. Refer to the “Customer Services” chapter of this
Platform User Manual for contact information.
2.2 Powering the Instrument On and O
The Instrument must be fully charged before first use. It will take approximately
2hours to fully charge the battery using the power supply unit provided.
Place the Instrument on a level, stable surface. Power on by briefly pressing the
power button at the rear of the Instrument.You will hear the Instrument powering
on and the display will be blank for several seconds.When prompted enter user
ID and/or password to login.
The Instrument touch-screen will dim after 2 minutes of inactivity.Tap the touch-
screen to restore the touch-screen brightness.
To power the Instrument off after use, press the power button at the rear of the
Instrument for 2 seconds, and tap the screen message to confirm power off.
TheInstrument should be powered off for transportation and when not in use.
2.3 Instrument Self-Check
The Instrument will perform a self-check when starting up. Ensure that the
Instrument is on a level, stable surface during this process. If the Instrument door
is open, the Instrument will prompt to close the door before performing the self-
check. If a Test Strip is inserted at this time, the Instrument will prompt to remove
the Test Strip and close the door.The self-check will not proceed until the door is
closed.
2 Getting Started
Other manuals for Platform
1
Table of contents
Other LumiraDx Laboratory Equipment manuals