32
2
Charging via computer:
• Connect the USB charging cable with the USB port of a computer. The LED on the USB charger cable lights
green indicating that the charger unit is correctly connected to the computer. If you plug in a helicopter with
a discharged battery, the LED on the USB charging cable does not light up; this shows that the helicopter
battery is being charged. The USB charging cable and the charging socket on the helicopter are designed
to make incorrect connection impossible.
• It takes about 30 minutes to recharge a discharged battery (but NOT a deep-discharged one). When the
battery is fully charged, the LED display on the USB charger cable lights up green again.
Note: When supplied, the lipo-battery is already partially charged so the first charging cycle may well take less time.
It is essential to follow the connection sequence given above! If you have the charger cable only
connected to the helicopter, and not to a source of electricity, a green LED display indicates that there
is still power in the battery. The green LED display does not necessarily indicate the battery is still
adequately charged. While charging, the power switch must be in the “OFF” position.
Inserting the batteries in the remote control
3
Open the battery compartment with a screwdriver and insert the batteries in the remote control. Please
keep in mind the correct polarity. After having closed the compartment you can check all functions of the
remote control with the help of the power-switch on the front. With the power-switch turned ON and proper
functioning, the top center LED on the remote control will light up red. When the control LED flashes rapidly,
the batteries in the controller must be changed.
Frequency bind between model and remote control
4
The Carrera RC helicopter and the remote control are frequency bound at purchase. Should there occur
any problems with the communication between the Carrera RC helicopter and the remote control at the
beginning, please carry out a new frequency bind.
• Remove the model from its presentation plinth.
• Switch on the model at the ON/OFF switch.
• The LED in the helicopter now flashes in rhythmically-accelerating sequence.
• Switch on the controller at the ON/OFF switch. Slide the left joystick, i.e. the gas lever, completely to the
top and back down again into the zero position. The bond will take place automatically. While connecting,
the controller emits a signal tone.
• Hold the model so that the rotor blades are horizontal.
• Allow the helicopter a few moments until the system is correctly initialised and is ready for operation.
• The control LED now lights continuously once again, indicating that the connection is ended.
Checklist for flight preparation
This checklist does not replace the contents of the operating instructions. Although it can be used as a quick-
start-guide we strongly advise to first read the operating instructions in detail before you proceed.
• Check the contents of the package
• Connect the charging unit to the source of power.
• Charge the lipo-battery as described in the section “Charging the lipo-battery”.
• Fit two AAA batteries in the controller, making sure their polarity is correct.
• Look for a suitable environment for flying
• Proceed as described in
4
.
• Repeat the above points as required, if you wish to fly more helicopters at the same time.
• Check the control system
• Start the helicopter from one hand. At the same time, hold the controller in the other hand so that you can
take over control of the helicopter immediately.
WARNING! THE MODEL FLIES FORWARDS BY ITSELF AND CAN ONLY BE CONTROLLED IN HEIGHT
AND DIRECTION
• Make yourself familiar with the control system
• Trim the helicopter as necessary as described under “Controlling the helicopter”.
• The helicopter is now ready to be flown.
• If the helicopter displays no functions, retry the above binding procedure.
• Fly the model
• Land the model
• Switch the model off at the ON/OFF switch (3 sec.).
• Always switch off the remote control last
Range of functions of the remote control
5
1. Antenna
2. Power switch (ON / OFF)
3. Control LED
4. Gas
5. Tail (spinning in circles)
6. Trimmer for tail
3
7. Battery compartment
Description of helicopter
6
1. Coaxial rotor system
2. Socket for charging the lipo-battery
3. Display- & charging socket
4. ON-/OFF switch
Controlling the helicopter
7
In case you don´t know the control functions of your Carrera RC helicopter yet, please take some min-
utes before the first flight in or to make yourself familiar with them. The descriptions left or right refer to
the view out of the cockpit (pilote´s view). Push the throttle up to increase the rotational speed of the main
rotor blades. Increase the rotational speed of the main rotor blades and the model will start to ascend.
If you push down the throttle and thus reduce the rotational speed of the main rotor blades the helicopter
will descend. When the model has lifted off the ground you can get it into stationary hovering without abrupt
ascending or descending by carefully moving the throttle upwards and downwards.
8
Move the right lever (tail) to the left and the helicopter’s nose turns (yaws) round the main rotor’s axis in
a circle to the left. Move the right lever (tail) to the right and the helicopter’s nose turns (yaws) round the
main rotor’s axis in a circle to the right. Use the trimmer for tail until you have reached a stable neutral position
of the helicopter when hovering, without moving the right lever (tail).
9
WARNING! THE MODEL FLIES FORWARDS BY ITSELF AND CAN ONLY BE CONTROLLED IN
HEIGHT AND DIRECTION
After having made yourself familiar with the main control functions and having chosen an appropriate area for
flying the helicopter, you can start the first flight.
Choosing the flight area
10
When being prepared for the first flight you should choose a closed room without any persons
or obstacles which is as big as possible. Due to the size and controllability of the helicopter
experienced pilotes may be able to fly the helicopter in relatively small rooms. For your first flights we
strongly recommend to choose a room with a minimum floor space of 5 x 6 metres and 2.40 metres of
height. After having trimmed your helicopter for flight and having made yourself familiar with the
controlling and its functions you may start flying in smaller and less open environments.
This toy is intended to be used in domestic area (house and garden) only.
Troubleshooting
Problem: Remote control does not work.
Cause: The ON/OFF-power switch is turned “OFF”.
Solution: Turn the ON/OFF-power switch “ON”.
Cause: The batteries have been wrongly inserted.
Solution: Check if the batteries have been correctly inserted.
Cause: The batteries do not have enough power.
Solution: Insert new batteries.
Problem: The helicopter cannot be controlled with the remote control
Cause: The power switch on the reomote control is turned “OFF”.
Solution: First turn the power switch on the remote control “ON”.
Cause: The remote control is possibly not correctly frequency bound with the receiver on the helicopter.
Solution: Link as described in
4
.
Problem: The rotor blades do not rotate.
Cause: The power switch on the model or the controller is at “OFF”
Solution: Turn the ON/OFF-power switch “ON”.
Cause: The rechargeable battery is too weak or has run out of power.
Solution: Charge the battery (see chapter “Charging the battery”).
Problem: The helicopter does not lift.
Cause: The rotor blades rotate too slowly.
Solution: Push the throttle up.
Cause: The battery´s power is not sufficient.
Solution: Charge the battery (see chapter “Charging the battery”).
Problem: During flight, the helicopter loses speed and height without any obvious reason.
Cause: The battery is too weak.
Solution: Charge the battery (see chapter “Charging the battery”).
Problem: The helicopter lands too quickly.
Cause: Loss of throttle control.
Solution: Push the throttle down slowly.
Cause: Throttle has been pushed down too quickly.
Errors and changes excepted · Colours / final design – changes excepted
Technical changes and design-related changes excepted · Pictograms = symbolic photos
Αξιότιμε πελάτη
Συγχαρητήρια για την αγορά του μοντέλου ελικοπτέρου της Carrera RC, κατασκευασμένο σύμφωνα με τα
σημερινά πρότυπα της τεχνολογίας. Επειδή προσπαθούμε πάντοτε να βελτιώνουμε την εξέλιξη και ανά-
πτυξη των προϊόντων μας, επιφυλασσόμαστε για τυχόν τεχνικές αλλαγές στον εξοπλισμό, στα υλικά και
στο σχέδιο του ελικοπτέρου οποιαδήποτε στιγμή και χωρίς καμία προειδοποίηση. Μικρές αποκλίσεις του
αγορασθέντος προϊόντος από τα στοιχεία και τις φωτογραφίες αυτών των οδηγιών σε καμία περίπτωση δεν
μπορούν να θεμελιώσουν αξιώσεις οποιασδήποτε μορφής. Αυτές οι οδηγίες χρήσης και συναρμολόγησης
αποτελούν αναπόσπαστο συμπλήρωμα του προϊόντος. Η εγγύηση παύει να ισχύει αν δεν τηρηθούν οι οδη-
γίες χρήσης και οι οδηγίες ασφαλείας που περιέχονται σε αυτές. Φυλάξτε αυτές τις οδηγίες για να μπορείτε
να τις διαβάσετε αργότερα και να τις παραδώσετε μαζί με το μοντέλο σε τρίτους.
Την τελευταία και πιο ενημερωμένη έκδοση αυτών των οδηγιών χρήσης, όπως και πληροφορίες
για ανταλλακτικά θα βρείτε στο carrera-rc.com στον τομέα Service.
Όροι εγγύησης
Τα προϊόντα Carrera είναι προϊόντα υψηλής ποιότητας και τεχνολογίας, τα οποία πρέπει να αντι-
μετωπίζονται με ιδιαίτερη φροντίδα. Προσέχετε απαραιτήτως τις υποδείξεις στις οδηγίες χρήσης.
Όλα τα τεμάχια ελέγχονται διεξοδικά (με την επιφύλαξη για τεχνικές αλλαγές και τροποποιήσεις
στα μοντέλα, οι οποίες αποσκοπούν στη βελτίωση των προϊόντων).
Εάν παρ‘ όλα αυτά εμφανιστεί κάποια βλάβη, αυτή καλύπτεται στα πλαίσια των όρων της εγγύη-
σης: Η Carrera Toys GmbH (στο εξής αποκαλούμενη „Κατασκευαστής“) εγγυάται στον τελικό πελάτη (στο
εξής αποκαλούμενος „Πελάτης“) σύμφωνα με τους ακόλουθους όρους, ότι το μοντέλο ελικοπτέρου Carrera
RC (στο εξής αποκαλούμενο „Προϊόν“) που παραδόθηκε στον πελάτη, δεν θα παρουσιάσει εντός χρονικού
διαστήματος δύο ετών από την ημερομηνία αγοράς του (χρόνος εγγύησης) βλάβη που να προέρχεται από
σφάλμα ή κακή επεξεργασία υλικού. Ο κατασκευαστής μπορεί βλάβες και σφάλματα να τα αποκαταστήσει
με δικά του έξοδα και κατά την κρίση του με επισκευή του προϊόντος ή με την παράδοση νέων ή πλήρως
συντηρημένων τεμαχίων. Η εγγύηση δεν καλύπτει φθαρμένα εξαρτήματα (όπως π.χ. την επαναφορτιζόμε-
νη μπαταρία, πτερύγια έλικα, κάλυμμα καμπίνας, γρανάζια), βλάβες που οφείλονται σε κακή μεταχείριση/
χρήση του προϊόντος ή επεμβάσεις τρίτων. Άλλες αξιώσεις του πελάτη, ιδιαίτερα ως προς την καταβολή
αποζημίωσης, έναντι του κατασκευαστή ρητώς αποκλείονται. Η εγγύηση δεν επηρεάζει τα δικαιώματα που
απέκτησε ο πελάτης από τη σύμβαση ή το νόμο (μεταγενέστερη εκπλήρωση, ακύρωση της σύμβασης, μείωση
τιμήματος, αποζημίωση) έναντι του εκάστοτε πωλητή, τα οποία ισχύουν, όταν το προϊόν στη μετάβαση του
κινδύνου δεν βρισκόταν σε άψογη κατάσταση.
Αξιώσεις από αυτήν την εγγύηση υφίστανται μόνον όταν
• το σφάλμα δεν αφορά βλάβες, που προκλήθηκαν από μία κατά τις παραδοχές στις οδηγίες χρήσης, κακή
ή μη σύμφωνη με αυτές χρήση,
• το σφάλμα δεν οφείλεται σε λειτουργικές φθορές,
• στο προϊόν δεν διακρίνονται εξωτερικές επεμβάσεις ή επισκευές από συνεργεία που δεν είναι εξουσιοδο-
τημένα από τον κατασκευαστή,
• στο προϊόν χρησιμοποιήθηκε μόνο ο εξοπλισμός που έχει εγκριθεί από την κατασκευαστή και
• το προϊόν αποσταλεί μαζί με τη γνήσια απόδειξη αγοράς (τιμολόγιο / απόδειξη ταμειακής μηχανής) και την
πλήρως συμπληρωμένη κάρτα εγγύησης χωρίς οποιαδήποτε μεταβολή των στοιχείων της από τον πελάτη.
Δεν είναι δυνατή η αντικατάσταση των καρτών εγγύησης.
Υπόδειξη για κράτη της ΕΕ: Υποδεικνύεται στον πελάτη ότι ο πωλητής έχει την υποχρέωση παροχής εγ-
γύησης από το νόμο, η οποία δεν περιορίζεται με κανένα τρόπο από την ως προς το αντικείμενο εγγύηση.
Dear customer
Congratulation! You bought a Carrera RC-helicopter which has been manufactured according to today´s
state-of-the-art technology. As it is our constant endeavour to develop and improve our products, we reserve
the right to make modifications, either of a technical nature or with respect to features, materials, and design,
at any time, and without prior notice. For this reason, no claims will be accepted for any slight deviations in
your product from the data and illustrations contained in these instructions. These operating and assembly
instructions are an integral part of the product. Non-observance of these operating instructions and the safety
instructions they contain will render the guarantee null and void. These instructions are to be kept for future
reference and in the event that the product is passed on to a third party.
For the latest version of these operating instructions and information on replacement and spare
parts available, please visit carrera-rc.com in the service area.
Guarantee conditions
Carrera products are technically advanced products which should be handled with care. It is impor-
tant to follow the directions given in the operating instructions. All components have been subjected
to careful inspection (technical modifications and alterations to the model for the purpose of product
improvement are reserved).
Should any faults nevertheless occur, guarantee is assumed within the scope of the following conditions:
In accordance with the following provisions, Carrera Toys GmbH (hereinafter referred to as “manufacturer”)
warrants to the endconsumer (hereinafter referred to as “customer”) that the Carrera RC-model-helicopter
(hereinafter referred to as “product”) delivered to the customer shall be free from defects in material or work-
manship for two years from the date of purchase (guarantee period). Such defects will, at the manufacturer´s
option, either be repaired by the manufacturer or fixed by delivering new or refurbished parts free of charge.
The warranty does not cover failure due to normal wear and tear, (e.g. to batteries, rotor blades, cabin cover-
ing, gear wheels etc.), or damage as a result of improper handling/misuse or unauthorised interference. Any
other customer´s claims asserted against the manufacturer, especially action for damages, shall be excluded.
The contractual and statutory rights of the customer against the seller (supplementary performance, rescis-
sion of the contract, abatement, compensation) which exist with the product not having been free from defects
at the time of the passing of risk, shall remain unaffected by this warranty.
Claims from this special warranty shall only be valid if:
• the defect reported has not arisen by damage caused by unintended use or misuse as specified in the
instruction manual,
• the failure of the product is not due to normal wear and tear
• the product does not show any signs resulting from repairs or other interferences carried out by workshops
not having been authorised by the manufacturer,
• the product has only been operated with accessories authorised by the manufacturer and
• the product is sent in together with the original proof of purchase (invoice / receipt) and the completely filled
in warranty card which has not been altered in any way.
Guarantee cards cannot be replaced.
Note for EU countries: Reference is hereby made to the seller’s statutory guarantee obligation, to the extent
that this guarantee obligation is not restricted by the product guarantee.
Notes for AUSTRALIA: Our goods come with guarantees that cannot be excluded under the ACL. You are
entitled to a replacement or refund for a major failure and for compensation for any other reasonably foresee-
able loss or damage. You are also entitled to have the goods repaired or replaced if goods fail to be of accept-
able quality and the failure does not amount to a major failure.
Declaration of conformity
Carrera Toys GmbH hereby declares that this model including the controller conforms with the fundamental
requirements of the following EC directives: EC Directives 2009/48 and the other relevant regulations of
Directive 2014/53/EU (RED).
The original declaration of conformity can be requested from carrera-rc.com.
0
UAS class
Maximum radio-frequency power transmitted <10 dBm · Frequency range: 2400 – 2483.5 MHz
Warning!
WARNING! This toy contains small parts which can be swallowed and is therefore not
suitable for children under 3 years of age.
WARNING! danger of pinching during operation! Remove all packaging materials and
wire fastenings before handing the toy over to the child. For information and to answer
any questions, please retain packaging, address and instructions in a safe place for
future reference. Keep the instructions for use for later reference. Note for adult supervisors: Check if
the toy is assembled as instructed. The assembly shall be performed under the supervision of an adult.
WARNING! Not suitable for children under 8 years old!
This product is not intended for use by children without supervision of a parent. Flying the helicopter requires
skill and children must be trained under the direct supervision of an adult. Before first use: Read the user’s
information together with your child. Inappropriate use may result in severe injuries and/or damage to
property. It has to be operated with care and caution and requires both mechanical and mental skills. The
operating instructions contain notes on safety and technical regulations as well as information on maintaining
and operating the product. It is indispensable to read these instructions thoroughly before the first usage. Only
this helps to avoid accidents with injuries and damage.
For safe use, the room where the toy is used must be sufficiently large. Only use the helicopter in
closed rooms which provide sufficient space and follow all instructions given in this manual.
Hands, hair and loose clothing, including other objects such as pens and screwdrivers must be kept away
from the propeller (rotor). Do not touch the rotating rotor. Especially take care that your hands DO NOT get
close to the rotor blades!
CAUTION: Risk of eye injuries. Do not fly near your face to avoid injuries.
As user of this product you are solely responsible for handling it safely in order to ensure that neither
you nor other persons or their property suffer damages or are endangered.
• Never use your model with weak remote control batteries.
• This toy is only designed to be used in a home environment.
• CAUTION: Do not start up and fly when persons, a nimals or any obstructions are within the flying
range of the helicopter.
• Exactly observe the instructions and warnings for this product and for any possible additional equipment
(battery charger, rechargeable batteries etc.) being used by you.
• Should the helicopter come into contact with any living thing or solid object, immediately return the
gas control to zero, in other words the left-hand joystick must be at the stop at the bottom of the slide!
• Avoid any moisture as this might do damage to the electronics.
• Do not change or modify anything on the helicopter.
If you do not agree to these terms please immediately return the complete helicopter model in new and
unused condition to the retailer.
Important information concerning Lithium Polymer rechargeable batteries
Lithium-Polymer (LiPo) rechargeable batteries are significantly more sensitive than traditional alkali- or
NiMH-rechargeable batteries which are normally used with radio control units. Therefore the instructions
and warnings have to be observed in detail. In case of improper use of LiPo rechargeable batteries there is
a danger of fire. Always follow the manufacturers´ instructions if you dispose of LiPo rechargeable batteries.
Regulations on disposal for waste electrical and electronic equipment (WEEE)
This symbol, showing refuse bins with a cross through them, denotes that empty
batteries, rechargeable batteries, button cells, recharge able battery packs, equipment
batteries, disused electrical equipment, etc. should not be disposed of in domestic
refuse, as they are harmful to the environment and health. Please help to preserve
environment and health and talk to your children about the correct disposal of used
batteries and disused electrical equipment. Batteries and disused electrical equipment should be handed in to
the usual collection points where they can be properly recycled. Do not mix dissimilar battery types or employ
new and used batteries together. Empty batteries should be removed from the product. Do not recharge non-
recharge able batteries due to risk of explosion. Batteries are to be inserted with the correct polarity.
WARNING! Rechargeable batteries are only to be charged by adults. This toy contains batteries that are non-re-
placeable. Supply terminal are not to be short-circuited. The toy shall only be used with a power supply for toys.
The power supply is not a toy.
(5V d.c. / USB (0.5 A))
WARNING: For the purposes of recharging the battery,
only use the detachable supply unit provided with this toy. Battery chargers used with the toy are to be
regularly examined for damage to the cord, plug, enclosure and other parts, and in the event of such damage,
they must not be used until the damage has been repaired. The toy is only to be connected to Class II equipment
bearing the following symbol.
or
FCC statement
This device complies with Part 15 of the FCC Rules. Operation is subject to the following two conditions:
(1) this device may not cause harmful interference, and
(2) this device must accept any interference received, including interference that may cause undesired operation.
Changes or modifications not expressly approved by the party responsible for compliance could void the us-
er’s authority to operate the equipment.
NOTE: This product has been tested and found to comply with the limits for a Class B digital device, pursuant to
Part 15 of the FCC Rules. These limits are designed to provide reasonable protection against harmful interfer-
ence in a residential installation. This product generates, uses and can radiate radio frequency energy and, if not
installed and used in accordance with the instructions, may cause harmful interference to radio communications.
However, there is no guarantee that interference will not occur in a particular installation. If the product does
cause harmful interference to radio or television reception, which can be determined by turning the equipment off
and on, the user is encouraged to try to correct the interference by one or more of the following measures :
• Reorient or relocate the receiving antenna.a
• Increase the separation between the product and receiver.
• Connect the product into an outlet on a circuit different from that to which the receiver is connected.
• Consult the dealer or an experienced radio/TV technician for help.
IC statement
The device contain license-exempt transmitter(s)/ receiver(s) that comply with Innovation, Science and Eco-
nomic Development Canada’s licence-exempt RSS(s). Operation is subject to the following two conditions:
1. The device must not cause interference;
2. The device must accept any interference, including interference that may cause undesired operation of the device.
Guidelines and warnings for the use of LiPo rechargeable batteries
• You have to charge the attached 3.7 V 180 mAh / 0.66Wh LiPo rechargeable battery in a safe place
and at a safe distance to flammable material.
• Never leave the battery unattended while it is charging
• After a flight, the rechargeable battery has to cool down to the ambient air temperature before charging it.
• You must always use the corresponding LiPo charging unit (USB cable / remote control). In case of
non-compliance with these directions there is a danger of fire resulting in a health risk and/or damage to
property. NEVER use any other battery charger.
• Should the rechargeable battery swell or deform while discharging or recharging, you have to immediately
stop charging or discharging the battery. Take the battery out as quickly and carefully as possible and place
it in a safe and open area offside any inflammable material and watch it for at least 15 minutes. In case you
continue charging or discharging a battery which has already started to swell or deform there is a danger of
fire! Even in case of slight deforming or ballooning the rechargeable battery has to be taken out of operation.
• Store the rechargeable battery at ambient temperature in a dry place.
• Always recharge the battery after use to prevent its becoming deep discharged. After use, the bat-
tery must be allowed to cool down for at least 20 minutes before it can be fully recharged. Recharge
the battery occasionally (suggested every 2–3 months). Supply terminals are not to be short-circuit-
ed. Failure to treat the battery as described above can lead to its becoming defective. Never leave
the battery unattended while it is being charged.
• When transporting or temporarily storing the rechargeable battery the temperature should be between
5-50°C. If possible, do not store the battery or the model in a car and do not expose it to direct sunlight. In
case the battery is broiled it can be damaged or catch fire.
Note: If the battery voltage/output is low you will recognise that a considerable trim and/or controlling is
necessary to avoid that the helicopter starts trundling. This usually occurs before reaching a battery voltage
of 3 V and it is a good moment to end the flight.
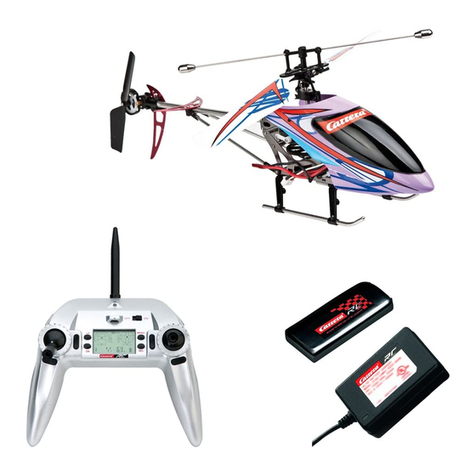
Contents of package
1
1x Helicopter
1x Controller
1x Display- & charging socket
1x USB charging cable
2x 1.5 V Micro AAA batteries (non-rechargeable)
Recharging the LiPo rechargeable battery
This toy contains batteries that are non-replaceable.
Make sure you only charge the LiPo rechargeable battery
supplied with the LiPo charging unit also supplied (USB cable and remote control). In case you try to charge
the rechargeable battery with a different LiPo battery charger or any other battery charger, this might cause
serious damages. Please carefully read the previous chapter about warnings and guidelines on the usage of
rechargeable batteries before proceeding.
ENGLISH ΕΛΛΗΝΙΚΆ

