manuals.online logo
Brands
  1. Home
  2. •
  3. Brands
  4. •
  5. Carrera
  6. •
  7. Toy
  8. •
  9. Carrera Digital 124 Wireless+ User manual

Carrera Digital 124 Wireless+ User manual

30342
7
Table of contents
Safety instructions 7
Contents of package 7
Important Information 7
Assembly instructions 7/8
Electrical connection 7
Coding/decoding
of the cars to the according speed controller 8
False start 8
Display and range of functions 8
Training mode 8
Race modes 8
Display Settings 9
Connection PC-Unit 9
Maintenance and care 9
Troubleshooting / Driving tips 9
Technical specifications 9
Welcome
Welcome to the Team Carrera!
These operating instructions contain important information regard-
ing the assembly and operation of your Carrera DIGITAL 124 / 132
electronic lap counter. Please read them carefully and keep them in
a safe place afterwards.
If you have any queries, please do not hesitate to contact our dis-
tributor or visit our websites:
www.carrera-toys.com · www.carreraclub.com
Please check the contents for completeness and possible transport
damage. The packaging contains important information and should
also be retained.
Please take note that the electronic lap counter is only functioning in
combination with item 30344 Black Box Carrera DIGITAL 124/ 132.
The lap counter can be used with Carrera DIGITAL 124/ 132 cars.
Please refer to the Black Box operating instructions should you
require information for operating the 30344 Black Box Carrera
DIGITAL 124 / 132.
We hope you will derive a lot of pleasure from your new Carrera
DIGITAL 124 / 132 electronic lap counter.
Safety instructions
• WARNING! Not suitable for children under 36 months. Danger of
suffocation due to small parts which may be swallowed. Caution:
risk of pinching caused by function.
• Regularly check the track and cars for damage to cables, plugs
and housings! Replace defective parts.
• The car racetrack is not suitable for outdoor operation or operation
in wet locations! Keep away from liquids.
• Do not place any metal parts onto the track to avoid short-circuits.
Do not place the track in the immediate vicinity of delicate objects,
as these could be damaged by cars hurled from the track.
• Pull the plug before cleaning the racetrack! Only use a damp cloth
for cleaning, no solvents or chemicals. When it is not in use, store
the track in a dry and dust-protected location, preferably in the origi-
nal cardboard box.
• Do not operate race track at face- or eye-level – risk of injury due
to cars being catapulted off the track.
Contents of package
1x
1x
1x 1x
1x
8x
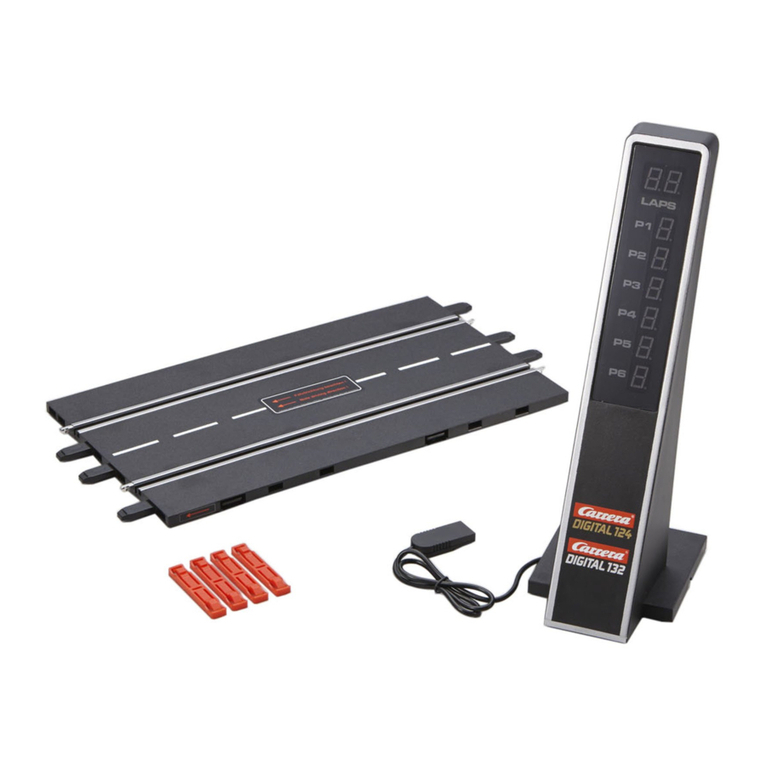
1 Standard straight
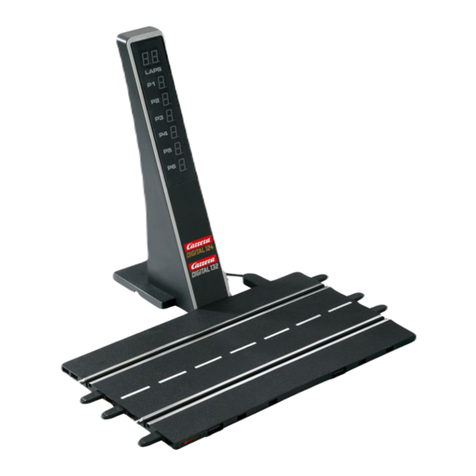
1 Standard straight with DIGITAL 124 / 132 electronic lap counter
1 End piece right
1 End piece left
8 Track section interlocks
Instructions
Please check the contents for completeness and possible transport
damage. The packaging contains important information and should
also be retained.
Important Information
Carrera DIGITAL 124/132
EXCLUSIV
EVOLUTION
Carrera DIGITAL 124/132 EXCLUSIV
EVOLUTION
Please note that Exclusiv/Evolution (analog system) and Carrera
DIGITAL 124/132 (digital system) involve two separate and com-
pletely independent systems. We hereby expressly indicate that
both systems must be kept separate when setting up the track, i.e.
no connecting rail from Exclusiv/Evolution may be used together
with the connecting rail and Black Box of the Carrera DIGITAL124/132,
even if only one of the two connecting rails (Exclusiv/Evolution con-
necting rail or Carrera DIGITAL 124/132 connecting rail and Black
Box) is attached to the current supply. Furthermore, no other Car-
rera DIGITAL 124/132 components (switches, electronic lap counter,
pit stop) may be built into an Exclusiv/Evolution course, i.e. via ana-
log operation.
Non-compliance with the above information may result in damage or
destruction of the respective Carrera DIGITAL124/132 components.
In this case no warranty may be claimed.
Assembly instructions
Electrical connection
For installation into an existing Carrera DIGITAL 124/ 132 layout a
standard straight 1is contained in the delivery quantity to make
up the distance.
Please note when installing the electronic lap counter 2that the
Black Box 3must be in immediate proximity in order to attach it
to the Carrera DIGITAL 124/ 132 Black Box (Art. No. 30344) using
a cable connection 4. The electronic lap counter is initialized by
switching on the Black Box.
Do not install the electronic lap counter directly after a curve; insert
at least one standard straight in front of the Black Box and the lap
counter.
Insert the standard straight with an electronic lap counter Carrera
DIGITAL 124/132 into the track layout as illustrated.
Connect the electronic lap counter to the Black Box as shown in
the illustration.
Note: To avoid short-circuits and electrocution, the toy may not be
connected using foreign devices, plugs, cables or other objects for-
eign to this toy. The Carrera DIGITAL 124/132 car racetrack only
works properly with an original Carrera DIGITAL 124/132 trans-
former.
4
23
Carrera DIGITAL 124/132 + 30344
1
ON/OFF
8
Assembly instructions
1 4
2 3
1+2+3Before assembling please insert the connecting clips
in the track as shown in figure 1.Stick tracks together on a flat
base. Move the connecting clips according to figure 2in direction
of the arrow until they audibly snap in. The connecting clip may also
be inserted later. The connecting clips can be removed into both
directions by simply pressing down the clamped nose (see fig. 3).
4Fastening: To fasten the track sections on a board, it is neces-
sary to use the track section fasteners (Item no. 85209, not con-
tained in the package).
Note:
Carpeting is not a suitable foundation on which to build the track be-
cause of static charging, formation of fluff and ready inflammability.
Coding/decoding of the cars to
the according speed controller
2x CLICK
1 2
2x CLICK
CK
3
Place car on the track, push lane-change-button twice fig. 1, lift car
at the front, put car back again fig. 2, while car´s lights are flashing
push lane-change-button twice fig. 3. Programming is confirmed
by a tone. All settings are saved until new programming is carried
out.
False start
False start: If a car’s speed controller is actuated during the traffic
light phase, this is rated as false start. The vehicle that has caused
the false start will travel a short distance and the LED on the rele-
vant vehicle or hand control will flash. The race is not released and
the start has to be repeated.
Display and
range of functions
1 2
3
4
Range of functions
1Training mode
2Lap races possible from 0 – 9999 laps (factory setting 50 laps)
3Time races from 00:00:00’01 – 99:99:99:999 hours
(hh:mm:ss’ms) (factory setting 00:05’00’’00)
The electronic lap counter Carrera DIGITAL 124 / 132 disposes of a
memory function. Once the values of the factory setting are changed
the altered values remain displayed until having been reset.
4Signal tone and fanfare horn may be switched on and off by ac-
tivating the switch (ON/OFF).
Training mode
1
Training mode
The training mode is used for training and the starting positions for
the race and can be started without setting the laps or time.
The training mode is set as follows:
1. Switch on the Black box (ON/OFF switch).
2. After approx. 1 second the central LED will illuminate perma-
nently and a brief acoustic signal will sound.
3. The Carrera DIGITAL 124 / 132 electronic lap counter automati-
cally switches on in training mode.
4. Press the start button of the Black Box once – all of the LEDs
are constantly lit.
5. Place the pre-coded car/s on the connecting track.
6. Then press the start button again – the starting sequence is initi-
ated, the LEDs are lit and acoustic signals can be heard.
7. The training run begins with elapse of the starting sequence and
the overall time (“TIME”) and counting begins.
8. The display shows the following information:
• Allocation of the individual cars (1-6)
• Total time of training race next to “TIME”
• Lap time currently driven “LAP TIME”
ATTENTION!
Single lap times exceeding 09:59:999 cannot be displayed, illustra-
tion see fig. 1.This does not affect the total time illustration under
“TIME”.
While pushing BUTTON 1 during measuring, further information can
be retrieved.
• Press “BEST TIME” 1x – best lap time. Only beating the current
best time will again be displayed.
• Press “TIME” 2x – displaying the leading car (POS 1) and the other
cars´ time lag to the leading car
< 1 lap:
display of time difference “+ m:ss:ms” to the leading car
> 1 lap:
display of lap difference to the leading car “+ L 00001”
• Press “POSITION” 3x – current positioning of individual cars
• Press “LAPS” 4x – laps already driven
• Press 5x – change back to the current training race
9. For finishing the training race, push BUTTON 3 (“ESC”) once
during the race. You will return to the main menu (the word “TRAIN-
ING” flashes)
Race modes
Racing mode
1. For being able to switch to the racing mode after the electronic lap
counter Carrera DIGITAL 124/ 132 has automatically turned on via
the Black Box, please push BUTTON 3 (“ESC”).
2. The next display indication allows you to switch between the train-
ing- and the racing mode while pushing BUTTON 1 (“CHA”).
3. Confirm selection of the racing mode (the word “Race” flashes) by
BUTTON 2 (“SEL”), the word “LAP” flashes.
4. You have the choice between
1
lap race and
2
time races.
1Lap Races
1.
If you like to start a lap race (“LAP”) please confirm by pushing
BUTTON 2 (“SEL”).
2.
After confirmation you may set the number of laps you like to com-
plete (it is possible to set lap races from 0000 to 9999 laps, factory
setting 0050 laps).
3.
Basically you have to set the 1`s place first, then the 10`s place
and the 100`s place and finally the 1000`s place (display cursor
flashes on each place). By pushing BUTTON 1 (“UP”) you increase
the number. In order to change to the next places please push BUT-
TON 2 (“SEL”) and set the value as described. In case the preset
number of laps shall not be changed, please confirm by pushing
BUTTON 2 (“SEL”) until the lap display disappears.
4.
After having set the number of laps push the start button of the
Black Box once – alle LEDs will flash permanently.
5. Place the pre-coded car/s on the connecting track.
6. Then press the start button again – the starting sequence is initi-
ated, the LEDs are lit and acoustic signals can be heard.
7. The lap race starts after the start sequence has proceeded.
8. The total time “TIME” starts to run. Once the leading car has
passed through, its total time is displayed and updated upon each
passing.
9. The display shows the following information:
• Allocation of the individual cars (1-6)
• Total time of the leading car next to “TIME”
• Lap time currently driven “LAP TIME”
While pushing BUTTON 1 during measuring, further information can
be retrieved.
• Press “BEST TIME” 1x – best lap time. Only beating the current
best time will again be displayed
• Press “TIME” 2x – displaying the leading car (POS 1) and the
other cars´ time lag to the leading car
< 1 lap: display of time difference “+ m:ss:ms” to the leading car
> 1 lap: display of lap difference to the leading car “+ L 00001”
• Press “POSITION” 3x – current positioning of individual cars
• Press “LAPS” 4x – laps still to go
• Press 5x – change back to the current race
10. As soon as all cars have finished the last lap a signal indicating
the end of the race is audible and the display starts to flash.
11. For returning to the main menu push BUTTON 3 once („ESC“)
1Time Racing
1. In order to measure the time of a time race please follow steps
1-3 (see lap races).
2. To start a time race after mode selection lap race (“RACE”) push
BUTTON 1 (“CHA”) for changing from the lap race mode (“LAP”) to
the time race mode (“TIME”).
3. Confirm selection of time race (“TIME”) by BUTTON 2 (“SEL”).
4. After confirmation the seconds´ position of the time display will
flash (factory setting 00:05:00 min.).
5. Basically you have to set the seconds first, then the minutes
and finally the hours (display cursor flashes on each position). By
pushing BUTTON 1 (“UP”) you increase the number. In order to
change to the next positions please push BUTTON 2 (“SEL”) and
set the value as described. In case the preset racing time shall not
be changed please confirm by pushing BUTTON 2 (“SEL”) until the
ltime display disappears.
6. After having set the requested time for the race push the start but-
ton of the Black Box once – alle LEDs will flash permanently.
7. Place the pre-coded car/s on the connecting track.
8. Then press the start button again – the starting sequence is initi-
ated, the LEDs are lit and acoustic signals can be heard.
9. The time race starts after the start sequence has proceeded.
10. The total time “TIME” starts to run backwards.
11. The display shows the following information:
• Allocation of the individual cars (1-6)
• Total time still to be driven “TIME”
• Lap time currently driven “LAP TIME”
While pushing BUTTON 1 during measuring, further information can
be retrieved
12. After the total time set has expired the race is finished. A signal
will be audible and the display starts to flash.
13. For returning to the main menu push BUTTON 3 once (“ESC”)
9
Display Settings
1 2
3
1Contrast-Setting Display
Switch off Black Box. Keep Button 1 (Lap Time Option) pushed
while switching on the Black Box until the display changes accord-
ing to figure.
Line “TIME” (1) indicates the corresponding software version. The
display´s contrast can be changed (max. 20) by
“CHA
y
A
“ and “CHA
ca b
A
”.
2Display Check
Switch off Black Box. Keep Button 3 (ESC) pushed while switching
on the Black Box until the display changes according to figure.
3Factory Setting
For resetting all data please switch off Black Box. Keep Button 2
(RESET) pushed while switching on the Black Box until the display
changes according to figure.
Connection PC-Unit
1
A B
2
For displaying purposes of your lap counter on a computer we rec-
ommend the Carrera DIGITAL 124/132 PC-Unit (item no. 30349). In
addition you can manage your own databases for cars and drivers.
Maintenance and care
1
To ensure a proper operation of the motor-racing circuit, all race-
track components should be regularly cleaned. Pull the plug prior
to cleaning.
1Racetrack: Keep the track surface and track slots clean with a
dry cloth. Do not use any solvents or chemicals for cleaning. When
it is not in use, store the racetrack in a clean and dust-protected
location, preferably in the original cardboard box.
Troubleshooting
Driving tips
Troubleshooting:
In case of any malfunctions, please check the following:
• Has the connection to the power supply been established cor-
rectly?
• Have transformer and speed controllers been connected
correctly?
• Are the track connections faultless?
• Are the racetrack and track slots clean and free of any foreign
objects?
• Are the sliding contacts in order and do they make contact with
the track slot?
• Are the cars correctly coded to the according speed controller?
• The track‘s current feed will be switched off automatically for 5
seconds, if there is an electrical short circuit: this will be notified by
audible and visual signals.
• Are the cars placed on the track in running direction? In case of
non-functioning push the running direction switch which is on the
car´s bottom.
• Are the correct guide keels being used and which mode has been
selected.
• Insert at least one standard straight in front of Black Box and lap
counter.
Note:
During operation small car parts as spoilers or mirrors may get off or
brake due to being original detailed parts of the car model. To avoid
this it is possible to remove them before operation.
All Carrera spare parts are available in the webshop:
www.carrera-toys.com
Delivery exclusively to Germany, Austria, Netherlands, Belgium and
Luxembourg.
Technical specifications
Output voltage · Toy transformer
14,8 V 51,8 VA
18 V 54 VA
This device is marked by “selective sort throught” symbol related to
sort through domestic, electric and electronic, waste.
This means the product must be treated by a specialized “sorting/
collecting” system in accordance with European directive 2002/96/
CE, to reduce the impact upon environment.
For more precise information, please contact your local administra-
tion.
Electronical product which are not going through special collect-
ing, are potentially dangerous for environment and human health,
because of dangerous substance.

Other manuals for Digital 124 Wireless+

15

This manual suits for next models

1

Other Carrera Toy manuals

Carrera 10109 2,4 GHz WIRELESS Plus SET DUO User manual

Carrera

Carrera 10109 2,4 GHz WIRELESS Plus SET DUO User manual

Carrera 30135 WEST HAMPTON User manual

Carrera

Carrera 30135 WEST HAMPTON User manual

Carrera Digital 143 Nascar User manual

Carrera

Carrera Digital 143 Nascar User manual

Carrera Digital 124 Wireless+ User manual

Carrera

Carrera Digital 124 Wireless+ User manual

Carrera 25208 LaFerrari User manual

Carrera

Carrera 25208 LaFerrari User manual

Carrera 30357 User guide

Carrera

Carrera 30357 User guide

Carrera 12007 User manual

Carrera

Carrera 12007 User manual

Carrera Digital 124 Wireless+ User manual

Carrera

Carrera Digital 124 Wireless+ User manual

Carrera Evolution Go!!! User manual

Carrera

Carrera Evolution Go!!! User manual

Carrera 20030354 STARTLIGHT User manual

Carrera

Carrera 20030354 STARTLIGHT User manual

Carrera 30165 DTM rivals User manual

Carrera

Carrera 30165 DTM rivals User manual

Carrera Ferrari Boat Arno XI ?300006 User manual

Carrera

Carrera Ferrari Boat Arno XI ?300006 User manual

Carrera Digital 124 Wireless+ User manual

Carrera

Carrera Digital 124 Wireless+ User manual

Carrera power wave User manual

Carrera

Carrera power wave User manual

Carrera 80119L User manual

Carrera

Carrera 80119L User manual

Carrera 25124 CHECKERED FLAG RUN User manual

Carrera

Carrera 25124 CHECKERED FLAG RUN User manual

Carrera Evolution 25189 Le Mans Contest User manual

Carrera

Carrera Evolution 25189 Le Mans Contest User manual

Carrera PROFI RC SPEEDRAY User manual

Carrera

Carrera PROFI RC SPEEDRAY User manual

Carrera Patrol Boat Falshoft 301006 User manual

Carrera

Carrera Patrol Boat Falshoft 301006 User manual

Carrera 62283 User manual

Carrera

Carrera 62283 User manual

Carrera GO!!! User manual

Carrera

Carrera GO!!! User manual

Carrera 25157 POWER PERFORMANCE User manual

Carrera

Carrera 25157 POWER PERFORMANCE User manual

Carrera Ferrari Arno XI 300005 User manual

Carrera

Carrera Ferrari Arno XI 300005 User manual

Carrera PROFI RC SX1 User manual

Carrera

Carrera PROFI RC SX1 User manual

Popular Toy manuals by other brands

educo e523368 instructions

educo

educo e523368 instructions

THUNDER TIGER Tiger Bipe 40 Assembly instructions

THUNDER TIGER

THUNDER TIGER Tiger Bipe 40 Assembly instructions

Real Good Toys Classic Bungalow instructions

Real Good Toys

Real Good Toys Classic Bungalow instructions

Bandits and Angels TWT8376 Assembly instructions

Bandits and Angels

Bandits and Angels TWT8376 Assembly instructions

Mattel Diva Starz Scooter-iffic 29311 instructions

Mattel

Mattel Diva Starz Scooter-iffic 29311 instructions

Faller LARGE COALING BAY quick start guide

Faller

Faller LARGE COALING BAY quick start guide

Mega Bloks First Builders CPF70 quick start guide

Mega Bloks

Mega Bloks First Builders CPF70 quick start guide

Spirit Halloween Limb Ripper Easy-to-follow Instructions

Spirit Halloween

Spirit Halloween Limb Ripper Easy-to-follow Instructions

Hornby Hobbies Airfix Wildcat F4F-4 manual

Hornby Hobbies

Hornby Hobbies Airfix Wildcat F4F-4 manual

Fisher-Price FGW16 quick start guide

Fisher-Price

Fisher-Price FGW16 quick start guide

Pilot Communications 50CC Assembly manual

Pilot Communications

Pilot Communications 50CC Assembly manual

LGB JONNY Instruction

LGB

LGB JONNY Instruction

Eduard Panzer IV Ausf. H schurzen Assembly instructions

Eduard

Eduard Panzer IV Ausf. H schurzen Assembly instructions

Trix 11206 manual

Trix

Trix 11206 manual

Hasbro Vamp 65269/65266 instructions

Hasbro

Hasbro Vamp 65269/65266 instructions

SMC Networks DC3-DAKOTA instruction manual

SMC Networks

SMC Networks DC3-DAKOTA instruction manual

Madcow Rocketry PIRANHA manual

Madcow Rocketry

Madcow Rocketry PIRANHA manual

Franklin HAMMERIN HANDS 69002 quick start guide

Franklin

Franklin HAMMERIN HANDS 69002 quick start guide

manuals.online logo
manuals.online logoBrands
  • About & Mission
  • Contact us
  • Privacy Policy
  • Terms and Conditions

Copyright 2025 Manuals.Online. All Rights Reserved.