5
Install Accessories — The following accessories can
be used with this thermostat:
• remote temperature sensor (33CSSEN-WB)
• outdoor temperature sensor (33CSSEN-01)
• duct temperature sensor (33CSSEN-DS)
• Add-a-Wire™ accessory (33CSACC-AW)
Refer to the accessory installation instructions for more
information.
REMOTE TEMPERATURE SENSOR — A remote temper-
ature sensor may be provided to read the temperature from a
space. If a remote temperature sensor is connected, the thermo-
stat will ignore the reading of its internal sensor. When the ther-
mostat is using a reading from a remote sensor, the degree sym-
bol above the temperature reading will blink.
When installing a remote sensor, do not run wiring in the
same conduit as the HVAC equipment control wires, fire alarm
wiring, or other high voltage wiring. Do not use the building
metalwork as a ground. Use only unshielded wire.
NOTE: Sensors can only be averaged when using a wireless
remote sensor (33CSRFS-RC/RE).
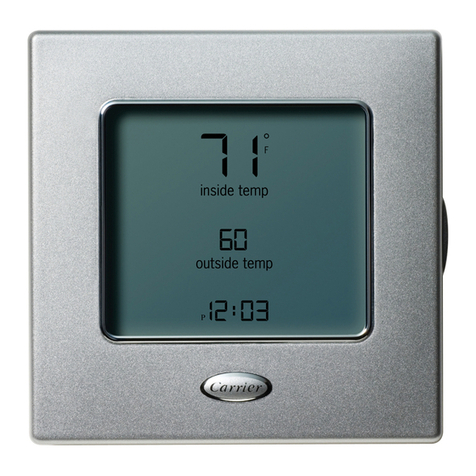
OUTDOOR TEMPERATURE SENSOR — An outdoor tem-
perature sensor may be provided to read the outside tempera-
ture. The thermostat will not control to the outside temperature
sensor. Outside temperature can be viewed by pressing and
holding the Mode button for 2 seconds.
NOTE: Advanced Setup Step 14 must be configured to Yes in
order to view outside temperature.
DUCT TEMPERATURE SENSOR — A duct temperature
sensor may be provided to either view the duct temperature or
to control to duct temperature (based on the setting of Ad-
vanced Setup Step 14). If Advanced Setup Step 14 is set to Yes,
then the duct temperature sensor reading can only be viewed
and the duct sensor is not used to control the thermostat. Press
and hold the Mode button for 2 seconds to view duct tempera-
ture. If Advanced Setup Step 14 is set to No, then the duct tem-
perature would control thermostat operation.
ADD-A-WIRE — The Add-A-Wire accessory is used to re-
pair a broken wire on a thermostat or to add an extra terminal
for cooling or heat pump operation.
Sensor Calibration — Every thermostat is factory cali-
brated. Under normal circumstances there will never be a need
to re-calibrate the thermostat. If re-calibration must be done,
perform the following procedure:
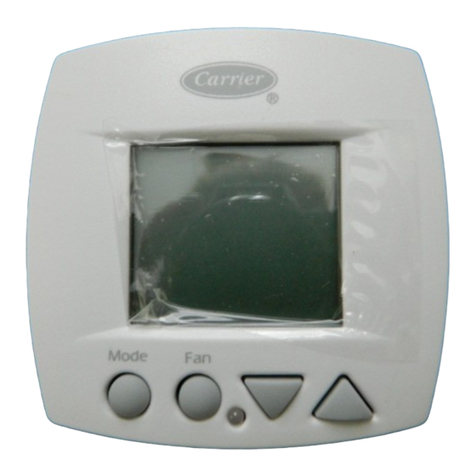
1. Hold down the Mode and Fan buttons for 5 seconds. All
of the icons on the display screen will appear. Release the
buttons. Press the UP and DOWN ARROW buttons
simultaneously.
2. Press the UP and DOWN ARROW buttons simulta-
neously again. The current temperature will be displayed.
3. Use an accurate thermometer to measure room tempera-
ture. Press the UP or DOWN ARROW buttons until the
number equals room temperature.
4. Press the Mode button to return to normal operation.
Check Thermostat Operation — To check thermo-
stat operation, perform the following procedure:
1. Press the Mode button repeatedly until the Heat icon ap-
pears on the display. The thermostat is now in Heating
mode.
2. Press the UP ARROW button until the heating set point is
10 F (6 C) higher than the current room temperature.
Heating and fan should be energized. The red indicator
light should be lit.
3. Press the Mode button repeatedly until the Cool icon ap-
pears on the display. The thermostat is now in Cooling
mode.
4. Press the DOWN ARROW button until the cooling set
point is 10 F lower than the current room temperature.
Cooling and fan should be energized. The green indicator
light should be lit.
5. Press the Mode button repeatedly until the Off icon ap-
pears. Press the Fan button until the display reads Fan On.
The fan should energize.
6. If heating, cooling, or fan do not work, check wiring and
consult Troubleshooting section.
Final Checklist
1. Put away tools and instruments. Clean up debris and
packaging.
2. Review Owner’s Guide with occupant or owner.
3. Leave the manuals with owner.
OPERATION
Mode Button Operation — The Mode button selects
the operating mode of the thermostat. If OFF is selected, the
thermostat will not enter Heating or Cooling mode. If HEAT is
selected, the thermostat will only enter Heating mode (if the
room temperature is below the heating set point). If COOL is
selected, the thermostat will only enter Cooling mode (if the
room temperature is above the cooling set point). If AUTO is
selected, the thermostat will enter Heating or Cooling mode
based on the room temperature and the heating and cooling set
points.
AUTO-CHANGEOVER — When the thermostat mode is set
to AUTO, the thermostat will provide automatic changeover
from Heating to Cooling mode and Cooling to Heating mode
when required. The thermostat will automatically switch to
maintain the desired temperature setting. The thermostat does
not need to be manually changed from heating to cooling or
cooling to heating operation.
Fan Button — The Fan button is used to configure fan op-
eration. Fan operation can be set to Fan On or Auto (no icon
displayed).
When the fan is set to Fan On, the fan will run continuously
for better air circulation.
NOTE: If the thermostat is in the Unoccupied or OFF modes,
the fan will run only during heating or cooling.
When the fan is set to Auto (no icon displayed), the fan will
only energize during heating or cooling operation.
Emergency Heat Button — Emergency heat is avail-
able for heat pump applications. To turn on emergency heat,
press the Emergency Heat button. An “EH” will be displayed.
During emergency heat, the fan will operate and the second
stage of heat will be energized (locking out the first stage com-
pressor). To exit emergency heat, press the Emergency Heat
button. During emergency heat, only OFF and HEAT modes
are available.
Backlight Button — The Backlight button is used to
change the setting of the Backlight display. If the configuration
is set to Yes, the backlight will be lit continuously. If the config-
uration is set to No, the display will be lit only after a button is
pushed. The display will stay lit until action has ceased.
Reset Filter Button — The Reset Filter button is used to
reset the Service Filter icon display while in the Advanced Set-
up Configuration Step 10.
If the Reset Filter button is pressed, then the number of
hours of fan operation is displayed. To reset the filter hours to
zero, press the Fan button while the hours are displayed.
