manuals.online logo
Brands
  1. Home
  2. •
  3. Brands
  4. •
  5. Carrier
  6. •
  7. Thermostat
  8. •
  9. Carrier 33CS User manual

Carrier 33CS User manual

33CS
Fan Coil
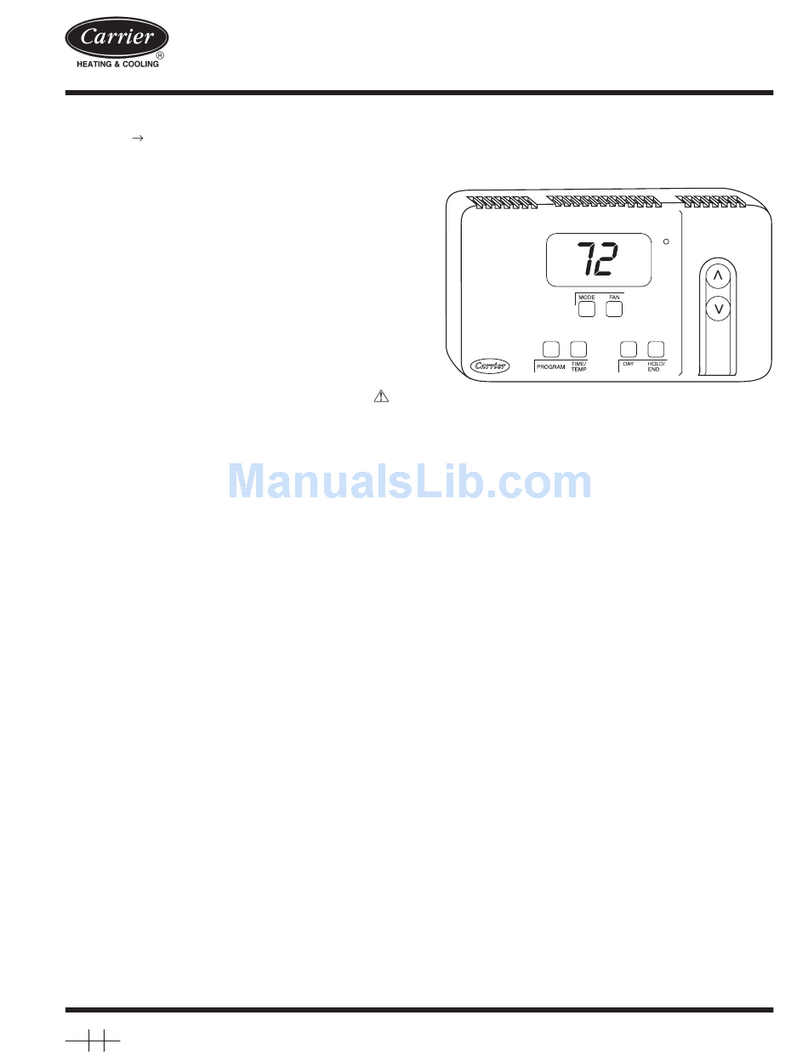
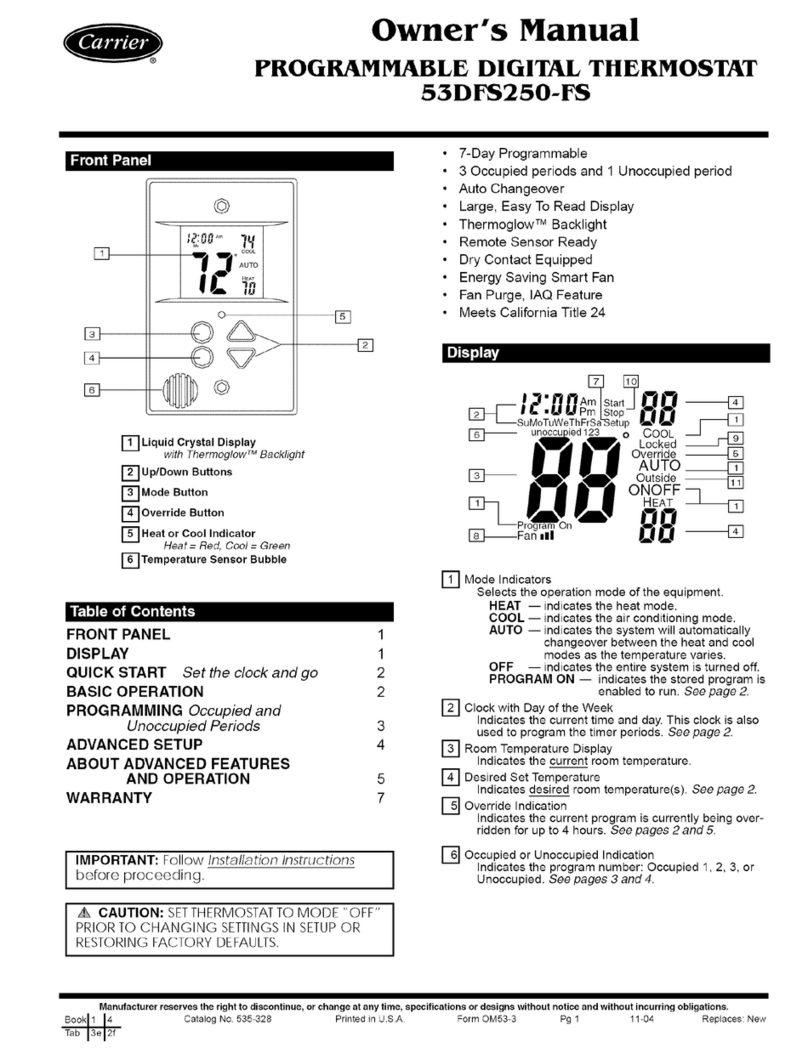
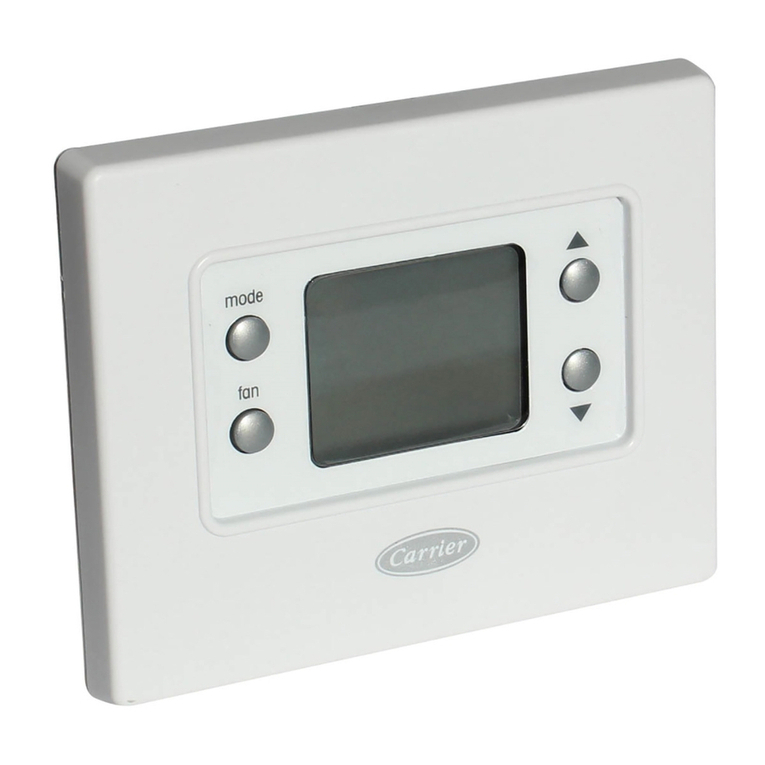
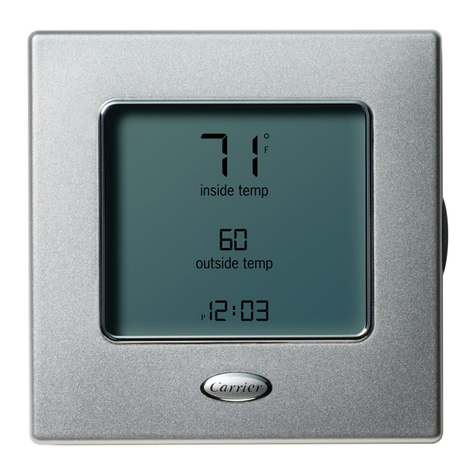
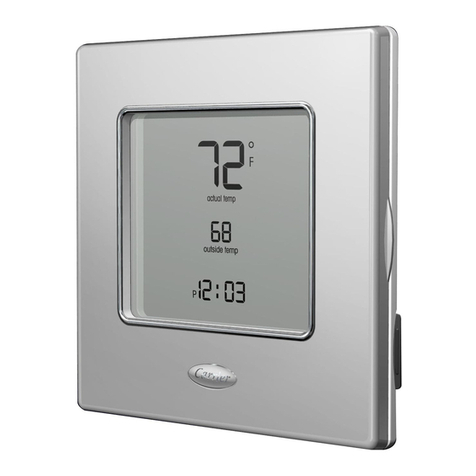
Programmable Thermostat
Installation and Operating Instructions
Part Number 33CSSP2-FC
IMPORTANT: Read entire instructions before starting
the installation.
CONTENTS
SAFETY CONSIDERATIONS ...................... 1
GENERAL ........................................ 1
INSTALLATION ................................ 1-10
Select Thermostat Location ...................... 1
Install Thermostat ................................ 1
Changeover Sensor .............................. 3
Set Clock ......................................... 3
Configure Advanced Setup ....................... 3
Install Accessories ............................... 7
Program Thermostat Schedules .................. 7
Factory Defaults ................................. 8
Calibrate Sensor ................................. 8
Check Thermostat Operation ..................... 8
Final Checklist .................................. 10
OPERATION ................................... 10,11
Select Desired Temperature ..................... 10
Four-Pipe Operation ............................. 10
Two-Pipe Operation ............................. l0
Fan Operation ................................... l0
Keypad Lock .................................... 10
Clock Backup ................................... 10
Minimum Heat/Cool Temperature Difference .... 10
Single Set Point Operation ...................... 10
Dual Set Point Operation ........................ 10
Outside Air Temperature Sensor ................ 11
Locking Cover .................................. 11
Dry Contact Switch/External Control ............ 11
TROUBLESHOOTING ............................ 11
SAFETY CONSIDERATIONS
Read and follow manufacturer instructions carelhlly. Fol-
low all local electrical codes during instfdlation. All wiring
must conform to local and natiomd electrical codes. Improper
wiring or installation may dmnage thermostat.
Recognize safety information. This is the safety alert sym-
bol z_. When the safety alert symbol is present on equipment
or in the instruction manual, be alert to the potential for person-
al injury.
Understand the signal words DANGER, WARNING find
CAUTION. These words me used with the safety fdert symbol.
DANGER identifies the most serious hazards which will result
in severe personal injury or death. WARNING signifies a haz-
ard which could result in pel_onal injury or death. CAUTION
is used to identify unsafe practices which would result in minor
pel_onal injury or property dmnage.
GENERAL
The fan coil programmable thermostats are wall-mounted or
unit-mounted, low-voltage thermostats which maintfdn room
temperatme by controlling the operation of a fan coil unit.
Separate heating and cooling set points, auto-changeover
capability, 2-pipe or 4-pipe configurability, and single or dufd
set point options fdlow for greater flexibility.
The fllermostats are normally wall-mounted for 42C and
42D fan coil units. For 42S and 42V fan coil units, the thermo-
stat is mounted on the fan coil unit or inside the fan coil unit on
a junction box. For 42S and 42V fan coil units, the thermostat
may also be remote w fall-mounted, if desired.
All thermostats allow up to 4 time/temperature settings to
be programmed per 24-hour period. Each thermostat stores
programs for 7 independent days. Batteries are not required.
During power interruption, the internal NEVERLOST rMmem-
ory stores configuration settings for an unlimited mnount of
time while the clock continues to run for fit least 48 hours.
The thermostat can be configured to accept several different
equipment configurations, including 2-pipe or 4-pipe operation.
The temperature display range of the themtostat is 35 to
99 F (2 to 36 C).
NOTE: The thermostat is factory-configured for use in 4-pipe
applications. The advanced setup must be performed to config-
ure the thermostat for use with 2-pipe applications.
INSTALLATION
Select Thermostat Location -- The thermostat should
be mounted:
• approximately 5 ft from the floor
• close to or in a frequently used room, preferably on fin
inside partitioning wall
• on a section of wall without pipes or ductwork
• where temperature operating limits m'e within 32 to 122 F
(0° to 50 C)
• where humidity operating range is within 0 to 95% relative
humidity, non-condensing
The thermostat should NOT be mounted:
• close to a window, on an outside wall, or next to a door
leading to the outside
• where exposed to direct light and heat from a lamp, the sun,
a fireplace, or any other temperature-radiating object which
may cause a false leading
• close to or in dilect fdfflow from supply registers or return-
air grilles
• in meas wiflt poor air circulation (such as behind a door or
in an alcove)
Install Thermostat
Before installing themtostat, turn off all power to the unit.
There may be more than one power disconnect. Electrical
shock can cause injury or death.
1. Turn off all power to fan coil unit.
2. ff an existing thermostat is being replaced:
a. Remove existing thermostat from the wall or unit.
Manufacturer reserves the right to discontinue, or change at any time, specifications or designs without notice and without incurring obligations.
Book 1 14 PC 111 Catalog No 533-30020 Printed in U.S,A, Form 33CS-56SI Pg 1 11-04 Replaces: 33CS-52SI
m
Tab 11a 13a
b. Disconnect wires from existing thermostat. Do not
allow wires to fall back into the wall. As each wire
is disconnected, record wire color and terminal
connection.
c. Discard or recycle old thermostat.
NOTE: Mercury is a hazardous waste and must be
disposed of properly.
3. Thermostat can be mounted directly to the w_fll or onto
the unit when required. See Fig. 1. An accessory w¢fll
mounting plate is available when an existing hole in the
wall is too large for the thermostat or when mounting to a
junction box in the wall (the thermostat will not com-
pletely cover a 2 x 4-in. junction box).
4. If mounting plate is being used, install mounting plate on
wall or junction box. Mounting plate consists of two piec-
es: the metal mounting plate (see Fig. 2A) and the plastic
mounting plate (see Fig. 2B). The standard mounting
plate will cover a 2 x 4-in. or 4 x 4-in. junction box.
Accessory mounting plates of different sizes are also
available. Accessory mounting plate pall numbers tue
P474-0421 (7 x 41/4-in.) or P474-0421L (51/2 x 61/4-in.).
a. Install the metal mounting plate to wall or junction
box with 2 screws provided. Use the outermost
screw holes.
b. Place plastic mounting plate over the metal mount-
ing plate. Be sure wiring exits through holes in
both mounting plates. Plastic mounting plate is
secured to metal mounting plate when the thermo-
stat mounting base is installed (Step 7).
5. Remove the thermostat cover from back plate to expose
mounting holes and wiring connections. See Fig. 1.
6. Route thermostat wires through large hole in thermostat
mounting base. Remove outer sheath from wires for add-
ed flexibility. Stan&ud solid or multi-conductor thermo-
stat wire should be used from the thermostat to the unit.
Size and length considerations are _ts follows: for a
maximum distance from unit of 36 ft, use 22 AWG
(American Wire Gage) wire; for a maximum distance
from unit of 100 ft, use 18 AWG wire.
7. If acces._oi 7 mountirlg l)law is not used:
Level back plate agtdnst wall and mark wall through the
2 mounting holes in base. Drill two 3/16-in. mounting
holes in wall where maned. Mounting holes are provided
if installing on unit.
hnproper wiring or installation may cause damage to the
thermostat. Check to ensure wiring is correct before pro-
ceeding with installation of unit. Do not mn thermostat
wiring in same conduit as high-voltage powo: or HVAC
wiring. Interference from other wiring may cause incorrect
readings or commands from thermostat.
9. Push excess wiring into wall. Seal hole in wall to prevent
drafts.
10. Re-attach thermostat cover to back plate.
11. Turn on power to unit. The thermostat will receive power
from the fan coil unit.
NOTE: The thermostat is strictly a low-voltage control.
One or two 33ZCRLYBRD relay boards must be in-
st_flled to isolate any line voltage, fans, or water v_dves
from the fan coil.
3 1/8"
31/8"
MOUNTING
HOLE \
RS+5 RS R G Y1 G3 Wl G2 C H20 CK1
[1111 t t4t t:4t4
I//
HOLE FOR
WIRING
TERMINAL
BLOCK
MOUNTING
HOLE
Fig. 1 -- Thermostat Back Plate Mounting
and Wiring
39/16"
Be careful not to chill into wiring in wzdl. Electrical shock
could result.
Secure back plate to wall or unit with 2 screws and
anchors provided. Ensure all wires exit through hole in
back plate.
If accessoi 3"mountirlg plaw i_ used:
Secure the metal mounting plate to the wall with two
screws provided. Use the outermost screw holes. Place
the thermostat back plate securely in the indentation
provided in the plastic mounting plate. Place plastic
mounting plate and thermostat back plate over metal
mounting plate. Secure mounting plates and thermostat
back plate to the wall with 2 screws provided. Ensure _dl
wires exit through hole in mounting base.
Adjust wire length and routing to allow proper closure of
the thermostat. Strip each wire at the end no more than
l/4-in, to prevent adjacent wires from shorting togethec
Match and connect wires to termimds on the thermostat.
See Fig. 3-7 and Tables 1 and 2.
Fig. 2A- Metal Mounting Plate Dimensions
1
4 1/4"
Fig. 2B -- Plastic Mounting Plate Dimensions
Table 1 -- Thermostat Wiring Terminations
(4-Pipe Systems)
EXISTING WIRE FUNCTION TERMINAL
DESIGNATION CONNECTION
Y1, Y, or C Cooling Y1
Wl, W, or H Heating W1
Rh, R, M, Vr, or A Power R
C Common C
G, F, or LOW Low Fan Speed G
MED Medium Fan Speed G2
HIGH High Fan Speed G3
Table 2 -- Thermostat Wiring Terminations
(2-Pipe Systems)
EXISTING WIRE FUNCTION TERMINAL
DESIGNATION CONNECTION
Y1, Y, or C Water Valve Y1
Wl, W, or H Strip Heater W1
Rh, R, M, Vr, or A Power R
C Common C
G, F, or LOW Low Fan Speed G
MED Medium Fan Speed G2
HIGH High Fan Speed G3
Changeover Sensor -- If the thermostat is being used
with a two-pipe system, a changeover sensor (33CSWCO-FC)
may be used to provide automatic heat!cool mode changeovel:
Set Clock- Tile Set Clock lunction allows the user to
change the time and &ty displayed on the thennostat. Press and
hold the Mode and Fan buttons at the stone time for 2 seconds until
the display changes. Tile display will show the Setup annunciatol:
Tile cunent time will blink on trod off. Press the UP ARROW trod
DOWN ARROW buttons until the conect time is shown. Hold
down the buttons to quickly move through the time display. Tile
AM and PM annunciators will automatic_dly change. To scroll
through by hom_ instead of minutes, hold down the Fan button
while pressing UP ARROW or DOWN ARROW. To ensure the
schedules tue properly followed, make sure that AM or PM is cor-
rect for the time chosen. When the conect time is shown, press the
Mode button to modily the c_ktyof the week. Tile cunent day will
blink on and off. Press the IJP ARROW and DOWN ARROW
buttons until the con'ect &ty is shown. Press and hold the Mode
and Ftm buttons simultaneously to exit the Set Clock mode.
Configure Advanced Setup -- To enter the advanced
setup scmens of the thermostat, press the Mode and Fan
buttons simultaneously for 10 seconds. Set thermostat mode to
OFF before configuring the thermostat.
NOTE: The display will change after 2 seconds. This is a
quick configuration to set the clock only. Continue to hold
down the Mode and Fan buttons for 10 seconds to enter
Advanced Setup mode.
The display will change. If only Advanced Setup Steps 1
and 2 am accessible, then the bnttons were not held down long
enough. The Advanced Setup Step number is shown in the top
right corner of the thermostat screen. Use the Mode button to
advance through the steps. Them am 15 Advanced Setup Steps.
Use the UP and DOWN ARROW buttons to change the
settings. See Table 3. Pmss the Mode and Fan buttons at the
same time to exit the Advanced Setup mode.
NOTE: Refer to the Set Clock section for Advanced Setup
Steps 1 and 2.
DISPLAY CONFIGURATION (Step 3) -- The Display con-
figuration is used to select what the thermostat will display
when it is not being used. If the configuration is set to ON, the
therruostat will display mode, fan operation, set points, and
room tempemtum. [f the configuration is set to OFF. the thermo-
stat will only display the time. If any button is pressed, the
thermostat screen will return to full display. Tile default is ON.
SINGLE OR DUAL SET POINT CONFIGURATION (Step
4) -- Step 4 is used to configure the thermostat for single or
dual set point operation. Tile configuration can be set to 1 or 2.
Tile default is 2. When the configuration is set to 1, then them
is only one set point which is used for both heating and cooling.
When the configuration is set to 2, then them am two set points
(one for heating, one for cooling).
TWO OR FOUR PIPE SYSTEM CONFIGURATION
(Step 5) -- Step 5 is used to configum the thermostat for use in
a 2-pipe or 4-pipe system. When the configuration is set to 2,
file thermostat will be configumd for use with a 2-pipe system.
When the configuration is set to 4, the thermostat will be
configumd for use with a 4-pipe system. Tile default is 4.
NOTE: Advanced Setup Step 6 will only be shown if Step 5 is
set to 2.
TWO-PIPE SYSTEM OPERATION (Step 6)-- Step 6 is
used to configum the thermostat for use in a 2-pipe system.
Tile configuration can be set to 1,2, 3, 4, or 5. The default is 3.
When the Two-Pipe Operation configuration is set to 1, the
two-pipe system will function as a Heat-Only system. When
the Two-Pipe Operation configuration is set to 2, the two-pipe
system will function as a Cool-Only system. When the Two-
Pipe Operation configuration is set to 3, the two-pipe system
will function as a Heat/Cool Auto-Changeover system. When
the Two-Pipe Operation configuration is set to 4, the two-pipe
system will function as a Heat!Cool system with auxiliary elec-
tric heat (lockout electric heat when hot water is available).
When the Two-Pipe Operation configuration is set to 5, the
two-pipe system will function as a Heat/Cool system with total
electric heat (no hot water heat).
FAN OPERATION (Step 7) -- If the fan operation is set to
ON, the fan will operate at continuous low speed. If the fan
operation is set to OFE the fan will cycle off and will only be
energized during a heating or cooling cycle (AUTO mode). Tile
default is ON.
NOTE: When a remote tempemtum sensor is used, the choice
should be Fan ON.
DEADBAND (Step 8) -- The deadband is the difference in
temperatum above the cooling set point or below the heating
set point that the thermostat will wait before turning on the first
stage of heating or cooling. For example, if the cooling set
point is 82 F (28 C) and the deadband is 2 degmes, the filst
stage of cooling will not be energized until the temperatum
reaches 84 F (29 C). The range of values is 1 to 6 degmes. The
default is 2 degrees.
NOTE:Ifsinglesetpointoperationisused,thedeadbandwill
beaboveandbelowthesinglesetpoint.
SETPOINTMINIMUMDIFFERENCE(Step9)-- Themin-
imumdifferencebetweenheatingandcoolingsetpointscanbe
use>configured.Therangeisfrom0to6degrees.Thedefault
is 2degrees.Theminimumdifferenceisenforcedduring
AutochangeoverandProgramOnoperation.
BACKLIGHTDISPLAY(Step10)-- Thedisplaybacklight
canbesettoON(alwayson)orOFF(turnoff8secondsafter
usage).ThedefaultisOFF.
FAHRENHEIT/CELSIUSOPERATION(Step11)-- The
thermostatcanbesetto operatein Fahrenheitor Celsius
degrees.Setthevariableto"F' forFahrenheitoperation.Set
thevariableto"C"forCelsiusoperation.Thedefaultis"IF:."
REMOTESENSOR(Step12)-- TheRemoteSensorcon-
figurationisusedtoconfiguretheoperationofaremotesensor
(ifused).If theconfigurationissettoYES,thentheremote
sensorwillfunctionasanoutdoorairtemperaturesensor(read
only).Thethermostatwillnotcontroltothetemperature.Ifthe
configurationissettoNO,thentheremotesensorwillfunction
asaremotetemperatmesensor.Thethermostatwillcontrolto
thetemperaturereadingfromthesensol:ThedefaultisYES.
OVERRIDETIMEDURATION(Step13)-- Step13isused
toadjusttheamountof timethattheoverridewillactivate
Occupied1setpointsduringaprogrammedUnoccupiedtime
period.Therangeis0to6houLs.Thedefaultis2hours.
DRYCONTACT SWITCH (Step 14) -- Step 14 is used to
configure the &y contact switch as norm_dly open (NO) or
normally closed (NC). The default is NO.
DRY CONTACT SWITCH OPERATION (Step 15) --
Step 15 is used to configure the operation of the dry contact
switch. When the dry contact switch is active, the thermostat
can enter Occupied or Unoccupied mode. If the configuration
is set to Occupied, then the thermostat will enter Occupied
mode when the dry contact switch is active. If the configuration
is set to Unoccupied, then the thermostat will enter Unoccupied
mode when the dUcontact switch is active. The default is
Occupied.
NOTE: Step 16 will only be displayed if Step 15 is set to
Unoccupied.
DRY CONTACT SWITCH UNOCCUPIED OPERATION
(Step 16) -- If the Step 15 configuration is set to Unoccupied,
then the thermostat will enter Unoccupied mode when the dU
contact switch is energized. Step 16 detemlines what the
thermostat will do when it enters Unoccupied mode. If the con-
figuration is set to Unoccupied Set Points, then the themlostat
will control to the unoccupied set points. If the configuration is
set to Off, the thermostat will turn off the fan coil during
Unoccupied mode. The default is to control to the unoccupied
set points.
The dry contact switch configuration allows for the dry con-
tact switch input to be used for a condensate overflow switch
when correctly configured. For example, when the drain pan is
full, a condensate switdl would trip the dry contact, causing the
fan coil unit to shut off.
J CZZ2}
;- o
_.- .....C2Z3_
_.- -4ZD
0 ®_@
=-...c=:
[ZEEB
THERMOSTAT
-,,,
33ZCRLYBRD
@-
_,! []
i
-O..... ,o
Fig. 3 -- Typical Wiring Diagram -- 4-Pipe, 2-Relay Boards, Line Voltage Water Valves
REMOTESENSOR 33CSSEN-01
33CSSEN-WB
33CSSEN-DS
THERMOSTAT
ECC3
EZZZ]
IDRY CONTACT
24vac
24 Volt Water
Valves
33ZCRLYBRD
Fig. 4 -- Typical Wiring Diagram J4-Pipe, Low Voltage Valves,
Remote Temperature Sensor and Dry Contact
J
o
®
THERMOSTAT
'--E]323
l 24 Volt Water
Valve
'_.___
<_"- 'V'
@too
i
33ZCRLYBRD
Fig. 5 -- Typical Wiring Diagram -- 2-Pipe, Low Voltage Valve, Heat Only or Cool Only
REMOTE SENSOR 33CSSEN-01
33CSSEN-WB
33CSSEN-DS
THERMOSTAT
i°
CH_OngeoverSensor
33CSWCO-FC
24 Volt Water
Valve
33ZCRLYBRD
Fig. 6 -- Typical Wiring Diagram -- 2-Pipe, Low Voltage Valve, Water Changeover Sensor
f czc3
f®
i®
0 ®
® _
®
_ J
THERMOSTAT
24 Volt Cold
Water Valve
24 Volt Relay
to Control Strip Heater
33ZCRLYBRD
Fig. 7 -- Typical Wiring Diagram -- 2-Pipe, Low Voltage Valve, Chilled Water with Electric Strip Heat
Table3-- Advanced Setup Configuration
STEP DESCRIPTION RANGE DEFAULT
1 Time of Day (Clock) 24 Hour 12:00 AM
2 Day of Week Su - Sa Mo
3Display Blanking OFF/ON ON
4 Single/Dual Set Point 1, 2 2
5 2 or 4 Pipe System 2, 4 4
6 2-Pipe System 1-5 3
Operation
7 Fan Operation OFF/ON ON
8 Deadband 1-6 degrees 2
Set Point Minimum
9 Temperature Difference 0 - 6 degrees 2
10 Therm°gl°wmM OFF/ON OFF
Backlight
11 Temperature Units F/C F
12 Remote Sensor Setup YES/NO YES
13 Override Time Duration 0-6 hours 2 hours
14 Dry Contact Switch NO/NC NO
15 Dry Contact Switch Occupied,
Operation Unoccupied Occupied
Dry Contact Switch Off, Set Points Set Points
16 Unoccupied Operation
Install Accessories--The Add-A-Wire TM accessory 5.
can be used with this thermostat. The remote temperature
sensor (33CSSEN-WB), outdoor-rated temperature sensor
(33CSSEN-01), and the duct sensor (33CSSEN-DS) can be
used with this thennostat.
Refer to tile individual accessory installation instructions for 6.
more information.
Program Thermostat Schedules -- Before program-
ming the thermostat, plan the thennostat daily schedule. The
schedule is divided into 7 days (Monday through Sun&y). 7.
Each day has from 2 to 4 time periods (Occupied 1, Occupied
2, Occupied 3, Unoccupied) depending on the configuration of
the thermostat. Each occupied time period has a stmt time, stop
time, heating set point, and cooling set point. The unoccupied 8.
time period has a heating set point and a cooling set point. The
unoccupied time period is active whenever an occupied time
period is not active. Fill in Table 4 as an aid to programming
tile &fily schedules. 9.
PROGRAMMING MODE--To program the daily sched-
ules, perform the following procedure:
1. Enter Programming mode by pressing and holding the
Mode and UP ARROW" buttons. The Occupied 1 annun- 10.
ciator will appear on the thermostat display. Use the
UP ARROW and DOWN ARROW buttons to set the
maximum number of Occupied periods for each day. The
fl_ermostat can be set to 1, 2, or 3. After the number of
Occupied periods has been selected, press the Mode but-
ton. See Fig. 8.
The cooling set point for Occupied 1 will be displayed.
Use file UP ARROW and DOWN ARROW buttons to
raise or lower the cooling set point until the desired tem-
perature is shown. The range of acceptable values is 35 to
99 F (2 to 36 C). Press file Mode button to continue. See
Fig. 8.
The heating set point for Occupied 1 will be displayed.
Use file UP ARROW and DOWN ARROW buttons to
raise or lower file heating set point until the desired tem-
perature is shown. The range of acceptable values is 35 to
99 F (2 to 36 C). Press file Mode button to continue. See
Fig. 8.
The cooling set point for Unoccupied will be displayed.
Use the UP ARROW and DOWN ARROW buttons to
raise or lower the cooling set point until the desired tem-
perature is shown. The range of acceptable values is 35 to
99 F (2 to 36 C) or "OF" no unoccupied cooling). To
configure the Unoccupied Cooling set point to OE press
file DOWN ARROW button until 35 F (2 C) is displayed.
Press the DOWN ARROW button again to display OE
Press the Mode button to continue.
The heating set point for Unoccupied will be displayed.
Use file UP ARROW and DOWN ARROW buttons to
raise or lower the heating set point until the desired tem-
perature is shown. The range of acceptable values is 35 to
99 F (2 to 36 C). Press the Mode button to continue.
The day of the week will be shown. Use the UP ARROW
and DOWN ARROW buttons to change the day of the
week until file desired starting day is shown. Possible
choices are Mo (Monday) through Su (Sun&ty). Press the
Mode button when file desired day is shown.
The Start Time for Occupied 1 will be displayed. Use the
UP ARROW and DOWN ARROW buttons to raise or
lower the time until the desired Start Time is shown. Press
file Mode button to continue. See Fig. 9.
The Stop Time for Occupied 1 will be displayed. Use the
UP ARROW and DOWN ARROW buttons to r;dse or
lower the time until the desired Stop Time is shown. Press
the Mode button to continue.
The ON/OFF icon will be displayed. Use the UP
ARROW to turn the Occupied 1 period ON for this day.
Use the DOWN ARROW to turn the Occupied 1 period
OFF for this &y.
Repeat Steps 2 through 9 to program the remaining
schedule for Occupied periods 2 and 3.
Table 4 -- Daily Schedule Planner
DAY SCHEDULE
OF THE Occupied 1 Occupied 2 Occupied 3 Unoccupied
WEEK Start /Stop /Heat /Cool Start /Stop /Heat /Cool Start /Stop /Heat /Cool Heat /Cool
Monday / / / / / / / / / /
Tuesday / / / / / / / / / /
Wednesday / / / / / / / / / /
Thursday / / / / / / / / / /
Friday / / / / / / / / / /
Saturday / / / / / / / / / /
Sunday / / / / / / / / / /
NOTE: The cooling temperature set point must be higher than the heating temperature set point. (The temperature difference may be changed in
the advanced set up configuration.)
II. The Copy command can be used to copy the previous
day's schedule if the schedules me the same. The copy
command becomes available after all the occupied
periods are programmed in a &ly. Use the UP ARROW
to change the copy command to YES. Use the DOWN
ARROW to change the copy command to NO. Press file
Mode button when the choice has been made. See Fig. 10.
If NO was selected, the schedule will automatically
change to the next &ty and the user must enter the
occupied and unoccupied schedules for that day.
NOTE: Occupied 1 schedule heating and cooling set
points are the same for each day. Occupied 2 and 3 set
points may be set to different values for each day of the
week.
If YES was selected, the schedule will be copied to the
next day. The schedule copy may be repeated until Sun-
day is reached. The Sunday schedule cannot be copied to
Monday.
12. After all the times and set points for each day have been
entered, press and hold the Mode and UP ARROW but-
tons to exit Programming mode.
NOTE: The thermostat will continue to follow the schedule
until a new one is entered.
If only one occupied schedule is selected, the Occupied 2
and 3 schedules are skipped. If the stml time is set later in the
day than the stop time, file program will mn from midnight of
that day to the stop time and then from the start time to
midnight. If the same stmt and stop times are programmed for
an occupancy schedule, file thermostat will be in Occupied
mode for 24 hours. If one occupied period starts or stops within
another occupied period, the lower numbebed schedule has
priority. For example, if schedule Occupied 3 is running for
24 hours and Occupied 2 schedule comes on from 1 to 3 PM,
the set points from Occupied 2 are in effect from 1 to 3 PM.
OVERRIDING THE SCHEDULE -- The norln¢fl time sched-
ule can be ovemdden by pressing and holding the FAN button
for 5 seconds during programmed, unoccupied periods. The
ovenide feature may only be used when the thermostat is run-
ning the time schedule in Program On mode. Pressing and hold-
ing the FAN button for 5 seconds will temporarily force the
thermostat into Occupied 1 comfort settings for 1 to 6 hours.
The Override icon will be illuminated during this time. Pressing
and holding the FAN button, while the thermostat is currently
overriding the daily schedule, will reset file timeb: The thermo-
stat will then return to file correct time period for the &ty.
Factory Defaults -- If the thermostat needs to be reset to
factory default settings, perform the following procedure:
1. Set thermostat mode to OFF.
2. Hold down the Mode button and press the DOWN
ARROW button simultaneously for 5 seconds. All of the
icons on the display screen will appem.
3. Press and hold the Fan button until Fd (factory defaults)
appears on the screen.
4. Press the Mode button twice to return to norm_d display.
NOTE: The occupied and unoccupied schedules will be reset.
The schedule will need to be be-entered.
Calibrate Sensor-- Every thermostat is factory-
calibrated. Under nomml circumstances there will never be a
need to re-c;dibrate the thermostat. If re-calibration must be
done, perform the following procedure:
1. Set thermostat mode to OFF.
2. Hold down the Mode and DOWN ARROW buttons for
5 seconds. All of file icons on the display screen will
appem: Release the buttons.
"3U
occupied 1 _
COOL
HEAT
Fig. 8 -- Setting Occupied 1 Set Points
7:00Am Start
MO occupied1
Fig. 9 -- Start Time Display
Fig. 10 -- Copy Command Display
3. Press the Mode button. The current temperature will be
displayed.
4. Use an accurate thermometer to measure room tempera-
ture. Press the UP or DOWN ARROW buttons until the
number equals room temperature.
5. Press the Mode button to return to normal operation.
Check Thermostat Operation
FOUR-PIPE OPERATION- To check thermostat opera-
tion with a 4-pipe system, perform the following procedure:
1. Turn on power to the fan coil unit.
2. Press the Mode button repeatedly until the Heat icon
appears on the display. The thermostat is now in Heating
mode.
3. Press the UP ARROW button until file heating set point is
10 F (6 C) higher than the current room temperature.
The hot water valve will open and the fan should be
energized.
4. Press file Fan button repeatedly until the Fan icon appears
with a single bar next to it.Confirm that the fan is running
at low speed. Press the Fan button again. Tile Fan icon
appears with two bal.s next to it. Confirm that the fan is
running at medium speed. Press the Fan button again.
The Fan icon appems with throe bars next to it. Confirm
that the fan is running at high speed. Press the Fan button
again. Tile bars next to file Fan icon should disappeac
5. Press the Mode button repeatedly until the Cool icon
appears on the display. The thermostat is now in Cooling
mode.
6. Press the DOWN ARROW button until the cooling set
point is 10 F (6 C) lower than the current room tempera-
ture. Tile cold water valve will open and the fan should be
energized.
7. Press the Mode button repeatedly until the OFF icon
appears. Both valves should be closed and the fan should
be off.
8. If heating, cooling, or fan do not operate properly, check
wiring and consult Table 5.
TWO-PIPE OPERATION WITH CHANGEOVER SEN-
SOR AND NO STRIP HEAT -- To check thermostat opera-
tion of a 2-pipe system with changeover sensok perform the
following procedure:
1. Turn on power to the fan coil unit.
2. Make sum the thermostat is correctly configured for use
in two-pipe applications. Advanced setup Step 5 should
be set to 2 (two-pipe applications). Advanced setup
Step 6 should be set to 3 (heat/cool changeover system
without electric heat).
3. Pless the Fan button repeatedly until the Fan icon appears
with a single bar next to it.Confirm that the fan is running
at low speed. Press the Fan button again. Tile Fan icon
appears with two bm.s next to it. Confirm that the fan is
running at medium speed. Press the Fan button again.
The Fan icon appems with throe bars next to it. Confirm
that the fan is running at high speed. Press the Fan button
again. Tile bras next to the Fan icon should disappear
When no bars am shown, the fan will mn in AUTO
mode. The fan speed will automatic_dly change based on
load requirements.
4. If hot water heat is available, press the Mode button
repeatedly until the Heat icon appems on the display. The
thermostat is now in Heating mode.
5. Press the UP ARROW button until the heating set point is
10 F (6 C) higher than the current room temperature.
The hot water valve will open and the fan should be
energized.
6. If cold water cooling is available, press the Mode button
repeatedly until the Cool icon appears on the display. The
thermostat is now in Cooling mode.
7. Pless the DOWN ARROW button until the cooling set
point is 10 F (6 C) lower than the current room tempera-
ture. Tile cold water valve will open and the fan should be
energized.
8. Press the Mode button repeatedly until the OFF icon
appears. Both valves should be closed and the fan should
be off.
9. If heating, cooling, or fan do not operate properly, check
wiring and consult Table 5.
TWO-PIPE OPERATION WITHOUT CHANGEOVER
SENSOR--To check thermostat operation with a 2-pipe
system without changeover sensor, perform the following
procedure:
1. Turn on power to the fan coil unit.
2. Make sure the themlostat is conectly configured for use
in two-pipe applications. Advanced Setup Step 5 should
be set to 2 (two-pipe applications). Advanced setup
Step 6 should be set to 1 (heat only), 2 (cool only), or 5
(cooling with strip heat).
3. Press the Fan button repeatedly until the Fan icon appems
with a single bar next to it.Confirm that the fan is running
at low speed. Press the Fan button again. The Fan icon
appears with two bars next to it. Confirm that the fan is
running at medium speed. Press the Fan button again.
Tile Fan icon appears with three bm.snext to it. Confirm
flintthe fan is running at high speed. Press the Fan button
again. The bars next to the Fan icon should disappem:
When no bras are shown, the fan will mn in AUTO
mode. The fan speed will automatically change based on
load requirements.
4. If heating is available, press the Mode button repeatedly
until the Heat icon appears on the display. The thermostat
is now in Heating mode. Press the UP ARROW" button
until file heating set point is 10 F (6 C) higher than the
cunent room temperature.Heating will energize (the hot
water v_dvewill open or the strip heat will energize) and
the fan will run.
5. ff cooling only or cooling only with strip heat system,
press the Mode button repeatedly until the Cool icon
appears on the display. The fllerlnostat is now in Cooling
mode. Press the DOWN ARROW button until the cool-
ing set point is 10 F (6 C) lower than the current room
temperature. The cold water valve will open and the fan
will run.
6. Press the Mode button repeatedly until the OFF icon
appears. All v;dves should closed and the strip heater and
fan should be off.
7. ff heating, cooling, or fan do not operate properly, check
wiring and consult Table 5.
TWO-PIPE OPERATION WITH CHANGEOVER SEN-
SOR AND STRIP HEAT-- To check themlostat operation
of a 2-pipe system with changeover sensor and strip heat, per-
form the following procedure:
1. Turn on power to the fan coil unit.
2. Make sure the thermostat is correctly configured for use
in two-pipe applications. Advanced setup Step 5 should
be set to 2 (two-pipe applications). Advanced setup
Step 6 should be set to 4 (heat!cool changeover system
with electric heat).
3. Press the Fan button repeatedly until the Fan icon appems
with a single bar next to it. Confirm that the fan is running
at low speed. Press the Fan button again. The Fan icon
appears with two bars next to it. Confirm that the fan is
running at medium speed. Press the Fan button again.
Tile Fan icon appears with throe bm.s next to it. Confirm
that the fan is running at high speed. Press the Fan button
again. The bras next to the Fan icon should disappear
4. If hot water heat is available, press the Mode button
repeatedly until the Heat icon appems on the display. The
thermostat is now in Heating mode.
NOTE: The strip electric heat and cooling will be locked
out if hot water heat is avgdlable.
5. Press the UP ARROW button until the heating set point is
10 F (6 C) higher than the current room temperature. The
hot water valve will open or the strip heat will energize
and the fan should be energized.
6. If cold water cooling is available, press the Mode button
repeatedly until the Cool icon appems on the display. The
fllermostat is now in Cooling mode.
7. Press the DOWN ARROW button until the cooling
set point is 10 F ((7 C) lower than the current room
temperature. The cold water valve will open and the fan
should be energized.
8. PresstheUPARROWbuttonuntiltheheatingsetpointis
10F (6C) higher than the current room temperature.
Electric strip heating will be available if cold water is
sensed by file changeover sensor. The strip heater will
energize and the fan will run.
9. Press the Mode button repeatedly until the OFF icon ap-
pears. Both v_dves should be closed and the strip heat and
fan should be off.
10. If heating, cooling, or fan do not operate properly, check
wiring and consult Table 5.
Final Checklist
I. Put away tools and instruments. Clean up debris and
packaging.
2. Review Owner's Guide with occupant or ownel:
3. Leave the manuals with owner.
OPERATION
Select Desired Temperature -- The UP and DOWN
ARROW buttons are used to adjust the heating and cooling set
points. Pressing the UP and DOWN ARROW buttons in Auto
mode will adjust both the heating and cooling set points. Press-
ing the UP and DOWN ARROW buttons in either Heat or
Cool mode will adjust only the heating or cooling set point.
NOTE: If the Single Set Point mode is configured, there will
be only one set point for both heating and cooling.
Four-Pipe Operation -- _e Mode button selects the
operating mode of the thermostat. If OFF is selected, the
thermostat will not enter Heating or Cooling mode. If HEAT is
selected, the thermostat will only enter Heating mode (if the
room temperature is below the heating set point). If COOL is
selected, the themlostat will only enter Cooling mode (if the
room temperature is above the cooling set point). If AUTO is
selected, the thermostat will enter Heating or Cooling mode
based on the room temperature and the heating and cooling set
points. If Program On is selected, the thermostat will follow the
Occupied schedule.
Two-Pipe Operation
HEAT ONLY- When the themlostat is configured for Heat
Only operation, only Heat, Program On and Off modes can be
selected.
COOL ONLY -- When the thermostat is configured for Cool
Only operation, only Cool, Progrmn On and Off modes can be
selected.
HEAT/COOL WITH CHANGEOVER SENSOR -- When
the thermostat is configured for operation with a changeover
sensok all modes _u'e available for operation. If the water
temperature is changed during the year. the thermostat will
automatically lock out the incorrect mode. Heat or Cool modes
may not be available, depending on water temperature.
TOTAL OR AUXILIARY ELECTRIC HEAT -- The Mode
button selects the operating mode of the thermostat. If OFF is
selected, the thermostat will not enter Heating or Cooling
mode.
If HEAT is selected, the thermostat will only enter Heating
mode (if room temperature is below the heating set point). For
total electric heat, a c;dl for heat will activate the electric heatel:
For auxilimy electric heat, a call for heat will either activate the
electric heater (if chilled water is in the coil), or open the coil
v;dve (if hot water is in the coil).
If COOL is selected, the thermostat will only enter Cooling
mode (if room temperature is above the cooling set point and
chilled water is in the coil).
If AUTO is selected, the thermostat will enter Heating or
Cooling mode based on the room temperature and the heating
and cooling set points.
Fan Operation --The Fan button is used to select fan
operation. When only the Fan icon is shown, the fan is in "Au-
to" mode and will mn continuously (unless thermostat mode is
set to OFF or thermostat is in unoccupied mode and heating or
cooling are not active). The thermostat will increase or de-
crease the fan speed based on temperature demand.
Fan operation can _flso be set to always mn at Low. Medi-
um, or High speeds. To set fan operation at Ix)w speed, press
the Fan button until one bar is shown next to the Fan icon. The
fan will run continuously at Ix)w speed (unless thermostat
mode is set to OFF or thermostat is in unoccupied mode and
heating or cooling are not active).
To set fan operation at Medium speed, press the Fan button
until two bars ;u'e shown next to the Fan icon. The fan will mn
continuously at Medium speed (unless thermostat mode is set
to OFF or thermostat is in unoccupied mode and heating or
cooling are not active).
To set fan operation at High speed, press the Fan button
until three bars are shown next to the Fan icon. The fan will mn
continuously at High speed (unless thermostat mode is set to
OFF or thermostat is in unoccupied mode and heating or cool-
ing are not active).
Keypad Lock -- To prevent unauthorized use of the ther-
mostat, the front panel buttons can be disabled. To disable or
lock the keypad, press and hold the Mode button. While
holding down the Mode button, press the UP and DOWN
ARROW buttons simultaneously. The "Locked" icon will ap-
peru on the display.
The thermostat is unlocked by performing the same proce-
dure. Press and hold the Mode button. While holding down the
Mode button, press the UP and DOWN ARROW buttons
simultaneously. The "Locked" icon will be removed from the
display.
Clock Backup --In the event of a power loss, the ther-
mostat internal clock will continue to keep proper time for a
minimum of 48 hours without external power or batteries.
Minimum Heat/Cool Temperature Difference --
The heating and cooling set points will not be allowed to be set
any closer to each other than the value set in Advanced setup
Step 9. The minimum temperature difference is enforced dur-
ing Auto mode and Program On operation.
Single Set Point Operation -- When the thermostat
is configured for single set point operation, the display on the
thermostat will change. Instead of displaying cunent room
temperature, the large number shown will be the user set point.
This set point is used for both heating and cooling.
To prevent short cycling in single set point mode, it is
recommended that the deadband be set to a minimum of 2.
Press and hold the Mode button for 2 seconds to display
the room temperature. Press any button to return to the normal
display.
Dual Set Point Operation -- When the thermostat is
configured for du;d set point operation, there ;ue sep;uate heat
and cool set points. The adjustable set point range is 35 to 99 F
(2 to 36 C). When the thermostat is in Heat or Cool mode, the
set points can be adjusted to any temperature within the operat-
ing range.
When the thermostat is in Auto mode, the thermostat will
not allow the Cool set point to be lower than the Heat set point.
The thermostat will also use the programmed Deadband value
(Advanced Setup Step 8) to deterraine the minimum difference
between the Heat and Cool set points. If the Deadband is set for
6 degrees, the Cool set point cannot be set within 6 F of the
Heat set point.
When entering Auto mode from Heat or Cool modes, the
Heat and Cool set points will remain spread apart by the same
amount when the set points are adjusted. For example, if the
10
Cool set point is 80 F (adjusted in Cool mode) and file Heat set
point is 70 F (adjusted in Heat mode), when entering Auto
mode, both set points would be adjusted by the same mnount
when the UP and DOWN ARROW buttons ale pressed.
Therefore, if the DOWN ARROW was pressed 5 times, the
Cool set point would be 75 F and the Heat set point would be
65 E To adjust the set points individu_dly, enter the Heat or
Cool modes first.
Outside Air Temperature Sensor- Press and hold
the Fan button for 2 seconds to dispkiy outside temperature
(if optional outdoor sensor is wiled to thermostat). Press tiny
button to return to normal operation.
Locking Cover--A locking cover with tmnper-proof
screws is provided with the themiostat. The locking cover can be
used to keep the thermostat set points and configurations from
being changed. A speci;d tool is required to remove the covel:
Dry Contact Switch/External Control -- A dry
contact switch is provided to allow tin external device to force
the thermostat into Occupied 1, Unoccupied, or shut down the
fan coil unit. If the thermostat is forced into Unoccupied set
points via the @ contact closure, the Occupied 1 via file d q
contact closure, the Occupied 1 icon will blink each second.
The external device is wired to contacts CKI and R.
NOTE: More flian one thermostat is not required. All thermo-
stats wired to the external device will enter Occupied 1 and
Unoccupied modes at the same time.
TROUBLESHOOTING
Table 5 -- Troubleshooting
PROBLEM
The fan always runs in Low speed, even with no temperature
demand.
The fan will not run in all three speeds or switches speeds in
improper order.
Cold water valve opens for both a cool or heat demand in a
4-pipe system.
Valve does not open in 2-pipe system.
Thermostat display only shows clock.
Thermostat displays large set point instead of room
temperature.
The thermostat flashes "Occupied 1" when in Program
Mode.
The thermostat will only allow Heat or Off modes in 2-pipe
installations, even though chilled water is available.
SOLUTION
This is normal operation of the thermostat. If the fan needs to be shut off,
switch mode to Off. The fan will also not run in the unoccupied mode when
there is no call for heating or cooling.
Wiring between the thermostat and the relay board or between the relay board
and the fan is incorrect. Check the wiring for proper connection.
Check the configuration of Advanced Setup Step 5. Configuration should be
set for 4-pipe system.
Wiring or configuration is incorrect. Check the configuration of Advanced
Setup Step 5. Configuration should be set for 2-pipe system. Make sure water
valve is wired to the Y1 terminal.
This is configured in Advanced Setup Step 3. Change Display Blanking config-
uration to Off.
This is the normal display when the thermostat is set to single set point instead
of dual set point (Advanced Setup Step 4).
The sensor connected to the dry contact switch of the thermostat is active,
forcing the thermostat into Occupied mode. If no sensor is connected, set the
Advanced Setup Step 14 configuration to NO (normally open).
Changeover sensor is faulty, improperly wired or improperly installed. Confirm
proper wiring of the changeover sensor. Confirm proper placement of the sen-
sor. If wiring and placement are proper, check the changeover sensor with an
ohmmeter as follows:
1. Remove power from the fan coil system.
2. Disconnect wiring between the sensor and the thermostat.
3. Place an ohmmeter between R and the wire just disconnected from the
thermostat.
4. The sensor should show continuity whenever the water temperature is con-
firmed to be at or below 65 R If the sensor is open when the water temper-
ature is at or below 65 F, replace the sensor.
11
Copyright 2004 Carrier Corporation
Manufacturer reserves the right to discontinue, or change at any time, specifications or designs without notice and without incurring obligations.
Book 1 14 PC 111 Catalog No. 533-30020 Printed in U.S.A. Form 33CS-56SI Pg 12 3-06A 11-04 Replaces: 33CS-52SI
Tab 11a 13a
m

Other manuals for 33CS

18

Other Carrier Thermostat manuals

Carrier 33CS Instructions and recipes

Carrier

Carrier 33CS Instructions and recipes

Carrier TB-NAC User manual

Carrier

Carrier TB-NAC User manual

Carrier 50QE900-511WS User manual

Carrier

Carrier 50QE900-511WS User manual

Carrier EDGE PRO 33CS2PPRH-01 User manual

Carrier

Carrier EDGE PRO 33CS2PPRH-01 User manual

Carrier ComfortVu TBPL-24-H Operating instructions

Carrier

Carrier ComfortVu TBPL-24-H Operating instructions

Carrier Cool Share Web-Programmable Thermostat User manual

Carrier

Carrier Cool Share Web-Programmable Thermostat User manual

Carrier 33CS400-01 User manual

Carrier

Carrier 33CS400-01 User manual

Carrier KSACN1001AAA User manual

Carrier

Carrier KSACN1001AAA User manual

Carrier Infinity SYSTXCCITW01 User manual

Carrier

Carrier Infinity SYSTXCCITW01 User manual

Carrier 33CS User manual

Carrier

Carrier 33CS User manual

Carrier Aquazone 50QE900 User manual

Carrier

Carrier Aquazone 50QE900 User manual

Carrier TOTALINE GOLD P274-0150 User manual

Carrier

Carrier TOTALINE GOLD P274-0150 User manual

Carrier AC Instructions and recipes

Carrier

Carrier AC Instructions and recipes

Carrier Performance EDGE User manual

Carrier

Carrier Performance EDGE User manual

Carrier 33CS400-01 User manual

Carrier

Carrier 33CS400-01 User manual

Carrier Infinity Control Home User manual

Carrier

Carrier Infinity Control Home User manual

Carrier MODULINE 37HS Datasheet

Carrier

Carrier MODULINE 37HS Datasheet

Carrier Aquazone 50QE900-NPWS User manual

Carrier

Carrier Aquazone 50QE900-NPWS User manual

Carrier SYSTXCCITW01-A Infinity Installation instructions

Carrier

Carrier SYSTXCCITW01-A Infinity Installation instructions

Carrier A94134 Instructions and recipes

Carrier

Carrier A94134 Instructions and recipes

Carrier 33CS Instructions and recipes

Carrier

Carrier 33CS Instructions and recipes

Carrier TB-PAC User manual

Carrier

Carrier TB-PAC User manual

Carrier ComfortVu TB-24-HM Operating instructions

Carrier

Carrier ComfortVu TB-24-HM Operating instructions

Carrier Programmable Dual Fuel Thermostats Instructions and recipes

Carrier

Carrier Programmable Dual Fuel Thermostats Instructions and recipes

Popular Thermostat manuals by other brands

Tekmar tekmarNet 552 Quick setup guide

Tekmar

Tekmar tekmarNet 552 Quick setup guide

Beok Controls TGR-85 user guide

Beok Controls

Beok Controls TGR-85 user guide

XCI TSH-2 TrueTouch instruction manual

XCI

XCI TSH-2 TrueTouch instruction manual

DeDietrich AD 221 manual

DeDietrich

DeDietrich AD 221 manual

Honeywell TC500A Integration guide

Honeywell

Honeywell TC500A Integration guide

Theben RAMSES 850 top2 OT Installation and operating instructions

Theben

Theben RAMSES 850 top2 OT Installation and operating instructions

Ventair Ultecon UT-M1 installation instructions

Ventair

Ventair Ultecon UT-M1 installation instructions

Siemens RDH100 user manual

Siemens

Siemens RDH100 user manual

KPS CONFORTLINE TERMODIGI user manual

KPS

KPS CONFORTLINE TERMODIGI user manual

Cetetherm Round manual

Cetetherm

Cetetherm Round manual

Hobby Biotherm eco Instructions for use

Hobby

Hobby Biotherm eco Instructions for use

Seitron wi-time quick guide

Seitron

Seitron wi-time quick guide

Hunter Set 'n Save I 42204 owner's manual

Hunter

Hunter Set 'n Save I 42204 owner's manual

Verano VER-24 s user manual

Verano

Verano VER-24 s user manual

Elko TEV-2 manual

Elko

Elko TEV-2 manual

Regulus TP18 LCD quick start guide

Regulus

Regulus TP18 LCD quick start guide

ClimateMaster ATC32U01 iGate user manual

ClimateMaster

ClimateMaster ATC32U01 iGate user manual

Hunter 44033-01 44272 owner's manual

Hunter

Hunter 44033-01 44272 owner's manual

manuals.online logo
manuals.online logoBrands
  • About & Mission
  • Contact us
  • Privacy Policy
  • Terms and Conditions

Copyright 2025 Manuals.Online. All Rights Reserved.