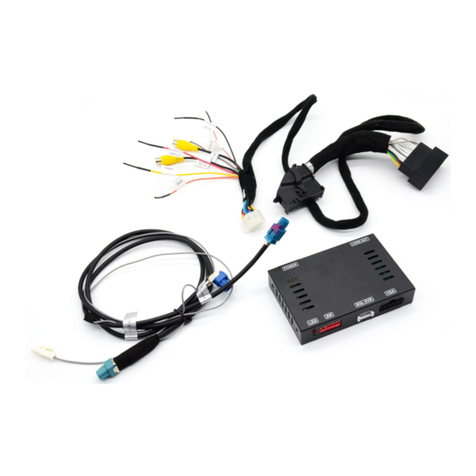
Cartizan VI-AD320C-B9 User manual

Instruction Manual
Wireless CarPlay/Android Auto Integration
for Audi MIB/MIB II system
Model No.
VI-AD320C-B9
MCU Ver.
19.1.11.12
SW Ver.
V2.0.1.4.lzy
Manual Ver.
1.0
Date
May 17. 2019

Total Solution for Car Audio & Video Interface
2 / 17
Cartizan Technology | www.icartizan.com
Content:
Warning
Compatibility
Features
Package Components
Connection Diagram
How to connect an external MIC (optional)
DIP Setting
Operation Instruction
How to switch from original to add-on interface
Add on module UI
How to connect/disconnect wireless Apple CarPlay
CarPlay operation
Android Auto operation
Other settings
3
5
6
7
8
9
10
11
11
12
13
14
15
16

Total Solution for Car Audio & Video Interface
3 / 17
Cartizan Technology | www.icartizan.com
△
!Warning:
In order to protect the driving safety and avoid break the traffic law; please DO NOT operate the interface while driving.
The reversing surveillance function just is used in reversing assistance. Please check the entire surroundings while reversing.
All steps of installation should be done by the well-trained specialist.
During installation, the ignition key should be taken off and after all installation finished, connect power cable last.
Please DO NOT plug or pull the connected cables in the state of power-on, in order to avoid damaged monitor or accessory.
Install wiring in a manner in which cables will not come in contact with metal parts. The wiring may be damaged by contact with
metal parts, resulting in fire and shocks. Avoid all contact with hot surfaces when wiring the main unit. High temperatures may
damage wiring, causing shorts, arcing and fires.
Please DO NOT put the product in the damp environment or water, in order to avoid electric shock,damaged and fire accident
caused by a short circuit.
Kindly check all components are in the box when receiving the product. If anything missing, inform to the supplier/manufacturer.
Start the engine before loading, check the interface whether have function displayed, key control whether correct, the vehicle
Total Solution for Car Audio & Video Interface
4 / 17
Cartizan Technology | www.icartizan.com
interface whether having a scratch. Please give the feedback to the supplier/manufacturer if there have any questions.
Please note that put the disassembled automotive components in a good way on the installation process, avoid scratching the
instrument panel, the leftovers of connecting cables need to handle and DO NOT leave it in the car. The connecting plug must be
insulated in order to short circuit.
The cables should be connected in a good way; the vehicle installation space is a little small, so reduce space usage as far as
possible. There should be a good plan about connect cables, avoid affecting the active component of connecting, such as control
components of turning the steering wheel, throttle and brake pedal. There need to be fastened after connecting cables in case of a
drop.

Total Solution for Car Audio & Video Interface
5 / 17
Cartizan Technology | www.icartizan.com
Compatibility:
Brands
Model
Years
Original System
Audi
A3
2013-
Select vehicles with MIB/MIB2 STD,
5.8 / 7 inch monitor
4 Pin LVDS connector
A4/S4
2016-
A5/S5
2016-
Q5
2018-
Q7
2016-2018
NOTE! This interface does NOT fit vehicles with 8.3 inch factory screen.

Total Solution for Car Audio & Video Interface
6 / 17
Cartizan Technology | www.icartizan.com
Features:
Support wireless & wired Apple CarPlay, wireless & wired Android Auto, AirPlay mirroring
USB HD video and lossless music playback (APE, WAV, FLAC, MP3, WMA, etc.)
Offer 2 CVBS video input (front & rear view camera)
Support PDC (Parking Distance Control) and FPG (Flexible Parking Guidelines)
Display front view automatically after shifting from R gear, also support setting the duration
Integrated DSP module offers high quality audio effect
Operate by OEM knob controller & steering wheel buttons
Support OEM microphone
Further software update via USB port
Wireless/
wired
CarPlay
Wireless/wired
Android Auto
AirPlay
Mirroring
USB media
playback
F/R view
cameras
FPG
PDC
Further SW.
update

Total Solution for Car Audio & Video Interface
7 / 17
Cartizan Technology | www.icartizan.com
Package Components:
Main Unit
Dimension: 130*105*30 mm
Quadlock Main Power Cable
4 pin LVDS Cable
USB & CVBS Cable
Optional Component:
External Microphone
(Needed when a car without
OEM MIC)
WiFi & BT Antenna

Total Solution for Car Audio & Video Interface
8 / 17
Cartizan Technology | www.icartizan.com
Connection Diagram
POWER/CAN
LVDS
USB/CVBS
ANT
OEM
Screen
OEM
Head Unit
Provided
4pin LVDS
Cable
Provided female LVDS connects to
OEM male LVDS cable from screen
OEM
Quadlock
Connector
USB female
Connector
Connect to head unit
Quadlock Main Power Cable
DIP SW
WiFi & BT antenna
Rear camera in
Front camera/DVR video in
Camera Power. Supply 12V power for backup camera
GND
Reverse Detect. Connect to reverse light if CAMERA_POWER
cable does not output 12V

Total Solution for Car Audio & Video Interface
9 / 17
Cartizan Technology | www.icartizan.com
How to connect an external MIC (optional):
MIC+
MIC-
MIC+
MIC-
OEM quadlock connector
DONE
Connect the external microphone to pinout MIC+
and MIC- of OEM quadlock connector.
NOTE! Ignore this page if your car integrates original
microphone.

Total Solution for Car Audio & Video Interface
10 / 17
Cartizan Technology | www.icartizan.com
DIP Setting:
DIP
Selection of car model Model
DIP
ON
OFF
1 2 3 4 5 6
7
Car without “PARK”
button
Car with “PARK”
button
ON
ON
OFF
OFF
ON
ON
2013-2016 A3 (5.8 inch)
AD320C-B9
8
External microphone
OEM microphone
ON
ON
OFF
ON
ON
OFF
2017- A3 (5.8 inch)
ON
ON
ON
OFF
OFF
ON
2013-2016 A3 (7 inch)
ON
ON
ON
OFF
OFF
OFF
2017- A3 (7 inch)
ON
ON
OFF
ON
OFF
OFF
2016- A4/S4/A5/S5 (7 inch);
2018- Q5 (7 inch)
ON
ON
ON
OFF
ON
ON
2016-2018 Q7 (7 inch)
OFF
OFF
OFF
OFF
OFF
OFF
2013-2017 Q5 (MMI);
2012-2015 A4/A5/A6/A7 (MMI)
AD320C-Q5U;
(AD320C-A6 for
2012-15 A6/A7)
OFF
OFF
OFF
ON
ON
ON
2010-2012 Q5 (MMI);
2010-2011 A4/A5 (MMI)
OFF
OFF
ON
ON
OFF
ON
2010-2011 A6 (C6)
AD320C-Q7
OFF
OFF
OFF
OFF
ON
OFF
2010-2015 Q7
OFF
OFF
ON
ON
ON
ON
2016-2018 A6/A7
AD320C-A7C
OFF
OFF
ON
ON
OFF
OFF
2014-2018 Q3
AD320C-Q3S
OFF
OFF
OFF
OFF
OFF
ON
A8
AD320C-A8
OFF
OFF
OFF
ON
OFF
ON
Without MMI: 2009-2015 A4/A5/Q5
AD320C-SYM
OFF
ON
ON
OFF
Factory test DIP setting (No.1~6):
OFF –OFF –ON –OFF –ON –OFF
NOTE! Please reboot the interface for effective after
changing any DIP setting.

Total Solution for Car Audio & Video Interface
11 / 17
Cartizan Technology | www.icartizan.com
Operation Instruction:
Long press “MEDIA”
Order: OEM - Add on - OEM
How to delivering
audio to OEM
radio
NOTE! Make sure switch to “AUX” mode on original car stereo for audio
transmission before using the CarPlay integration.
How to switch from Original to Add-on interface
Add on Module Interface
OEM UI
NOTE! If a car without
AUX jack but with AMI,
please plug in an AMI
cable to factory AMI port,
and do not connect
anything with another
side of the cable.

Total Solution for Car Audio & Video Interface
12 / 17
Cartizan Technology | www.icartizan.com
Add on module UI
○
9
○
8
○
7
○
6
○
5
○
4
○
3
○
2
○
10
○
11
○
1
○
1
Home of add on module UI
○
2
○
3
○
4
○
5
○
6
○
7
○
8
○
9
○
10
○
11
Display when a mobile phone has connected to integration’s
Bluetooth
CarPlay/Android Auto status bar. Display when iPhone/Android
phone has connected CarPlay/Android Auto
Wireless/Wired CarPlay and wireless Android Auto
Wired Android Auto
Wireless AirPlay mirroring for iPhone
USB cable screen mirroring for iPhone
USB multimedia (music & video) playback
Front view/DVR video in
Settings
Back to factory infotainment

Total Solution for Car Audio & Video Interface
13 / 17
Cartizan Technology | www.icartizan.com
How to connect wireless Apple CarPlay
Select
PHONELINK
and make sure
your iPhone
enables WiFi
& Bluetooth
and stay on BT
setting menu
Connect Mobile Device
Start Search
Select your
iPhone device
in the searched
list
Select iAP2 Profile, then tap
Pair & Allow on the pop-up
notification of iPhone
Wait for a few seconds, CarPlay
icon will appear on the upper left,
it means successfully.
Your iPhone Device

Total Solution for Car Audio & Video Interface
14 / 17
Cartizan Technology | www.icartizan.com
How to disconnect wireless Apple CarPlay
Connected CarPlay devices, you can disconnect CarPlay in the next menu:
select your device, and then tap it to disconnect CarPlay.
Bluetooth paired devices, you can find out all BT paired devices list here
Reset add on module
CarPlay Operation
Back to add on module
Long press 3S to activate
Siri

Total Solution for Car Audio & Video Interface
15 / 17
Cartizan Technology | www.icartizan.com
Android Auto Operation
Plug in Android
smartphone
with USB cable,
tap ANDROID
AUTO to start
A area
B area
○
1
○
2
○
3
○
1: Return
○
2
:Turn the dial to move menu-pointer; Click as
confirm; Long press 3S to activate Google Assistant
○
3
: Menu-pointer switch to A area; Long press to
bring up upper left menu
○
4: Menu-pointer switch to B area
○
4

Total Solution for Car Audio & Video Interface
16 / 17
Cartizan Technology | www.icartizan.com
Other settings
Display setting
Front image flip
horizontal
Right/Left driving
mode, also available
for CarPlay
Audio effect setting
Choose reversing
camera type
Automatic front view display
time, 0 means disable front view

Total Solution for Car Audio & Video Interface
17 / 17
Cartizan Technology | www.icartizan.com
Copyright © Cartizan. All rights reserved.
Table of contents
Other Cartizan Automobile Accessories manuals

Cartizan
Cartizan CHAMPION User manual

Cartizan
Cartizan PAS-FD-SYNC2 User manual

Cartizan
Cartizan VI-BM-CIC2 User manual

Cartizan
Cartizan VI-BM-81C3 User manual

Cartizan
Cartizan CarPlay User manual

Cartizan
Cartizan PAS-FD-951 User manual

Cartizan
Cartizan VI-BM-24C User manual

Cartizan
Cartizan VI-BM-24C2 User manual

Cartizan
Cartizan VI-FR-189C User manual
Popular Automobile Accessories manuals by other brands

Thule
Thule HangOn 9708 Instructions for use

AL-KO
AL-KO AKS 3004 Service information

Sony Ericsson
Sony Ericsson HCB-300 user manual

Metra Electronics
Metra Electronics 99-3103 installation instructions

ConWys AG
ConWys AG 21020503C Fitting instructions

Big Country
Big Country 372901 installation instructions