Contents
a
a
enn
3
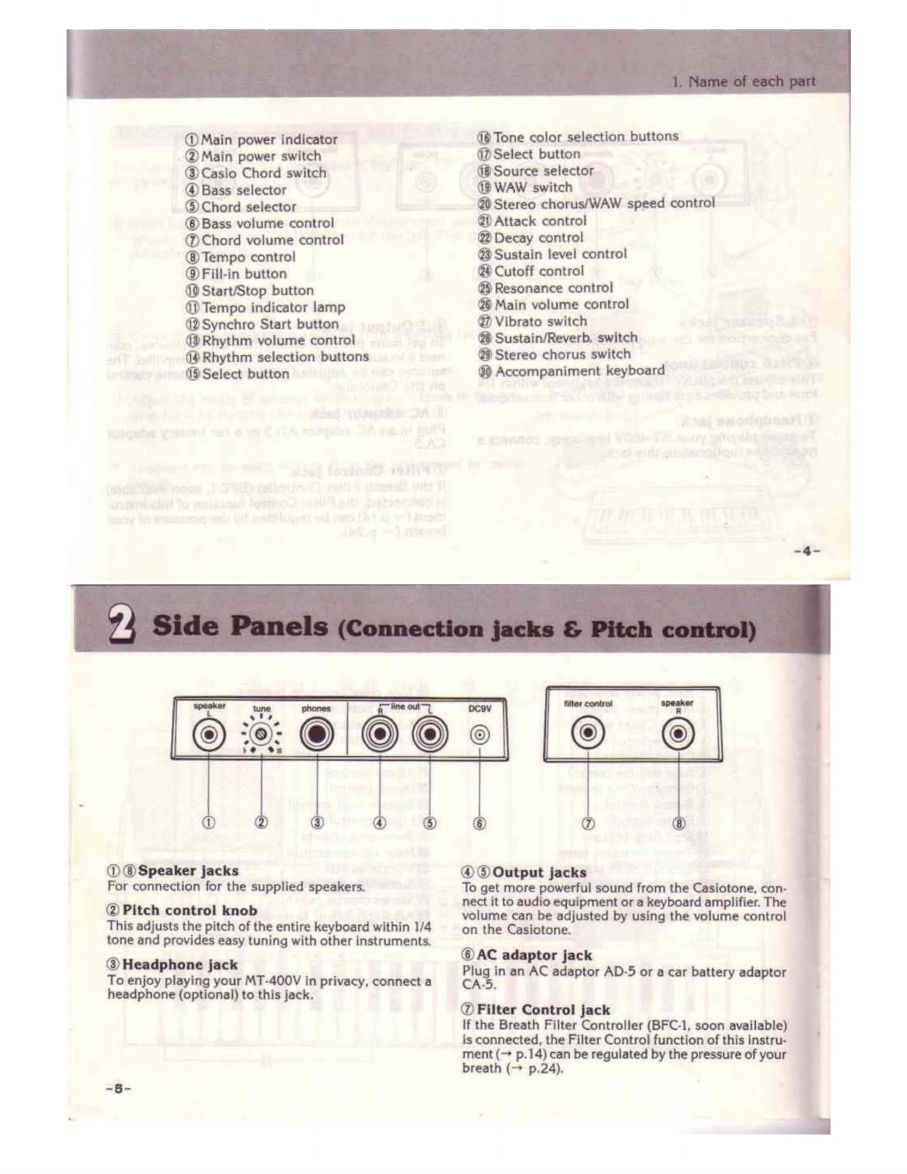
2.
Side
panels
(Connection
jacks
&
Pitch
COnMtrol)
........ccccccsssesceessseennensseeneesens
5
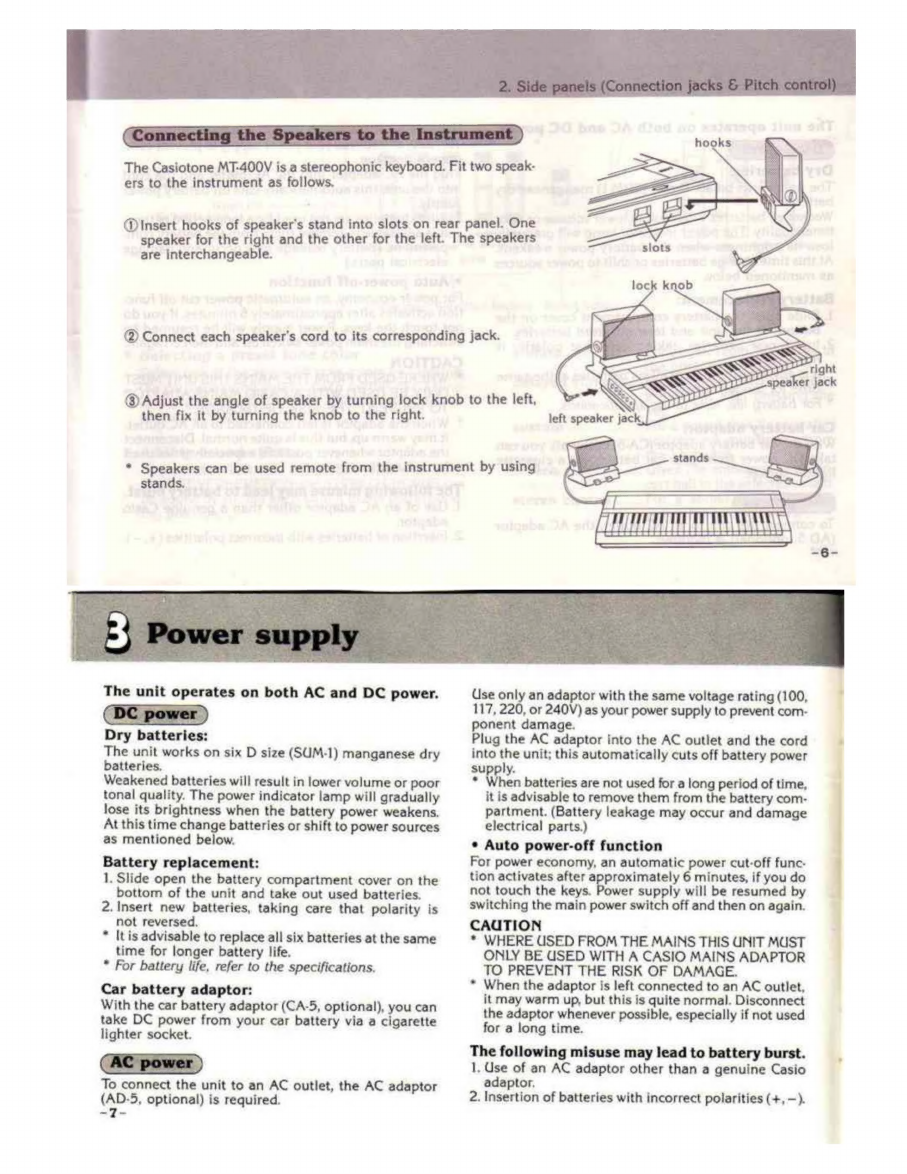
¢
Connecting
the
speakers
to
the
instrument
.............ccccccccceeseesseeeeeseeneeeeee
6
ev
SMUT
IMMUN.
csiisnnnsziemnnsanhnnidiiiiinenciticoneediilin
sien
salditibtbndtirsidinnnanenepanetinntoaitbnenmemnnnnuens
7
4.
Preset
tone
colors
&
sound
effects
......ccccscscececssnessecssesssessseessenseesseeseaseesesnens
8
ORIOLES
AUTEN
OIC
TTY
—
at
SRO
OSS
EE
TEES
TET
Tae
Ea
SIE
Rie
TE
9
©.
RAG
ROCOIDOTTOTE.
sossscvssassiesecsensnecsecessenncqsiexearccrasennesuisversesvenapenumrvexentasentee
1]
Ba
THe
Fier:
Garteel
Fiat
isissccccsasetiiiavssccsscnsdcecesssisccvensecnstatanessctvecnsiatessesees
14
©:
RCE
LCREONY
BS
Ce
FMGAT
CHEN
no
cennceszenqescccenssessenecscepspescosesypentennanencanane
14
©.
FUNGHONS:
OF
COC
SWIG
.
cercressescencscnascesrvancosncsinvstensossoeessassneoesssescunenestonsce
16
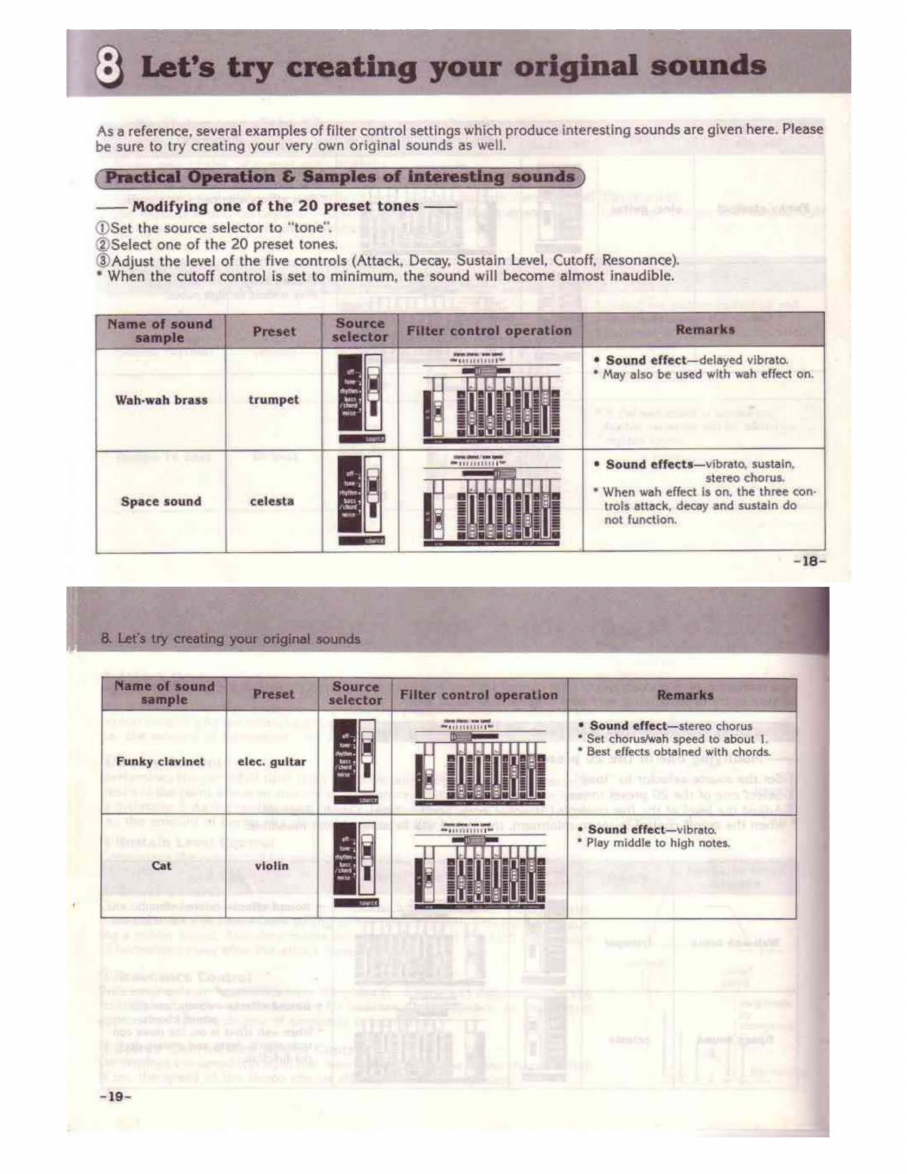
8.
Let's
try
creating
your
original
SOUMAS
...........cccccccesesscesscseeeeeeeeeeeseeeerersraneees
18
*
Practical
operation
&
Samples
of
interesting
SOUNAS
.........cccssesecserereesens
18
*
Filter
control
by
the
Breath
Filter
Controller
BFC-1.
(optional)
.......00.....
24
D5
Sr
I
-
PUDARE
RADU
assassin
cans
chdcansp
bop
ova
betnceba
eacccapacen
ch
denedidesbvavbaboend
25
TN
a
26
Es),
SOE
OMEI
OIG
is
cas
cc
csccicaciassciszi
ns
buen
stictenidiibiietat
ni
taeda
Rivneonta
tena
ieeeeeee
27
-2-
G
®
@QOidoi?
DD)
O©®@/]
®
®
Lees
12
&
{7
|
SS
BS
=
|
;
ooo
a
Si
es
oo
|
:
Se
ce
OS
a
ne
7
'
-
;
eS
=
=
=
.
in
Z—___L,|
[==e==
ne
|
WNL
4
—
SSSEEESEEEE
we
“
-
\.
eel
oe
—_
Te