ToreBan
C1
K-100
ELECTRONIC
MUSICAL
INSTRUMENT
Thank
you
and
congratulations
on
your
purchase
of
the
CASIO
CTK-100.
In
order
to
enjoy
the
features
and
functions
of
this
unit
to
their
fullest,
be
sure
to
carefully
read
this
manual
and
follow
the
instructions
contained
herein.
NOTICE
This
equipment
has
been
tested
and
found
to
comply
with
the
limits
fora
Class
B
digital
device,
pursuant
to
Part.15
of
the
FCC
Rules.
These
limits
are
designed
to
provide
reasonable
protection
against
harmful
interference
in
a
residential
installation.
This
equipment
generates,
uses
and
can
radiate
radio
frequency
energy
and,
if
not
installed
and
used
in
accordance
with
the
instructions,
may
cause
harmful
interference
to
radio
communications.
However,
there
is
no
guarantee
that
interference
will
not
occur
in
a
particular
installation.
If
this
equipment
does
cause
harmful
interference
to
radio
or
television
reception,
which
can
be
determined
by
turning
the
equipment
off
and
on,
the
user
is
encouraged
to
try
to
correct
the
interference
by
one
or
more
of
the
following
measures:
¢
Reorient
or
relocate
the
receiving
antenna.
¢
Increase
the
separation
between
the
equipment
and
receiver.
¢
Connect
the
equipment
into
an
outlet
on
a
circuit
different
from
that
to
which
the
receiver
is
connected.
*
Consult
the
dealer
or
an
experienced
radio/TV
technician
for
help.
FCC
WARNING
Changes
or
modifications
not
expressly
approved
by
the
party
responsible
for
compli-
ance
could
void
the
user’s
authority
to
operate
the
equipment.
COTO
OCATONS
sisssuccctanesoesouestedy
teastenaasceuuetonscuceabactepesepussckcutadavuoedecteiavedtesseusianet
4
Demonstration
TUNG
..........ccccccecscsssssscecssscescvscesecesecaessevsueesesatsastsaesecauesseens
5
Choosing
a
Power
Supply
.............:ccsssscsssssssscssssseessesceseesseceeecsesesseeescsaceseresssecens
6
Installing
the
batteries
..............cccccccscccsssssssscseescscescseanccececesesecsnsecsseueasessnsces
6
USING
AC
POWER
yi
cinstitarn
iiradvelssTavialsdahiceersesslnedeaueiesasedeienu
cavierhcre
Ti
Using
a
car’s
cigarette
lighter
........00...ccccccccccsssscsecesessstscccecesctsseceesecstaneneens
7
DOK
ATION
cacao
tae
cs
ec
cuvancicsscseaeeceaeeuanecet
camstencuchewie
ene
pccanssudenetieeeCusvescececosuatiaunent
8
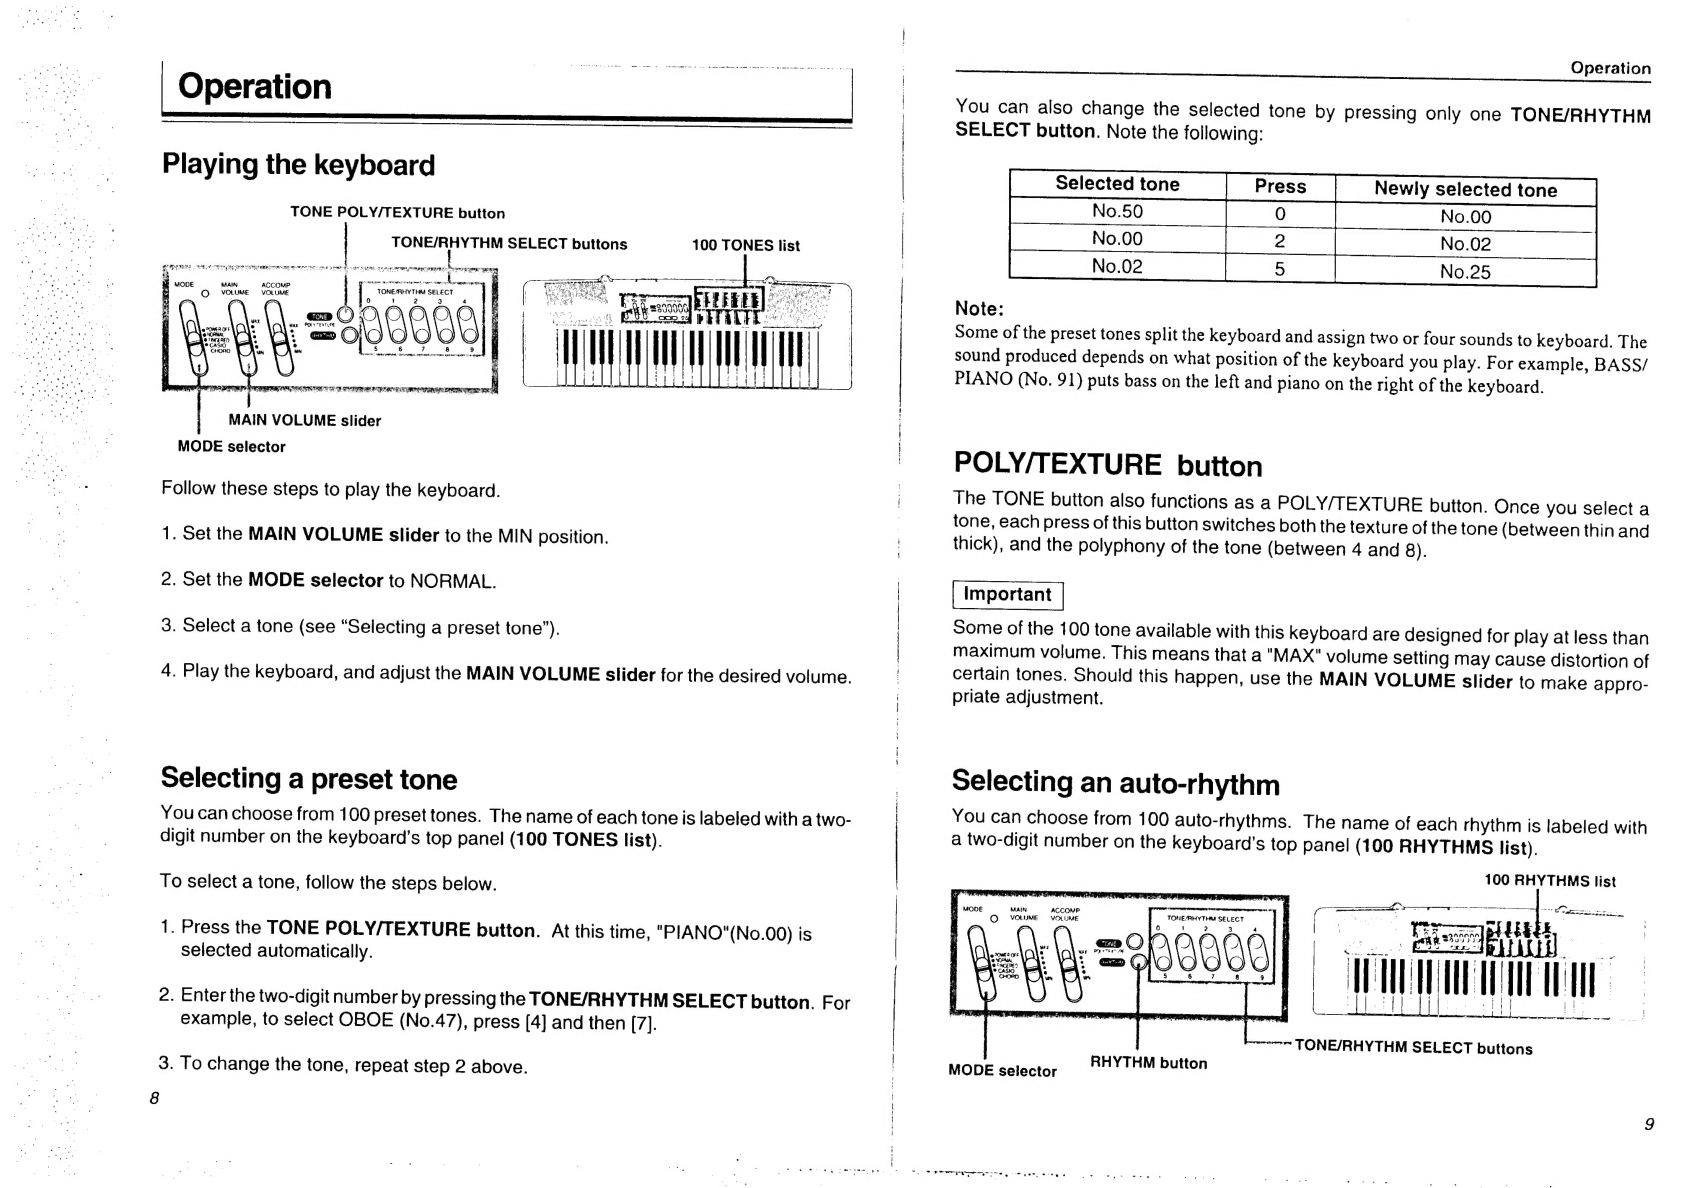
Playing
the
keyboard
.00...........cccccccsccsssssssssssccsssseccsscceccssccssensasstsesssvsccccuuencs
8
Selecting
a
preset
tone
.............
bese
eles
eae
toe
ea
ia
eat
naan
eadeweas
8
POLY
PEAT
URE
Ut
is
so
sect
st
tte
sa
poeta
ena
shedecnsaiasip
donaceesaldncindee
eeavasdeletidl
ata
9
Selecting
an
AuUtO-rHythM
.00.....
eee
cccccsssceccessssscccesseeesececeesettaseescensaaeeeens
9
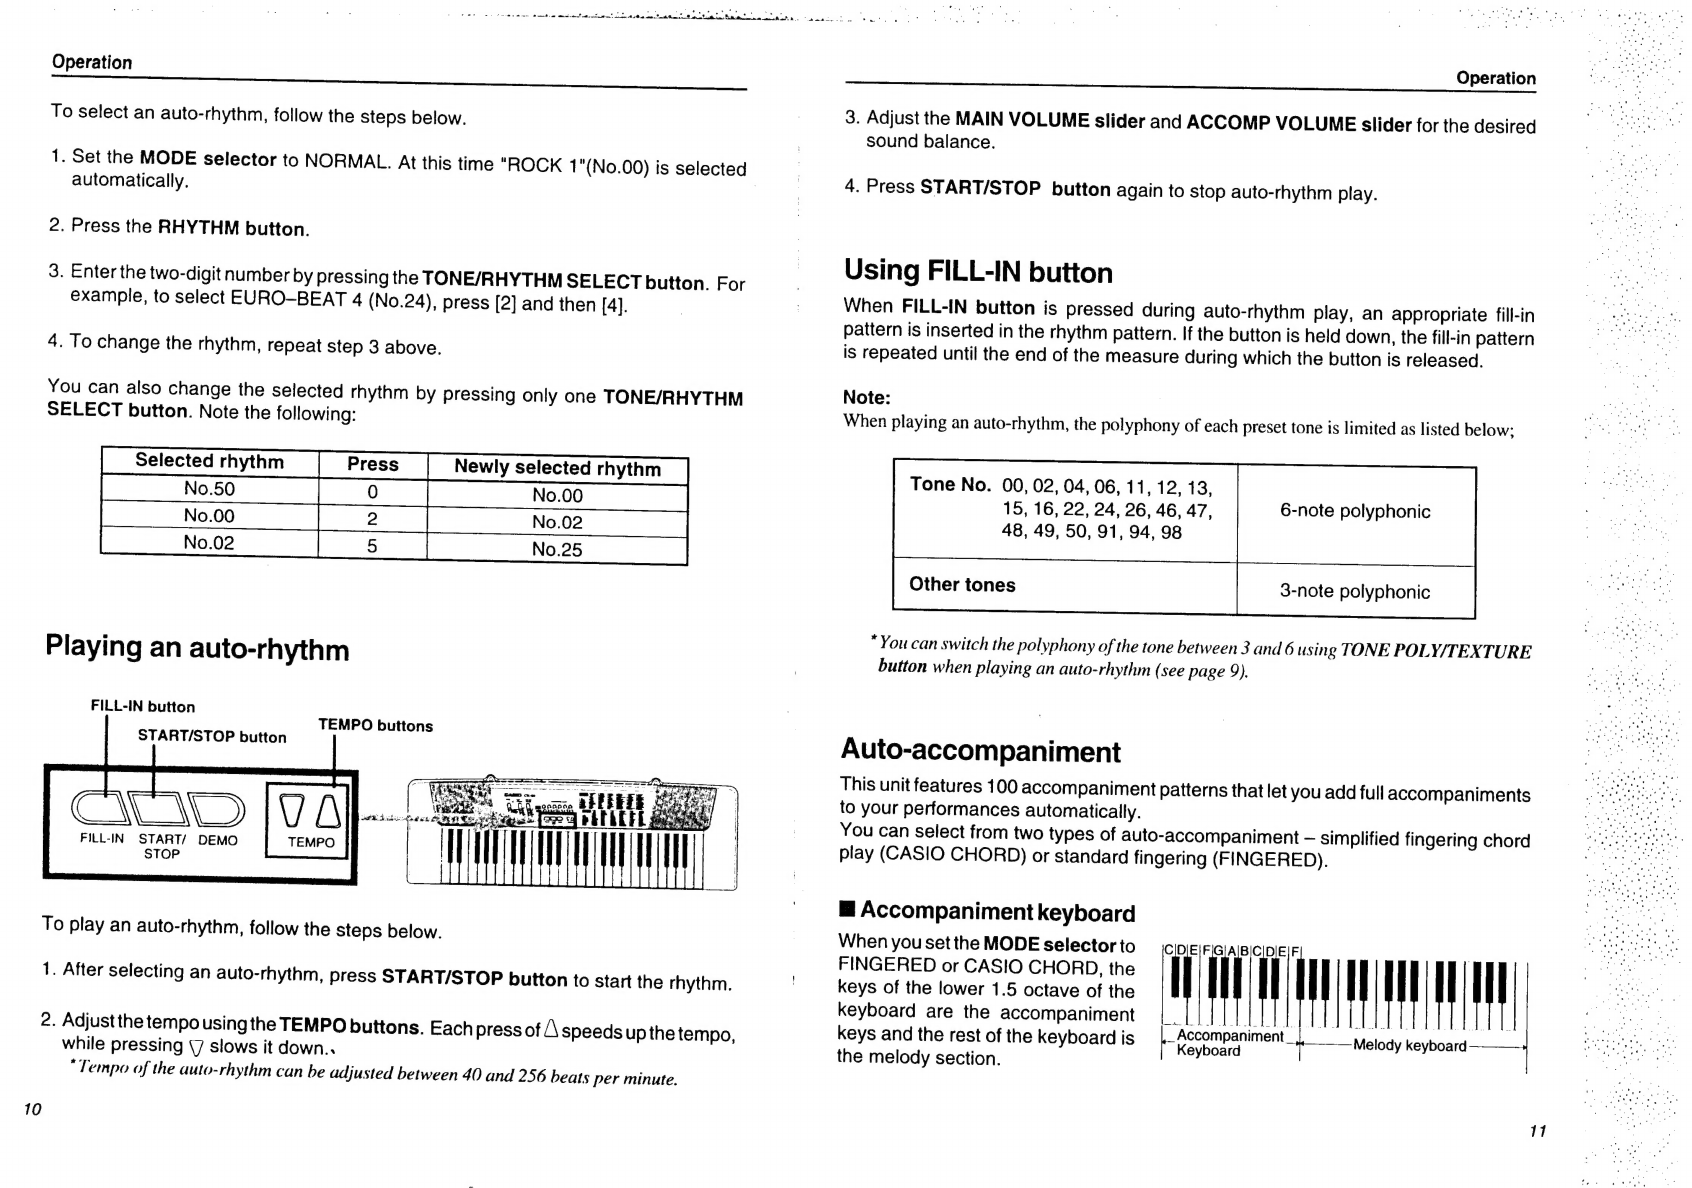
Playing
AN
AUtO-rNYth
............:ccccsccssssssscssscsseccesessssscnseccesesseseescsasasececessnses
10
SING:
FUHTIN
DUOM
witessca
sect
c
case
dacatoct
Sheth
cn
ach,
eteoss
cme
sdantietaaineantenck
taukeaaceeeat
11
AUTO=ACCOMPANIMON
ios
sess
cansuiasarinsebiay
sciasseue
usehe
yada
eed/evebeshdeawoceaioccice
11
TFOUDIOSHOOUING
iaise
Sea
idiacis
ceccnicicdtascugcucaseiiecetesacenasansedaetcd
cuenseseesewsesaabenGuiauone
16
Care
Of
YOur
KE
yDOai
dd
iciisscosisins
scsseesescacssvacecrdinsveddenicetet
sie
nae
eebehedtneveieicdeeeen
17
SPCC
ITC
AT
ONNS
sig
sid
val
sicceas
asec
yeas
oevancucveanexanann
eases
accel
das
secesnaawieewcevsalededstacdess
17
EIST
OU
PINGQOred.
CHO
ccatics
isso
eiceces-
cannes
vanssuacusuodaasnieebiclderasdecdsteveabe.terccactevs:
34
Important
Any
of
the
following
conditions
indicates
that
battery
power
is
low
and
that
you
should
replace
batteries
or
shift
to
one
of
the
alternate
power
sources
as
soon
as
possible.
*
Dim
power
supply
lamp
¢
Abnormally
low
speaker/headphone
volume
*
Distortion
of
sound
output
¢
Abnormal
auto-play
tune
playback
*
Abnormal
rhythm
pattern
playback
¢
Continued
sound
output
even
after
you
release
a
button
eo
gay
*
ee
a