manuals.online logo
Brands
  1. Home
  2. •
  3. Brands
  4. •
  5. Casio
  6. •
  7. Musical Instrument
  8. •
  9. Casio TONE BANK CT-670 User manual

Casio TONE BANK CT-670 User manual

Other Casio Musical Instrument manuals

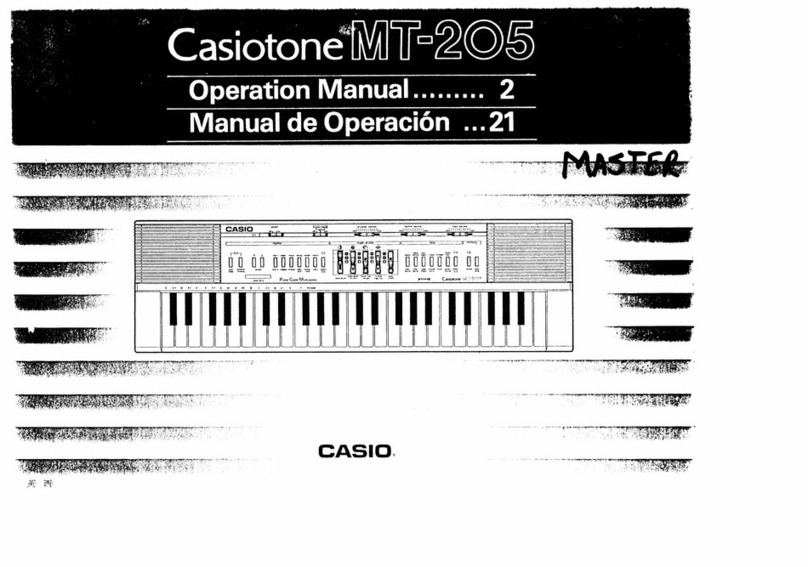
Casio Casiotone MT-205 User manual

Casio

Casio Casiotone MT-205 User manual

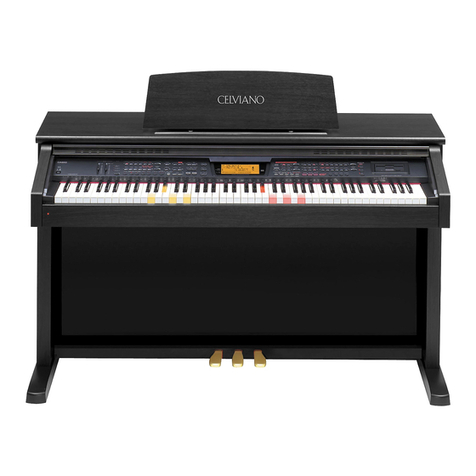
Casio CELVIANO GP-400 User manual

Casio

Casio CELVIANO GP-400 User manual

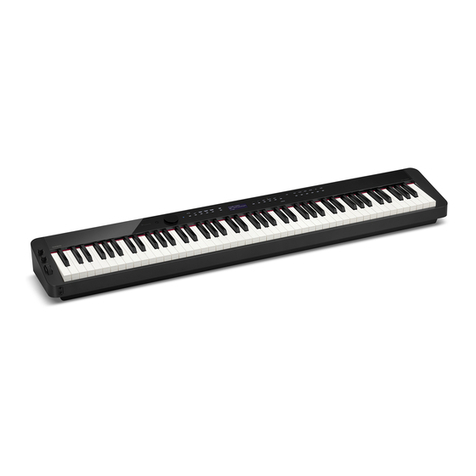
Casio PX-S3100BK User manual

Casio

Casio PX-S3100BK User manual

Casio DG-20 Operator's manual

Casio

Casio DG-20 Operator's manual

Casio SA-20 User manual

Casio

Casio SA-20 User manual

Casio CTK-100 User manual

Casio

Casio CTK-100 User manual

Casio Magical Light ML-1 User manual

Casio

Casio Magical Light ML-1 User manual

Casio CELVIANO GP-310 User manual

Casio

Casio CELVIANO GP-310 User manual

Casio LK-170 User manual

Casio

Casio LK-170 User manual

Casio CDP-240R User manual

Casio

Casio CDP-240R User manual

Casio Privia PX-765 User manual

Casio

Casio Privia PX-765 User manual

Casio TONE BANK CT-395 User manual

Casio

Casio TONE BANK CT-395 User manual

Casio LK-120 User manual

Casio

Casio LK-120 User manual

Casio CTK-3500 User manual

Casio

Casio CTK-3500 User manual

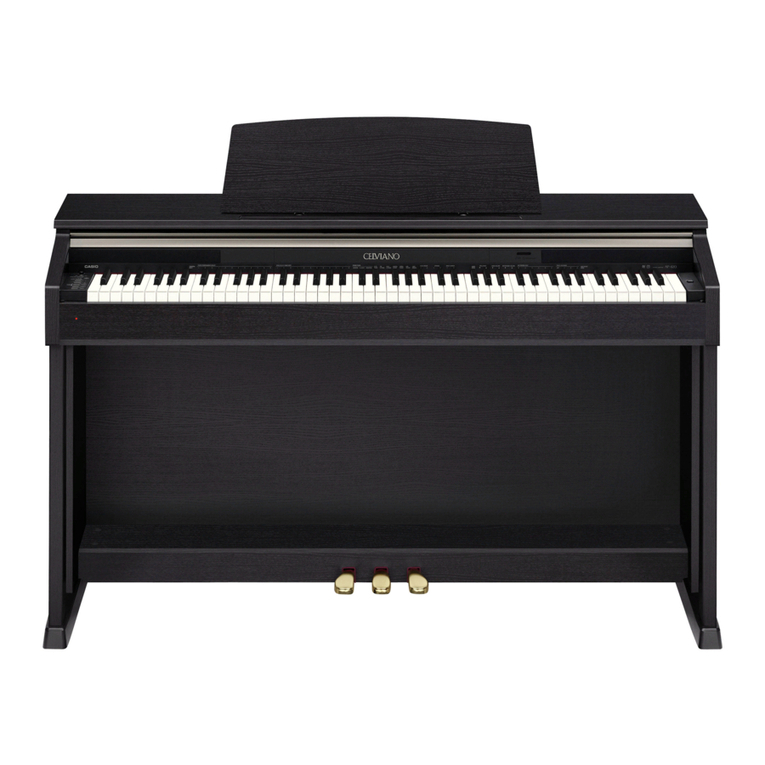
Casio Celviano AP-420 User manual

Casio

Casio Celviano AP-420 User manual

Casio HT-700 User manual

Casio

Casio HT-700 User manual

Casio CDP-120 User manual

Casio

Casio CDP-120 User manual

Casio Celviano AP-80R User manual

Casio

Casio Celviano AP-80R User manual

Casio TONEBANK MT-750 User manual

Casio

Casio TONEBANK MT-750 User manual

Casio Celviano AP-80R User manual

Casio

Casio Celviano AP-80R User manual

Casio Privia PX-150 User manual

Casio

Casio Privia PX-150 User manual

Casio DM-100 User manual

Casio

Casio DM-100 User manual

Casio SK-5 - SERVICE Troubleshooting guide

Casio

Casio SK-5 - SERVICE Troubleshooting guide

Casio Privia PX-100 Installation instructions

Casio

Casio Privia PX-100 Installation instructions

Popular Musical Instrument manuals by other brands

Funkey SP-561 user manual

Funkey

Funkey SP-561 user manual

thomann DP-275 GP BP user manual

thomann

thomann DP-275 GP BP user manual

Kawai CN17 Operation guide

Kawai

Kawai CN17 Operation guide

Yamaha PCY130 owner's manual

Yamaha

Yamaha PCY130 owner's manual

Roland LX-15 Brochure & specs

Roland

Roland LX-15 Brochure & specs

Johannus Rembrandt 200 user manual

Johannus

Johannus Rembrandt 200 user manual

Yamaha Clavinova CVP-609 Reference manual

Yamaha

Yamaha Clavinova CVP-609 Reference manual

Yamaha PSR-E473 owner's manual

Yamaha

Yamaha PSR-E473 owner's manual

Modulus Quantum Series owner's manual

Modulus

Modulus Quantum Series owner's manual

Gear4music SDP-4 user manual

Gear4music

Gear4music SDP-4 user manual

HOMCOM 390-006 Assembly instruction

HOMCOM

HOMCOM 390-006 Assembly instruction

Xotic Guitars ProVintage Series owner's manual

Xotic Guitars

Xotic Guitars ProVintage Series owner's manual

Sadowsky MetroLine Series operating manual

Sadowsky

Sadowsky MetroLine Series operating manual

Bosendorfer CEUS user manual

Bosendorfer

Bosendorfer CEUS user manual

Yamaha Electone EL-17 owner's manual

Yamaha

Yamaha Electone EL-17 owner's manual

Alesis AHB-1 Assembly guide

Alesis

Alesis AHB-1 Assembly guide

Hotpoint RF512GP How to get the best

Hotpoint

Hotpoint RF512GP How to get the best

Yamaha DGX-530 manual

Yamaha

Yamaha DGX-530 manual

manuals.online logo
manuals.online logoBrands
  • About & Mission
  • Contact us
  • Privacy Policy
  • Terms and Conditions

Copyright 2025 Manuals.Online. All Rights Reserved.

U.S.
Pats.
4,121,284
4325
364
4,371,923
4,896,260 4,942,516
CASIO
COMPUTER
CO.,
LTD.
©
6-1,
Nishi-Shinjuku
2-chome
Shinjuku-ku,
Tokyo
163-02,
Japan
OH0408059H
®
@
Printed
in
Japan
CT670ES-1
cs
CS
ay
a
ate)
ey
ee
ee
*
pea
Fe
n
mmea
E
a
oray
reae
a
ee
mat
cer
+
a
=
a
ES
KEYBOARDS
ELECTRONIC
MUSICAL
INSTRUMENT
S
G
CT670ES-1
INSTRUMENTO
MUSICAL
ELECTRONICO
OPERATION
MANUAL
...........2
MANUAL
DE
OPERACION....34
ToneBan
CT-670
©
ELECTRONIC
MUSICAL
INSTRUMENT
Contents
2.
Power
Supply
ic2
1.6
advice
Benes
d
has
Ses
beg
sadws
MDC
DOWE!
«4
gore
corse
eg
soe
E
AT
BAG
POWE!
4
2tue
nthe
teeu
vials
een
dd
aaa
3.
General
Operations
.................
0...
c
cece
=
m
Getting
started.
..........
0...
cece cece
eee
ee
m
Volume
sliders..................
Ebates
asian
ata
m
Pitch
bender
h256.cb0
ln
Sauer
aad
tents
cen:
MAUI
COMO
i
zorria
oa
aes
Ee
eden
4.
Preset
Tones
(220-SOUND
TONE
BANK)...........
m
Selecting
a
basic
tone
...............ce
cece
eee
m
Selecting
a
BANK
sound...................0.5
m
Keyboard
split
tones
.............0.0.
cee
ee
ees
5.
Auto-Rhythms
(110
BEAT
BANK)
..................
m
Selecting
a
basic
rhythm
.....................
m
Selecting
a
BANK
rhythm........
i
Sane
eels
m
Playing
an
auto-rhythm
........
aaea
Pearce
6.
Multi-accompaniment
System.....................
m
Accompaniment
keyboard
....................
m
Playing
an
accompaniment
using
CASIO
CHORD
cas
oa
caay
eda
ee
ee
ere
m
Playing
an
accompaniment
using
FINGERED
CHORD
jt
etuineooavcawedu
dd
ed
peatebu
diated
m
Using
the
MUSICAL
CONTROLLER
buttons
....
u
Using
the
ORCHESTRATION
buttons
........
AG
m
Using
the
INTERPLAY
buttons.................
ene)
eae
i
ae
|
7.
Tone
Editor
.........0..0
00.
ccc
cee
cece
eeeceuees
20
m
Using
the
TONE
EDITOR
buttons..............
20
8.
Performance
Memory
Function...................
21
M:
RCCOlMING
mousee
Gaal
es
es
Ena
21
m
Playing
back
memory
contents.........
E
22
9.
MIDI
Functions....................
aora
Pinea
23
E
What
SMID
pine
repre
ee
enee
23
=œ
MIDI
terminal
functions
.......
TE
T
eee
E
m
CT-670
MIDI
settings
.............
ETN
23
+
Setting
the
MIDI
mode
....................
23
+
Setting
the
MIDI
channel
..................
24
+
Assigning
preset
tones
to
MIDI
channels
--
(MODE
B)
sranie
ni
Outed
oare
as
elle
ee
29
è
Setting
the
MIDI
clock
(internal/external)
....25
¢
Setting
the
volume
in
the
MIDI
mode.......
25
m
CT-670
MIDI
applications
.....................
26
¢
Connecting
to
another
MIDI
keyboard
......
26
=
@
Use
as
multi-timbral
sound
source..........
26
m
Technical
reference
...............000ce
ceca
28
_@
Program
change
reference..................
28
`
@
Polyphony
reference
...........
Are
Sistas
a
tamu
29
10.
Troubleshooting
..................0.00
000002
30
11.
Care
of
Your
Keyboard
.............
ote
cea
tary
31
12.
Specifications
.....................
TE
ET
32
CA
General
Guide
oOo
000
O
O
OOỌ
DO
®
®
|
9
ee
PN
2m
<Rear
panel
>
[$$
y
HE
AT
r
rT
sod
B
E
Ret
Be
bees
on
am
oe
corn
‘eos
es
tou
CLA!
©
008
600
©
MIDI
terininale
N/OUTTHRU)
@
Tuning
control.
@
Sustain
jack
©
Foot
Volume
jack
®©
Output
jacks
(L/R)
@
Headphones
jack
|
@
AC
adaptor
jack
_
©
Built-in
speakers
|
@
TONE
BANK
button
—
~
@POWER/CHORD/MIDI
selector
@
MEMORY
buttons
7
~
©
ORCHESTRATION
buttons
©
@
TONE
EDITOR
buttons
|
‘Demonstration
Tune—
ter
oF
4
©
110
BEAT
BANK
list
_
©
@
DEMO
button
This
unit
features
a
preset
demonio
tune
ewhieh
has
been
©
VOLUME
sliders
—
@Pitch
bender
carefully
programmed
to
showcase
all
the
features
and
benefits
|
ZDEMO=
©
3-digit
display
:
@
MUSICAL
CONTROLLER
buttons
!
of
this
unit.
Simply
press
the
DEMO
button
@,
and
listen
to
{CJ}
@
TONE
selectors
OO
@
INTERPLAY
buttons
the
CT-670
play.
ea
©
220
TONE
BANK
list
-
@
BEAT
selectors
©
TONE
SELECT
button
Na
@
BEAT
BANK
button
©
©
The
demonstration
tune
is
played
in
an
endless
ep
Press
the
DEMO
button
again
to
stop
the
tune.
e
The
keyboard
is
inoperable
while
playing
the
demonstration
tune.
oe
|
“3
|
|
-
|
a
2
Power
Supply
This
unit
operates
on
both
AC
and
DC
power.
m
DC
Power
+
Dry
batteries
This
unit
can
be
powered
by
six
D
size
(SUM-1/R20P)
manganese
dry
cell
batteries.
Weakened
batteries
will
result
in
lower
volume
or
poor
tonal
quality.
The
-power
indicator
lamp
will
gradually
lose
its
brightness
when
battery
power
weakens.
At
this
time,
change
batteries
or
shift
to
one
of
the
alternate
|
pe
sources
mentioned
below.
+
To
reli
batteries
Q)
Open
the
battery
compartment
cover
on
the
bottom
of
the
unit
and
take
out
the
used
batteries.
(2)
Load
new
batteries
taking
care
that
the
plus
(+)
and
minus
(—)
poles
are
facing
in
the
correct
directions.
¢
Refer
to
the
specifications
for
standard
battery
life.
PRECAUTIONS
Incorrectly
using
batteries
can
cause
them
to
leak
or
burst,
and
may
damage
your
product.
Note
the
following
precautions:
e
Be
sure
that
the
plus
(+)
and
minus
(—)
poles
are
facing
in
the
correct
directions.
e
Do
not
mix
battery
types.
e
Do
not
mix
new
batteries
with
old
ones.
e
Never
leave
dead
batteries
in
the
battery
compartment.
e
Remove
batteries
when
not
using
the
product
for
extended
periods.
e
The
batteries
supplied
with
the
unit
are
not
rechargeable.
©
Do
not
expose
batteries
to
direct
heat,
let
them
become
shorted
or
try
to
take
them
apart.
(If
a
battery
leaks,
clean
out
the
battery
compartment
of
the
product
immediately,
taking
care
to
avoid
letting
the
patty:
fluid
come
into
direct
contact
with
your
skin.)
2.
Power
Supply
m
AC
Power
An
AC
adaptor
(AD-5,
optional)
is
required
when
using
household
current.
Use
only
a
genuine
CASIO
adaptor
with
the
same
voltage
rating
(100,
117,
220
or
240)
as
the
power
supply
in
your
area
to
prevent
damage
to
internal
components.
Plug
the
AC
adaptor
into
the
AC
outlet
and
the
cord
into
the
unit.
This
will
automatically
cut
off
the
battery
power
supply.
AC
adaptor
AD-5
AC
outlet
|
AC
adaptor
jack
CAUTION
|
e
Use
only
genuine
CASIO
adaptors
to
avoid
risk
of
damage.
e
The
adaptor
may
become
warm
when
left
connected
to
an
AC
outlet.
This
is
normal,
but
the
adaptor
should
be
unplugged
when
not
in
use.
a
i
fe
ee
ee
ee
eet
i
ees
I
a
a
i
a
een
A
aa
a
a
a
A n
St
a
Eii
i
General
Operations
e
Refer
to
the
general
guide
found
on
page
4-5
for
exact
locations
of
this
keyboard
controls
and
connections.
=
Getting
started
|
(1)
Set
the
POWER/CHORD/MIDI
selector
to
ON.
|
(2)
Adjust
the
volume
level
using
the
MAIN
VOLUME
slider.
(3)
Select
one
of
the
220
preset
tones
(see
“Preset
Tones”,
page
9).
(4)
Now,
start
playing.
|
m
VOLUME
sliders
MAIN
VOLUME
slider:
Adjusts
the
overall
volume
of
the
unit.
ACCOMP
VOLUME
slider:
—
Adjusts
the
volume
of
the
accompaniment
pattern.
RHYTHM
VOLUME
slider:
Adjusts
the
volume
of
the
auto-rhythm.
ACCOMP
VOLUME
slider
MAIN
VOLUME
slider
RHYTHM
VOLUME
slider
MAIN
VOLUME
mol
FEET
EET
binx
ACCOMP
VOLUME
RHYTHM
VOLUME
wel
LT
dens
wl
MAX
=
PITCH
bender
_
Rotating
the
pitch
bend
wheel
located
to
the
left
of
the
keyboard
changes
the
pitch
of
the
melody
tone
(range:
+1
whole
tone).
|
e
The
pitch
bender
affects
the
entire
keyboard
when
the
CHORD/MIDI
selector
is
set
to
OFF.
e
When
the
CHORD/MIDI
selector
is
set
to
ON
or
FINGERED,
it
affects
the
melody
keyboard
keys
only.
|
|
E
Tuning
control
|
You
can
adjust
the
pitch
of
the
entire
keyboard
within
+30
cents
using
the
_
tuning
control
on
the
bottom
panel.
This
allows
easy
tuning
with
other
.
instruments.
ioii
Sica:
|
A
=
N
ii
: 4
i
——
T
eevee
e
Refer
to
the
general
guide
found
on
page
4-5
for
exact
locations
of
this
keyboard
controls
and
connections.
This
unit
features
a
total
of
220
preset
tones
including
20
basic
tones
and
200
BANK
sounds.
|
Look
at
the
220
SOUND
TONE
BANK
list
on
the
front
panel.
As
you'll
notice,
the
preset
tones
are
divided
into
20
groups
such
as
PIANO
group,
HARPSICHORD
group,
etc.
The
basic
tones
are
the
representative
ones,
which
appear
at
the
top
of
the
list
of
each
group.
You
can
select
the
basic
tones
directly
using
a
TONE
selectors.
The
BANK
sounds
are
variations
of
each
group,
which
_
can
be
selected
using
the
TONE
selectors
after
pressing
the
TONE
BANK
button.
220
SOUND
E
PIANO
00
PIANO
1
Basic
tone
4
PIANO
4
PIANO
&
BANK
sounds
00
00.5
00.6
PIANO/STRINGS
00.7
STRING
PIANO
00.8
BASS/PIANO
3
00.9
BASS/PIANO
4
E
Selecting
a
basic
tone
(tone
00-19)
|
Note
that
you
do
not
press
the
TONE
BANK
button
(the
indicator
above
this
button
is
not
lit)
when
selecting
a
basic
tone.
|
3
©
Specify
either
the
upper
or
lower
row
of
preset
tones
by
pressing
the
TONE
SELECT
button.
The
indicator
above
or
below
this
button
lights
to
show
the
active
row.
(2)
Press
one
of
the
TONE
selectors
to
choose
a
preset
tone.
e
PIANO
1
(tone
00)
is
automatically
selected
when
the
power
of
the
unit
is
switched
ON.
E
Selecting
a
BANK
sound
Look
at
the
220
SOUND
TONE
BANK
list
again.
The
tones
which
have
3-digit
numbers
are
BANK
sounds.
To
select
a
BANK
sound,
first
select
the
basic
tone
of
the
group
that
contains
the
BANK
sound
you
want,
and
then
press
the
TONE BANK
button
(the
indicator
above
this
button
lights).
Now,
you
can
select
the
BANK
sounds
of
the
group
you've
selected
by
pressing
a
TONE
selector.
|
4,
Preset
Tones
(220-SOUND
TONE
BANK)
<
Example
>
To
select
OCARINA
(tone
number
174)
after
selecting
BASSOON
(tone
number
04.
3)
|
@Set
the
POWER/CHORD/MIDI
selector
to
ON.
PIANO
1
tone
(tone
00)
is
EEE
selected.
@
Press
TONE
selector
4.
SAXO-
PHONE
1
TRUMPET
@)
Press
the
TONE
BANK
button.
The
indicator
above
this
button
lights.
(4)
Press
the
TONE
selector
3.
BASSOON
is
selected
now.
-
03
DIST
GUITAR
1
C]
ACOUS
GUITAR1
13
(5)
Next,
select
OCARINA.
Press
the
TONE
BANK
button.
(6)Press
the
TONE
SELECT
button,
and
then
press
TONE
selector
7
(now
tone
17
is
selected).
:
@
Press
the
TONE
BANK
button
again.
(8)Press
TONE
selector
4.
Now
OCARINA
is
selected.
TRUMPET
4
—10—
4,
Preset
Tones
(220-SOUND
TONE
BANK)
m
Keyboard
split
tones
Some
of
the
preset
tones
split
the
keyboard
and
assign
two
or
more
sounds.
With
such
a
preset
tone,
the
sound
produced
depends
on
what
position
of
the
keyboard
you
play.
For
example,
BASS/PIANO
1
(tone
16)
puts
BASS
on
the
left
and
PIANO
on
the
right
of
the
EAI
ane
<
Example
>
BASS/PIANO
1
(No.
16)
PERCUSSION
1
(No.
12)
90000600000
©
0
D
1?
B
@
bass
drum
©
mia
tom
©
snare
drum
@
low
tom
©
gated
snare
drum
@
floor
tom
©
closed
hi-hat
@
cow
bell
@
open
hi-hat
@®
timbales
@
crash
cymbal
@
maracas
@
ride
symbal
@®
claves
©
hi
tom
©
clap
hands
e
en
Auto-r
hy
thms
(110
BEAT
BANK)
e
Refer
to
the
general
guide
found
on
page
4-5
for
exact
locations
of
this
keyboard
controls
and
connections.
This
unit
features
a
total
of
110
rhythm
patterns
including
10
basic
rhythms
and
100
BANK
rhythms.
Look
at
the
110
BEAT
BANK
list
on
the
front
panel.
As
with
preset
tones,
the
rhythm
patterns
are
divided
into
groups.
The
basic
rhythms
at
the
top
of
the
list
for
each
group
are
the
representative
ones.
You
can
directly
select
the
basic
rhythms
using
the
BEAT
selectors.
The
BANK
rhythms
are
variations
of
each
group,
which
can
be
selected
using
the
BEAT
selectors
after
pressing
the
BEAT
BANK
button.
110
BEAT
BANK
0
ROCK
1
——
Basic
rhythm
SOFT
ROCK
SLOW
ROCK
1
BANK
rhythms
SLOW
ROCK
2
E
Selecting
a
basic
rhythm
(rhythm
number
0-9)
Note
that
you
do
not
press
the
BEAT
BANK
button
(the
indicator
above
this
button
is
not
lit)
when
selecting
a
basic
rhythm.
Simply
press
one
of
the
BEAT
selectors.
;
e
ROCK
1
rhythm
(rhythm
0)
is
automatically
selected
when
the
power
of
the
unit
is
switched
ON.
m
m
Selecting
a
BANK
rhythm
|
-
Look
at
the
110
BEAT
BANK
list
again.
The
rhythms
which
have
2-
-digit
numbers
are
BANK
rhythms.
To
select
a
BANK
rhythm,
first
select
the
basic
rhythm
of
the
group
that
contains
the
BANK
rhythm
you
want,
and
then
press
the
BEAT
BANK
button
(the
indicator
above
this
button
lights).
Now,
you
can
select
the
BANK
rhythms
in
the
group
you've
selected
by
pressing
a
BEAT
selector.
a
5.
Auto-rhythms
(110
BEAT
BANK)
<
Example
>
To
select
BOSSA
NOVA
(rhythm
76)
after
selecting
DISCO
(rhythm
5.1)
-
@)
Set
the
POWER/CHORD/MIDI
selector
to
ON.
ROCK
1
(rhythm
0)
is
automatically
selected.:
(2)
Press
BEAT
selector
5.
@
Press
the
BEAT
BANK
button.
The
indicator
above
this
button
lights.
(4)
Press
BEAT
selector
1.
DISCO
is
selected
now.
(5)
Next,
select
BOSSA
NOVA.
Press
the
BEAT
BANK
button.
(©)
Press
BEAT
selector
7.
@)
Press
the
BEAT
BANK
button
again.
(8)
Press
BEAT
selector
6.
Now
BOSSA
NOVA
is
selected.
—13—
5.
Auto-rhythms
(110
BEAT
BANK)
:
i
ee
ee
me Te
ee
=
Playing
an
auto-rhythm
E
@)After
selecting
an
auto-rhythm,
press
the
START/STOP
button
to
start
the
rhythm.
a
(2)
Adjust
the
tempo
using
the
TEMPO
control
buttons.
Each
press
of
[A]
speeds
up
the
tempo,
while
pressing
[Y]
slows
it
down.
The
3-digit
display
shows
the
tempo
of
the
rhythm.
|
*
Be
e
The
tempo
of
the
auto-rhythm
can
be
adjusted
between
40
and
256
beats
per
minute.
(3)
You
can
adjust
the
volume
of
the
rhythm
by
using
the
RHYTHM
volume
slider.
(4)
Press
the
START/STOP
button
again
to
stop
auto-rhythm
play.
e
You
can
use
the
MUSICAL
CONTROLLER
buttons
to
start
an
auto-rhythm
with
intro
pattern,
inserting
fill-ins
to
the
rhythm,
etc.
Please
refer
to
page
17,
“Using
MUSICAL
CONTROLLER
buttons”
for
details.
oe,
eR
Multi-accompaniment
system
|
°
Refer
to
the
general
guide
found
on
page
4-5
for
exact
locations
of
this
keyboard
controls
and
connections.
This
unit
features
110
accompaniment
patterns
that
let
you
enjoy
automatic
play
of
full
accompaniments
to
your
performances.
Five
parts,
including
Rhythm,
Bass,
Chord
1,
Chord
2
and
Obbligato
add
more
depth
to
your
music.
A
set
of
ORCHESTRATION
buttons
even
lets
you
switch
any
of
these
parts
ON
and
OFF
to
let
you
tailor
the
accompaniment
to
the
music
you
are
playing.
In
addition,
the
MUSICAL
CONTROLLER
buttons
also
give
you
full
control
over
the
accompaniment
patterns,
including
intro,
fill-in
and
ending.
m
Accompaniment
keyboard
|
|
If
the
POWER/CHORD/MIDI
selector
is
set
to
FINGERED
or
ON,
keys
of
the
lower
1.5
octave
of
the
keyboard
become
accompaniment
keyboard.
You
can
use
the
accompaniment
keyboard
keys
for
auto-accompaniment
performance.
Accompaniment
Melody
keyboard
keyboard
=
Playing
an
accompaniment
using
CASIO
CHORD
@)
Set
the
POWER/CHORD/MIDI
selector
to
the
ON
position.
7
®©
Select
one
of
the
auto-rhythms
(refer
to
“5.
Auto-rhythms”
on
page
12).
(3)
Start
the
auto-rhythm
by
pressing
the
START/STOP
button.
ss”
(4)
Play
on
the
accompaniment
keyboard
keys
according
to
the
CASIO
CHORD
system
(refer
to
“CASIO
CHORD
system”
on
page
16).
The
moment
you
press
an
accompaniment
keyboard
key,
the
auto-accompaniment
pattern
starts
to
play
in
the
rhythm
track.
_@Press
the
START/STOP
button
again
to
stop
auto-accompaniment
play.
aati
ee!
6.
Multi-accompaniment
system
|
|
7
|
*
6.
Multi-accompaniment
system
Casio
Chord
system
-
_
@
Using
the
MUSICAL
CONTROLLER
buttons
The
10
MUSICAL
CONTROLLER
buttons
give
you
control
over
the
accompani-
ment
patterns.
When
the
POWER/CHORD/MIDI
selector
is
in
the
FINGERED
or
ON
position,
you
can
control
all
of
the
accompaniment
patterns.
When
it
is
in
the
OFF
position,
you
can
control
the
rhythm
pattern
only.
The
Casio
Chord
system
has
been
developed
s
so
you
can
play
the
four
main
types
of
chords
more
easily.
Playing
of
the
chords
is
s
simplified
as
shown
below:
°
Pressing
one
of
the
accompaniment
keyboard
keys
prenuda,
a
major
chord
corresponding
to
that
note.
¢
Simultaneously
pressing
any
key
to
the
right
(two
keys
at
the
same
time)
results
in
a
minor
chord.
|
TEMPO
control
e
Similarly,
pressing
one
more
key
to
the
right
(three
keys
in
all)
produces
=
wal
se
J=
T=p
i=
Ea
Fh
buttons
a
seventh
chord,
and
pressing
the
fourth
key
to
the
right
(four
keys
il
in
all)
creates
a
minor
seventh
chord.
ae
haat
<
Examples
>
INTRO
(LONG)
tf!
a
button
C
(C
major
chord)—Press
@.
7
:
er
obr
hii
Cm
(C
minor
chord)—Press
@,
@
together.
|
3
utton
utton
C7
(C
seventh
chord)—Press
@,
@,
©
together.
da
vnc
een
eae
BREAK
button
ENDING
button
|
Cm7
(C
minor
seventh
chord)—Press
@,
@,
©,
@
mron
;
FILLIN
button
together.
S
e
Not
only
@,
©,
and
@,
but
any
black
or
white
keys
can
be
used
as
eee
as
they
are
to
<MUSICAL
CONTROLLER
buttons
>
the
right
of
@.
+
INTRO
button
This
button
inserts
a
light
1-
-measure
introduction
before
starting
the
normal
=
Playing
an
accompaniment
using
FINGERED
CHORD
accompaniment
pattern.
©
Set
the
POWER/CHORD/MIDI
selector
to
the
FINGERED
position.
@)
Select
one
of
the
auto-rhythms
(refer
to
“5.
Auto-rhythms”
on
page
12).
¢
INTRO
(LONG)
button
|
|
@)
Start
the
auto-rhythm
by
pressing
the
START/STOP
button.
í
This
button
inserts
a
4-
to
5-
measure
introduction
before
starting
the
normal
(4)
Play
chords
as
usual
on
the
accompaniment
keyboard
keys.
The
moment
you
_
accompaniment
pattern.
The
chord
progression
used
in
the
intro
leads
into
play
a
chord
on
the
accompaniment
keyboard
keys,
the
auto-accompaniment
-=
the
progression
used
for
the
accompaniment.
Even
if
you
do
not
specify
an
pattern
starts
to
play
in
the
rhythm
track.
accompaniment
keyboard
chord
when
you
press
this
button
for
an
intro,
the
(©)
Press
the
START/STOP
button
again
to
stop
auto-accompaniment
play.
|
unit
automatically
bases
the
intro
on
the
last
chord
you
played
(or
on
Cmaj-
è
This
unit
is
capable
of
recognizing
the
following
Os,
M,
m,
aug,
dim,
sus4,
7
MZ
m7,
7-5,
if
you
have
switched
the
unit
on
and
have
not
yet
played
a
chord).
mMZ7Z
m7-5,
7sus4,
add
9,
m
add
9,
dim
Z
|
+
BREAK
button
When
you
press
this
button
during
play
of
an
accompaniment,
a
1-
to
.
2-measure
pattern
is
inserted,
which
stops
at
the
Peers
of
a
subsequent
pattern.
—16—
|
T
—17—
6.
Multi-accompaniment
system
|
a
A
a
en
A
ghee
es
fey
ed
ae
N
+
FILL-IN
button
When
you
press
this
button
during
play
of
an
accompaniment,
a
1-
to
2-measure
fill-in
pattern
is
inserted.
+
ENDING
button
When
you
press
this
button
in
place
of
the
START/STOP
button
to
end
the
accompaniment
play,
a
2-
to
3-measure
ending
panenn
is
inserted
before
accompaniment
play
is
stopped.
+
CODA
button
When
you
press
this
button
in
piace
of
the
START/STOP
button
to
end
the
accompaniment
play,
a
4-
to
5-measure
long
ending
pattern
is
inserted
before
accompaniment
play
is
stopped.
The
progression
of
chords
used
in
the
ending
pattern
are
based
on
the
chord
that
is
being
played
when
the
you
press
this
button.
+
SYNCHRO
button
Press
this
button,
and
the
unit
stands
by
waiting
for
you
to
play
a
note
on
the
accompaniment
keyboard.
The
selected
rhythm
pattern
begins
as
soon
as
you
press
a
key.
=
Using
the
ORCHESTRATION
buttons
The
auto-accompaniment
patterns
produced
by
this
unit
consist
of
5
different
elements;
rhythm
track,
bass
line,
chord
1
pattern,
chord
2
pattern
and
obbligato.
The
ORCHESTRATION
buttons
switch
the
sound
of
these
elements
(except
the
rhythm
and
bass
line)
ON
and
OFF.
For
example,
if
you
want
only
a
rhythm
track
and
bass
line
for
your
accompaniment,
you
can
turn
off
the
other
3
elements.
ORCHESTRATION
buttons:
CHORD
1
button........switches
chord
1
sound
on
and
off.
CHORD
2
button........
switches
chord
2
sound
on
and
off.
-=
OBBLIGATO
button.....switches
obbligato
sound
on
and
off.
—18—
6.
Multi-accompaniment
system
CHORD
1
button
—
:
CHORD
2
mona
ORE
TON
RAE
OBBLIGATO
button-
ORCHESTRATION
MIO
O
heey
MO!
ECHO
LINE
AUTO
HARMONIZE
button
—
j
INTERPLAY
buttons
>
ECHO
LINE
button
e
Whenever
you
set
the
POWER/CHORD/MIDI
selector
to
FINGERED
or
ON,
CHORD
1
and
CHORD
2
buttons
are
set
to
on
and
OBBLIGATO
button
is
set
to
off
automatically.
m
Using
the
INTERPLAY
buttons
+
AUTO
HARMONIZE
button
If
this
button
is
depressed
during
play
of
an
accompaniment
pattern,
the
—
chord
selected
on
the
accompaniment
keyboard
is
automatically
nannonizes
with
notes
Bees
on
the
melody
keyboard.
:
@
ECHO
LINE
button
eai
If
this
button
is
depressed
during
play
of
an
sceonipaniient
patein,
notes
played
on
the
melody
keyboard
are
automatically
ecnoed,
in
eecoreanee
with
the
phrasing
you
use.
e
The
AUTO
HARMONIZE
and
ECHO
LINE
function
cannot
be
selected
at
the
same
time.
eo
ee