manuals.online logo
Brands
  1. Home
  2. •
  3. Brands
  4. •
  5. Casio
  6. •
  7. Synthesizer
  8. •
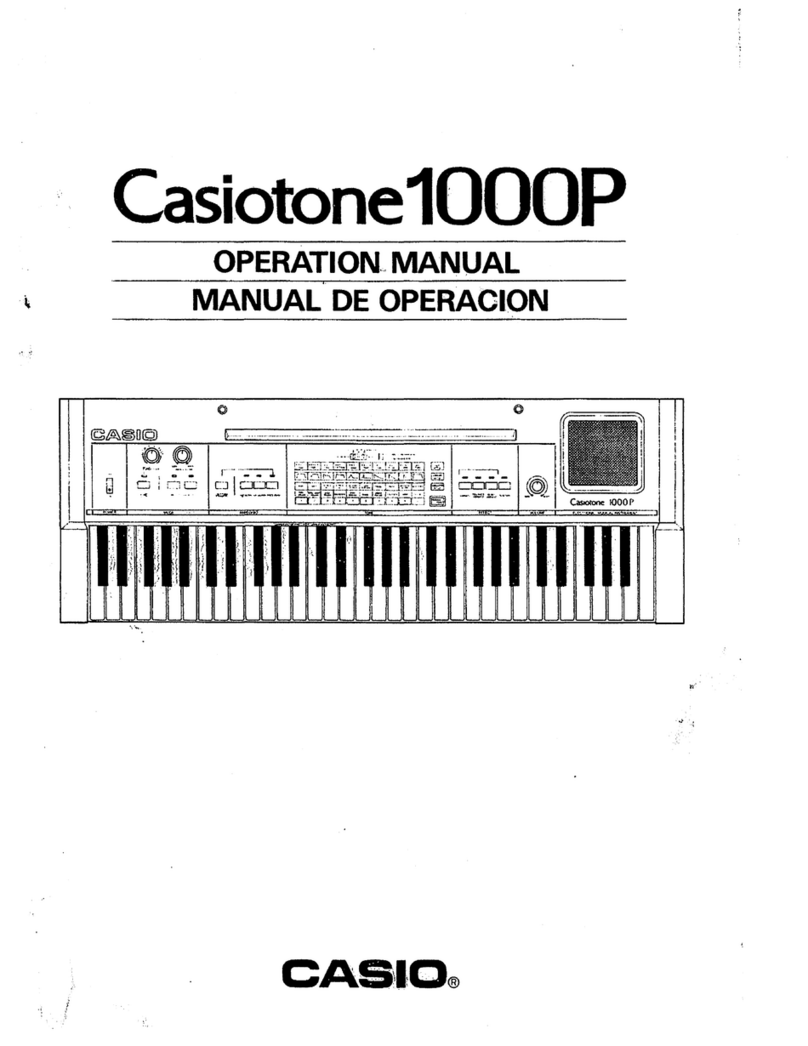
  9. Casio Casiotone CT-360 User manual

Casio Casiotone CT-360 User manual

Casiotone
CT-360
ELECTRONIC
MUSICAL
INSTRUMENT
INSTRUMENTO
MUSICAL
ELECTRONICO
OPERATION
MANUAL
2
MANUAL
DE
OPERACION
20
Casiotone
C
T-360
ELECTRONIC
MUSICAL
INSTRUMENT
Introduction
Congratulations
upon
your
selection
of
a
Casiotone
CT-360.
The
CT-360
is
state-of-the-art
musical
instrument
which
incorporates
the
latest
electronics
technology
to
make
its
operation
as
easy
as
possible.
Exceptional
sound
quality
backed
up
by
a
host
of
sophisticated
features
and
functions
makes
the
CT-360
a
joy
to
play
for
everyone.
In
order
to
enjoy
the
features
and
functions
of
the
CT-360
to
their
fullest,
be
sure
to
carefully
read
this
manual
and
follow
the
instructions
contained
herein.
Contents
1.
General
Guide
...........
cc
cccccceececceeeeeeees
4
2.
POWER
SUDDIY
ised
foe
cncesl
cna
cectinadnndenmascn:
6
3.
General
Operation
.................00.
cece
eeees
8
Be
ROSCU
VOMG
stenscanananl
oe
iene
tenn
cnytiiadsvuenedass
9
5.
Auto-rhythm
2.00.00...
ccecceecceneceeea
seen
10
6.
Auto-accompaniment
.....................:00.ccceee
ees
11
7.
Manual
Memory
....................cccccceeceecceneeeeees
14
8.
Troubleshooting
..............0000.ccccccceeeeceeeeeee
eee:
15
9.
Care
of
Your
Unit
.........cccccccscccsessesccsdeesasensees
16
10.
Specifications
.............0...00.ccc
ccc
cececseveeeeeeenees
17
a
CS
CO
Meee
ee
fo
;
af
hx
‘
nae
BANG
cthfSe
RGA
ME
eure
EX
a
(‘<a>
<i)
is
PS
|
°
&
=i
f
2L9
(OOOO
|e
|
fe
MAIN
ACCOMP
CASIO
CHORD
INTRO:
SIABT!
SENCHRO:
TEMPO
SELECT
PM,
hZg,
POO
TRUM
E
T
un
RECORD
START!
VOLUME
CHORD
RHYTHM
TONE
MEMORY
Casiotone
CT-360
Mid
@
Main
volume
control
@
Accompaniment
volume
control
©
Casio
Chord
switch
QO
Intro./fill-in
button
@Start/stop
button
@Tempo
indicator
@Synchro/ending
button
@O
Tempo
controls
©
Rhythm
selectors
@
Select
button
@
Preset
tone
selectors
®
Select
button
@®
Record
button
@
Memory
start/stop
button
®
Power
switch
@
Power
indicator
@
Battery
compartment
@
Accompaniment
keyboard
@®
Built-in
speaker
1.
General
Guide
(Back
panel)
@
Tuning
control
Adjusts
the
pitch
of
the
entire
keyboard
within
+1/4
tones
(+50
cents)
and
provides
easy
tuning
with
other
instruments.
@
Output
jack
For
connection
to
keyboard
amplifiers,
external
speakers,
audio
equipment,
etc.
AC
adaptor
jack
For
connection
of
AC
adaptor
(AD-5,
optional)
or
car
adaptor
(CA-5,
optional).
d
This
unit
operates
on
both
AC
and
DC
power.
¢
Dry
batteries
This
unit
can
be
powered
by
six
D
size
(SUM-1)
manganese
dry
batteries.
Weakened
batteries
will
result
in
lower
volume
or
poor
tonal
quality.
The
power
indicator
lamp
will
gradually
lose
its
brightness
when
battery
power
weakens.
At
this
time,
change
batteries
or
shift
to
one
of
the
alternate
power
sources
mentioned
below.
Battery
replacement:
@
Open
the
battery
compartment
cover
on
the
front
panel
of
the
unit
and
take
out
used
batteries.
@
Load
new
batteries
taking
care
that
polarity
is
correct.
*
It
is
advisable
to
replace
all
six
batteries
at
the
same
time
for
longer
battery
life.
*
Refer
to
the
specifications
for
standard
battery
lite.
On
¢
Car
battery
With
the
car
battery
adaptor
(CA-5,
optional),
DC
power
is
supplied
from
a
car
battery
through
the
cigarette
lighter
socket.
An
AC
adaptor
(AD-5,
optional)
is
required
to
connect
to
an
AC
outlet.
Use
only
an
adaptor
with
the
same
voltage
rating
(100,
117,
220,
or
240V)
as
the
power
supply
in
your
area
to
prevent
component
damage.
Plug
the
AC
adaptor
into
the
AC
outlet
and
the
cord
into
the
unit.
This
will
automatically
cut
off
the
battery
power
supply.
AC
adaptor
AD-5
Sy
a
r”
AC
outlet
Cigarette
lighter
socket
Car
battery
adaptor
CA-5
2.
Power
Supply
—
*
Auto
power
off
function
Power
is
automatically
cut
off
approximately
6
minutes
after
the
last
operation
of
the
unit.
Power
supply
can
be
restored
by
switching
power
OFF
and
then
ON
again.
*
Use
only
genuine
CASIO
adaptors
to
avoid
risk
of
damage.
“
Remove
batteries
from
the
battery
compartment
when
the
unit
is
not
used
for
extended
periods.
(Battery
leakage
can
damage
electrical
parts.)
“The
adaptor
may
become
warm
when
_
left
connected
to
an
outlet.
This
is
normal,
but
the
adaptor
should
be
disconnected
when
not
in
use.
*“
THE
FOLLOWING
CONDITIONS
CAN
CAUSE
BATTERIES
TO
BURST:
|,
Use
of
adaptors
other
than
genuine
CASIO
adaptors.
2.
Loading
batteries
with
polarities
reversed.
£}General
Operation
e
Power
switch
Power
switch
Press
to
turn
the
power
of
the
unit
ON
and
OFF.
OFF
g/g
ON
POWER
Main
volume
Accompaniment
volume
¢
Volume
controls
min
HTL
ax
mn
TTT
max
Accompaniment
volume......
Slide
to
control
the
volume
of
chords,
bass
and
arpeggio.
Main
volume......Slide
to
control
the
overall
volume
of
the
output.
MAIN
ACCOMP
VOLUME
(A
Preset
Tone
Preset
tone
selectors
Select
button
°
Selecting
a
preset
tone
Use
the
preset
tone
selectors
to
choose
a
tone.
When
the
lamp
above
the
select
button
is
lit,
the
tones
marked
above
the
tone
selectors
can
be
selected.
When
unlit,
the
tones
marked
below
the
selectors
can
be
selected.
ELEC
PIPE
HUMAN
SYN
PIANO
GUITAR
ORGAN
VOICE
FLUTE
SOUND
JWI
PIANO
Md
JAZZ
VIOLIN
TRUMPET
Apyy
SELECT
HONE
ORGAN
TONE
|
Auto-rhythm
Rhythm
selectors
SLOW
BOSSA
ROCK
2
REGGAE
16BEAT
ROCK
NOVA
WALTZ
Intro./fill-in
button
Tempo
indicator
pm
va
ee
end
START!
SYNCHRO
ROCK
1
POPS
DISCO
SWING
SAMBA
MARCH
|
SELECT
STOP
ENDING
INTRO}
FILL-IN
RHYTHM
Start/stop
button
Select
button
Tempo
controls
Synchro/ending
button
e
Selecting
an
auto-rhythm
Use
the
rhythm
selectors
to
choose
a
rhythm.
When
the
lamp
above
the
select
button
is
lit,
the
rhythms
marked
above
the
rhythm
selectors
can
be
selected.
When
unlit,
the
rhythms
marked
below
the
selectors
can
be
selected.
¢
Intro./fill-in
button
Pressing
when
an
auto-rhythm
is
not
being
played
begins
rhythm
play
after
a
2-measure
intro
pattern.
Pressing
during
auto-rhythm
play
inserts
a
percussive
fill-in
pattern.
The
fill-in
pattern
differs
according
to
the
auto-rhythm
selection.
Start/stop
button
Press
to
start
or
stop
rhythm.
Synchro/ending
button
Press
to
enter
synchro
start
standby.
Rhythm
starts
when
an
accompaniment
keyboard
key
(lower
1.5
octave,
C
through
F)
is
pressed.
Pressing
at
the
end
of
a
tune
inserts
an
ending
pattern.
Tempo
control
Tempo
or
speed,
at
which
the
rhythm
accompani-
ment
is
played,
can
be
controlled
using
the
tempo
buttons.
Pressing
the
<A>
button
will
increase
tempo
while
pressing
the
<W>
button
will
decrease
tempo.
Tempo
can
be
manually
adjusted
in
any
of
the
play
modes
and
can
be
changed
at
any
time
while
playing.
Tempo
indicator
Blinks
on
the
first
beat
of
each
measure
during
rhythm
accompaniment.
Stays
lit
in
the
synchro
start
standby
status.
-
@Auto-accompaniment
}
The
auto-accompaniment
function
of
this
unit
offers
two
ways
of
playing
chords.
One
is
the
normal
way
in
which
you
play
three
or
four
notes
at
the
same
time,
and
the
other
is
the
easier
“One-finger
method”
which
is
available
using
the
Casio
Chord
system.
¢
Casio
Chord
switch
Accompaniment
:
volume
control
Casio
Chord
switch
Turns
auto-accompaniment
on
and
off.
OFF:
asciiese:
For
normal
play
without
auto-
mint
HHIHINIIHbmax
_
oFre
eee
|
FINGERED
......
For
auto-accompaniment
pressing
chords
as
usual.
ON
cas
tamaatdintas
For
auto-accompaniment
using
the
ACCOMP
CASIO
CHORD
Casio
Chord
system.
*If
the
Casio
Chord
switch
is
set
to
“FINGERED”
or
“ON”,
the
lower
one-and-a-half
octaves
of
the
key-
board
become
accompaniment
keyboard
keys,
and
the
upper
part
of
the
keyboard
becomes
4-note
polyphonic.
¢
Accompaniment
volume
control
Adjusts
the
volume
of
the
auto-accompaniment,
i.e.,
rhythm,
chord
and
bass.
Casio
Chord
System
The
Casio
Chord
system
has
been
developed
so
you
can
play
the
four
main
types
of
chords
more
easily.
Playing
of
the
chords
is
simplified
as
shown
below:
¢
Pressing
one
of
the
accompaniment
keyboard
keys
produces
a
major
chord
corresponding
to
that
note.
¢
Simultaneously
pressing
any
key
to
the
right
(two
keys
at
the
same
time)
results
in
a
minor
chord.
°
Similarly,
pressing
one
more
key
to
the
right
(three
keys
in
all)
produces
a
seventh
chord,
and
pressing
the
fourth
key
to
the
right
(four
keys
in
all)
creates
a
minor
seventh
chord.
C|DIE
FF
IG/A|BIC
|D
IE
|F
(Example)
0000
|
:
C
(C
major
chord)—Press
@.
=<
lake
Solio
ia
oe
Cm
(C
minor
chord)—Press
@,
@
together.
C,
(C
seventh
chord)—Press
@,
@,
©
together.
Cm,
(C
minor
seventh
chord)—Press
@,
@, ©,
@
together.
*Not
only
@,
®@
and
@,
but
any
black
or
white
keys
can
be
used
as
long
as
they
are
to
the
right
of
@.
[1]
Auto-accompaniment
using
the
Casio
Chord
System
(One-finger
Method)
@Set
the
Casio
Chord
switch
to
saence
“HON”.
OFFa
&
sON
CASIO
CHORD
@Select
one
of
the
auto-rhythms
and
-
press
the
synchro/ending
button.
Eos
*The
tempo
indicator
lights,
meaning
that
the
accompaniment
keyboard
|
keys
are
ready
for
play.
J
a
OE
NSS”
@
Play
on
the
accompaniment
keyboard
keys
accord-
ing
to
the
Casio
Chord
system.
“Adjust
the
tempo
and
accompaniment
volume
using
the
respective
controls.
[2]
Auto-accompaniment
playing
chords
as
usual.
@Set
the
Casio
Chord
switch
to
cst.
“FINGERED”,
—
fe
2
5
ON
ee
CASIO
CHORD
@
Select
one
of
the
auto-rhythms
and
a
press
the
synchro/ending
button.
atts}
*The
tempo
indicator
lights,
meaning
that
the
accompaniment
keyboard
|
keys
are
ready
for
play.
START
SYNCHRO!
(3)
Play
achord
on
the
accompaniment
keyboard
keys.
“Adjust
the
tempo
and
accompaniment
volume
using
the
respective
controls.
Keyboard
play
can
be
stored
directly
into
memory.
Difficult
selections
can
be
input
at
a
slow
pace
and
then
sped
up
during
playback
using
the
tempo
control.
hha
hs
NOTE
Press
the
record
button
to
enter
the
ld
CY]
a
ark:
standby
mode.
—_~==
¢
Memory
capacity
is
approximately
508
notes
“RECONASTART?
(when
only
melody
is
input)
or
677
chords
ble
.
@
Press
the
memory
start/stop
button
aii
(when
only
chords
are
Input).
to
start
recording.
|_|
KE
Tempo
is
adjusted
during
recording
and
*
Recording
starts
after
one
measure
ULS?
playback
using
the
tempo
control.
of
beat
count.
Tone
and
rhythm
can
be
selected
during
recording
and
playback.
a
(3)
Press
the
memory
start/stop
button
]
| |
to
stop
recording.
Ulds
Input
can
be
performed
using
auto
accompani-
"RECORD
START.
ment
(Casio
Chord/Fingered)
for
play.
The
Casio
Chord
switch
is
not
operational,
however,
during
playback.
@
Press
the
m
ca
|
to
play
back
the
stored
memory.
Ld
START!
RECORD
efor
@)
Press
the
memory
start/stop
button
to
stop
playback.
a
START!
RECORD
STOR
ee
___
Trouble
No
sound,
even
if
keys
are
pressed.
roubles!
one.
*For
any
malfunction,
always
check
battery
condition
first.
(see
page
6)
|
Main
and
accompaniment
volume
Turn
up
main
and
accompaniment
~~
|
turned
down.
volume.
No
accompaniment.
_
oo
Refrigerators,
washing
machines
and
Use
outlet
as
far
away
as
possible
from
~~
|
similar
electric
appliances.
appliance
thought
to
be
the
cause.
con-
_
1.
Main
volume
turned
down.
|
2.
Defective
connection
cord.
Possible
Cause
—sséd
Remedy
1.
Main
volume
turned
down.
1.
Turn
up
main
volume.
|
2.
Headphones
connected.
2.
Disconnect
headphones.
Main
and
accompaniment
volume
turned
down.
Turn
up
main
and
accompaniment
volume.
1.
Turn
up
main
volume.
2.
Replace
connection
cord.
1.
Avoid
heat,
humidity,
and
direct
sunlight.
Do
not
overexpose
the
unit
to
direct
sunlight,
place
it
near
a
heater,
or
in
any
area
subject
to
high
temperature.
2.
Avoid
severe
impacts
and
do
not
drop.
severe
impacts
can
result
in
malfunction.
When
carrying
or
transporting
the
unit,
protect
the
key-
board
and
buttons
by
packing
with
soft
cloth.
3.
Keep
the
unit
free
of
liquids,
dust,
particles,
etc.
Do
not
allow
foreign
matter
to
enter
between
the
keys.
Be
especially
careful
of
metallic
objects
such
as
hairpins,
sewing
needles
or
coins.
Also,
do
not
allow
the
unit
to
get
wet.
4.
Never
attempt
to
modify
any
part
of
the
unit.
Your
keyboard
is
a
precision
musical
instrument
made
up
of
sophisticated
electronic
parts.
Any
modification
of,
or
tampering
with
internal
compo-
nents
can
cause
trouble
or
malfunction.
3.Do
not
use
lacquer
thinner
or
similar
chemi-
cals
for
cleaning.
Clean
the
keyboard
with
a
soft
cloth
dampened
with
a
mild
detergent
solution.
Soak
the
cloth
in
the
detergent
solution
and
squeeze
it
until
almost
dry.
-
Remove
batteries
before
extended
storage.
Batteries
left
in
the
unit
for
long
periods
can
leak
and
cause
damage
to
electronic
circuitry.
.In
case
of
malfunction...
Check
whether
buttons
and
connections
are
set
correctly
as
indicated
in
the
troubleshooting
chart
on
page
15
of
this
manual.
If
the
unit
still
does
not
work
properly,
contact
the
original
retailer
or
a
nearby
dealer.
Never
attempt
to
repair
the
unit
yourself.
This
can
result
in
serious
damage
of
the
components.
aa
ee
eee
Model:
Casiotone
CT-360
SS
a
eee
N
49
keys
Sas
Span
eea
umber
of
keys:
Polyphonic:
Preset
tones:
Auto-rhythm:
Rhythm
source:
Auto-accompaniment
function:
Tuning
control:
Built-in
speaker:
Output
jack:
Power
source:
Auto
power
off
function:
8-note
12
sounds;
piano,
vibraphone,
jazz
organ,
violin,
trumpet,
funky
clavi.,
elec.
piano,
elec.
guitar,
pipe
organ,
human
voice,
flute,
synth.
sound
12
rhythms;
rock
1,
pops,
disco,
swing,
samba,
march,
rock
2,
reggae,
16
beat,
slow
rock,
bossa
nova,
waltz
Pulse
Code
Modulation
Casio
Chord
on/off,
Fingered
Within
+50
cents
(+1/4
tone)
12
cm
dia.
X
1
(Output
=
2W)
Output
impedance
=
120
Q
Output
voltage
=
3.5
V
(RMS)
max.
3-way
AC/DC
power
source;
°
AC:
100,
117,
220
or
240
V
(+10
V),
50/60
Hz,
with
optional
AC
adaptor
AD-5.
¢
DC:
6
D
size
manganese
dry
batteries.
Battery
life:
Approximately
15
hours
(SUM-1).
e
Car
battery:
Power
taken
via
optional
car
adaptor
CA-5.
6
minutes
after
last
operation
Power
consumption:
Dimensions:
Weight:
Standard
accessories:
8.0
W
867
(W)
x
274
(D)
x
74
(H)
mm
34
1/8’’
(W)
x
10
3/4”
(D)
x
2
15/16”
(H)
5
Kg
(11
lbs)
including
batteries
6
D
size
manganese
dry
batteries
(SUM-1)
*Design
and
specifications
are
subject
to
change
without
notice.
ml
GUIDELINES
LAID
DOWN
BY
FCC
RULES
FOR
USE
OF
THE
UNIT
IN
THE
U.S.A.
(not
applicable
to
other
areas).
This
equipment
generates
and
uses
radio
frequency
energy
and
if
not
installed
and
used
properly,
that
is,
in
strict
accordance
with
the
manufacturer's
instruc-
tlons,
may
Cause
interference
to
radio
and
television
reception.
It
has
been
type
tested
and
found
to
comply
with
the
limits
for
a
Class
B
computing
device
in
accordance
with
the
specifications
in
Subpart
J}
of
Part
15
of
FCC
Rules,
which
are
designed
to
provide
reasonable
protection
against
such
interference
in
a
residential
installation.
However,
there
Is
no
guarantee
that
interference
will
not
occur
in
a
particular
installation.
If
this
equipment
does
cause
interference
to
radio
or
television
reception,
which
can
be
determined
by
turning
the
equipment
off
and
on,
the
user
is
encouraged
to
try
to
correct
the
inter-
ference
by
one
or
more
of
the
following
measures:
reorient
the
receiving
antenna
relocate
the
computer
with
respect
to
the
receiver
move
the
computer
away
from
the
receiver
eee
ewe
a
eon
plug
the
computer
into
a
different
outlet
sO
that
computer
and
receiver
are
on
different
branch
circuits.
If
necessary,
the
user
should
consult
the
dealer
or
an
experienced
radio/television
technician
for
additional
suggestions.
The
user
may
find
the
following
booklet
prepared
by
the
Federal
Communications
Commis-
sion
helpful:
‘How
to
Identify
and
Resolve
Radio-TV
Interference
Problems.”’
This
booklet
is
available
from
the
US
Government
Printing
Office,
Washington,
D.C.,
20402,
Stock
No.
004-000-00345-4.
ee
wp
eee
es

Other manuals for Casiotone CT-360

1

Other Casio Synthesizer manuals

Casio CZ-5000 User manual

Casio

Casio CZ-5000 User manual

Casio MA-150 User manual

Casio

Casio MA-150 User manual

Casio CTK-691 User manual

Casio

Casio CTK-691 User manual

Casio PL-40R User manual

Casio

Casio PL-40R User manual

Casio WK-7000 User manual

Casio

Casio WK-7000 User manual

Casio Cosmo CZ-1 User manual

Casio

Casio Cosmo CZ-1 User manual

Casio Privia PX-500L User manual

Casio

Casio Privia PX-500L User manual

Casio Privia PX-120 User manual

Casio

Casio Privia PX-120 User manual

Casio CASIOTONE 310 User manual

Casio

Casio CASIOTONE 310 User manual

Casio XW-G1 User manual

Casio

Casio XW-G1 User manual

Casio FZ-1 Troubleshooting guide

Casio

Casio FZ-1 Troubleshooting guide
Casio Casiotone CT-S100 User manual

Casio

Casio Casiotone CT-S100 User manual

Casio Casiotone MT-100 User manual

Casio

Casio Casiotone MT-100 User manual

Casio Casiotone 1000P User manual

Casio

Casio Casiotone 1000P User manual

Casio CTK-531 User manual

Casio

Casio CTK-531 User manual

Casio Cosmo CZ-1 User manual

Casio

Casio Cosmo CZ-1 User manual

Casio PL-40R User manual

Casio

Casio PL-40R User manual

Casio CTK-530 User manual

Casio

Casio CTK-530 User manual

Casio Cosmo CZ-230S User manual

Casio

Casio Cosmo CZ-230S User manual

Casio CZ Series User manual

Casio

Casio CZ Series User manual

Casio XW-P1 User manual

Casio

Casio XW-P1 User manual
Casio CZ-1000 User manual

Casio

Casio CZ-1000 User manual

Casio WK-6000 User manual

Casio

Casio WK-6000 User manual

Casio CZ-101 Cosmo User manual

Casio

Casio CZ-101 Cosmo User manual

Popular Synthesizer manuals by other brands

dSPACE XODULAR user guide

dSPACE

dSPACE XODULAR user guide

Roland Fantom-G none Addendum sheet

Roland

Roland Fantom-G none Addendum sheet

Roland JV-880 owner's manual

Roland

Roland JV-880 owner's manual

Alesis qs6.1 supplementary guide

Alesis

Alesis qs6.1 supplementary guide

KETRON SD9 PRO live station quick guide

KETRON

KETRON SD9 PRO live station quick guide

Korg DSS-1 user guide

Korg

Korg DSS-1 user guide

Matsushita Electric SX-KC211 Service manual

Matsushita Electric

Matsushita Electric SX-KC211 Service manual

Yamaha DX27 owner's manual

Yamaha

Yamaha DX27 owner's manual

ARP Instruments Quadra owner's manual

ARP Instruments

ARP Instruments Quadra owner's manual

Roland vk09 Service manual

Roland

Roland vk09 Service manual

Xaoc Devices SAMARA Operator's manual

Xaoc Devices

Xaoc Devices SAMARA Operator's manual

Asteroid Mini Reference manual

Asteroid

Asteroid Mini Reference manual

Wurlitzer 140 Service manual

Wurlitzer

Wurlitzer 140 Service manual

MOGlabs ARF021 manual

MOGlabs

MOGlabs ARF021 manual

Moog Slim Phatty user manual

Moog

Moog Slim Phatty user manual

Roland GR-20 Mode d'emploi

Roland

Roland GR-20 Mode d'emploi

Roland JUNO-60 owner's manual

Roland

Roland JUNO-60 owner's manual

Isn’tses The Fort Processor Instructions and construction details

Isn’tses

Isn’tses The Fort Processor Instructions and construction details

manuals.online logo
manuals.online logoBrands
  • About & Mission
  • Contact us
  • Privacy Policy
  • Terms and Conditions

Copyright 2025 Manuals.Online. All Rights Reserved.