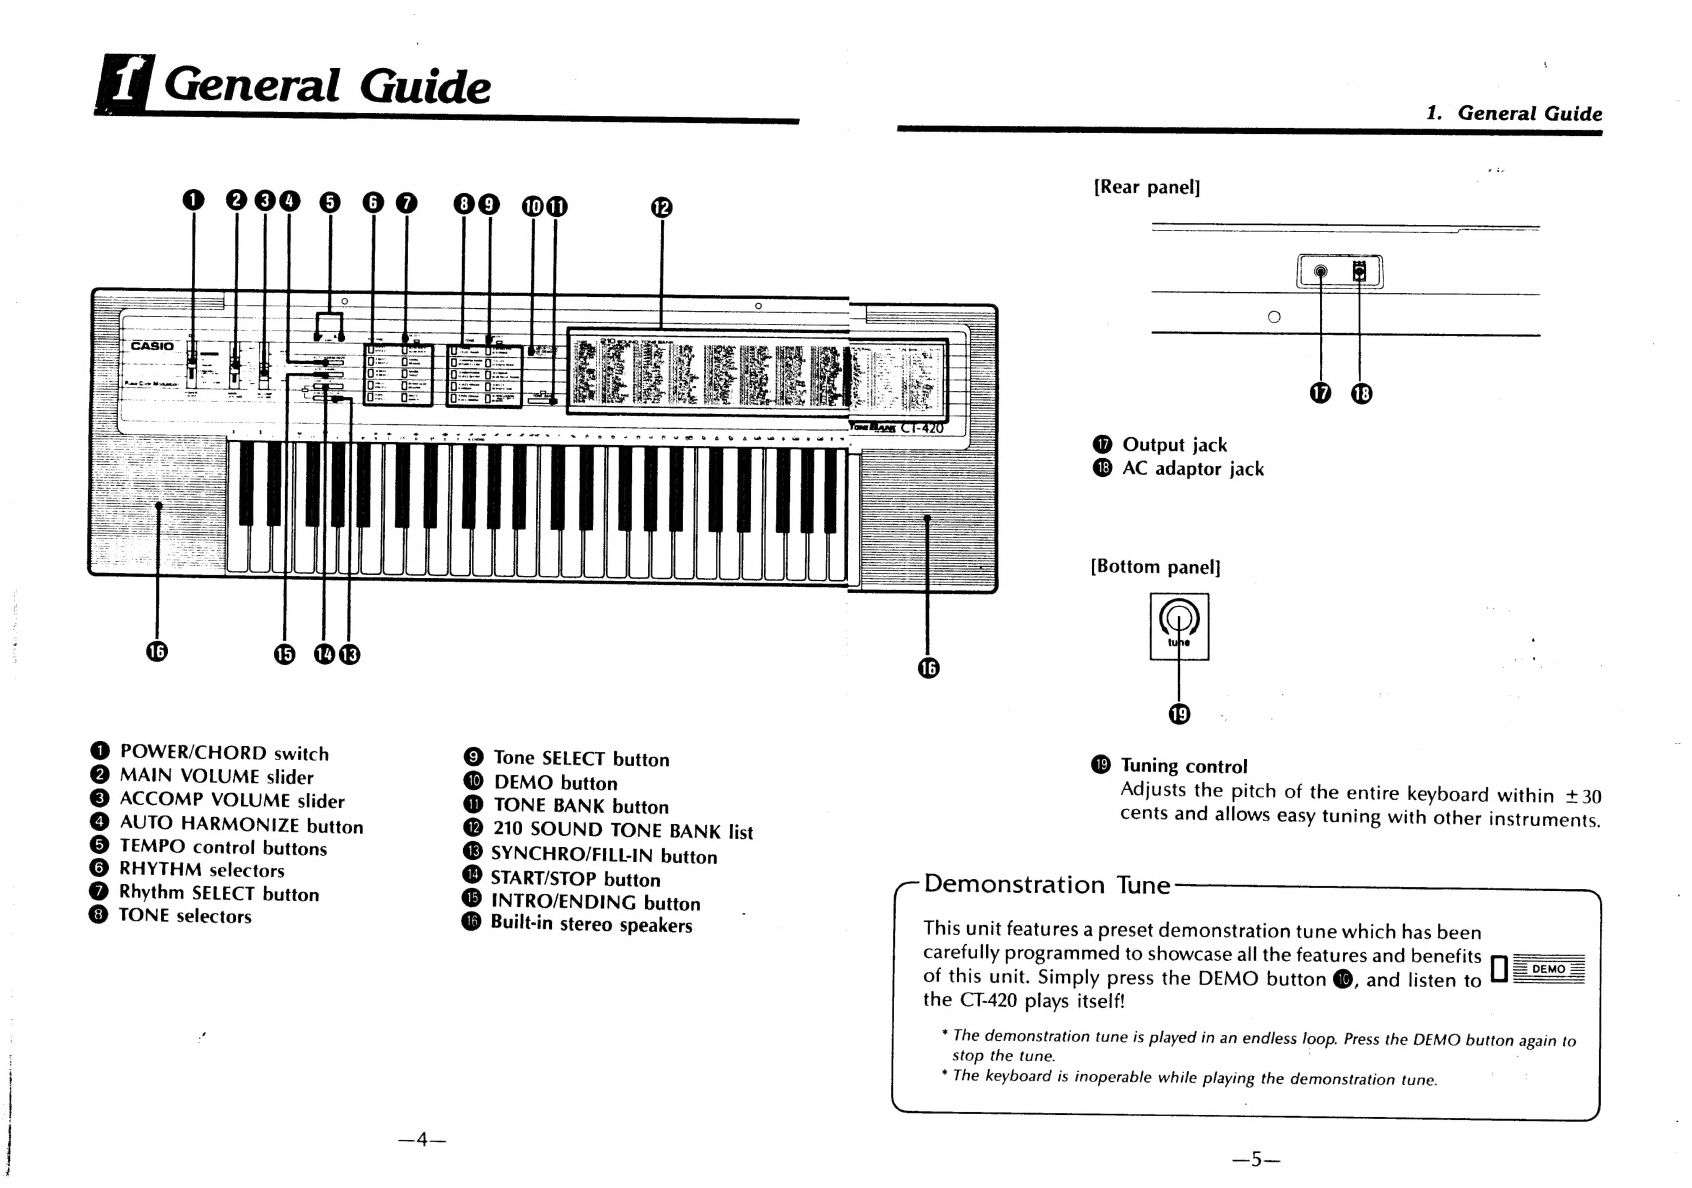
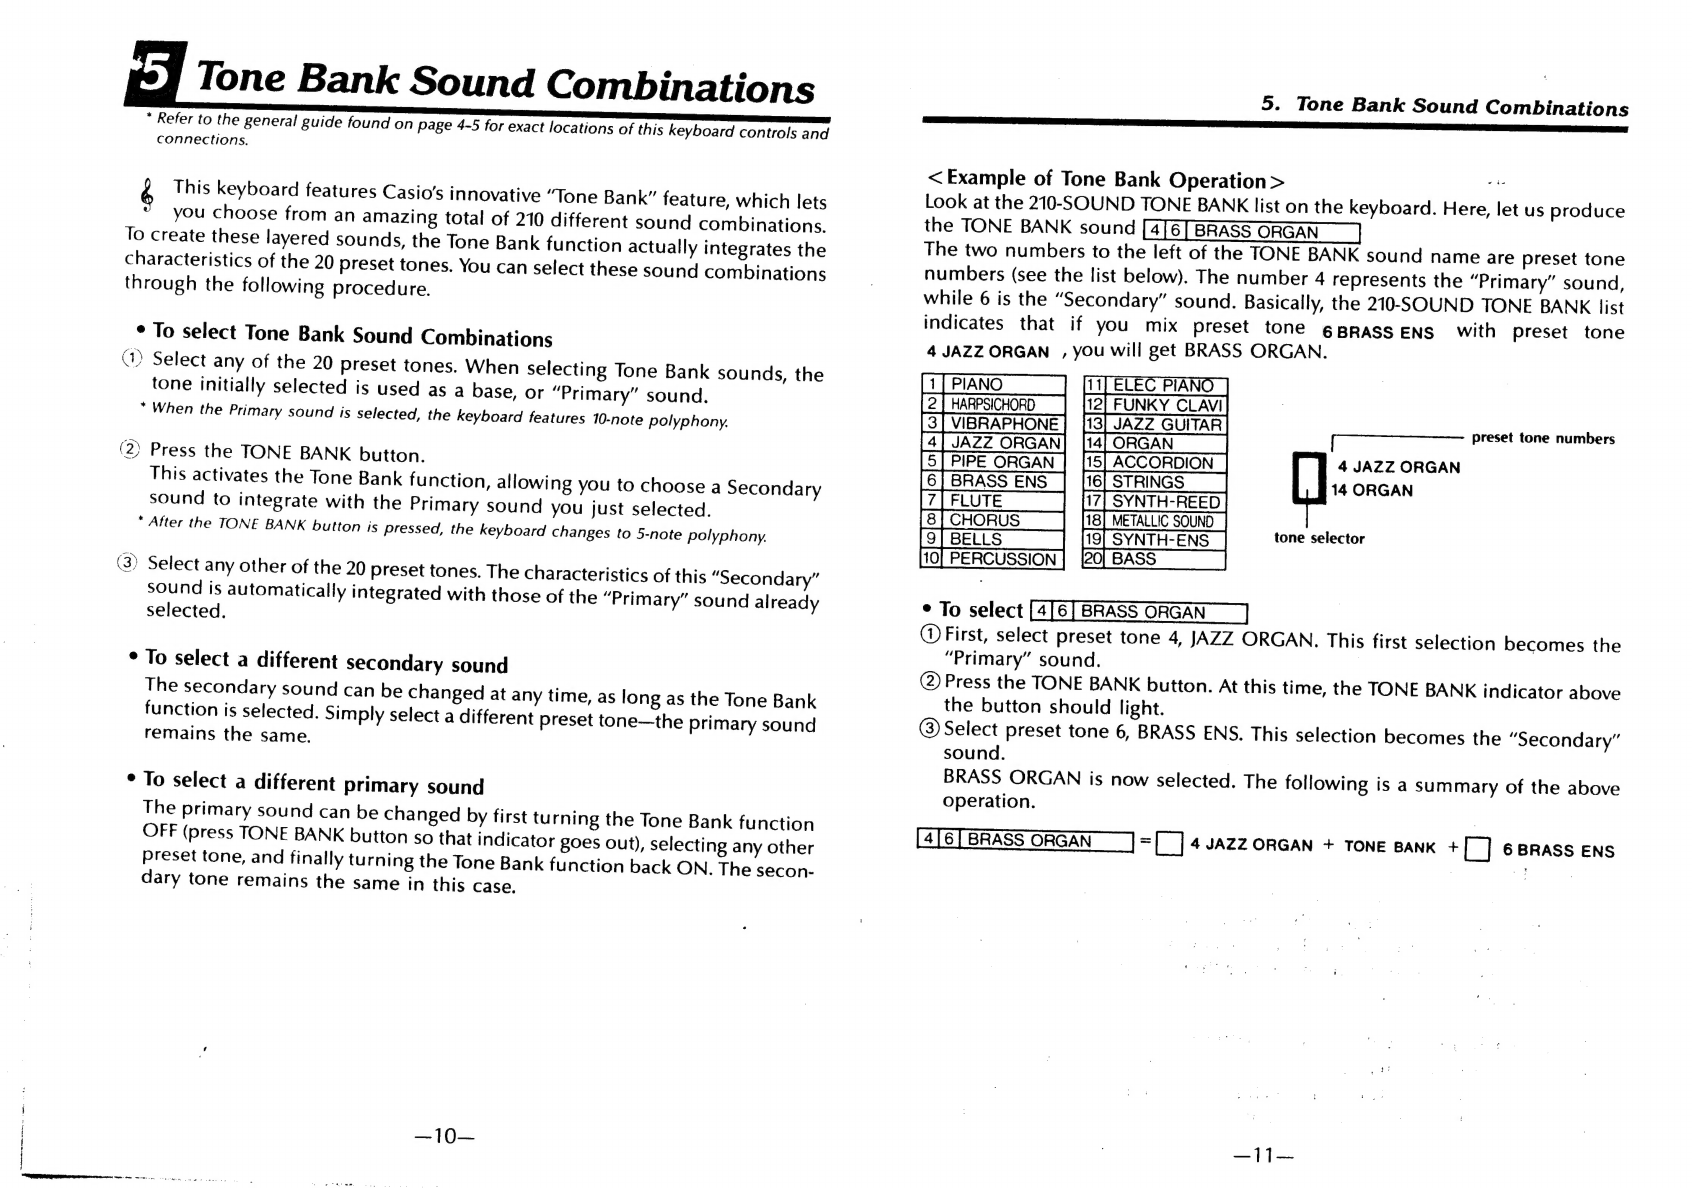
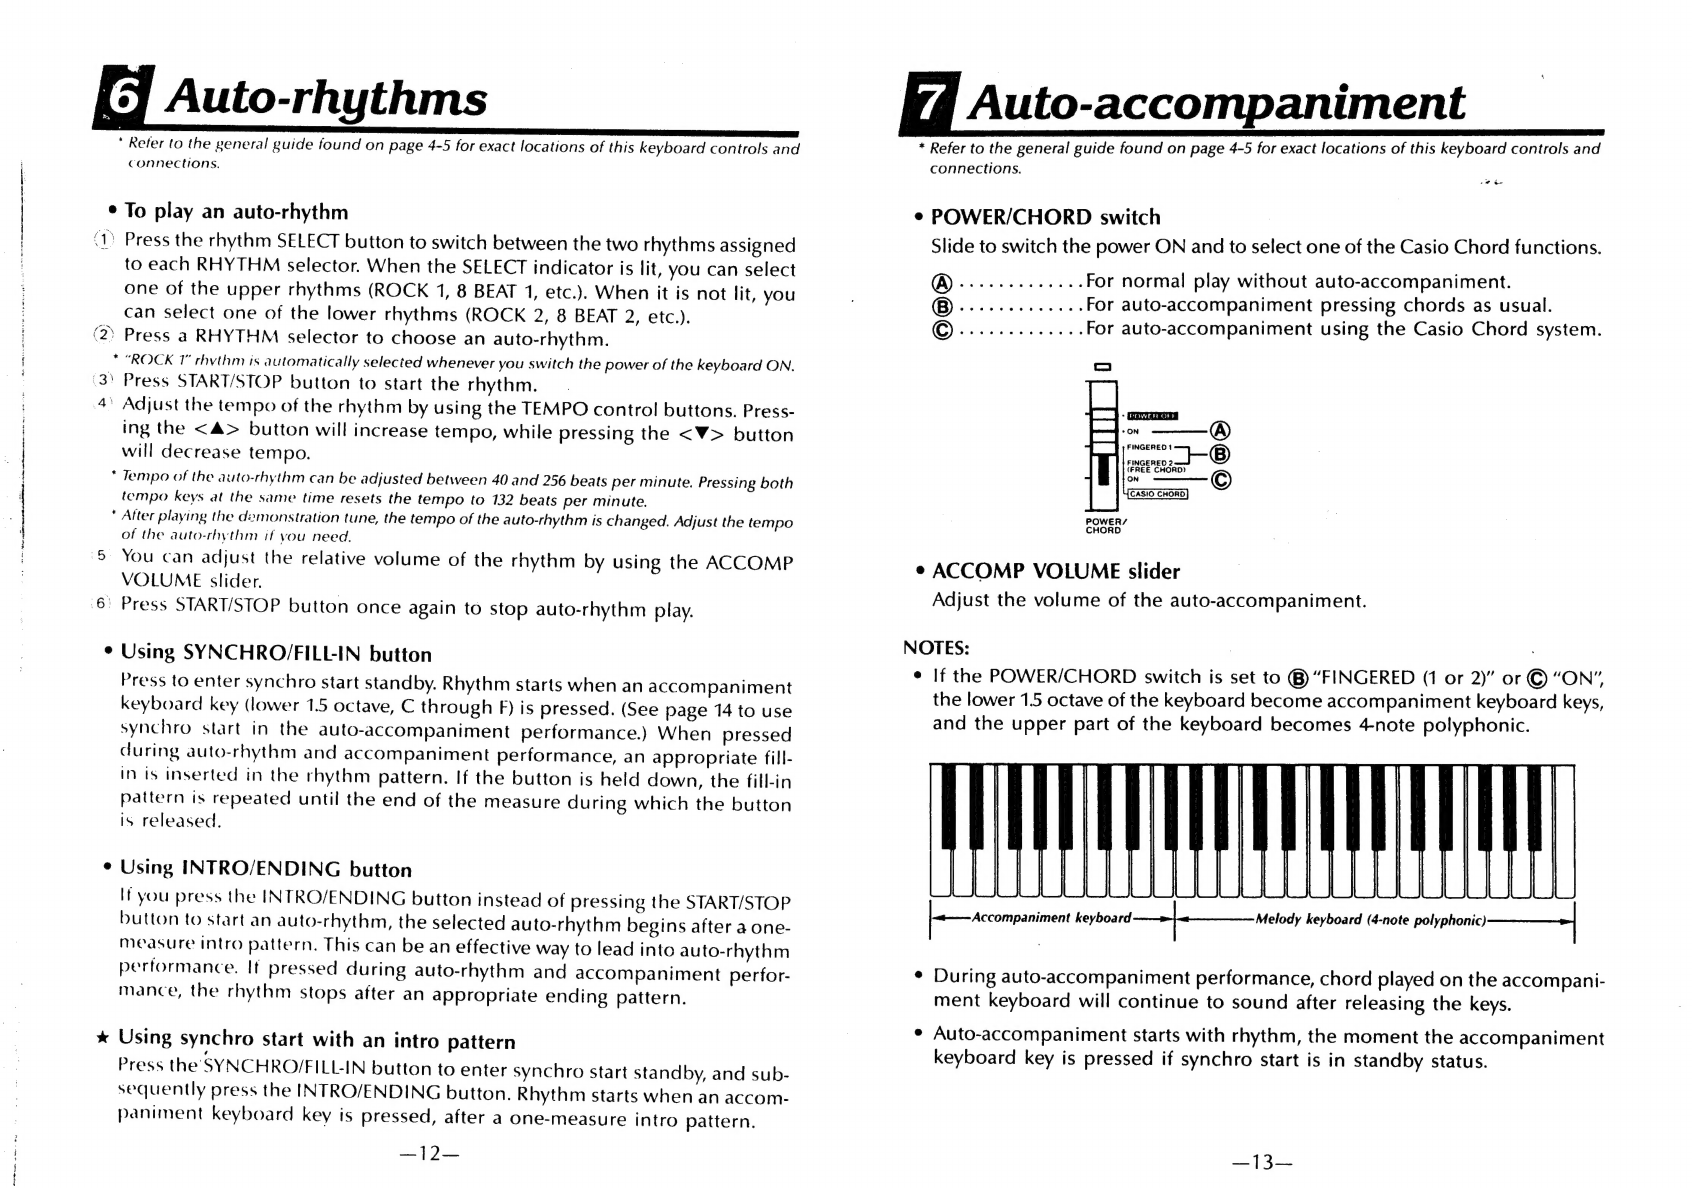
Casio ToneBank CT-420 User manual
Other Casio Synthesizer manuals

Casio
Casio XW-G1 User manual

Casio
Casio Cosmosunthesizer CZ-3000 User manual

Casio
Casio PT-50 User manual

Casio
Casio Privia PX-300 User manual

Casio
Casio Casiotone CT-S400 User manual

Casio
Casio CT-S300 User manual

Casio
Casio Privia PX-S1000 User manual

Casio
Casio CTK-650 User manual

Casio
Casio CZ-101 Cosmo User manual

Casio
Casio PL-40R User manual

Casio
Casio Privia PX-300 User manual

Casio
Casio Casiotone CT-S100 User manual

Casio
Casio MZ-2000 User manual

Casio
Casio LK-130ES User manual

Casio
Casio Magical Light ML-1 User manual

Casio
Casio CTK-860in User manual

Casio
Casio CTK-900 User manual

Casio
Casio CT-S300 User manual

Casio
Casio CTK-4400 User manual

Casio
Casio FZ-1 Troubleshooting guide